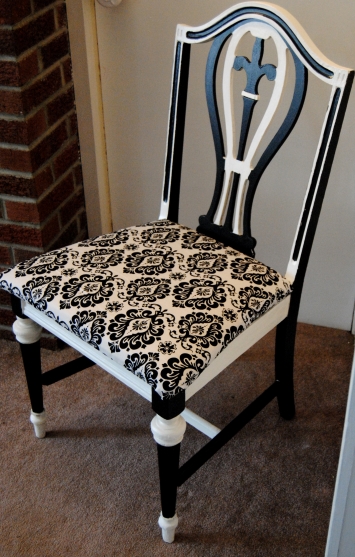
It all started when I purchased a lovely (but very abused) chair from Goodwill for $3.99. I loved the design qualities of this chair and thought it would make a lovely restyle. I especially loved the is. Which means “ Lily flower” in French. I removed the chair seat, only to discover it broken beyond repair. I was not willing to let this chair go, and I was determined to find a replacement seat. My husband and I kept our eyes open for any broken chairs on the side of the road that we could use to salvage a seat.
For months, this chair sat and I resisted the temptation of buying a chair to salvage. Then one day, my patience paid off. My sister and I went thrift shopping one weekend and in front of the store they had free furniture. I was ecstatic! Their it was the perfect candidate, a chair missing the arms, but with a perfectly usable seat. I confirmed with the store manager that this chair was indeed “free” and loaded it into the car with the biggest smile planted on my face. I immediately removed the seat when I got the chair home and it was a perfect fit.
To read more about this project see The Broken Chair Challenge: Upcycled Black and White Damask Chair.
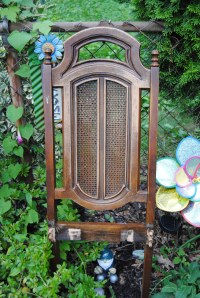
Now, I was left with the remnants of another chair, and did not want the all the parts of this chair to end up in the trash. It had a lovely seat back, and I had seen some lovely upcycling of chair backs into picture frames on Pinterest. I decided to give it a try. One great example of this can be found at All Things Thrifty.com
The finish on this was extremely worn. If it had not been in such poor shape, I don’t think I would have opted to paint it. By far, the most difficult and challenging aspect of this project was sawing the legs off the chair back. I used a hacksaw, but it was quite tough to do! An electric or battery operated hand saw would have worked better, but on the bright side it was at least a 500 calorie burner! Rarely can you say you burn calories crafting! Once this was completed, I sanded the area that was cut. I took the chair back outside and spray painted it black, using about two coats. I allowed the piece to dry overnight.
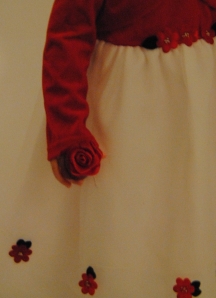
The next day, I chose a large photo from one of my daughter’s previous Picture People photo sessions. I measured the area and trimmed the photograph to sit inside the middle of the chair back. I used a hot glue gun to adhere the photo to the wood. I had a few craft jewels and roses that I added to the chair back to make it “pop” I originally glued a large rose to the bottom of the chair back, but decided to remove it later as you will see in the photos below. One of the smaller roses, I carefully glued to her hand in the photo, It creates an illusion that she is actually holding a rose in the photo. I think it gives the photo a bit of an extra dimension. A nice little “touch” to the project.
I decided to hang this in our bedroom which is black, white with grey wall. It was very difficult to snap an adequate photo as the flash kept reflecting off the shiny surface , but it is lovely and I am so glad I tried this!
Think of all the possibilities before you toss that old chair!
Materials:
Hot Glue Gun
Spray Paint (If you choose to paint)
Old Chair Back
Scissors
Saw (If needed)
Screw driver (if needed)
Sandpaper


That’s a neat idea! Love it!
Zhenya
http://beingzhenya.com
LikeLike
Thanks Zhenya! Great way to reuse an old chair!
LikeLike
great idea. a cafe near where i live has lined one wall, floor to ceiling with timber chair backs. your upcycled work reminded me of it. such a vision!
LikeLike
Thank you : )
LikeLike
Burning calories crafting? That was hilarious and PRICELESS!
LikeLike
Upshabby I was determined and I kid you not when I say I got a workout LOL
LikeLike