

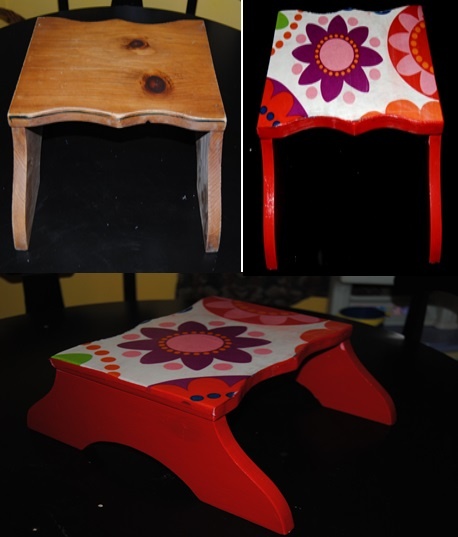
I was on a mission: to find the perfect wooden step stool, I could restyle and put my own stamp on. It won’t be long before our little Erin will need one so that she can stand at our bathroom sink and wash her hands and brush her teeth. I thought finding the right one wouldn’t be easy. Going to thrift stores is hit or miss when it comes to finding something specific. As luck would have it hiding under a table of various thrift store tchotchke was the perfect little wooden steps tool. It was love at first site! I snatched it up immediately. As luck would also have it, I found the perfect material to use to decoupage onto the stool. A“groovy” drape designed by Helen Trast for Ikea. It was perfect for many reasons, the material was almost burlap- like, so it would hold up well after sealing, and it was colorful and fun.
Materials Used:
Cloth Drapery
Mod Podge Matte Finish
Red Acrylic Apple Barrel Paint
White Latex Primer
Mod Podge Roller tool
First I used white primer to paint over the wood. Then I turned the step stool upside down onto the drape material and traced the top surface with a black marker. I used scissors to carefully cut the outline. I used the Mod Podge to glue the material down and smoothed out any air bubbles with the Mod Podge Roller tool. I painted the remaining uncovered parts of the stool with red Apple Barrel Acrylic paint. Once everything was dry I used the Mod Podge to seal the item. I repeated this step 3 times letting it dry thoroughly between coats and Voila! Erin will now be able to step up in style with a 70’s groove!
Month: April 2013

Nursery Rhymes-Welcoming our bundle of joy with a hand painted wall mural
Back in 2010, my husband and I received the news he and I had been waiting for most of our lives. We were expecting our first child in May of 2011. We were both over the moon as we had struggled for more than 5 years to get pregnant,and at our age our window of opportunity was closing fast. I had dreamed about this moment for most of my life. I wanted to do something special for him or her to welcome our little bundle of joy into the world. I decided to try something new, sure I like to draw and paint, but I had never attempted a wall mural like I had planned.
The truth is working on her nursery gave me an outlet to channel all my nervous energy. Having waited for so long, I was full of worry. This like most of my projects, distracted my over active mind nicely and channeled that nervous energy into something positive. I wanted to stay neutral as far as theme. My sister-in-law gave us a swing from the Fisher Price Rain forest Friends collection and I loved it! The brightly colored animals and whimsical feel was exactly what I had in mind. I started to plan. I went online and decided which animals I would draw and got started right away. Her room needed a total make over. We planned on tearing up the old carpet and putting in new, but wanted to get the painting done first to avoid any mess. I work full-time, so every day I would put in my 8 hours, come home and my goal was to paint an animal every night. I would bring my laptop into the room, put on the radio, and pull up a picture of one of the rain forest characters and get to work. I wish I could say that I followed a special technique, but I simply took a pencil and freehand drew the outline and then used acrylics to paint and fill in the color. I used the pictures of the animal characters on my laptop as a guide. I could have used a projection tool to make it perfect, but that was not my goal. I wanted it to be based on those characters, but by drawing free hand, they would have a bit of their own individuality.
When it was done I was pleased at how it turned out. It was not perfect, but unlike most things that I do that are flawed it didn’t bother me this time. I was happy that my first attempt at a wall mural had turned out so well! Now, Our daughter is 2 and I will inevitably face the day when she feels that she needs a “big girl room” and I will have to paint over monkey’s and tigers and replace them with princess’s and castles, but for now I am still enjoying the colorful jungle!

Finished Mural.
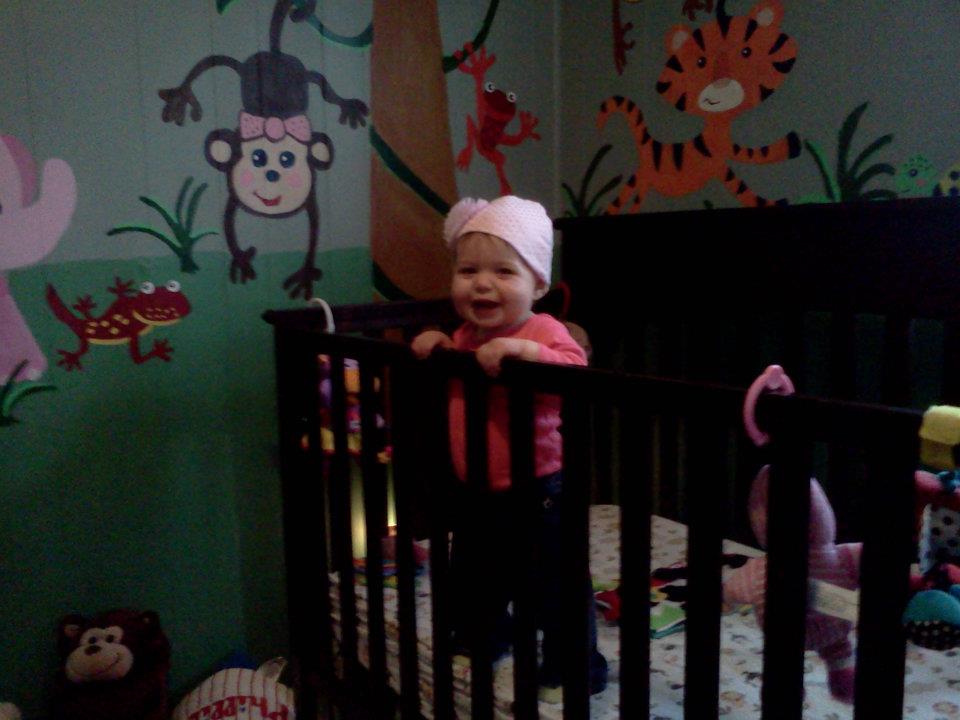
smiling (as usual) enjoying her Rainforest Friends Room age 9 months.

Trash to Treasure~ Upcycled Decoupage Bedroom Nightstands
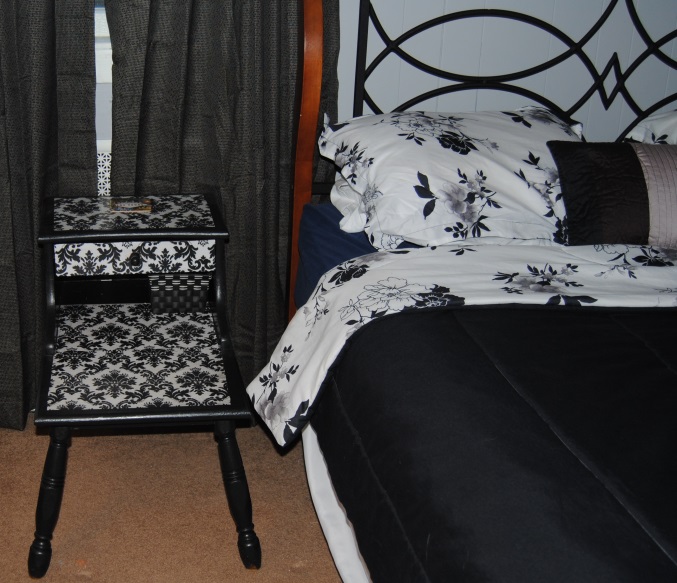
In early 2002 My husband and I were just starting out, and like most people just starting out you tend to be a little light when it comes to home decor and home furnishings. I will admit that not only do I like frequenting Good Will and various other thrift stores, I also like trash night. I always keep my eyes open for curbside furniture finds. I feel a little like a hero- I am keeping one more piece of garbage out of the landfill. So, it was on this fateful night that I spotted two bedroom nightstands beside the apartment dumpster no diving required LOL! The hubby and I were desperate to simply have a place to put a drink, or a book beside our bed. They were functional yes, but I secretly hated them and dreamed of getting new nightstands someday. Flash forward to 2013 and we still have the nightstands! We never got around to replacing them, and they were inching ever closer to fulfilling their original destiny when I discovered… Decoupage! There was no question these tables needed a serious makeover, but thanks to my other addiction Pinterest, the ideas were flowing and I decided to give it a try, besides they were going to end up in the trash anyway!
Materials I used:
One very old and beat up nightstand
Mod Podge Matte Finish
Black Acrylic Paint
Scrapbook Paper
These tables were so beat up not much sanding was required. I painted the entire piece and cut the scrapbook paper to fit the various areas of the table I wanted to cover. I used the Mod Podge to glue down the paper to the wood. I then sealed the entire table with Mod Podge covering the painted areas to give it a sheen and seal the paint so it wouldn’t chip. You see the final result below came out better than I imagined it would and once again these tables avoided the trash heap! They are holding up very well too although I would suggest using a coaster for that drink! : 0 )


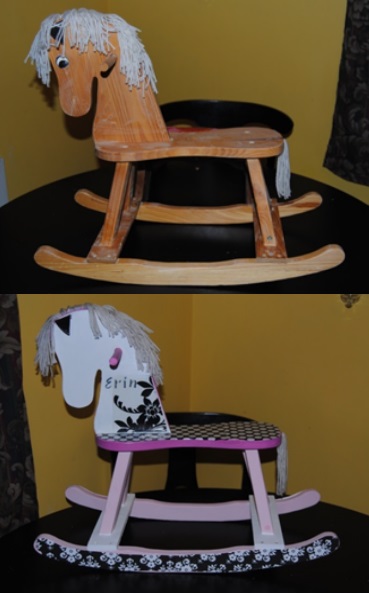
Wooden Rocking Horse Re-Do
I wanted to make something special this year for my daughter who is turning 2 next month. My husband and I share a common love of shopping at thrift stores and we found this horse at Good Will for $4.99. I sanded it lightly and used a primer. I then used acrylic paint to paint the horse two shades of pink and white. I decoupaged scrapbook paper onto the horse and used Mod Podge Matte
finish to glue and seal this project. I was going for a more classic rocking horse and the debate with family and friends over whether I should give the horse a mouth and eyes was quite amusing. What do you think? Do you prefer whimsical or classic rocking horses?

