Mod Podge Your Cottage: Window Sills Accented With Fabric

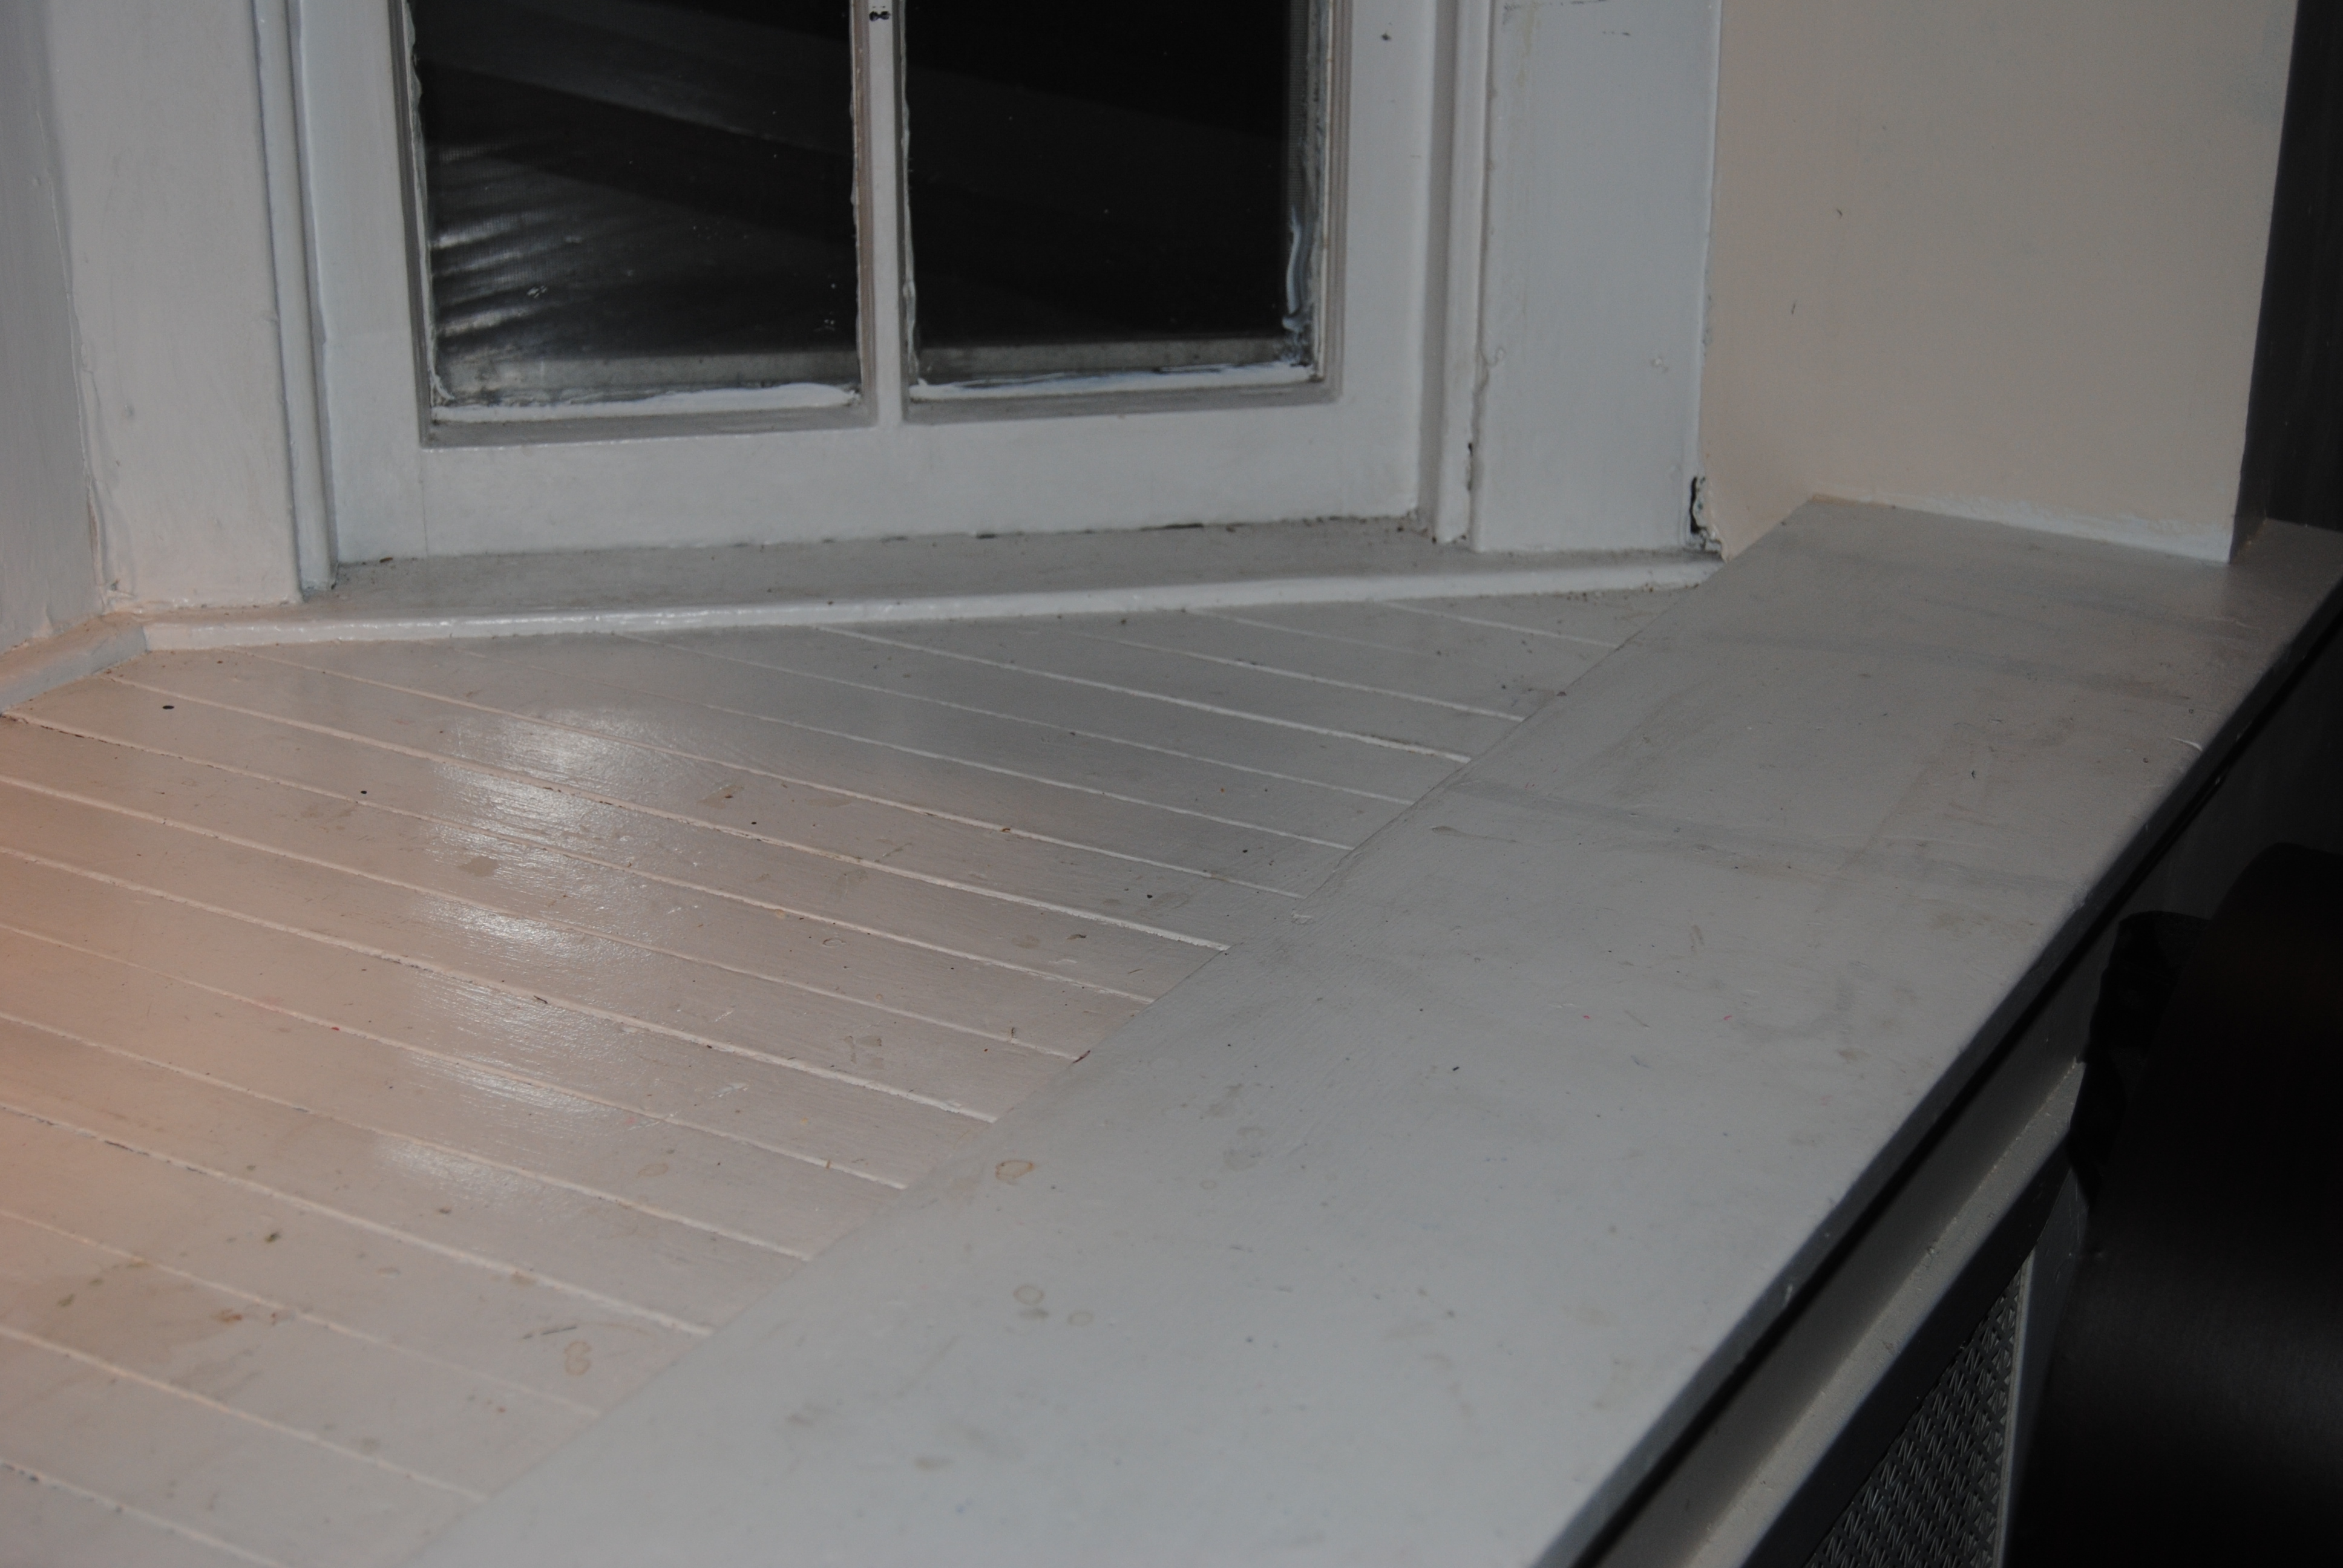
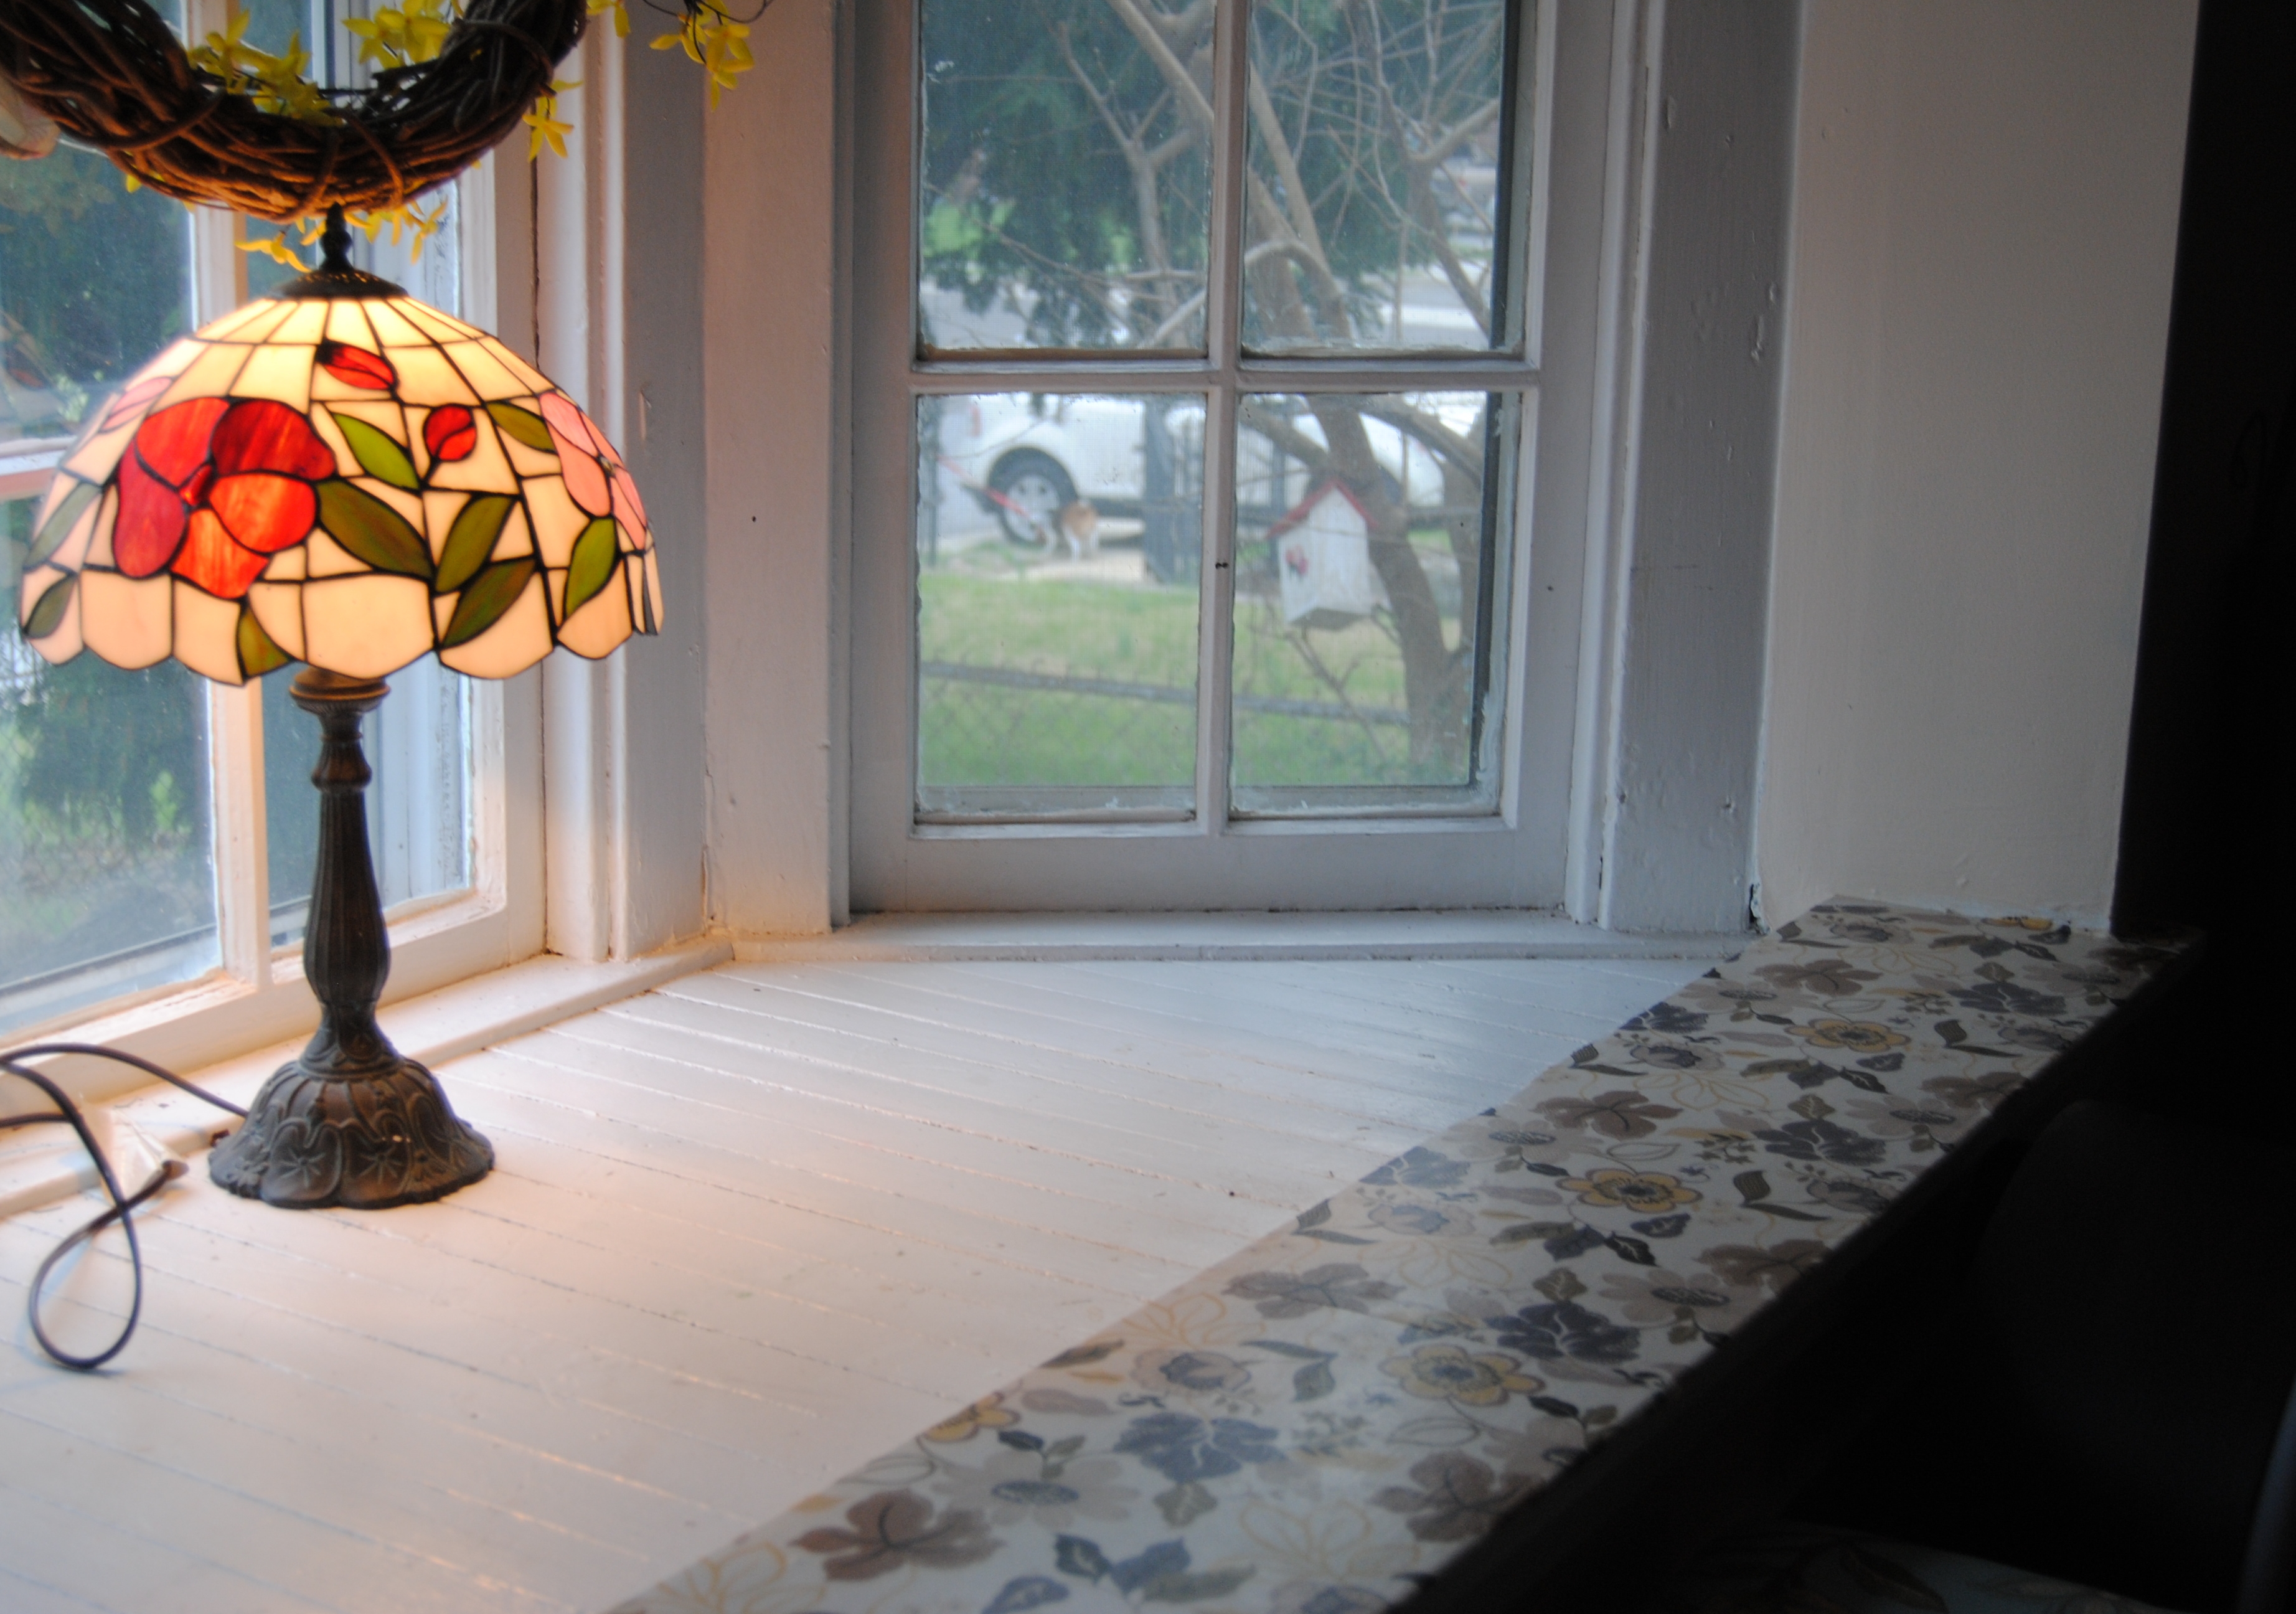
One of the features I loved when we first saw our house was our front living room window. It was a large half hexagon shape with a deep window sill.  It is a nice accent area, and fun to decorate during the various holidays.  During other times of the year our Tiffany knock off lamp illuminates the window and the front of the house outside. Our cat loves to climb in and chase after various bugs who find themselves unlucky once he discovers them. It is also the perfect spot to place my stereo cabinet, which also acts as a nice window seat.  The downside is the ledge often gets dirty and is difficult to keep clean. I also wanted to add an accent and brighten the dingy white paint that constantly needed a touch up. I thought decoupage would be a nice option here. I had used a similar technique in a previous project Decoupage Mania Restyling your home with Mod Podge.  For that project I used scrapbook paper to cover a built-in wall vanity.  I decided to use fabric on this window sill project due to more decorative variety and the larger project area. Our living room is a neutral sandstone color and I chose a neutral flower pattern.  The advantage of using fabric makes it easier to remove if you want a change the look as opposed to using paper which tends to tear apart when you attempt to remove it.

I used a magic erasure to thoroughly clean the area before getting started.

DSC_0167

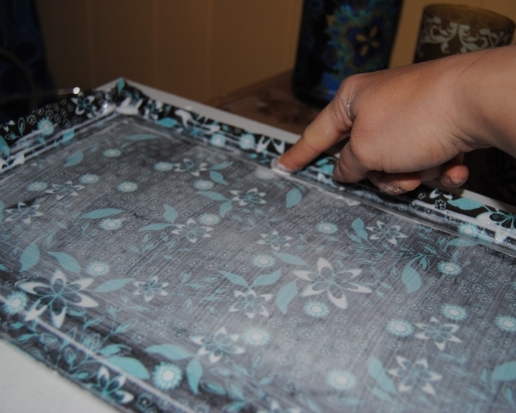
I cut two pieces of  fabric and lined up the images to create a seamless appearence in the middle of the sill.  The best part? The cut fabric doesn’t have to be perfect. Once the Mod Podge dries it is stiffer and easier to trim with a box-cutter knife.  Any excess fabric can be removed later.  I applied Mod Podge with a foam brush and placed the fabric over top.  I then applied Mod Podge over the top of the fabric.

DSC_0170

I allowed the Mod Podge to dry, trimmed away any excess fabric with the knife and applied an additional layer of Mod Podge over top and around the edges.

DSC_0171

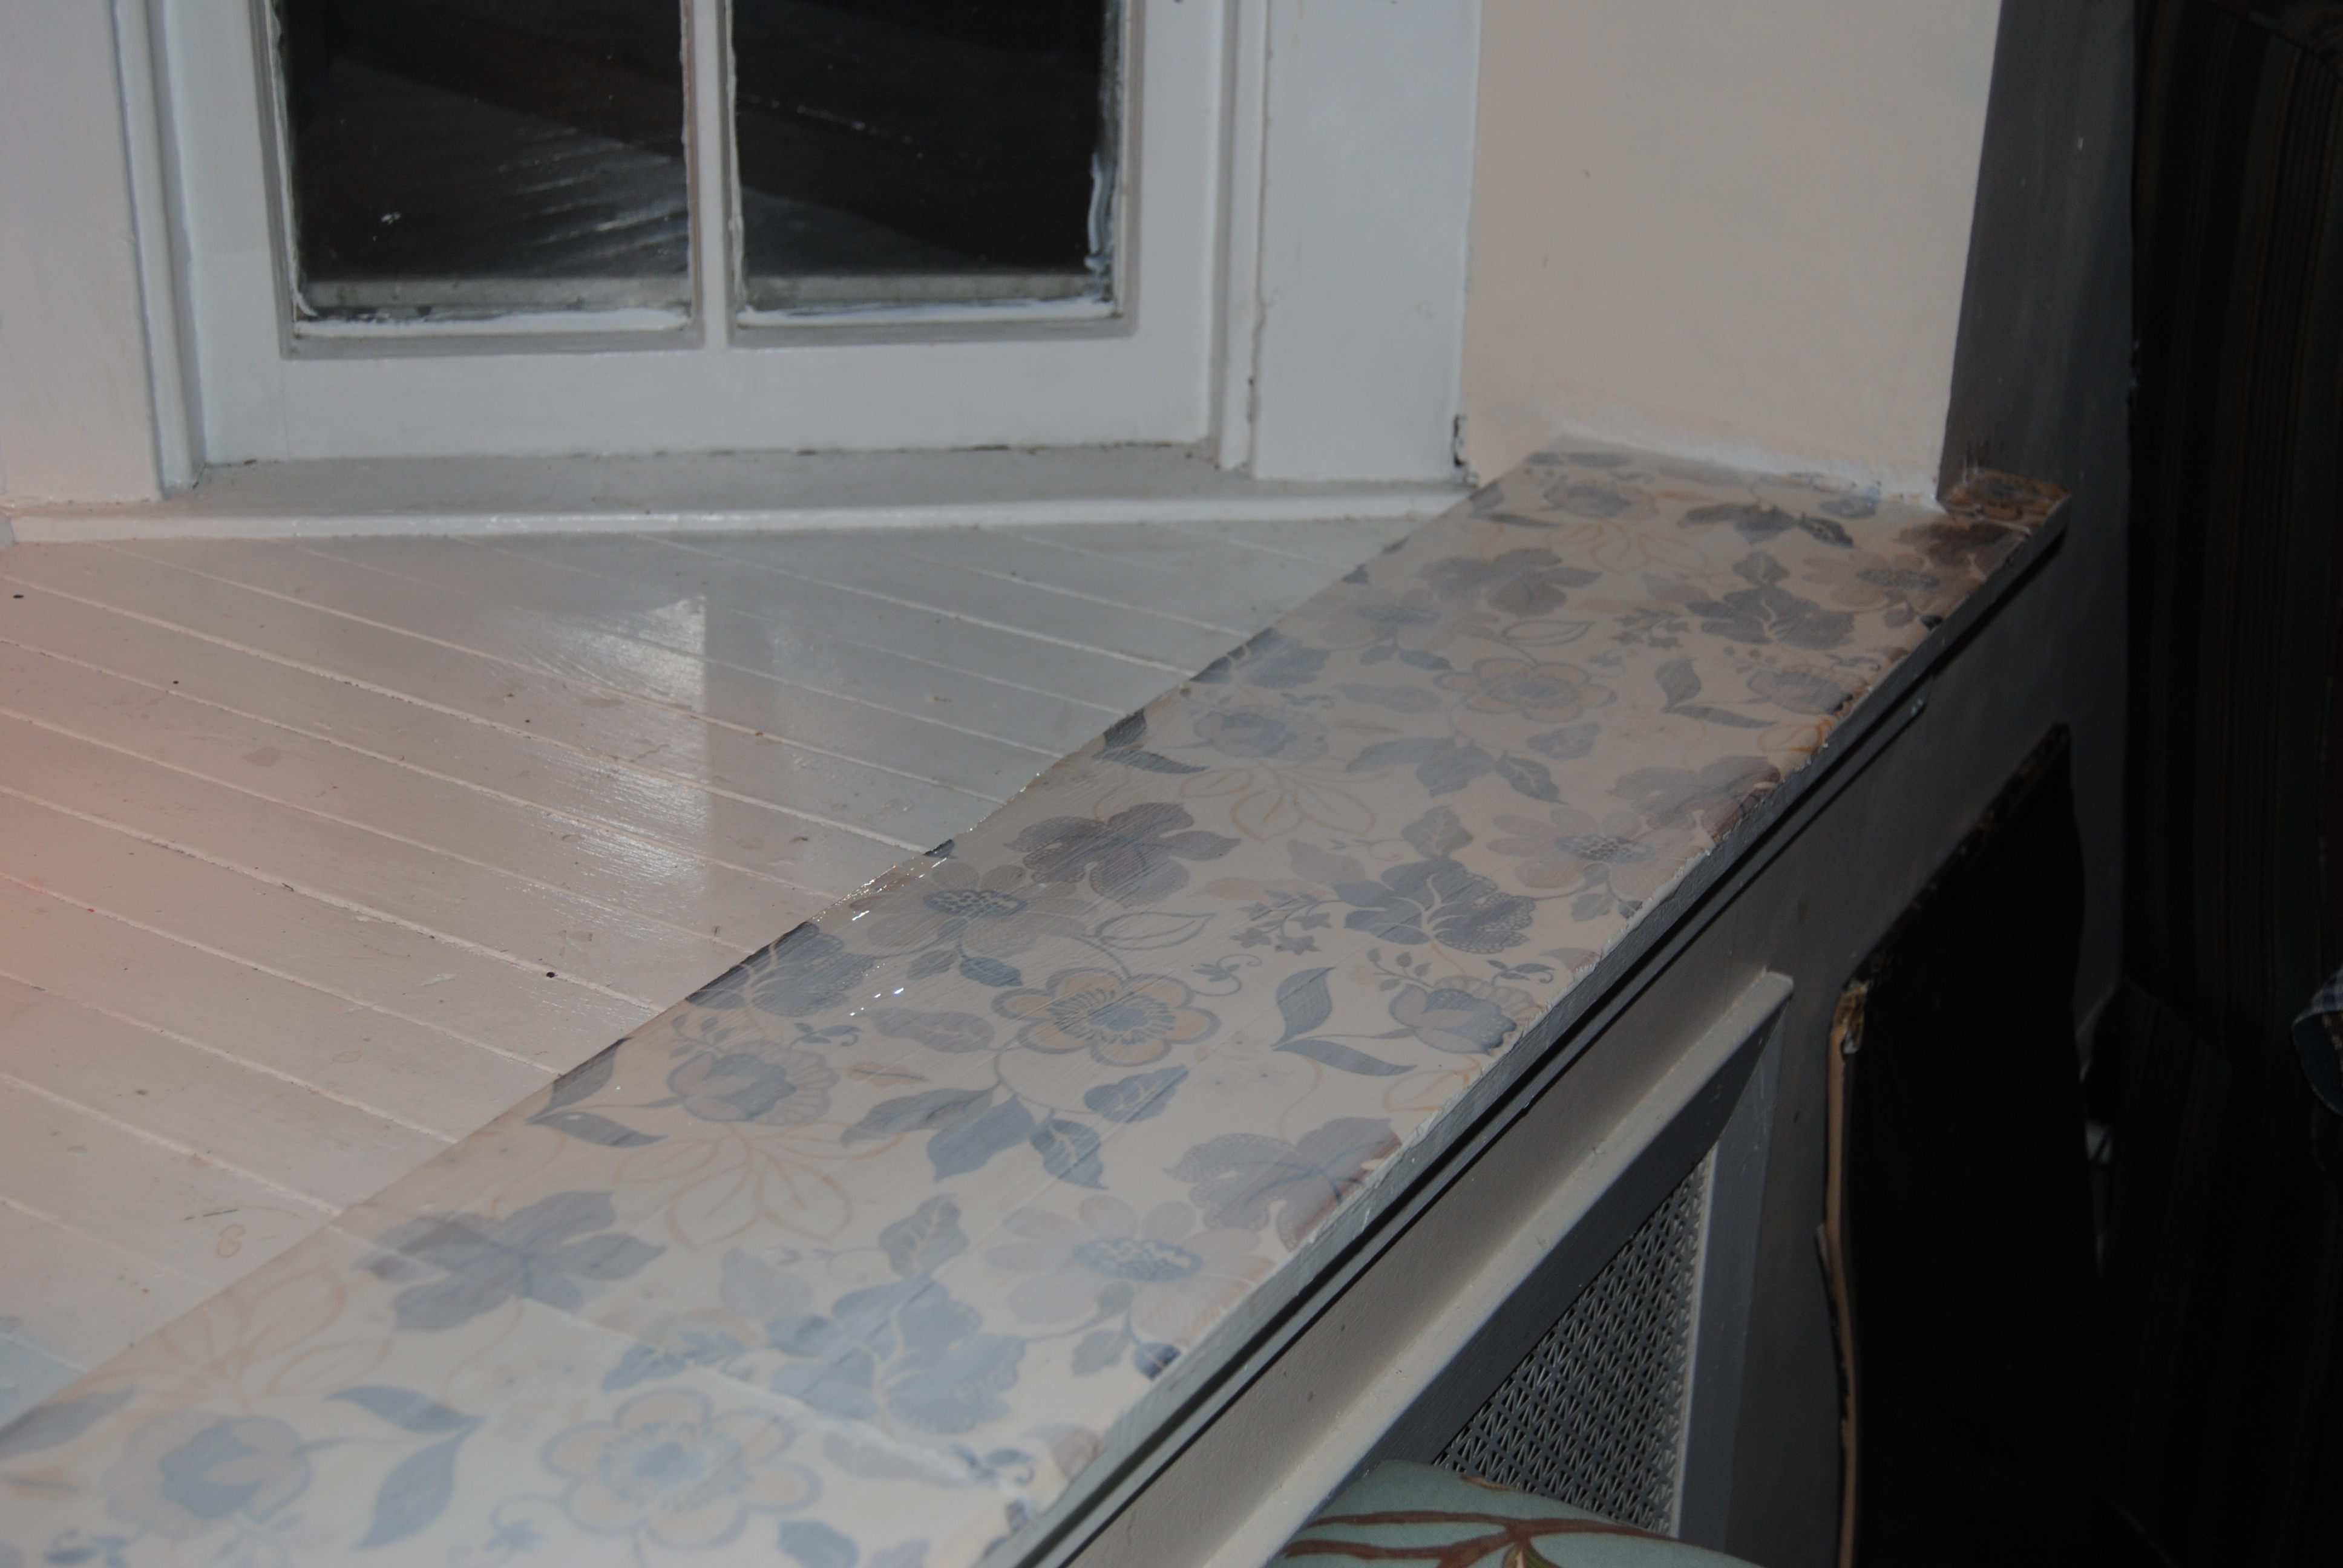
Once dry, Mod Podge leaves a nice, clear protective and easy to clean surface.  It also adds a decorative touch in any room.  The styles of fabric and possibilities are without limits, and suddenly I have to urge to do more decorative sills throughout the house!

DSC_0193


Finished Decorative Fabric Decoupage Window Sill

DSC_0194


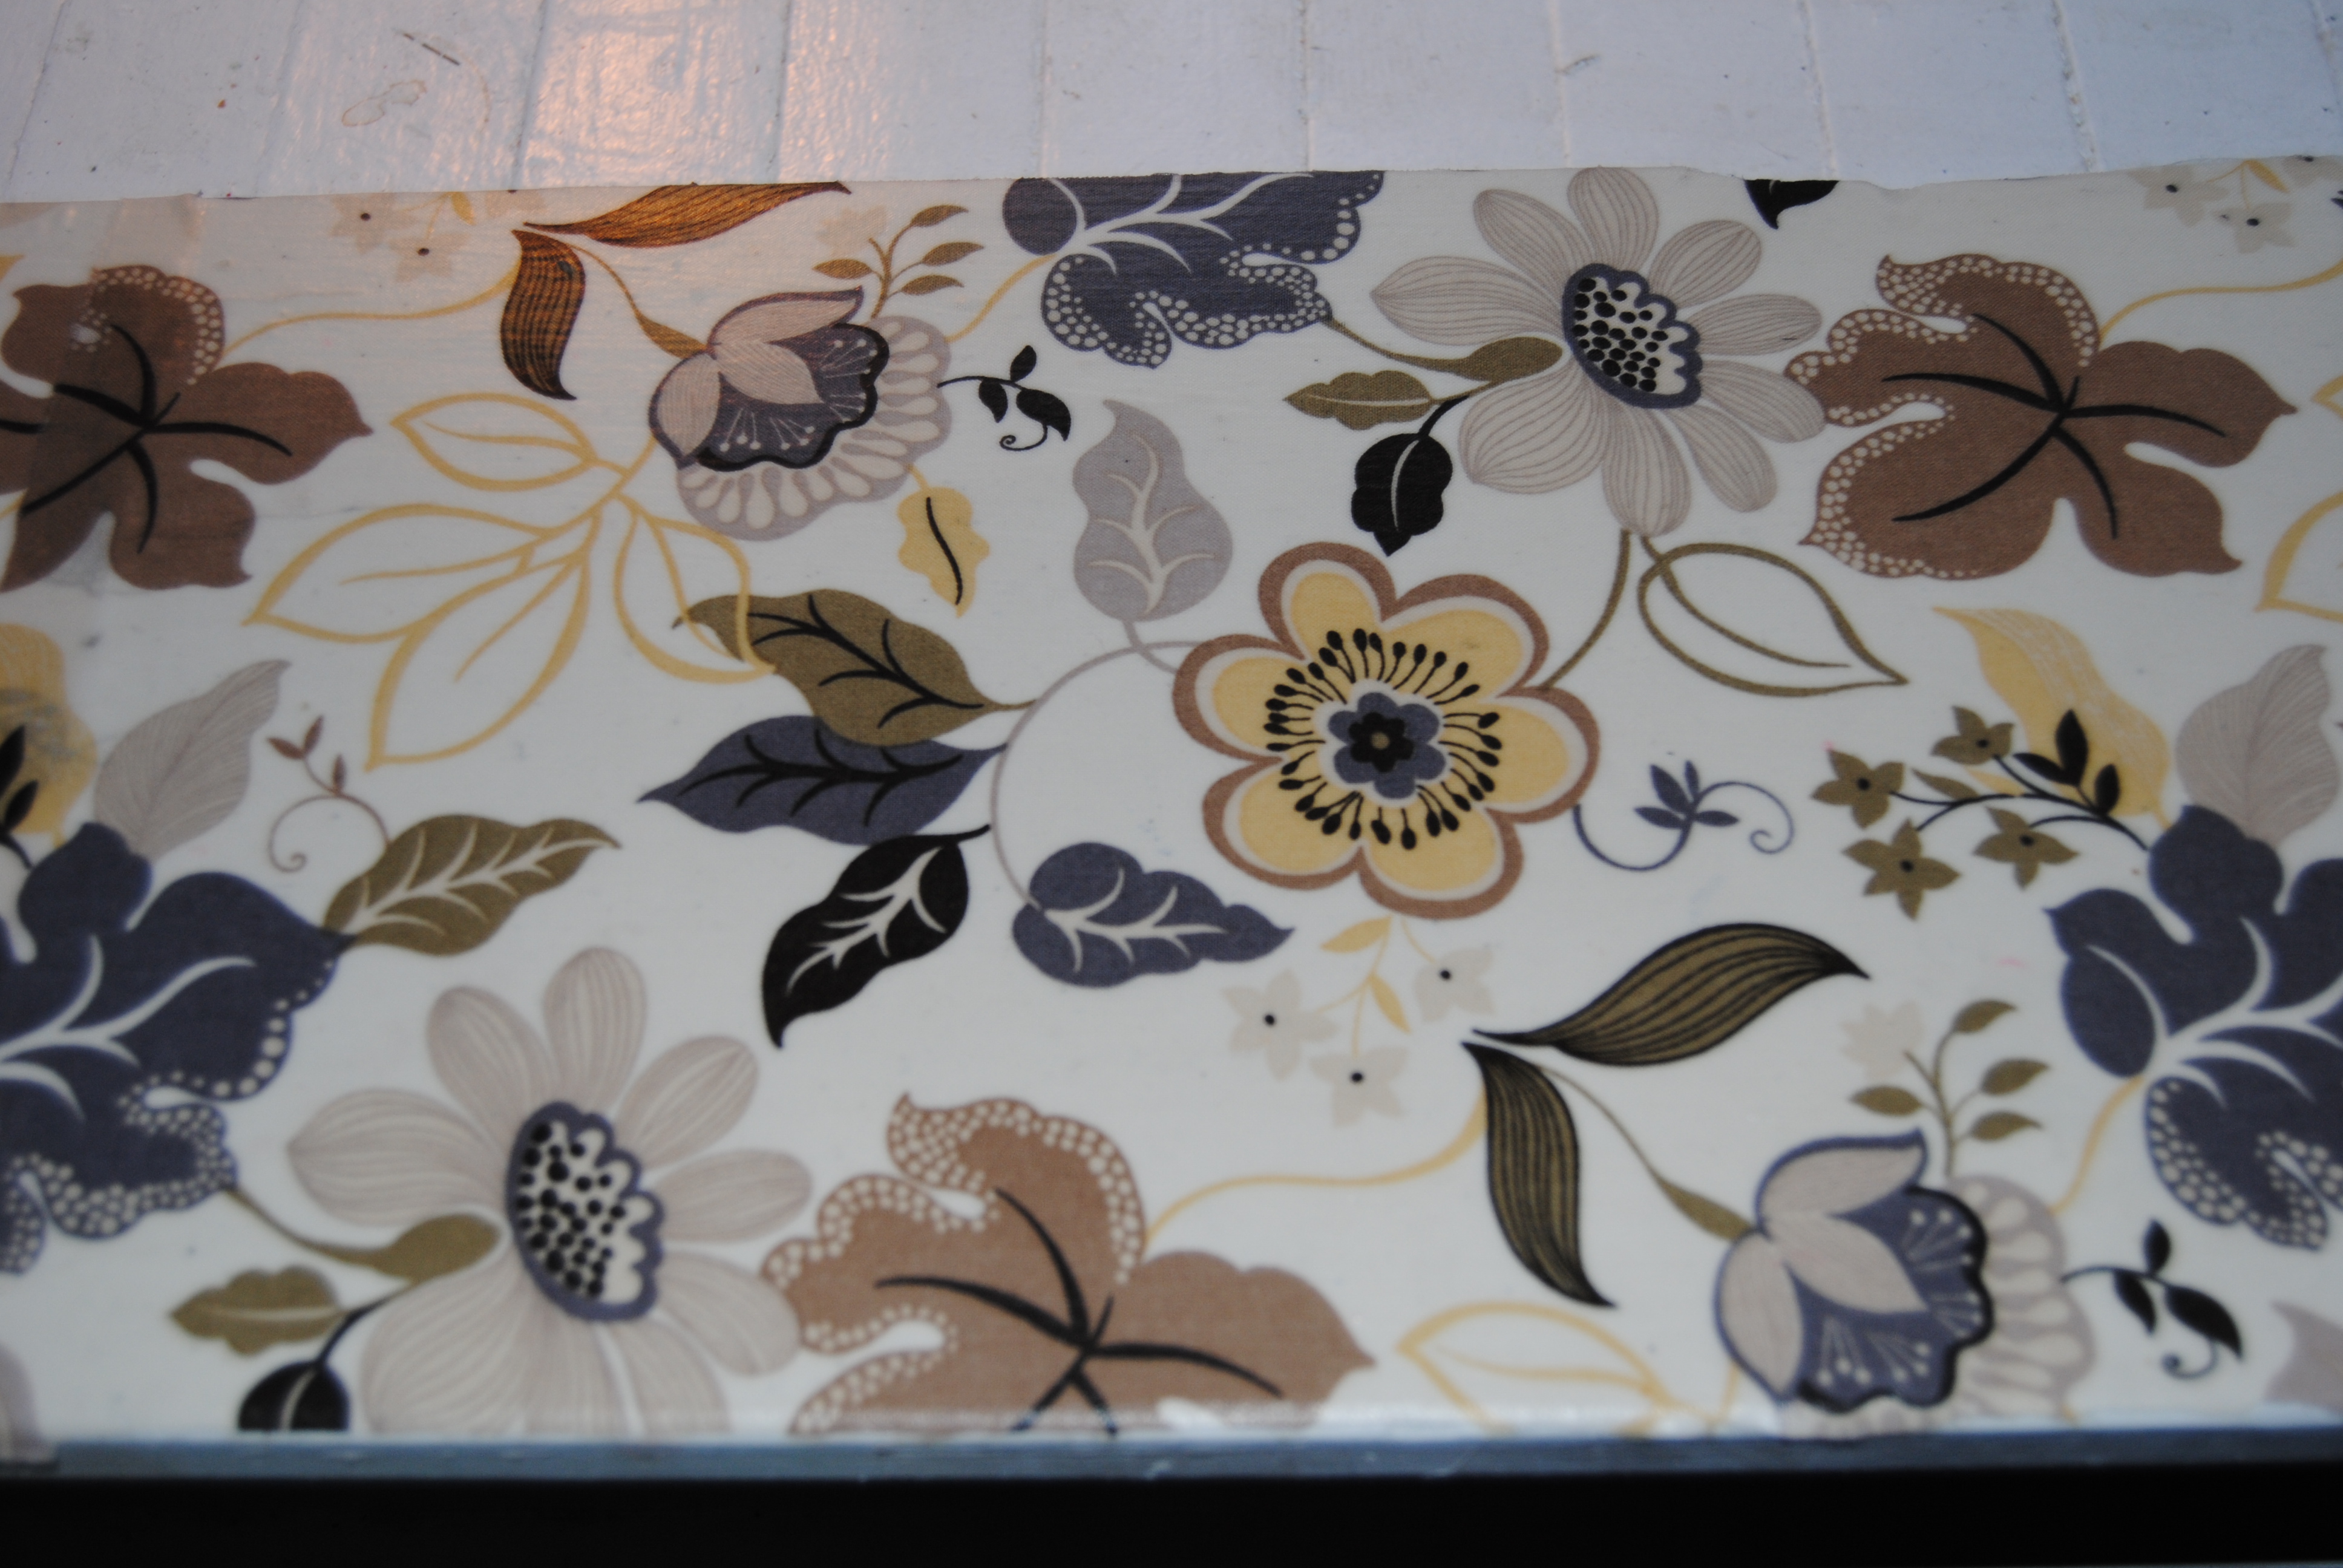
Neutral Floral Pattern-Fabric Purchased at Joann Fabric


DSC_0195


Materials:

Mod Podge

Fabric

Foam Brush

Box Cutter Knife

Stories of a house From | Inspire Me Heather

{stories of a house} my quote wall | Inspire Me Heather.

Since the last several days have consisted of me battling a nasty winter cold and the weather (Over 12 inches of snow last evening) I wanted to share with you a great Mod Podge project from Inspire me Heather.  It consists of a wall decorated with favorite quotations.  I would love to create a wall like this leading up to our attic, or down to our basement area.  I think I would try decoupage tiles, or even coasters.  I thought this was a fun project and I wanted to share it with all of you.

So.. I am putting down the snow shovel, and tissues, and moving on to my next upcycle project..

Design On A Nickel: Bathroom Cabinet Decoupage Restyle

Of all the rooms in our home our bathroom I can say without a doubt is my least favorite.  Our house was built-in 1937 and most older homes provided basic accommodations when it came restroom facilities.  Adding to these difficulties is the fact that we have only one, small bathroom in our home and it is in desperate need of a re-model.  That of course financially is not in the cards for us now.  However; I am a firm believer in making the best out of a situation, and I have had plans for quite sometime to work on improving our bathroom.  Our biggest eye sore was our bathroom sink cabinet. Replacing it was not an option, so I thought I could use some paint and a fabric decoupage to improve the look of the cabinet and add some design qualities to a rather bland and uninspired bathroom.

DSC_0951

Generic bathroom cabinet

I hadn’t tried a project like this before and I knew it would require quite a bit of work.  I picked up a half yard of fabric from Joann Fabric and prepped the cabinet by cleaning it with a damp cloth.  I used a screwdriver to remove the doors from the hinges.  I then removed the knobs and placed them aside.  I used a white all in one latex paint and primer to paint the outside and inside shelf of the cabinet.   I used a paint roller on the larger areas and a smaller paint brush for the areas the roller couldn’t reach. I also painted the cabinet doors.  I allowed the cabinet to dry thoroughly overnight. It took about three coats to completely cover it.

DSC_1016

DSC_1013

The next morning, I traced the painted cabinet doors onto the back of the fabric.  Any access fabric, I would trim away later with a box-cutter knife.  I applied Mod Podge to the doors with a foam craft brush.

DSC_1019

I then applied the fabric to the surface and smoothed it out with my hands. I applied another coat of Mod Podge over the top of the fabric and I used my nail to work the fabric into the crevices.

DSC_1022

I repeated the same process for the second door and allowed them to dry in front of the fan. Once dry, I used a box cutter knife to carefully trim the excess fabric using the groove of the door as a guide.

DSC_1037

I reconnected the doors to the cabinet and reattached the knobs.  I applied an additional fabric swatch to the front of the cabinet, and repeated the same process of applying the Mod Podge and fabric and trimming away the access fabric.  I then touched up any areas of the cabinet with paint that needed it.

DSC_1039

DSC_1040

I really love the aqua and brown color scheme and hope to incorporate some more color in our bathroom.  I feel this may be a great start to improving our tiny neglected lavatory! I was surprised at how well this project turned out and the cabinet has gone from eyesore to accent!  It cost only about ten dollars worth of materials to make this project a reality, and I am really glad I gave it a try.  I have a feeling this is only the begining!

Fabric, Decoupage and Paint Bathroom Cabinet Makeover

Bathroom Cabinet Makeover Materials:

Mod Podge

All in one latex primer and paint in one

Fabric of choice

foam craft brush/paint roller

paint brush/fine tipped marker

Box cutter knife/scissors

Before and After:

Bathroom Cabinet Makeover Before and After

Decoupage Mania-Restyling your home with Mod Podge

I am starting to think I have a problem.  I am addicted to decoupage!  My husband and friends joke with me that soon all that I have will be decoupaged, (including my underwear) and they may be right!  I am hooked.  The reasons are it looks great, and is an inexpensive way to restyle a home.  I also admit, I am a restless soul who can ever seem to sit even for one moment, and when I do, I am busy contemplating my next project or idea.  One of these areas in our home is at the top of our stairs in the hallway.  I believe it was intended to be a vanity.  There is a mirror and an outlet close by.  I basically use it as an area to display my husband’s mother’s blue vase.  (She passed away many years ago, so it means a lot to have an item of hers displayed in our home) and a small lighted Christmas tree during the holidays.   For a while I had considered tiling the area, but that would be quite an extensive project, although I know it would have looked amazing! Then I thought to myself, Why not decoupage it?  It’s similar to wall papering after all.

I used some scrapbook paper with a fairly neutral design.  I simply cleaned the area as best I could and applied Mod Podge Matte with a large paintbrush to the area.  I cut the paper in sections, trying to match the design the best I could so that it would appear as seamless as possible.  I smoothed out any air bubbles using my hand this time. (A bit messy but it worked rather well , and luckily the bathroom sink was nearby so no permanent mess to deal with.)  I placed a fan in front of it to help it dry quicker.  I then used multiple coats of Mod Podge to seal it (about three full coats overall.)  Now it looks neater as the original surface, looked rough even when I had painted it.  I find it is safe to clean a Mod Podged surface with a damp cloth.  I have even used a Clorox wipe and it was fine!  Overall I am happy with how this turned out and I think it makes the area look neater and adds a little “pop”  I was imagining other surfaces this could be tried on.  Window sills instantly come to mind as well as the bathroom cabinet.  No surface is my house is safe from decoupage! ; 0 )

built is wall vanity  before

Image

DIY Kitchen Sink Backsplash

Image

One day, my neighbor (gotta love him) offered me some free tiles.  He had just finished a project of his own and had extra tile he didn’t plan on using.  Of course I can never turn anything “free” down, so I happily accepted them and thanked him graciously.  Of course at the time, I had no idea what I was going to do with them.  I always wanted a kitchen backsplash, but I had never worked with tile before.  He had more faith I could do it than I had in myself.  He told me it was a relatively easy project to do.  My neighbor had suggested that I buy the adhesive and grout in one.  It worked out great and was simple to use.  The tiles my neighbor gifted to me were plain white.  I wanted to add more color, so I went to Home Depot, and purchased smaller blue mosaic tiles.  I laugh at this now, but I had no idea I could cut and glue and apply them on the mesh sheet they come on.  So, yes (are you ready to laugh at me and learn from my rookie mistake?)  I took every tile off and applied them individually!  This took forever and I wish I knew then what I knew now… It would have cut the project time in half!  It also would have been easier to measure and keep the tile from being applied crooked.  I had to fight to keep it straight.  You live and you learn!  I used a tiling trowel to spread out the grout adhesive.  I them applied the tiles.  I used the same mixture to grout the tiles and fill in the spaces in between.  Luckily, I didn’t need a tile cutter, which was a good thing, because I didn’t buy one!  Did it come out perfect? No, but it wasn’t terrible and gave me the confidence to try other things.  So I would say overall it was a success and cost under $50.00.

Since discovering Mod Podge I am thinking about decoupaging a few of the tiles to add more pop, but I just haven’t gotten around to it yet!  If I do, I will be sure and share.

Adding “Bling” to your outdoor table with glass marbles and tile

One day I was sitting outside staring at our old patio table.  Like a lot of things in our home the table was rescued from the trash heap.  It was given to us when my mom moved from a house into an apartment.  It worked out great for us, because at the time all we had was a plastic patio table that had seen better days.  I would go to department stores and pine over all the elaborate outdoor furniture.  Fancy Fire pits, gazebo’s etc. OK so I am a bit of a dreamer, since there was no way I could afford any of it!  Of course that didn’t stop yours truly from stealing a good idea or two from my window shopping and making my own “shabby shiek” version.  I had some left over mosaic tiles so I thought I would add a little “bling” to the table’s edges.  If you are really an adventurous type, you could actually add the tiles to the whole table.  For the job I used a Grout and adhesive in one. There are varying opinions on the internet regarding the use of this product and whether it works as well as grout and adhesive do independently.   I find that it has worked well for the smaller tile projects I have  completed.  The table has been out in all weather conditions and I have not lost one tile so I find that the combo product has held up pretty well.  I used small mosaic tiles along with decorative glass marbles I purchased at  dollar tree.  I think this small change gave the table a lot more character.  Also, another money saving tip:  If you want to save money on a table umbrella, the beach umbrella’s work just as well and are $10-$20 (and even more in some cases) less than the actual table umbrella’s.

I may not be able to afford that fancy gazebo, but through some ingenuity I can have my own little backyard oasis at a discount!

Tiled outdoor table

Beach umbrella VS Table Umbrella save money!

Necessity, The Mother of Invention-using left over tile to create a counter top cutting board/hot plate

They say necessity is the mother of invention.  When it comes to home improvement, sometimes you are forced to think outside the box, as was with the case of our burned kitchen counter top.  When we moved into our home about 7 years ago, our house was in need of some major TLC.  Up until that point the house was more like a college dorm than a family home.  The young man we purchased the home from had moved out to California, and he was letting his friends rent the home from him while he worked on selling it.  Needless to say, they did more damage while they were there, than good.  My husband and I were on a strict budget.  Most of the issues in the home were minor, but irritated us regardless.  One of those “annoyances” involved our kitchen counter top.  Their was a huge, highly visible burn mark right in the middle of the laminate counter top.  My husband and I could not afford to put in replacement counter tops, so for a while I simply used Velcro to fasten a small wooden cutting board to cover the ghastly burn mark, but I needed to come up with a more permanent solution.  My neighbor, god bless him, gave me some left over tile he had from a project he had just completed.  I used most of it for a  backsplash .  While putting up the back splash, I came up with a cost effective solution to our burned counter top problem.  I used the extra tiles to create a ceramic cutting board/ hot plate and matched it to the back splash.  I purchased a combination tile adhesive/grout which works great and is easy to use.  I took the tile and adhered them to the counter top using the adhesive and grout.  I then used the same adhesive and grout in one product  to seal over top and fill in the spaces between the tiles.  I used the smaller mosaic tiles to frame and add some color.  The result was something I could live with and it saved me hundreds of dollars in costs to have the counter top replaced.  I thought I would share this for those like us on a budget, but looking for inexpensive solutions to home improvement problems.  Almost 7 years later we still use the space as a hot plate and cutting board and replacing the counter tops became less of a priority on our to do list!

Image