Take These Broken Wings: Fairy In A Jar Kids Craft

My dutiful husband was mowing our front lawn the other day, and accidentally broke one of our plastic solar lights.  The top of the light still continued to function, and when day turned into night, it glowed as if to say “don’t throw me away, I am not done yet!”

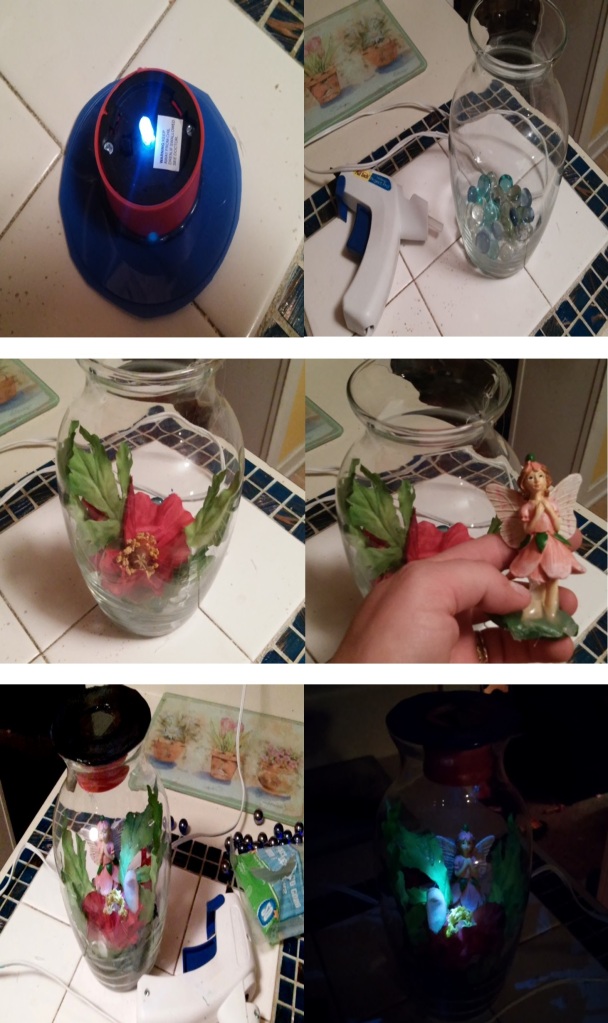
I often struggle to find new ideas for projects, but I have come to realize the best ideas come to me without even trying. I began to think about a way I could re-purpose the light.  Then, my mind wandered off as it often does, and I also pondered a separate incident that occurred during a trip to Joann Fabric earlier in the week.  My daughter picked up a small ceramic yard fairy. She wanted to carry it around the store.  It was small enough, so I allowed it.  She accidentally dropped the fairy and it broke in two. Exercising the “break it and you bought it moral policy”, I paid for the item hoping I could glue it back together when we got home. Then both memories collided and an idea to merge these broken items together was born. I would make a “lighted fairy in a jar” A paradise for a convalescing fairy with a broken wing.  I didn’t have a jar handy, so I used a glass vase I had lying around.  I also had some decorative marbles and sprinkled them on the bottom of the vase.

I then began to create a suitable home for our little fairy.  I used artificial flowers, trimmed and glued them inside the vase to create a suitable habitat for our little broken friend.

DSC_1578

I carefully placed the fairy inside the glass vase.  Before dropping her in, I used hot glue to cover the bottom of the statue to properly set her in place.  I intentionally applied random droplets of glue to give the appearance of condensation thus providing a drink for our little “pet”

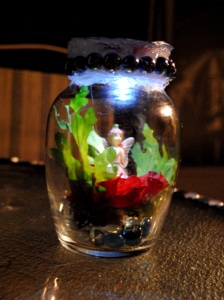
Now that the scene was set inside the glass, I  began to come up with a way to use the solar light to illuminate the vase,  I had a plastic lid handy, and decided to use the hot glue gun to adhere the plastic light to it.  I traced the light with a black sharpie onto the lid and cut a hole in the top to expose the solar panel. I glued the modified light and lid to the top of the vase, allowing the solar light to drop in place and illuminate the jar.  I added some additional blue marbles around the top rim of the jar for decoration.

It all came together something like this:

fairy in a jar

I would recommend this project is done under strict adult supervision due to the hot glue involved.  I actually dread using the high heat gun, because I always manage to burn myself with it at least once no matter how careful I am!

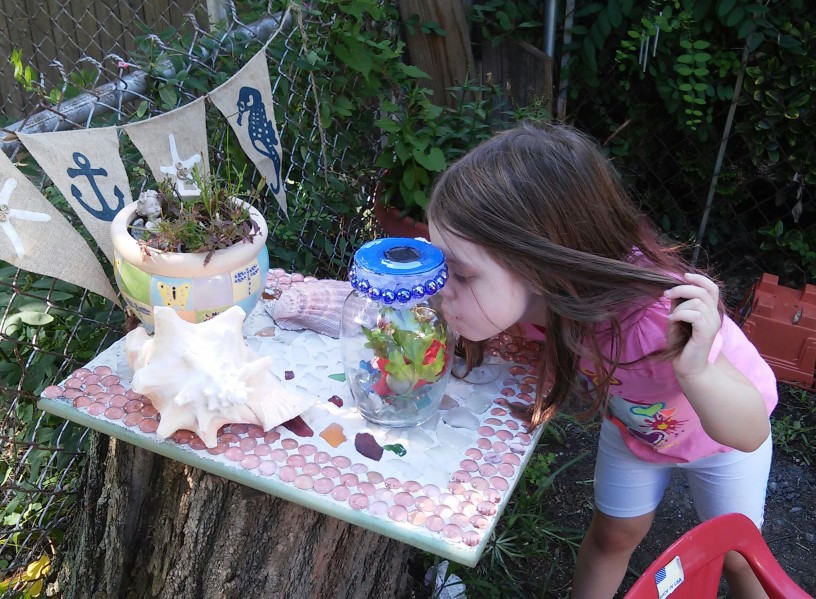
When I showed my daughter her fairy jar gift she loved it and decided to give it a kiss.  My heart just melted!  What little girl wouldn’t love her own “pet garden fairy”

20150718_165653-1[1]

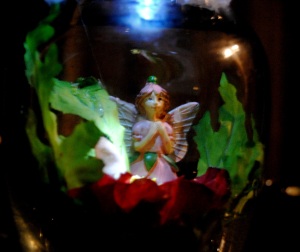
As the night turned into day her fascination only grew as the jar began to glow.  Then it occurred to me all the possibilities and jar themes you could come up with.  Let your imagination run wild and create a wonderful garden keepsake.. and remember broken things are beautiful!!!!

DSC_1579

Materials needed:

Jar or Vase

Plastic Lid

Solar Light (top)

High Heat Hot Glue Gun/Glue Sticks

Decorative items for your Jar:

Child’s toys figurines

Rocks, Plants, Marbles:

Create any scene you wish!

Where is Summer? The Birds Are Angry: Decoupage Kids Craft Bird House

It hasn’t felt much like summer over here.  The pool is up, the flowers are planted and beginning to blossom, but it is 52 degrees and the rain is cold! I am left to ponder the question, where is summer?

The good news: Rainy days are a great time for kids crafts.  All the more reason to plan a project the toddler apprentice and I could accomplish together.  The little one loves to watch The Disney Collector on You Tube. The DC Collector has become a bit of an internet phenomenon among the five and under crowd, and my daughter is no exception.  She enjoys watching those carefully manicured hands opening and revealing various toys and treasures. It was while watching these videos my daughter discovered her love of Angry Birds.  The birds must be angry that the weather has not been cooperating!  They could sure use a house I thought to myself!

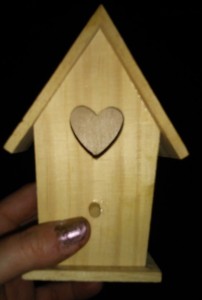
I also thought decorating a bird house would be fun project to do together. I purchased an unfinished,  wooden bird house at Joann Fabric.  They were on sale for .99 cents.

20150514_225726

I then went online and downloaded some Angry Bird images.  You can use character stickers if a printer is not available.

20150514_224224[1]

I cut the images out with a pair of scissors and placed them aside.

20150514_225456[1]

We painted the bird house together using red and blue acrylic paint.  It required two coats.  We then placed the painted bird house aside to dry.

20150514_232054[1]

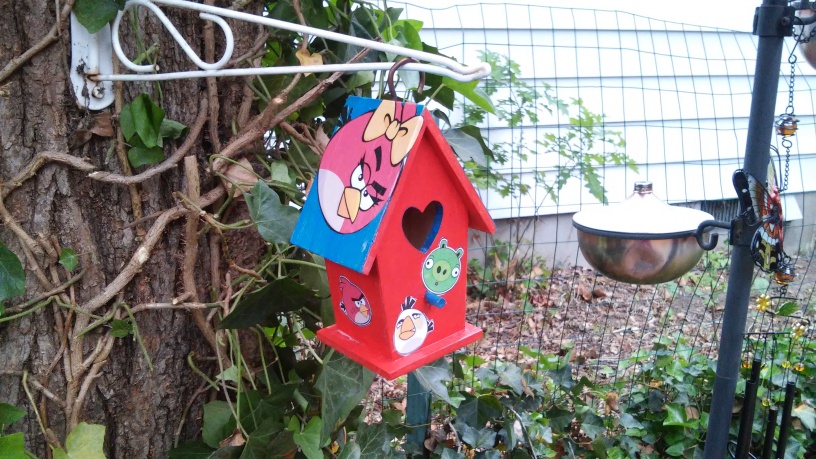
Once it was dry, I used Outdoor Mod Podge to apply the images to the bird house.  I then added a layer of Mod Podge over top of the image. Although Outdoor Mod Podge provides added protection from the elements, if left out it will eventually weather.  I added a coat of polyurethane to provide additional protection and prolong the life of the bird house.

20150518_185404[1]

Once the bird house was dry we used a “C” Shaped hook like this one to hang it.  Lets hope that now that our little backyard friends have a place to call home, they won’t be such “Angry” little birds anymore….

Materials Needed:

Unfinished Wooden Bird House

Angry Birds, images or stickers

Outdoor Mod Podge

Red and Blue Acrylic Paint

Clear Polyurethane (optional)

Paint Brushes/Scissors

C Shaped Hook (For Hanging)

Repurpose and Remember: Ideas for The Backyard

This weekend officially kicked off the start of summer in our household.  On Saturday, we celebrated our daughter’s 3rd birthday with a small family BBQ.  I am usually big on party planning, but this time I was forced to pull it all together last-minute.  This week has been hectic to say the least, as our daughter also started Preschool.  I am happy to report that things went well and the only tears shed were our own!  She handled going to school and riding the bus with ease and excitement, and asked us several times throughout the weekend if she was going to school!  Mission accomplished!

On Sunday, the hubby and I decided to do something we rarely get a chance to do:  Enjoy our backyard.  I like to think of our outdoor area as an extension of our indoor living space, but we very rarely get to relax and enjoy it together.  This weekend, with the holiday in full swing we decided to enjoy some time outside.   Sunday night in our area was absolutely beautiful.  No mosquitos and a cool evening breeze tickled the trees.  It was the perfect evening to sit and enjoy what Mother Nature had to offer. We put the little one to bed,  hooked up the monitor outside to listen for her, and  we lit a fire in our outdoor fireplace, sat back and enjoyed a relaxing much-needed evening together.

DSC_0322

I thought I would share some simple ideas to creating the scene for a relaxing evening at home.  Kudos to my husband, who came up with a simple but very useful idea.  A popular item at kid’s parties are glow sticks and bracelets. The sticks that continued to glow, he used to line our back porch stairs.  Not only did it look cool, but helped us navigate the stairs safely in the dark.

Glowsticks

Over the years we have received quite a few decorative candle holders as gifts.  As much as I would like to display each and every one in our home, there just isn’t enough wall space.  This particular gifted item was originally a decorative fireplace screen that was also a candle holder.  Although it was a lovely idea, we could no longer safely use it with our three-year old.  I decided to repurpose it as an outdoor wall hanging.  I attached it to our patio area wall with screws and used flameless tea lights to illuminate it.  It adds a festive and romantic feel to our seating area, and was a great way to repurpose an old decoration previously destined to attic exile.

DSC_0305

DSC_0304

I have always been a fan of the neighborhood Dollar Store.  Dollar Tree in particular has some great affordable decorations.  Patriotic decorations are no exception.  Since our daughter’s party is held close to the Memorial day holiday, I always incorporate patriotic decorations with her birthday décor.  I picked up these great round paper patriotic decorations.  Dollar tree sells a version of these that light up online, but the ones that I purchased did not.  To remedy this I added flameless battery operated tea light to illuminate them.  This added such a lovely look.  Battery operated tea lights are a great way to add decorative lighting without the dangers.  Having a three-year old roaming around, open flame candles and tiki torches become a hazard.  Despite this I still love the look and feel of luminaries and this is a great way to enjoy them without the danger.

DSC_0332

When my husband and I sat back and soaked it all in, we spoke of, and were thankful for all the men and woman who sacrifice so much to protect our freedoms.  If it wasn’t for these sacrifices, we would not be able to have moments like these.  Thank you to all those who have sacrificed so much so we can live in freedom and have a quality of life that we often take for granted.

Remember

Completely Stumped: Upcycled Tree Stump Ideas

Recently, my backyard neighbor approached me about cutting one of our trees down.  I have wonderful neighbors, and since it was her idea to remove the tree she also offered to pay for it.  She has a huge vegetable garden in the summer and the tree was a bit of a nuisance to her garden.  The tree was leaning and didn’t seem particularly healthy. Not to mention,  little saplings would appear everywhere in our yards and grew like weeds. Due to such factors, it seemed like a good idea to have it removed.  Unfortunately, we are now left with a bit of an ugly tree stump, and the guilt of removing a tree from nature, but the truth is our yards are too small and too close for such forestry.  I began doing research on ideas when it comes to upcycling tree stumps. I am still unsure as to what I am going to do with ours, but found some inventive ideas online I wanted to share.  After a long winter, it seems appropriate to welcome spring in such a way!

1. Interior Holic 

old-tree-stumps-in-garden

Who wouldn’t love a tree table!  Just one of many ideas on this site!  Tree stump natural flower planters, Tree stump side tables covered in polyurethane you name it this site has it!

2.  A Cultivated Nest

A DIY site dedicated to crafts is home to the unique idea of a tree stump chair!  I love this idea!  It not only recycles an old broken chair, but saves the old tree stump creating a unique piece of furniture in the process!

3. And… there is always HGTV ! Lets not forget our other backyard neighbors, birds!  This link will show you all the ways to greet and care for birds in a natural garden setting. This lovely idea uses a tree stump with a basin resting on top for a natural looking bird bath.

Bird Bath Tree Stump

Do you have any creative ways of  recycling tree stumps?  Are you as excited as I am to get outside and do a little spring cleanup?

Summertime Crafts- Restyled Flower Pots made with Outdoor Mod Podge

Image

This my favorite time of year. Our living spaces expand and we can now utilize backyards, patios, and balconies. Flower pots are an inexpensive addition to any outdoor space, and look just as good inside the home. Flower pots can be found at your local dollar store or just about anywhere, and restyling them is a simple, and easy craft.   I had this one hanging around and thought a little sprucing up was in order.  I had some Jacquard style scrapbook paper scraps I had used from a previous project.   As you can tell I love Jacquard designs!  I have just about used up this book of  scrap-book paper designs I purchased from Michael’s Crafts.  I will be our searching for some new scrapbook paper designs in the near future.  I simply cut the paper into a long strip and used Outdoor Mod Podge to glue the paper to the top rim of the ceramic pot.  I  then applied the Mod Podge to the outside, applying a few coats.  A very simple project that you can share with the kids.  You can use fabric, wrapping paper, magazine clippings, personal photographs just about anything.  I recommend using Outdoor Mod Podge even if you plan on keeping your flower-pot inside.  Every time you water the plant you run the risk of getting it wet, and the Outdoor Mod Podge works great under these conditions and will seal it beautifully!  The key is to have fun no matter what design you choose!

Adding “Bling” to your outdoor table with glass marbles and tile

One day I was sitting outside staring at our old patio table.  Like a lot of things in our home the table was rescued from the trash heap.  It was given to us when my mom moved from a house into an apartment.  It worked out great for us, because at the time all we had was a plastic patio table that had seen better days.  I would go to department stores and pine over all the elaborate outdoor furniture.  Fancy Fire pits, gazebo’s etc. OK so I am a bit of a dreamer, since there was no way I could afford any of it!  Of course that didn’t stop yours truly from stealing a good idea or two from my window shopping and making my own “shabby shiek” version.  I had some left over mosaic tiles so I thought I would add a little “bling” to the table’s edges.  If you are really an adventurous type, you could actually add the tiles to the whole table.  For the job I used a Grout and adhesive in one. There are varying opinions on the internet regarding the use of this product and whether it works as well as grout and adhesive do independently.   I find that it has worked well for the smaller tile projects I have  completed.  The table has been out in all weather conditions and I have not lost one tile so I find that the combo product has held up pretty well.  I used small mosaic tiles along with decorative glass marbles I purchased at  dollar tree.  I think this small change gave the table a lot more character.  Also, another money saving tip:  If you want to save money on a table umbrella, the beach umbrella’s work just as well and are $10-$20 (and even more in some cases) less than the actual table umbrella’s.

I may not be able to afford that fancy gazebo, but through some ingenuity I can have my own little backyard oasis at a discount!

Tiled outdoor table

Beach umbrella VS Table Umbrella save money!