Fabulous Frida: Dollar Store Decoupage

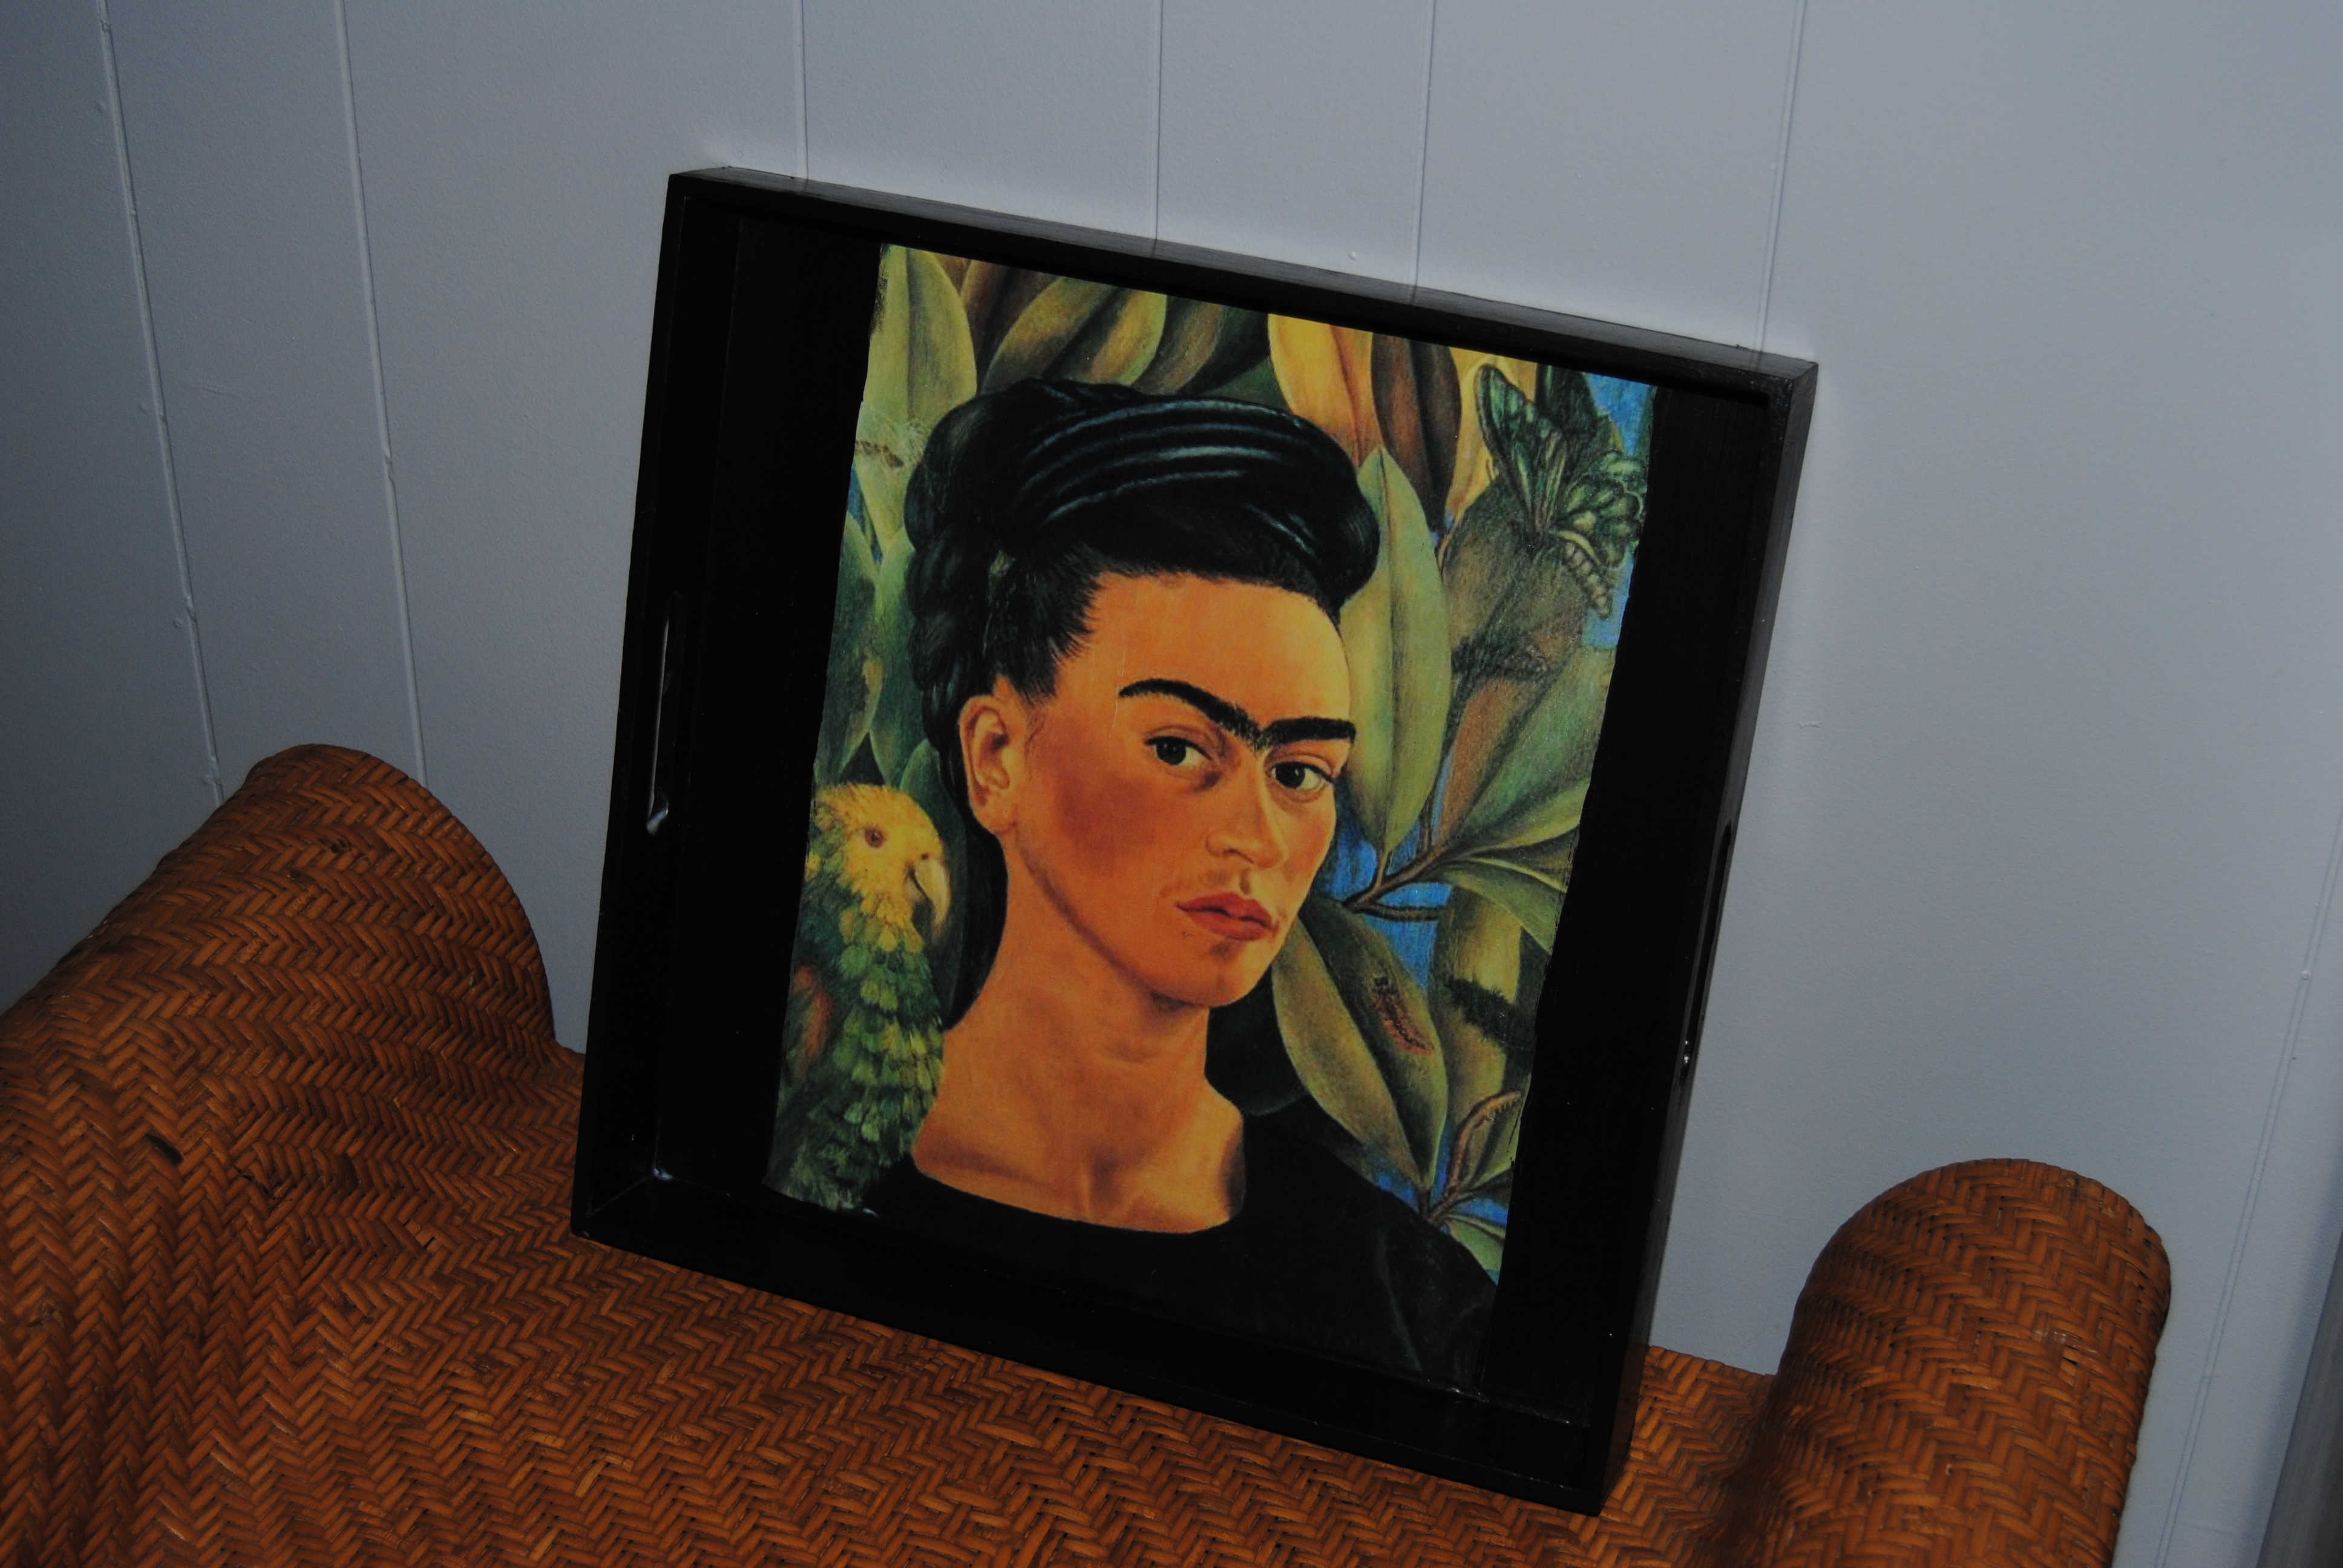
Beauty can present itself in many forms.  That is why I find the works of Frida Kahlo so intriguing.  The subject matter of her paintings are often grotesque and painful, but one can’t help being drawn to it.  Despite the many adversities life had to offer her, Kahlo never let it defeat her. She was a modern woman, ahead of her time, and created artwork that remains relevant today. Born in Mexico City around the start of the Mexican revolution,  At age 6 she contracted Polio which caused her to walk with a limp. As a young women, she was involved in a nearly fatal bus accident that left her with severe lifelong and painful injuries including her inability to carry a child.  Her heart was broken and this was reflected in many of her paintings, most of which were self portraits.

Self-Portrait-1926

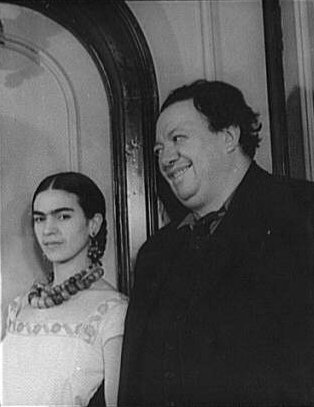
Frida Kahlo pictured below with her partner and muse, painter Diego Rivera in 1932.

Frida_Kahlo_Diego_Rivera_1932

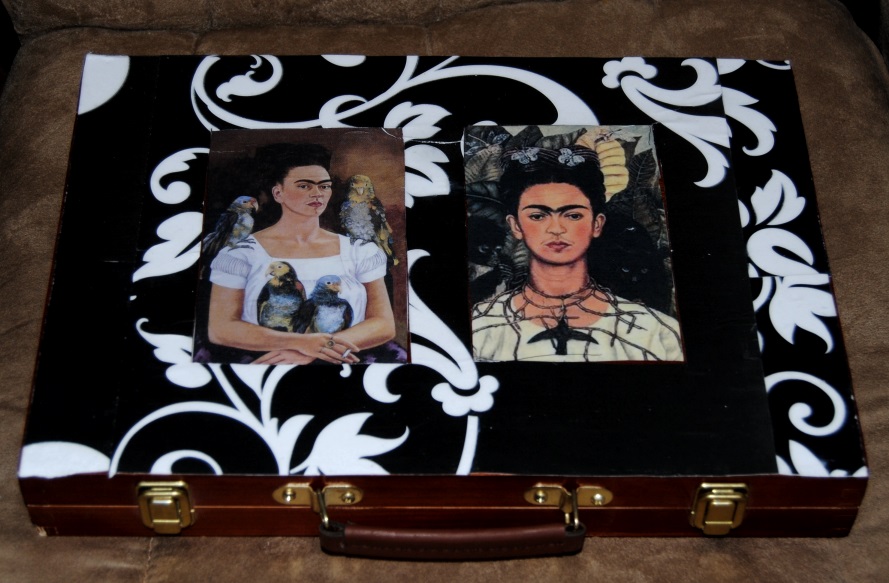
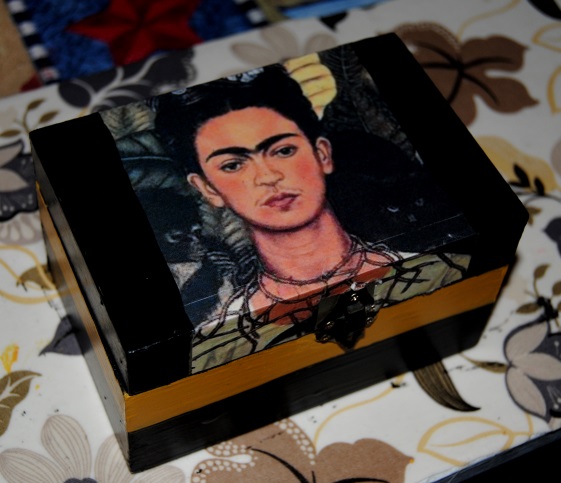
My sister is also a fan of Frida.  She recently had a surgery that would take some time and perseverance to recover from.  I wanted to make her something special to lift her spirits and inspire her while she was convalescing. I thought something with a Frida Kahlo theme could do just that.  I had a small wooden box that was far from special, but would be perfect to store her medications in.

DSC_0762

First, I cleaned the box thoroughly removing dust and dirt that accumulated during storage.  I printed out a 4×6 Frida print, and applied Mod Podge to the box with a paint brush.  I then carefully applied the print to the box.

DSC_0763

I used black and golden rod acrylic paint to finish off the box redesign. Once the box dried, I used Mod Podge to seal the project.

DSC_0765

Make your own art inspired box Dollar Store Craft

Imagine the possibilities!

Materials:

Mod Podge

Print of choice for decoupage

Acrylic Paint

Scissors and paint brushes

Feeling the Frida Frenzy?  Check out these other On the Upcycle Frida Kahlo inspired projects

Frida Kahlo Decoupage TrayFrida Kahlo Decoupage Art Case

On The Upcycle Restyle

on-the-upcycle.jpg

This weekend I decided to give “On The Upcycle” a much-needed reboot.  I felt the old blog layout was getting a bit stale. Last night I experienced an evening of insomnia, and decided it was the perfect time to explore new ideas. I hope you all like the new look!  Happy 4th of July weekend everyone!


DIY Children’s Playroom Art Display

Two of the toddler apprentice’s favorite activities are drawing and painting.  As a proud mom, I consider all of her drawings mini masterpieces.  I like to keep and display her artwork, but the refrigerator door was becoming too crowded. I decided to display them on the playroom wall via a “mini” clothes line. (minus the clothes of course!)

DSC_0724

Materials needed to make an “Art” line:

string/twine

2 small metal hooks

scissors

clothes pins

I used two mini metal hooks, hanging them on opposite ends of the wall.  I measured out the twine and cut to the desired length with the scissors. I tied the twine to the metal hooks allowing a bit of sag on the twine.  I then hung all of my daughter’s art on the line with clothes pins.

Kids art display

Finger Painting Artwork

What a great way to display her art, a simple DIY solution !

Philadelphia Phillies Phanatic Painted Wall Mural

Before our daughter was born, my husband had the ultimate sports man room.  It was filled with sports memorabilia, and a fully stocked bar.  We hung out in there regularly  watched movies laughed and joked and even kicked back a few drinks.  Now, a new kind of laughter fills this room. It is no longer the ultimate man room, but it IS the ultimate little girl’s playroom.  My husband and I discussed doing something special in the family room for our daughter Erin. We both liked the nursery wall mural and how it turned out.   Sure, we could have decided on a mural of  princess’s and castles, but I wanted to do something different and also keep true to the original theme of  the room which was sports.  One of her favorite toys is her Phillie Phanatic Pillow Pet, which ultimately gave me the idea.  I also wanted to do something for the hubby.  He was more than happy to give up his room for his daughter, but I wanted to thank him too, after all he is a huge Phillies fan!

I searched the internet for a good example of a Phanatic image I wanted to use as a visual.  I often draw through visually studying a picture before I begin.  I usually use a pencil to outline where I am going to paint.  I found it easier this time to simply draw the lines with a fine brush and black paint onto the wall.  If I made a mistake, I used a magic eraser to wipe away the paint.  (Magic Eraser does not work on a flat painted wall) I thought it would be cute to have him holding a pennant with ” Go Erin” on it.  I used acrylic paints and applied about 3 coats total.    The mural measures a little over 5 feet tall.  Hopefully, it will be a good luck charm this season and beyond!

Some Phillie Phanatic trivia:

The Phanatic replaced “Philadelphia Phil” and “Philadelphia Phillis”, a pair of siblings dressed in 18th-century dress.

During the winter after the 1977 season, Dennis Lehman, thought that the team needed a mascot similar to San Diego’s Famous Chicken created the Phanatic with the help of Acme Mascots

The Phanatic debuted on April 25, 1978, at The Veterans Stadium, when the Phillies played the Chicago Cubs.

His mother, Phoebe Phanatic, occasionally appears with the Phanatic.

Phillie Phanatic Painted Wall Mural

Full lengths shot of Phillie Phanatic Wall mural

Frida Kahlo inspired decorative decoupage tray and art case

Nothing is worth more than laughter. It is strength to laugh and to abandon oneself, to be light.
~Frida Kahlo

I picked up this ugly old tray for $2.00 at the flea market about a week ago.  At that time I really had no idea what I was going to do with it.  I did know one thing it needed a makeover! My sister’s birthday is coming up and since discovering my new upcycling obsession, I wanted to make her something special.  I always admired the artist Frida Kahlo and I was intrigued by her artwork and her life story.  My sister is also a fan of her art and got to see an exhibit of her work a few years back.  I recently did a quick project of my own when I decoupaged my art box with Frida Kahlo art and scrap book paper. (Pictured below)

This gave me the idea for the tray. Simple projects too!

Her birthday is next week.  Hope she likes the tray, but I am keeping the art box!

; 0 )

Art Case Before

DSC_0037

DSC_0067

DSC_0080

DIY Photo canvas and wall hangings

This Mother’s day, I made my mom a photo canvas of all four of her grandchildren.  This is also a great first project when working with Mod Podge for the first time.   I have seen many techniques on how to make photo canvas’s on the internet.  I have yet to try the photo transfer method.  (Of course when I do I will be sure and share it with you)

My husband and I attended a beautiful wedding in upstate NY not long after our daughter was born.  The photographer Erin Covey http://erincoveycreative.com/ stopped by our table and took a photo of us.  The bride was nice enough to share this photo with us after the wedding, and we were so happy with the result!  It is one of the first times we had been photographed together as a family.  I wanted to do something special with this print, but I wasn’t sure what to do.  Then I came across all the photo canvas making methods on Pinterest and around the internet,  and decided to go for it.  I wanted to make a bigger canvas, so I ordered a large print of the photo from snapfish.   l also decided for a more dramatic effect, I would convert the photo from color to black and white.  I purchased a canvas from Michael’s and waited somewhat patiently for the photo to arrive in the mail.  Once the photo arrived, I was ready to get started!  The print was slightly smaller than the canvas, so originally I decided to paint the area around it black.  After some thought, I decided to frame it instead with some scrapbook paper.  I was so glad I did!  I think it gives the canvas a unique look from other photo canvas’s I have seen out there!  I used the Modge Podge to glue the print to the canvas.  I then measured the scrapbook paper and used it to frame the photo.  Once dry I applied 3 coats of Modge Podge covering the whole canvas to seal it.

Also don’t stop at using just family photos!  ANY print can be made into a wall hanging.  (I have included an example of this in a kitchen wall hanging that I made) So, get out that Mod Podge and start crafting those last minute Mother’s day gifts.  Mom will love you for it!

Materials used: 

Large printed photo

Mod Podge Matte Finish

X acto knife

Scrapbook paper (to frame print)

Family Photo Canvas

Kitchen Wall Hanging

Modge Podge Photo Canvas

Decoupage “Ugly Tray” Re-styling using Mod Podge

One of the things I look for when I go to thrift stores and swap meets are ugly trays.  I like them because they are great items to decoupage and I love decoupage!  They are also fairly inexpensive.  They are great practice and experimental pieces, and they are functional.  The possibilities are endless as to  themes and what you can do with these trays.  They also make great gifts. For My first decoupage tray, I used a freestyle approach.  I printed out all these lovely Victorian Era prints.  I love the Victorian era artwork and elegant look.  I had this old tray that was quite boring and a few times I had actually thought of throwing it away because it took up space and was just plain ugly.  I decided it would be a great piece to experiment on.   I painted the entire piece black with acrylic paint, and cut out the prints I wanted to use in the collage. I then used Mod Podge Gloss finish to glue the images to the tray.  Once completely dry, I sealed the entire piece with 3 coats of Mod Podge gloss finish.   I decided to hang the tray on our living room wall.   These trays also make great wall art.

Image

Victorian inspired Art decoupage birdhouse

Happy Cinco De Mayo!

Yesterday afternoon, our family hit the flea market circuit  in the hopes of finding a kids sized wooden chair to convert into a Time Out chair, and any other items that would make a good future project.  I am happy to report that we walked away with several items: A kids wooden chair,   a wooden school desk and a few decorative trays.    It was an absolute beautiful day today to walk around outside and soak in the sun.  Yard sale season is also in full swing.  We saw many on the trip, but had to save our yard sailing aspirations for another day.

Today was also the day my most recent craft:  my Victorian bird house, would be ready to hang outside.    Prime real estate for some lucky little bird family.  I wanted to create a Victorian feel. I searched the internet for Victorian art and floral images.  I then printed out the images I wanted to use on my color printer.  I carefully cut out the images with an X acto knife.  I painted the bird house red and white.  Once the bird house was dry, I used the Mod Podge to adhere the cut out images to the birdhouse.  The possibilities are endless as far as the styles and themes you can create.  You can choose any images you like including family photos, sports etc.  I then applied 3 coats of Mod Podge allowing to dry thoroughly between coats.  I used a metal hook  and screw for hanging outside.

Materials:

Wooden bird house from Michael’s Crafts

Red and White Acrylic paint

X acto Knife

Outdoor Mod Podge

Untitled

Nursery Rhymes-Welcoming our bundle of joy with a hand painted wall mural

Back in 2010, my husband and I received the news he and I had been waiting for most of our lives. We were expecting our first child in May of 2011. We were both over the moon as we had struggled for more than 5 years to get pregnant,and at our age our window of opportunity was closing fast. I had dreamed about this moment for most of my life. I wanted to do something special for him or her to welcome our little bundle of joy into the world. I decided to try something new, sure I like to draw and paint, but I had never attempted a wall mural like I had planned.
The truth is working on her nursery gave me an outlet to channel all my nervous energy. Having waited for so long, I was full of worry. This like most of my projects, distracted my over active mind nicely and channeled that nervous energy into something positive. I wanted to stay neutral as far as theme. My sister-in-law gave us a swing from the Fisher Price Rain forest Friends collection and I loved it! The brightly colored animals and whimsical feel was exactly what I had in mind. I started to plan. I went online and decided which animals I would draw and got started right away. Her room needed a total make over. We planned on tearing up the old carpet and putting in new, but wanted to get the painting done first to avoid any mess. I work full-time, so every day I would put in my 8 hours, come home and my goal was to paint an animal every night. I would bring my laptop into the room, put on the radio, and pull up a picture of one of the rain forest characters and get to work. I wish I could say that I followed a special technique, but I simply took a pencil and freehand drew the outline and then used acrylics to paint and fill in the color. I used the pictures of the animal characters on my laptop as a guide. I could have used a projection tool to make it perfect, but that was not my goal. I wanted it to be based on those characters, but by drawing free hand, they would have a bit of their own individuality.
When it was done I was pleased at how it turned out. It was not perfect, but unlike most things that I do that are flawed it didn’t bother me this time. I was happy that my first attempt at a wall mural had turned out so well! Now, Our daughter is 2 and I will inevitably face the day when she feels that she needs a “big girl room” and I will have to paint over monkey’s and tigers and replace them with princess’s and castles, but for now I am still enjoying the colorful jungle!

Finished Mural.

Finished Mural.

Erin smiling (as usual) enjoying her Rainforest Friends Room age 9 months.

smiling (as usual) enjoying her Rainforest Friends Room age 9 months.