Hot Summer Nights: Paradise By The Back Porch Light

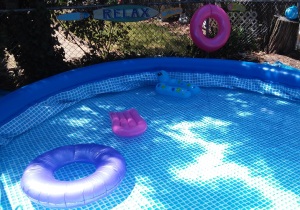
This past memorial day weekend, my husband and I were determined to get the yard ready for summer.  My daughter received an Easy Set Intex Pool from her Uncle and Aunt for Christmas and we could not wait to get the pool setup and operational.  My daughter’s 4th birthday this year will have a pool party theme, and the date for the party is quickly approaching.  My husband and I leveled out the ground in the area the pool would be placed.  We laid down a tarp and spread the pool out.  These inflatable Easy Set’s are great starter pools, and in our case the simpler the better since this is our first attempt at putting up a pool.

20150523_141004

We inflated the ring with a pump, and from the inside smoothed out the lining.  It took all day to fill.  The next day, we hooked up the filter, placed chlorine tabs in the floater, and assembled the ladder.  The water was very cold, so I hopped in to the pool for a test run.  For the most part everything went great and the set up was easy.  I was disappointed to find some parts in the lining that were not as smooth as we had wanted.  I can’t stress enough the importance of making sure the ground is clear of any debris and level.  Even after all our careful work, what seemed smooth at the surface was not always the case.  Once the weight of the water pressed the ground flat, some rocks and roots underground seemed to appear out of nowhere through the lining.  That being said the only way to remedy this would be to drain the pool and remove the debris from the area to smooth it out.  Until it is necessary to do so, we are going to take our chances.  I would feel guilty wasting all that water!  Luckily the pool came with plenty of patches if needed.

20150524_131400[1]

We purchased a few fun summer signs from Dollar Tree and lined the fence with them for added decoration.

I  also accomplished a few smaller projects.  I had a decorative metal star that I picked up at Christmas Tree Shop.  It was on clearance and I was never happy with the tan color.  I surmised that this was most likely the reason why it was on clearance.

20141108_172420[1]

Since it was Memorial day and the house was decorated in Americana….

20150509_132943-1[1]

I had some extra Rust-Oleum red spray paint, and I sprayed on a quick coat.  I like the star better now that it is red and I purchased it for half the price!

20141108_201050[1]

The other area I wanted to address was the corner of the yard by the pool. There is a rather large tree stump in this area.  Some time ago, I blogged about ideas here.

I struggled with what to do with this stump for some time.  This weekend that changed.  I decided to make it a fun project for my daughter and I to do together.  I had an old broken wooden TV tray.  I removed the table top from the legs and screwed it on to the tree stump surface.  My neighbor had given me some decorative, shells, glass pebbles and decorative rock. I thought it would be fun for us to create a mosaic table top for it.  I used some old tile grout and glue in one and spread it onto the table surface evenly.  The toddler apprentice and I then applied the rocks and glass pebbles.  We wiped off any excess grout and allowed it to dry overnight.  I used the unused legs of the TV tray as a garden trellis, another great re-purpose!  My goal was to use as much of the table as possible. Mission accomplished!

20150525_172623[1]

I placed the shells around for decoration.   Now Mommy has a place to put “her” sippy cup and relax by the pool, while my daughter has fun exploring and playing with the various sea shells.

20150525_173659[1]

20150525_172714[1]

Since this spring has been a bit sparse in the rain department, our grass took a hit and much of it died.  Once all the yard work was done, we raked the yard and spread out grass seed in the hopes of bringing our lawn back to life!  Once the grass grows under our feet, our little backyard oasis will be complete!

What do you have planned for your backyard oasis?  Do you have any summer projects you are eager to complete?  How do you like to kick off summer?

The Happy Card Project: Put A Little Love In Your Art

We all know how wonderful it feels when you have a chance to brighten someone’s day.  Sometimes, it is a simple gesture, lending a hand to someone in need, or a few words of encouragement when someone around us is feeling down.  Although many of us would like to contribute to those in need financially, there are times when this is not possible.  That doesn’t mean it is impossible to give.  One of the most precious gifts you can give is time.  This past July 4th weekend, the toddler apprentice and I put aside some time between bbq’s, fireworks and swimming, to sit down and make cards together.  I recently reconnected with an old friend on Facebook who brought a positive movement to my attention.   It was started by her daughter Corinne Mattia.  Corrinne is a psychology student and describes herself as an animal lover, and eternal optimist.  The idea is called  The Happy Card Project.

10426680_567028680074831_4640953951286492227_n

The Happy Card Project’s mission and message is simple:  We brighten our own lives through brightening the lives of others.  They aren’t looking for money or donated goods.  Their motto? Some pursue happiness while others create it.  The Happy Card Project want your homemade, or store-bought cards you may have around the house.  These cards can then be personalized with encouraging words, stories, or anything  intended to brighten someone’s day.   Donated cards are then delivered by the Happy Card Project Team to local hospitals, pediatric facilities, homeless shelters and senior living homes.  Their goal is to simply brighten the spirits of others.

The first 200 cards collected will be donated to the Homeless Bus a charity based in New York City.  The  Homeless Bus, Inc. has made over a 1000 trips to Manhattan providing immediate needs to the homeless from a passenger bus every Saturday night since 1992.  To learn more about this wonderful example of what just a few people can do to make the world a better place, and for ways you can help please visit: The Homelessbus.org

1001506_458858027542918_1251277114_n

Continuing to follow along with the “On The Upcycle” tradition, I decided to recycle some old greeting cards.   The little toddler apprentice and I sifted through an enormous amount of craft scraps, old cards, stickers and scrap-book paper.  She enjoyed going through these items, and chose a few cards that she liked.

DSC_0480

This was my first attempt at making handmade upcycled cards.  I have seen some beautiful examples of card making on the web and in the WordPress community.  One such artist resides at  The Cobweb Emporium.    These cards are well crafted, elegant and detailed.  Please be sure and stop by and pay Cob Webs a visit.  Trust me, my card crafting skills pale in comparison!

The apprentice and I worked together using the hand over hand technique. She helped me cut the images we planned to use from the old greeting cards with her safety scissors.  I had some unused card stock and it fit the envelopes I had perfectly.

DSC_0489

We then decorated each card and added the words Hope,  Cheer and Love. She especially enjoyed gluing the various pieces on the card stock and applying stickers.   Once the glue on the cards was dry we wrote notes of encouragement inside.  The more “adult” cards we signed from the family, and for the others we told a brief story from our three year-old’s point of view.  On the back of the cards we wrote “Made with love and little hands helped.”  We created a total of six cards using materials we already had available at home.  The cost was minimal and consisted of the postage needed to mail the cards.   I can’t think of a better way to spend an afternoon with your kids then doing crafts, and at the same time brighten someone’s else’s day!

DSC_0528

If you would like to spread some good cheer and encouragement to those in need, The Happy Card Project will continue to collect cards going forward for various charity organizations.

You can follow The Happy Card Project on Facebook Here.

If you would like to get involved and have cards you would like to donate to the cause, please send them to:

The Happy Card Project

PO Box 3802

Cherry Hill, NJ 08034

We mailed our cards today!

Design On A Nickel: Bathroom Cabinet Decoupage Restyle

Of all the rooms in our home our bathroom I can say without a doubt is my least favorite.  Our house was built-in 1937 and most older homes provided basic accommodations when it came restroom facilities.  Adding to these difficulties is the fact that we have only one, small bathroom in our home and it is in desperate need of a re-model.  That of course financially is not in the cards for us now.  However; I am a firm believer in making the best out of a situation, and I have had plans for quite sometime to work on improving our bathroom.  Our biggest eye sore was our bathroom sink cabinet. Replacing it was not an option, so I thought I could use some paint and a fabric decoupage to improve the look of the cabinet and add some design qualities to a rather bland and uninspired bathroom.

DSC_0951

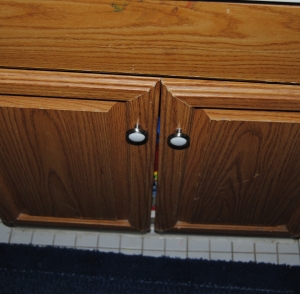
Generic bathroom cabinet

I hadn’t tried a project like this before and I knew it would require quite a bit of work.  I picked up a half yard of fabric from Joann Fabric and prepped the cabinet by cleaning it with a damp cloth.  I used a screwdriver to remove the doors from the hinges.  I then removed the knobs and placed them aside.  I used a white all in one latex paint and primer to paint the outside and inside shelf of the cabinet.   I used a paint roller on the larger areas and a smaller paint brush for the areas the roller couldn’t reach. I also painted the cabinet doors.  I allowed the cabinet to dry thoroughly overnight. It took about three coats to completely cover it.

DSC_1016

DSC_1013

The next morning, I traced the painted cabinet doors onto the back of the fabric.  Any access fabric, I would trim away later with a box-cutter knife.  I applied Mod Podge to the doors with a foam craft brush.

DSC_1019

I then applied the fabric to the surface and smoothed it out with my hands. I applied another coat of Mod Podge over the top of the fabric and I used my nail to work the fabric into the crevices.

DSC_1022

I repeated the same process for the second door and allowed them to dry in front of the fan. Once dry, I used a box cutter knife to carefully trim the excess fabric using the groove of the door as a guide.

DSC_1037

I reconnected the doors to the cabinet and reattached the knobs.  I applied an additional fabric swatch to the front of the cabinet, and repeated the same process of applying the Mod Podge and fabric and trimming away the access fabric.  I then touched up any areas of the cabinet with paint that needed it.

DSC_1039

DSC_1040

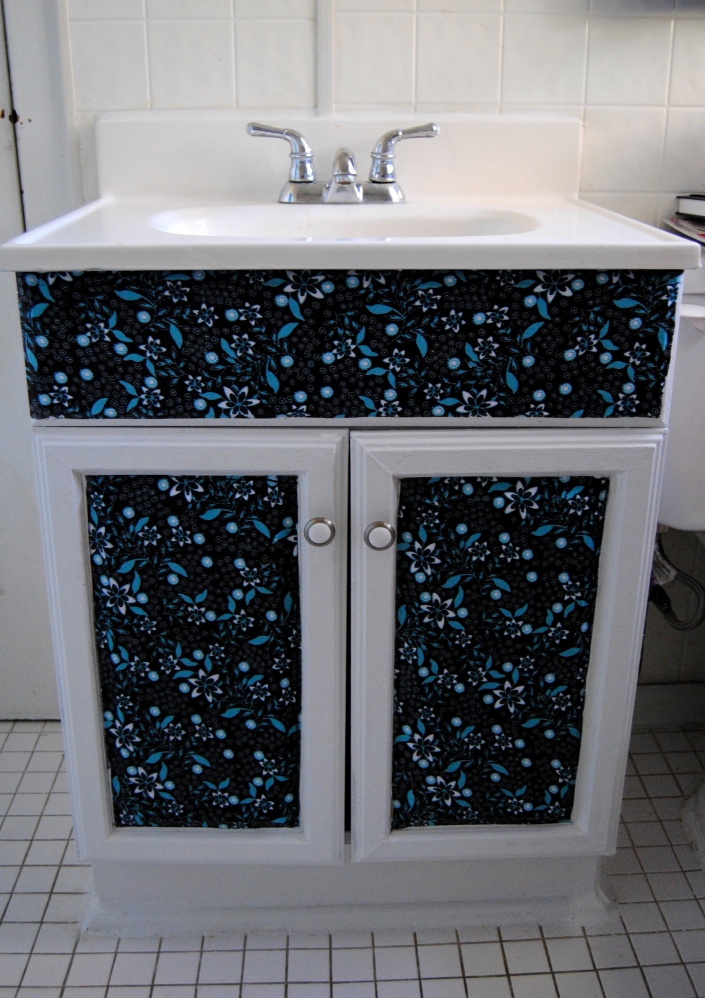
I really love the aqua and brown color scheme and hope to incorporate some more color in our bathroom.  I feel this may be a great start to improving our tiny neglected lavatory! I was surprised at how well this project turned out and the cabinet has gone from eyesore to accent!  It cost only about ten dollars worth of materials to make this project a reality, and I am really glad I gave it a try.  I have a feeling this is only the begining!

Fabric, Decoupage and Paint Bathroom Cabinet Makeover

Bathroom Cabinet Makeover Materials:

Mod Podge

All in one latex primer and paint in one

Fabric of choice

foam craft brush/paint roller

paint brush/fine tipped marker

Box cutter knife/scissors

Before and After:

Bathroom Cabinet Makeover Before and After

The Pillow Case Makeover: Upcycled, Pink and Brown Hand Painted Decoupage Chair

Image

I am always attracted furniture bargains.  On this day, as I often do, I took a quick look around the local Goodwill on my lunch break. It just so happened that all red tagged items were 50% off.  In the corner, toward the back of the store,  I noticed a wooden chair with a ladder back, red sticker taped on the front.  It was a little diamond in the rough.  I was surprised the original price was only $4.99, and with the discount this chair would only cost $2.50!  I had been wanting to try a full-sized chair project for a while, and this chair seemed like the perfect candidate.

It just so happened my sister had noticed some of my furniture projects the last time she was over the house. She asked me to make her something, but was not sure what she wanted.  When she saw this chair among the other furniture candidates, she thought perhaps I could design it based on her bedroom which is pink and brown.  It was then I came across a pink and brown flowered pillow case while looking through used textile bin and I thought it would be perfect for this project.  I texted her a picture of it to see if she liked it, and she did. I then began to plan…

Image

Fast forward to today…I went to JoAnn fabrics and bought some Apple Barrel Acrylic paint.  I matched the pink and brown pretty well against the pillow case.   The pink appears slightly darker in person than in the photos and matched it nicely.  My daughter managed to open one of the bottles of pink paint with the plastic still intact!  Thank goodness the store had wipes handy!  It was some sort of miracle she only managed to get it on her hands and avoided her clothes entirely!

When we got home, I put the princess down for a nap, and got to work.  I traced the chair seat onto the fabric with a black marker.  I carefully cut the tracing with a sharp pair of scissors.  I then applied Mod Podge, using a medium-sized paint brush to the seat.  I spread the fabric out over the seat stretching and smoothing out any creases with my hands.  Once dry, I applied another coat of Mod Podge over the top of the fabric.  While this dried, I used a white latex primer to paint the chair so that I could apply the acrylic paint onto a good base.    I then carefully hand painted the chair and used several coats until I achieved my desired result.

I sat the chair in front of a fan to dry and waited.  Once the paint was dry, I could apply the Mod Podge.  I  allowed it to dry between coats.  This chair needed about three coats over the entire piece to seal it.  I am hoping my sister likes the result!  I had seen the color dipped legs online, on other crafted chairs and I  love this design! I decided to incorporate it into this chair.  Now she has a stylish place to sit and read or put on a favorite pair of shoes, and it perfectly matches her bedroom decor!

$2.50 chair Before and after:

Image

Upcycled chair

Materials:

Wooden Chair

Pillow Case for decoupage

Mod Podge Matte Finish

Scissors/Fine Tipped Marker

Pink and Brown Acrylic Paint

Paint brushes various sizes

DSC_0555

Bedside table restyled with decoupage

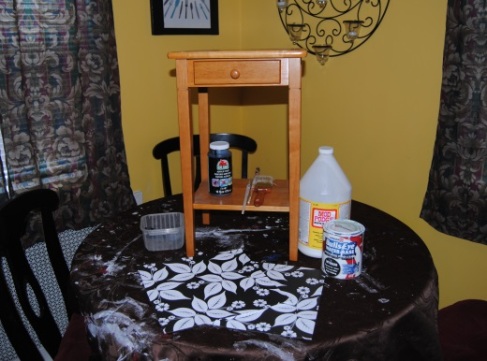
In this little table, I saw much hidden potential.  I can’t remember how I came across it.  I found it up in our attic. It was the perfect little project.  I brought it down, and it sat in my bedroom, waiting it’s turn to be upcycled.  Tonight seemed like the perfect night!  While the little toddler apprentice slept, I gathered all my materials together.  (Including my mess of a table cloth strewn with paint and Mod Podge of projects past.)

Image

First I tightened the table and cleaned it removing any dust or dirt.  Once dry, I primed the areas I planned to paint with a latex primer. I put aside the table to dry.  I took the scrapbook paper and cut it into the various sizes,  In this case the drawer could not be removed.  I could remove the knob,  so I pressed the paper up against the outside of the drawer creating a crease in the paper where it would need to be cut. Once the paper was cut I glued it down to the surfaces I wanted to decoupage.  I then painted the remaining areas black with black acrylic paint.  Once the entire piece was completely dry, I  covered the entire piece with Mod Podge Matte finish.  I used a medium sized paint brush for the larger areas and a smaller brush for the smaller areas.  Once dry, I applied two coats to the smaller painted areas and four coats to the decoupaged areas. The result is what you see here:

Image

Little tip: I had a few air bubbles appear on the table surface.  I used a sewing needle, poking a tiny hole in the air bubble.  I  smoothed it out and then applied more Mod Podge over top of it. Definitely helped!

Before and after:

Image