The Shirt That Didn’t Fit: Clothing Repurpose

I was up late shopping one night when I came across a lovely shirt on Ebay.  I usually don’t purchase clothes unless I can try them on first, but I had recently ordered something and it worked out perfectly, so I was feeling braver than usual.

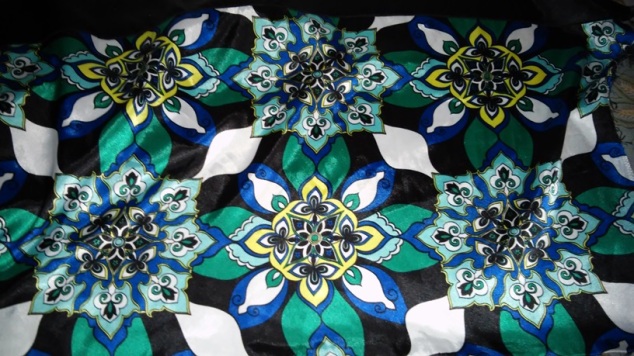
I received the item, and to my dismay it did not fit.  The seller had a no refund policy, so I attempted to relist the item for sale. Unfortunately, I didn’t have any luck reselling the item,  so I decided to utilize the shirt in a different way.  I loved the pattern and material, so I decided to re-purpose the item and use the fabric for decoupage.

20160114_191835

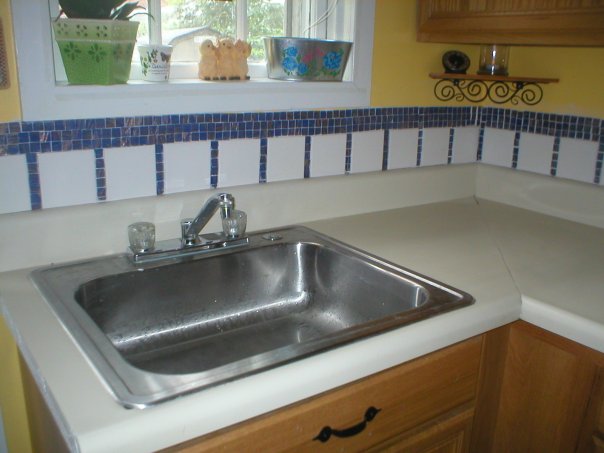
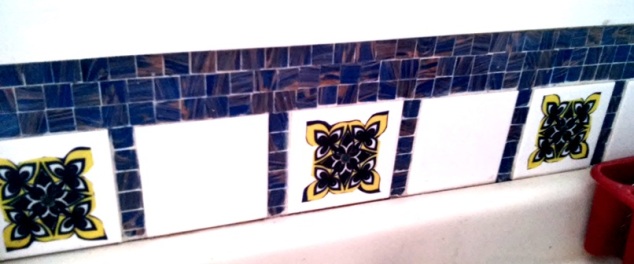
I carefully cut out the gold star pattern, and used a little Mod Podge to apply these to my kitchen back splash.  This added a much needed “pop” of color, and matched the kitchen decor perfectly.

Before:

DIY Kitchen Back Splash

After:

20160131_113806

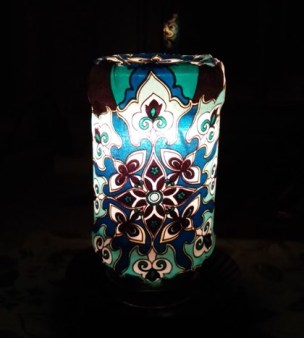
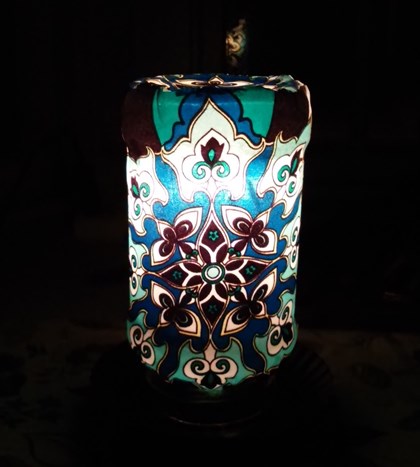
I had some fabric left over, so I decided to use it to make an accent lamp for my office.  I had an empty spaghetti jar which would work perfectly for this project.  I applied Mod Podge to the exterior of the jar and used some twine to add a decorative quality to the base. I applied the twine with hot glue.

20160216_074721

20160218_215538

For more details on how to create a decoupage jar lamp, check out some previous On The Upcycle decorative lighting projects…

Spaghetti Jar Lamp

Pickle Jar Lamp


Where is Summer? The Birds Are Angry: Decoupage Kids Craft Bird House

It hasn’t felt much like summer over here.  The pool is up, the flowers are planted and beginning to blossom, but it is 52 degrees and the rain is cold! I am left to ponder the question, where is summer?

The good news: Rainy days are a great time for kids crafts.  All the more reason to plan a project the toddler apprentice and I could accomplish together.  The little one loves to watch The Disney Collector on You Tube. The DC Collector has become a bit of an internet phenomenon among the five and under crowd, and my daughter is no exception.  She enjoys watching those carefully manicured hands opening and revealing various toys and treasures. It was while watching these videos my daughter discovered her love of Angry Birds.  The birds must be angry that the weather has not been cooperating!  They could sure use a house I thought to myself!

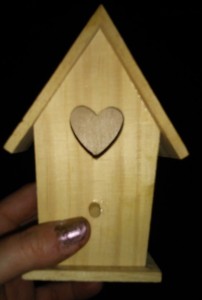
I also thought decorating a bird house would be fun project to do together. I purchased an unfinished,  wooden bird house at Joann Fabric.  They were on sale for .99 cents.

20150514_225726

I then went online and downloaded some Angry Bird images.  You can use character stickers if a printer is not available.

20150514_224224[1]

I cut the images out with a pair of scissors and placed them aside.

20150514_225456[1]

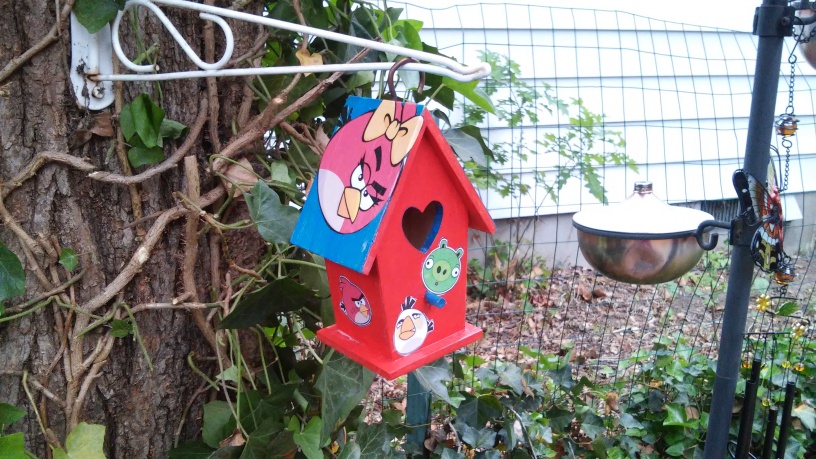
We painted the bird house together using red and blue acrylic paint.  It required two coats.  We then placed the painted bird house aside to dry.

20150514_232054[1]

Once it was dry, I used Outdoor Mod Podge to apply the images to the bird house.  I then added a layer of Mod Podge over top of the image. Although Outdoor Mod Podge provides added protection from the elements, if left out it will eventually weather.  I added a coat of polyurethane to provide additional protection and prolong the life of the bird house.

20150518_185404[1]

Once the bird house was dry we used a “C” Shaped hook like this one to hang it.  Lets hope that now that our little backyard friends have a place to call home, they won’t be such “Angry” little birds anymore….

Materials Needed:

Unfinished Wooden Bird House

Angry Birds, images or stickers

Outdoor Mod Podge

Red and Blue Acrylic Paint

Clear Polyurethane (optional)

Paint Brushes/Scissors

C Shaped Hook (For Hanging)

Inexpensive Gift Ideas: Miniature Desk Radio Decoupage

I have seen many radios and stereos in my day.  Everything from The Giant Boom Boxes of the 1980’s, to little mp3 players that fit in the palm of your hand, music has been delivered via many forms. I am a bit of a collector when it comes to music and pretty much anywhere I set up shop, I need to have a radio nearby. That includes my desk at work although it is rare I turn it on, listening to music does help with work related stress at times.  I also enjoy listening to the afternoon baseball games in the summertime.

Many stores carry these small desk top radios.  The one below was purchased at one of my favorite stores  Christmas Tree Shops. These also make great gifts for the music, sports lover in your life. This particular radio takes three AA batteries making it easy to take with you while on the go.

Desk top am fm radio


To personalize the radio and add a little flair, I decoupaged some fabric on to the outer case.  Since the radio has a “retro” feel I chose a colorful Mod fabric. I simply applied Mod Podge to the outer case with a smaller paint brush, measured and cut the fabric, and applied it to the case.  Once dry I applied a few coats of Mod Podge over the top.

DSC_1233


These make great gifts, and choice of fabric can be tailored around ones own individual tastes such as with character fabrics, and various designs featured at such stores as Joann Fabrics.

Mod Mini Radio Decoupage


Decoupage Mini Desk Radio


This little radio now has a retro feel that I love!

Hope your holiday season so far is merry and bright!!

Simple Fabric Decoupage Snowman Hand Soap Dispenser

As much as I love the holiday season, It has been a hectic few weeks decorating, attempting to make Christmas gifts and getting caught up in the everyday hustle and bustle of life.  Today, I experienced disappointment, after a mistake by yours truly turned into an epic craft fail. I now have to rethink an idea for an intended Christmas gift.  Not to mention most of the items I make between now and December 25th, I cannot share yet as it would ruin the surprise for those intended recipients.

I did manage to complete a simple craft today, I have been wanting to do for the upcoming Christmas holiday.  We like to decorate every room in our home including our bathroom.  I had an ordinary plastic soap dispenser that cost $.99 that is easily refilled.  I decided to decoupage some scrap snowman fabric left over from a previous project .

Image

I used outdoor Mod Podge previously used for a few summer projects.  The finish is a bit more durable when used in watery conditions. I carefully removed the label and I applied the Mod Podge with a foam craft brush to the outside if the bottle.  I wrapped the fabric around it, and smoothed out any wrinkles.  I trimmed any excess fabric and applied more Mod Podge over the fabric. I allowed it to dry for a few hours.  Once dry, it was ready to take its place along side the other decorative items and function as an inexpensive alternative to a fancy store-bought holiday soap dispenser.

Image

Holiday Decoupage Soap Disp

This idea can also be applied to hand lotion, and other gift basket items to add a holiday flare and personalize.  Choose a fabric suited to your holiday decor at Joann Fabrics.  Everything is better with decoupage!

The Secrets Out: John Waterhouse Decoupage Wooden Box Craft

I was in Michael’s Craft Store picking up some scrapbook paper, when I took a small detour down the wood craft aisle.  They had every shape and sized bird house, jewelry box, and  storage crates just to name a few.  Normally, I would just walk down the aisle and keep going,  but today I was intrigued by the idea of creating a craft from new previously un-used material. Besides, I had already looked through my home, been out thrifting, and  spent work lunches at Goodwill, and was unable to come across a simple wooden box to decoupage.  I thought one of these wooden boxes would be perfect for my friend’s birthday which was still a few month’s out, so I had plenty of time to make it in between making other crafts.

Art Minds Wooden Box

Wooden Box at Michael’s.com

My friend is a fan of the arts and I had been searching for the perfect painting to decoupage for her.  I came across the artwork of John Waterhouse  and saw a print entitled “My Sweet Rose”  It reminded me of my friend instantly when I saw it, and I thought she would love the image. I traced the box lid  on to the print with a pencil, cut it out and placed it to the side.  I used a foam brush to apply the Mod Podge to the box lid.  Once applied I glued the image to the box, carefully smoothing out any air bubbles or wrinkles.  I allowed the piece to dry.  Once dry I applied another coat of Mod Podge to the top of the photo, sealing the photo to the box.

I decided to stain the box instead of painting it.  I used a wood walnut stain, but any wood stain, finish or color would work. It really depends on personal taste.  I didn’t want the box to appear too dark so I only applied two coats total. I allowed the box dry. While drying I measured out the floral wrapping paper I wanted to use to line the inside.  I applied the wrapping paper with Mod Podge. The biggest challenge was keeping the wrapping paper from bubbling up.  I find wrapping paper the few times I have used it, doesn’t work well (Keep in mind it is thinner paper and purchased from the dollar store) The floral print ; However matched perfectly and I decided despite the challenges to use it in this project. Once the entire piece was dry I used another coat of Mod Podge to seal the entire box. I allowed the entire piece to dry under a fan overnight.

DSC_0813

DSC_0814

My friend’s birthday was July 4th, and she received the box in the mail and loved it.  John Waterhouse it turns out is one of her favorite artists, and she loved the keepsake quality of the box.

That also means, now that the secrets out I can share this craft with all of my internet friends.  I hope you enjoy!

Materials:

Used or new wooden box

Wood stain color of choice

Image/or images e to decoupage

wrapping paper (inside liner)

Craft foam brush

Scissors

Paint brush to apply stain
Wine Craft Wednesday: Upcycled Wine Bottle Garden Decorations

Image

There is nothing better than spending an evening decompressing after a long, hard day with a glass of wine.  Of course, even the occasional wine drinker is left to answer the question, “What do I do with all those empty wine bottles?” There are many great ideas out on the world-wide web for upcycling used bottles of all shapes and sizes.  Some of these projects call for “bottle cutting” and from what I have been reading online this is not always for the faint of heart. I wanted to do a wine bottle upcycle project that was simple and didn’t end with a trip to the Emergency Room.  I had decoupaged some bottles in the past, but I thought this time I would try something a little different.  I would attempt to make an outdoor garden marker using Outdoor Mod Podge and recycled gift bags.  First, I filled up a large pot with hot tap water.  I filled the wine bottles with hot water so they would submerse,  and placed them in the pot.  I let them sit for about and hour or until I could easily remove the wine labels.  While they dried I gathered the materials I needed.

Gift Bags

Scissors

Outdoor Mod Podge

Foam brush

I cut out the images I wanted to decoupage.  I turned the bottle upside down bottom of the bottle facing up.  I glued the images to the bottle using the Mod Podge and a foam brush.  I used my hands to smooth out the images and placed the  bottles under a stand up fan to dry.  Once dry, I applied 3 coats of Outdoor Mod Podge over the top of the image to seal. The instructions on the bottle of Outdoor Mod Podge say to let the piece dry indoors for about 72 hours.  An alternative use would be larger garden markers.  You could decoupage an image of a vegetable for example to label plants in the garden. The bottle neck acts as a stake to anchor the bottle into the ground.  Nowyou can kick back in the yard with that glass wine and admire your upcycle!

Image

Upcycled Wine Bottle Garden Markers

Another Large Wooden Tray Restyle

I picked up this tray for just a couple of dollars at Goodwill and had no initial plans for it.  I admit I love rescuing old trays even if I have no idea what to do with them.  It sat in our spare room for quite sometime primed, but unfinished.  I then picked up some Victorian inspired black with white fabric during a second Goodwill trip.  I liked it because it had trees on it with children playing.  It reminded me of some of the decor we had in my house growing up in the late 70’s early 80’s. I decided to use the fabric on the tray. I thought it would be a great way to display the fabric and keep the scene intact. I painted the tray with white acrylic paint and then applied the Mod Podge.  Since the fabric was dark, I couldn’t trace it, so I applied the fabric I had to the tray, and when the Mod Podge dried and the fabric hardened I used a box cutter knife to remove the excess fabric. Once dry I used about two more coats of Mod Podge over the entire piece.  If you are just starting out working with Mod Podge, trays are definitely the way to go!  They are a great starter project and the possibilities for styling are endless.

Image

Materials:

Mod Podge

Tray

Fabric

Box Cutter style knife

White acrylic paint and primer

Nuts and Bolts: Re-Purposed Plastic Container Earring Box

Image

We have all seen them in hardware stores, or down the home improvement aisle. Those nifty assorted nail, nut and bolt sets housed in those plastic containers. I had purchased one some time ago and after using most of the nails, I was left with the plastic box.  I held onto it thinking I would eventually use it for something. After some thought,  I had the perfect use for it, an earring holder.  Sure, I have a jewelry box, but the nice thing about this plastic box were all the individual compartments.  There is nothing worse than digging through a jewelry box drawer trying to find a matching pair of earrings.  Using this box would eliminate that problem.  It worked great, but lacked an aesthetic appeal, so I decided to do a simple restyle.  I traced the top of the box onto the scrapbook paper, then used Mod Podge Matte finish to glue the paper to the top of the lid. Once dry I used two coats of Mod Podge to seal the lid and the paper.  This was a very simple project, and works great!

Image

Image

The Gift Bag Makeover: Wooden Box Re-purposed and Restyled with decoupage

Utensil Holder Repurpose with Decoupage

Some time ago my husband purchased a box of silverware from JC Penney for me as a birthday gift.  We had just started hosting Christmas at our house and we realized we did not have enough place settings  for everyone when it came to eating utensils.  I was so happy to get these!  I finally had a matching set.  I love getting new things for the house.  They came is a wooden box with a felt/cardboard insert inside for storage,  I knew I would simply just store the spoons, forks and knives in my kitchen drawer for everyday use so I didn’t really need the box.  I didn’t want to throw it away so I did the thing I always do, put it up in the attic.  It then resurfaced on one of my “attic shopping trips”  I thought I could repurpose it to store things in.  Sewing supplies, stationery, arts and crafts, you name it.  You can never have enough storage boxes.  It was fairly easy to rip out the inside once this was done, I lined the inside with scrap-book paper and Mod Podge.  Any areas that were unpainted inside once I ripped out the utensil holder I painted black.  I then moved on to the outside.  I had this wonderful gift bag.  I held onto it for quite sometime I thought it would be perfect for this project.  I cut it measured it, and applied Mod Podge to the surface gluing down the gift bag.  I then sealed with three layers of Mod Podge Matte finish. Now I just have to decide what I will put in it!

Gift Bag

Wooden Box

Black Paint/Brushes

Scrapbook paper

Scissors

Mod Podge

Mini Mystery Cabinet Restyled with Decoupage

I picked up this little mini cabinet at Goodwill for $2.99.  Originally, It was navy blue with Asian lettering on the front.  I thought it was intriguing, but had no idea what it’s original use was.  It looked like a jewelry box, but inside were miniature shelves.  First, I primed the entire piece with a white latex primer.  Then I carefully cut the scrapbook paper so that it would fit onto the doors.  This was the biggest challenge, because I wanted to line up the design so that it would appear seamless.  Once I was able to do this, I used Mod Podge to glue the scrapbook paper to the miniature doors.  Once dry, I painted the piece black with acrylic paint. I then waited for the entire piece to dry, and used the Mod Podge matte finish to seal the piece.  I used about three coats, allowing the piece to dry fully in between coats. The result is what you see below.  Now that the piece was restyled, I still struggled as to what I would use it for. One of our biggest challenges is keeping our house safe for our two-year old.  My husband and I decided to hang this in our kitchen way above little hands.  We keep our daily medications in it and it is perfect for keeping smaller unsafe items out of her reach.  Mission accomplished!

Image

Materials:

Mod Podge Matte

Scrapbook paper

X-Acto knife

Black acrylic paint

Small Cabinet

Paint brushes/black felt tipped marker