Take These Broken Wings: Fairy In A Jar Kids Craft

My dutiful husband was mowing our front lawn the other day, and accidentally broke one of our plastic solar lights.  The top of the light still continued to function, and when day turned into night, it glowed as if to say “don’t throw me away, I am not done yet!”

I often struggle to find new ideas for projects, but I have come to realize the best ideas come to me without even trying. I began to think about a way I could re-purpose the light.  Then, my mind wandered off as it often does, and I also pondered a separate incident that occurred during a trip to Joann Fabric earlier in the week.  My daughter picked up a small ceramic yard fairy. She wanted to carry it around the store.  It was small enough, so I allowed it.  She accidentally dropped the fairy and it broke in two. Exercising the “break it and you bought it moral policy”, I paid for the item hoping I could glue it back together when we got home. Then both memories collided and an idea to merge these broken items together was born. I would make a “lighted fairy in a jar” A paradise for a convalescing fairy with a broken wing.  I didn’t have a jar handy, so I used a glass vase I had lying around.  I also had some decorative marbles and sprinkled them on the bottom of the vase.

I then began to create a suitable home for our little fairy.  I used artificial flowers, trimmed and glued them inside the vase to create a suitable habitat for our little broken friend.

DSC_1578

I carefully placed the fairy inside the glass vase.  Before dropping her in, I used hot glue to cover the bottom of the statue to properly set her in place.  I intentionally applied random droplets of glue to give the appearance of condensation thus providing a drink for our little “pet”

Now that the scene was set inside the glass, I  began to come up with a way to use the solar light to illuminate the vase,  I had a plastic lid handy, and decided to use the hot glue gun to adhere the plastic light to it.  I traced the light with a black sharpie onto the lid and cut a hole in the top to expose the solar panel. I glued the modified light and lid to the top of the vase, allowing the solar light to drop in place and illuminate the jar.  I added some additional blue marbles around the top rim of the jar for decoration.

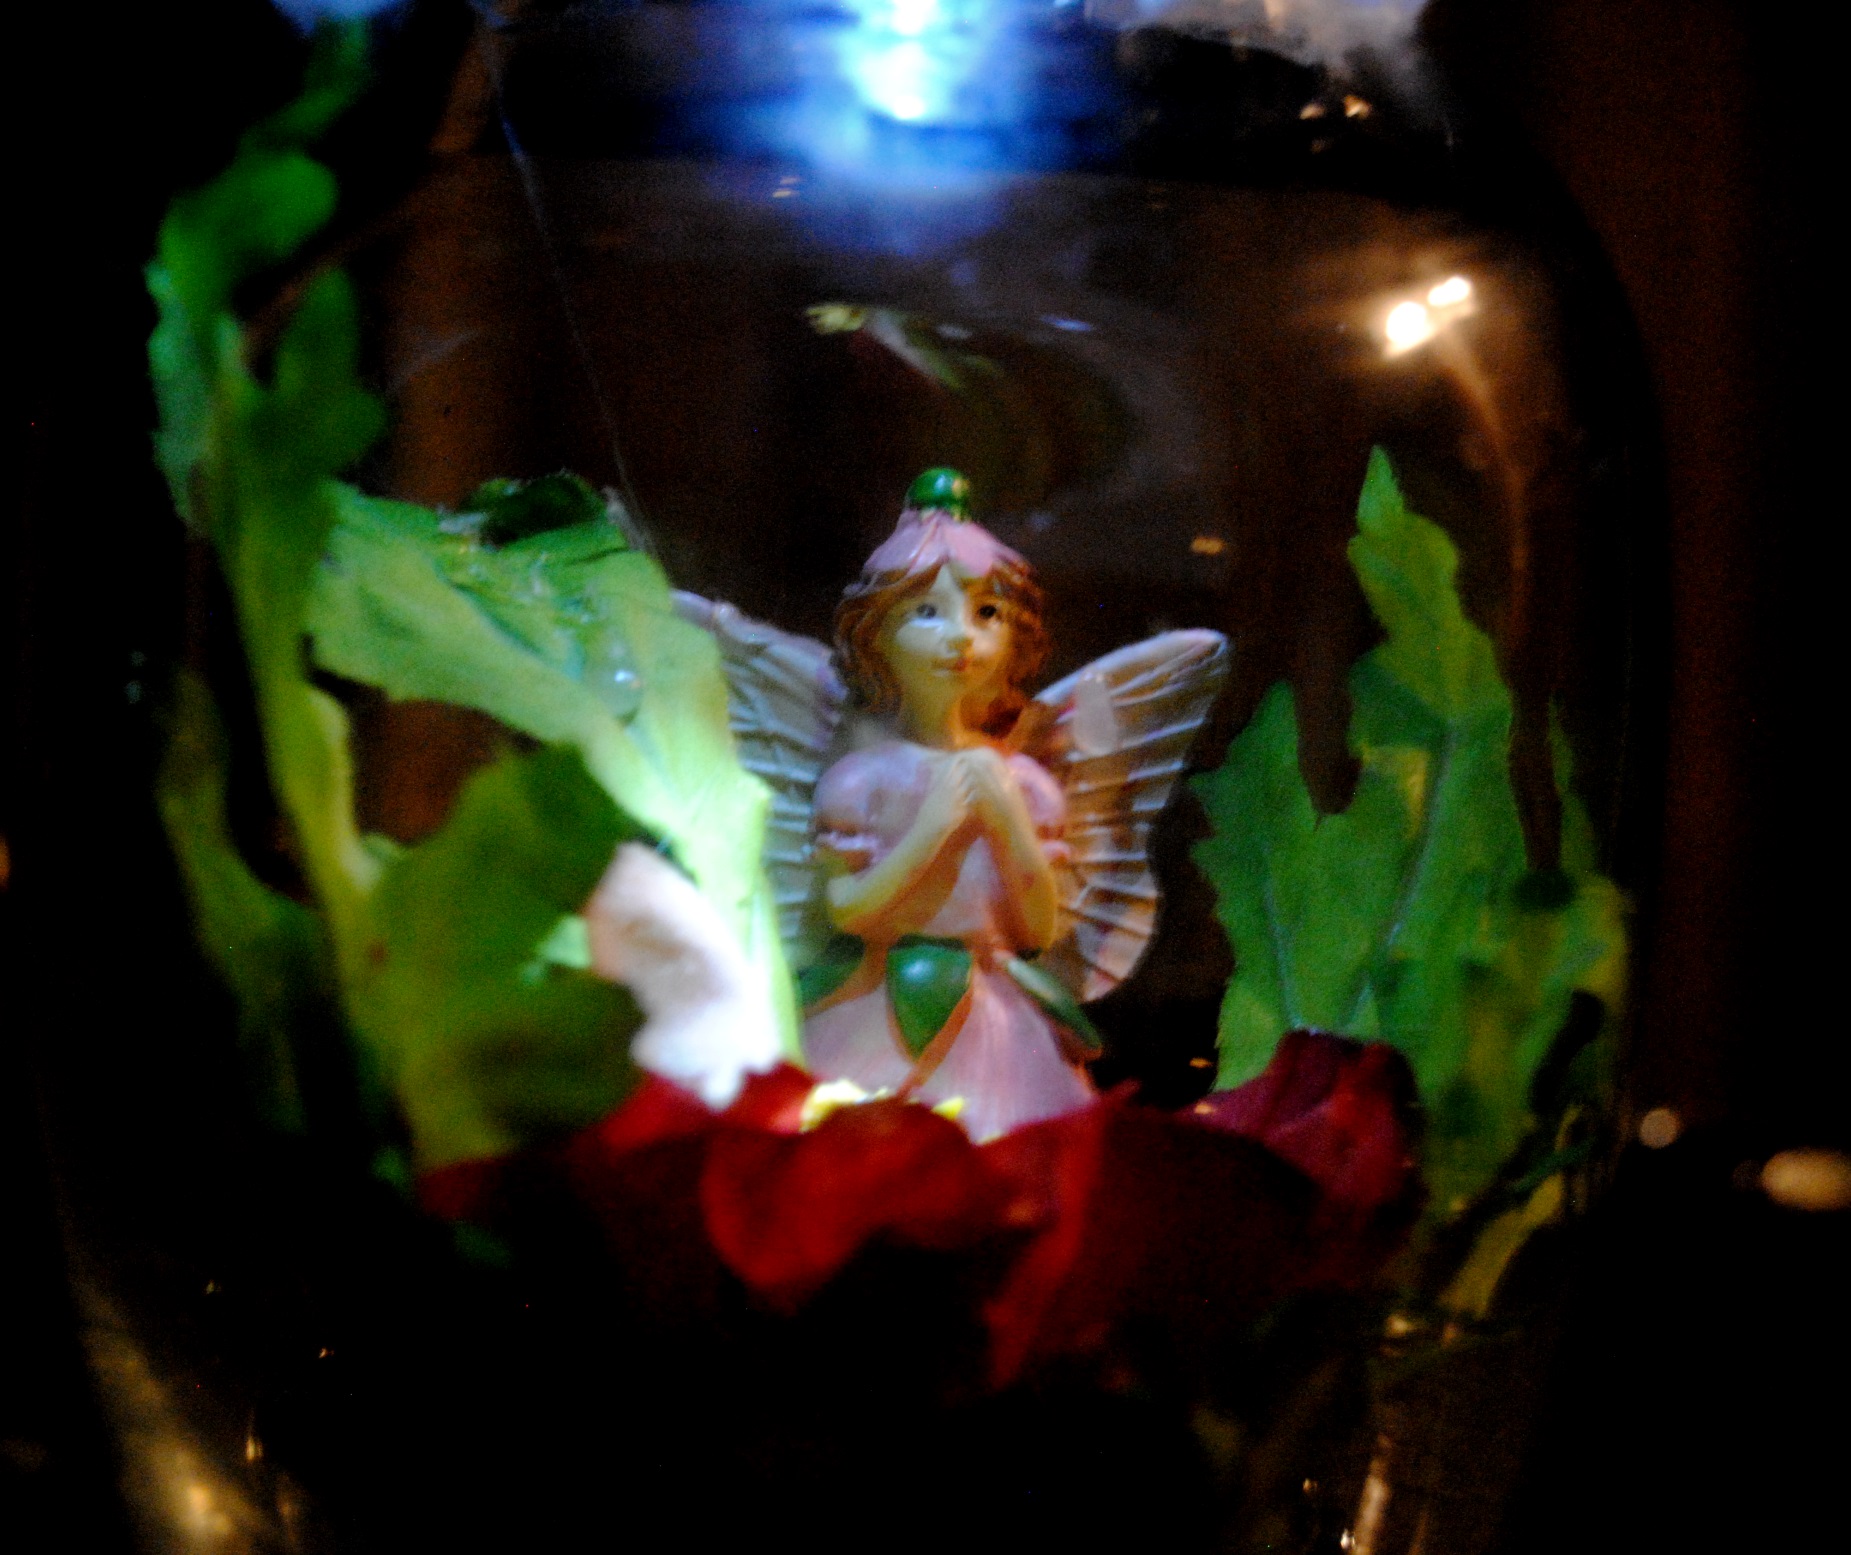
It all came together something like this:

fairy in a jar

I would recommend this project is done under strict adult supervision due to the hot glue involved.  I actually dread using the high heat gun, because I always manage to burn myself with it at least once no matter how careful I am!

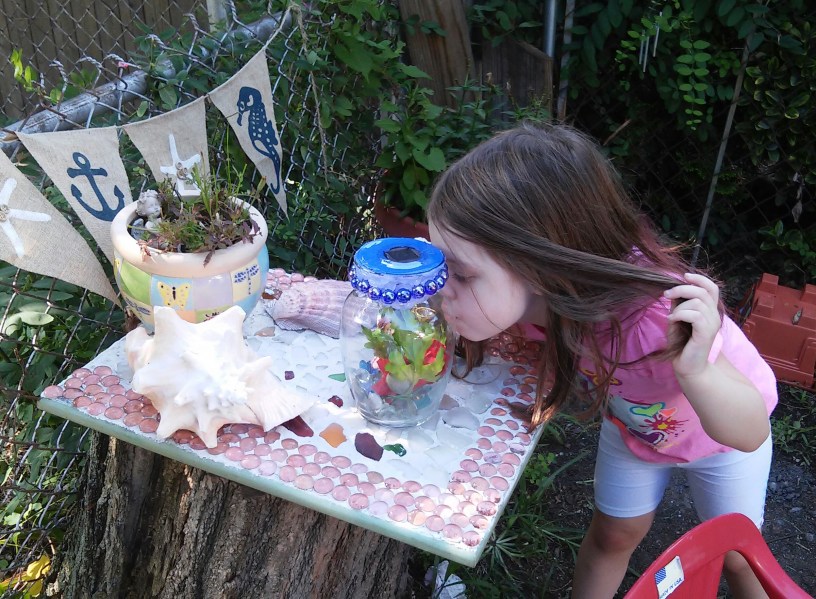
When I showed my daughter her fairy jar gift she loved it and decided to give it a kiss.  My heart just melted!  What little girl wouldn’t love her own “pet garden fairy”

20150718_165653-1[1]

As the night turned into day her fascination only grew as the jar began to glow.  Then it occurred to me all the possibilities and jar themes you could come up with.  Let your imagination run wild and create a wonderful garden keepsake.. and remember broken things are beautiful!!!!

DSC_1579

Materials needed:

Jar or Vase

Plastic Lid

Solar Light (top)

High Heat Hot Glue Gun/Glue Sticks

Decorative items for your Jar:

Child’s toys figurines

Rocks, Plants, Marbles:

Create any scene you wish!

Fun with Chalkboard Paint: Kitchen Cabinet Memo Board

One day I was standing in my kitchen staring at my boring cabinets when the idea came to me! My daughter loves playing with chalk and drawing.  The hubby and I often have the need to communicate through various “notes” left around the house.  We could really use a better way to communicate.  What better way then to create a family chalkboard?  I had often thought about modifying our kitchen cabinets in some way and this was a fun first step.   I was eager to try one of the most talked about craft items on the web, chalkboard paint.   My idea was to use the paint to create a chalkboard on the side of the kitchen sink cabinet, but the ideas for its use don’t end there.  Be sure and check out Brit and Co  40 Creative uses for Chalkboard paint and you will be amazed at all the fun possibilities.

I went to Joann Fabric and picked up some black chalkboard paint.  It was regular priced at around 6 dollars, but I used a 50% off one regular priced item coupon which knocked the price down to below 3 dollars!

DSC_0166

When I got home I cleaned and prepped the area of cabinet I planned to paint.  The bottle recommends 2 coats, but I used 4 total as I was attempting to paint over laminate.

DSC_0165

The project was relatively easy.  I used a brush to apply the paint allowing it  to dry thoroughly between coats.  The top side of the sink was damaged so I used a strip of fabric across the top to cover the area and add a little “pop” to the chalkboard.  I applied the fabric strip using Mod Podge and covered it in Polyurethane since it could be exposed to water being in such close proximity with the faucet.

DSC_0174

I waited about 24 hours for the final coat to dry before using the chalk. It worked beautifully!

DSC_0196

Now we can leave each other messages, post  holiday greetings, and our daughter can use her imagination and draw!

DSC_0198

And yes if you are wondering those are Peeps on a stick my daughter is holding.  Happy Easter Everyone!


“Be Mine Daddy”…. Valentine’s Day Kid’s Craft Ideas

On this Valentine’s day morning, many areas of the country are beginning the task of “digging out” after yet another treacherous winter storm hit the east coast overnight.  Just days before the same winter Nor’Easter  wreaked havoc in other parts of the country such as Georgia and the Carolinas. On top of it,  the little one and I have been battling a series of winter colds and are being forced to spend much of our time in the house due to the lousy weather.  Despite this, we have managed to make the best of these situations and have spent a lot of quality time together as a family.

I wanted to make my husband something special for Valentine’s day this year, and as with most of my creations,  I like to get my 2 1/2 year-old daughter (Also known as the toddler apprentice) involved in the process. I also knew that my husband being the wonderful dad he is, would appreciate the fact that his daughter helped mommy make his gift with “her own little hands.”  I have seen many great Valentine’s day kid’s crafts online via Pinterest and other sites, and I had many ideas swirling around in my head. I saw a great project courtesy of the Roylco kids craft blog (which I follow, and love) and although I decided to create my own version,  The Roylco project was quite inspiring.  Be sure to check it out!

For this project you will need:

Black, Pink, Red and White Construction Paper

Scissors

Kids White School Glue

Black Marker

White Non Toxic Kids Craft Paint

Frame (Optional)

First, I dipped my daughter’s hand in the white paint after pouring it on a paper plate. I pressed her hand on the black construction paper.  This was challenging and it took a few tries after the first two attempts became slightly smudged.  There is no greater excitement to a little one then “messy fun” so she didn’t seem to mind the multiple attempts at getting it right! Once I achieved the desired effect I allowed the construction paper to dry. After about an hour, the paper was dry and ready.  I drew different sized hearts on the red, white and pink paper and carefully cut them out.  The little one enjoyed squeezing the glue on the hearts and sticking them to the paper!

Valenine's Day Kid's  Craft fun!

Such a Good Helper……

Next, I wrote little sayings in the hearts.  I thought this would be cute, but if you prefer it, you can skip this step.  I wanted to make it more personalized for him.  I then found a great glass frame in our attic to frame it in. Now we have a great piece of Valentine’s Day wall art for years to come, permanently immortalizing our daughters little two year-old hands forever. (Can’t you tell I am an overly sentimental person?)

Valentine's Day Kids Craft For Daddy

The apprentice and I also made a Valentine’s Day glass jar lamp.  I had some great left over heart themed scrapbook paper I won courtesy of Ray’s So Crafty’s Labor Day Giveaway.  I have made several jar lamps, and like to interchange them on the light bases, depending on the mood, or for holidays.  I simply cut the paper, applied Mod Podge to the glass and adhered it around the jar carefully matching up the seam.  An easy, simple decoration guaranteed to warm hearts during this frigid Valentine’s Day.

Valentine's Day Jar Lamp made with Scrapbook paper and Mod Podge

“On The Upcycle” would like to wish everyone a safe and happy Valentine’s Day.  Hoping you are able to spend it with those you love today!

I got a fever for Pringles Can Crafts!

I saw on Pinterest  recently many uses for all those left over Pringles Chips cans. Through the magic of decoupage, these cans can be transformed from downright ugly to lovely!  They can be used to store various items and are a great way to gift Christmas cookies for the holidays.

Pringles-Gift-Box-Fun-Holiday-Crafts

Like these cookie containers from Cheap Crafting.Com

Today, I share with you a Pringle can kid’s craft.  My daughter loves to listen to music, but loves to make music even more!  I love to get her involved in the process and creating music together has been a wonderful Mother and Daughter bonding experience.  I cleaned out the can first.  You can fill the cans with dry pasta or dried beans.   I would fill the can up about half way.  To secure the lid, use a hot glue gun to adhere the lid permanently to the can.  Once the lid is secure, you can use either scrapbook paper or fabric and decoupage the outside of the can.  (This is necessary only if you want it to look “pretty”)  Apply the Mod Podge with a foam craft brush and wrap the fabric or scrapbook paper around the outside of the can.  This is also a great way to get use out of those old pieces of scrap fabric, that may be a bit small for other projects.  My daughter loves “shaking” her new percussion instruments. These “instruments” are a great way to encourage sensory development while at the same time encouraging fun!

DSC_1147

Kids instrument made from the smaller Pringles can.

Just For Fun: Rainbow Brite Decoupage Tote Bag

I have been intrigued recently by the idea of using decoupage on purses and suitcases. This requires me to work with different materials I have not tried before, and overcoming certain obstacles such as shape, texture and overall size. I thought this tote bag would be a great practice project, and a cute item to carry/store my daughter’s toys in.

DSC_0570

Their was an overall texture to the bag and I was not sure how the Mod Podge would adhere to it. I was concerned at the possibility that the texture underneath the paper would make the decoupage appear wrinkled.  I printed out an image of the Rainbow Brite characters.  I trimmed the image with a pair of scissors.   I applied Mod Podge to the bag surface with a foam craft brush carefully smoothing out any wrinkles in the paper.  Once dry,  I applied multiple coats of Mod Podge over the image. (The more coats on synthetics/plastics, the better the bond) It appeared to adhere to the bag well, but I have been burned by plastic/synthetic surfaces before.  The Mod Podge simply does not adhere well to these surfaces. Through constant use by two year-old hands, only time will tell the durability of this project. I would guess that canvas would be a bit more “user friendly” The decoupage looks great and the surface does not appear to have affected the paper much.  I hope my toddler appreciates Rainbow Brite as much as her mommy does!

Rainbow Brite Decoupage Tote bag

Materials:

Tote bag

Print for decoupage

Mod Podge

Scissors

foam craft brush