Goodwill Lunches- A Vintage Wooden Bucket

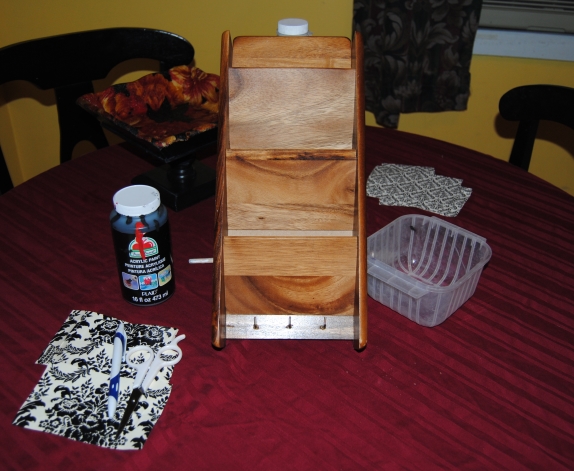
It has become a bit of a ritual to “pop in” to a GoodWill store or two during my lunch break. Most times my trips consist of  a quick look around and leaving the store empty-handed.  I usually go in with a mission in mind, and gravitate toward certain areas: Housewares, Furniture, Records and Fabrics. Even though some days are disappointing, lately I have been running into an interesting phenomenon.  Great Vintage items simply in need of a little TLC.

It all started with the Vintage Dixie Seating Company Kids Rocking Chair. A great find at a great price only $4.99!

Then I noticed this Wooden Bucket with metal straps that looked like a vintage piece to me.  The price was right, only $3.99.

Vintage Wooden Bucket

It had a few scuffs, but was generally in great shape.  I found myself taking it home with no real plans on what I was going to do with it.  I just really liked it, and I have not seen a wooden bucket like this before.  I felt like it was best to keep the bucket in its original state. I cleaned it thoroughly with a damp cloth, removing any dust and dirt. Once dry,  I simply used petroleum jelly on a cloth to buff the entire piece. (This works great on wood surfaces) The Vaseline even removed some of the scuff marks and scratches.

Upcyled Wooden Bucket

It cleaned up great, and the inside is in excellent condition!  A great find that just needed a little love.

Wooden Bucket inside

The uses for this bucket are endless, but for the moment this sits on my fireplace mantle. It’s nice little finds like these that keep me coming back for Goodwill lunches!

To Upcycle or not to Upcycle. That is the question.

I’ll admit when I go thrifting I am attracted to certain items, but not for the reasons you may think.  Sure everyone dreams about finding the picture frame with a copy of the original US constitution in it resulting in the big “pay day”, but I am not always in it for what something is worth. I still have a lot to learn when it comes to determining what has the most value. More often than not, my choices are simply based on what I like.  I love anything retro, furniture, and fabric. I love to think outside the box when it comes to how I utilize these materials.

It was on one of many trips to the Goodwill that I came across this kids rocking chair:

Image

I saw it from a far and I didn’t waste anytime making my way over to it.  In my cart it went without hesitation. I didn’t even check the price at first.  Anytime I see kids furniture, I can restyle I buy it. Looking down at the tag I couldn’t believe my eyes.  I could tell it was a well made chair and it was only $5.99! I flipped the chair over and saw this:

Image

When I got the chair home, I did a little internet research on it and the company that made the chair. The Dixie Seating Company was founded in 1930’s and are known for making quality chairs and furniture for kids and adults. Most of these chairs are going for $76-$200 per chair online! I paid $5.99.  Except for some minor wear, the chair is in excellent condition.

After taking this all into consideration, I have put away the primer and I am instead taking out the Murphy’s oil soap. I am rethinking the upcycle and my decision is to leave the chair in it’s original state.

What do you think?  Have you ever decided not to upcycle an item because you were concerned  a redesign could effect value?  I would love to hear what others think on this.  Do you all think I made the right decision?

I e-mailed the company to try to gain more info on the chair including when the chair was made. They have not  have responded. The company started in 1934, but has changed owners a few times, and they had no information on this serial #.  They said best guess early 50’s. I believe the chair is at least  30 years old.  If anyone out there can offer any additional info on this chair, I would greatly appreciate and would love to hear from you!

Image

Mail Call: Upcycled, Decoupage Mail and Key Holder

Image

I found this little wooden mail and key holder for two bucks at an outdoor swap meet.   I decided to use it by our front door so we could have a centralized place for our keys, cell phones and any other small items we take with us to work each day.  Initially, I was unsure of the design I would choose.  Then I remembered,  I still had some of the recycled gift bag I had used for my living room switch plate and outlet covers.  It became evident , the key/mail holder would be hanging  in close proximity to the switch plate and I thought it would look better if they matched.

Decoupage Switch Plate, Outlet

I measured and cut the gift bag to fit the mail slots. I then applied Mod Podge to glue the gift bag tracings to the slots.  While drying, I painted the rest of the piece black with acrylic paint.  Once the paint was completely dry I applied about three coats of Mod Podge over the entire piece to seal it. This was a very simple project with dramatic resulst!  It really stands out nicely against the Sandstone background and keeps electronics and other important items out of little toddler hands.

Before

Materials:

Mail/Key Holder

Mod Podge Matte finish

Gift bag/Scrapbook  paper

Black Acrylic Paint

Pen/Scissors/Paint Brushes

Decoupage key holder

Trash to Treasure~ Upcycled Decoupage Bedroom Nightstands

In early 2002 My husband and I were just starting out, and like most people just starting out you tend to be a little light when it comes to home decor and home furnishings. I will admit that not only do I like frequenting Good Will and various other thrift stores, I also like trash night. I always keep my eyes open for curbside furniture finds. I feel a little like a hero- I am keeping one more piece of garbage out of the landfill. So, it was on this fateful night that I spotted two bedroom nightstands beside the apartment dumpster no diving required LOL! The hubby and I were desperate to simply have a place to put a drink, or a book beside our bed. They were functional yes, but I secretly hated them and dreamed of getting new nightstands someday. Flash forward to 2013 and we still have the nightstands! We never got around to replacing them, and they were inching ever closer to fulfilling their original destiny when I discovered… Decoupage! There was no question these tables needed a serious makeover, but thanks to my other addiction Pinterest, the ideas were flowing and I decided to give it a try, besides they were going to end up in the trash anyway!

Materials I used:

One very old and beat up nightstand
Mod Podge Matte Finish
Black Acrylic Paint
Scrapbook Paper

These tables were so beat up not much sanding was required. I painted the entire piece and cut the scrapbook paper to fit the various areas of the table I wanted to cover. I used the Mod Podge to glue down the paper to the wood. I then sealed the entire table with Mod Podge covering the painted areas to give it a sheen and seal the paint so it wouldn’t chip. You see the final result below came out better than I imagined it would and once again these tables avoided the trash heap! They are holding up very well too although I would suggest using a coaster for that drink! : 0 )

DSC_1126h    Black and white decoupage tables  DSC_0032

Wooden Rocking Horse Re-Do

I wanted to make something special this year for my daughter who is turning 2 next month. My husband and I share a common love of shopping at thrift stores and we found this horse at Good Will for $4.99. I sanded it lightly and used a primer. I then used acrylic paint to paint the horse two shades of pink and white. I decoupaged scrapbook paper onto the horse and used Mod Podge Matte
finish to glue and seal this project. I was going for a more classic rocking horse and the debate with family and friends over whether I should give the horse a mouth and eyes was quite amusing. What do you think? Do you prefer whimsical or classic rocking horses?

Wooden Rocking Horse Re-Do