A Blizzard of Ideas: Basket Makeover

Getting snowed in has its privileges.  The family and I had a great weekend, despite being completely snowed in, during the East Coast blizzard of 2016. When mother nature gives you lemons, what else can you do but make some lemonade?  It was a perfect time for cooking, baking, and crafting, and the toddler apprentice and I did just that!

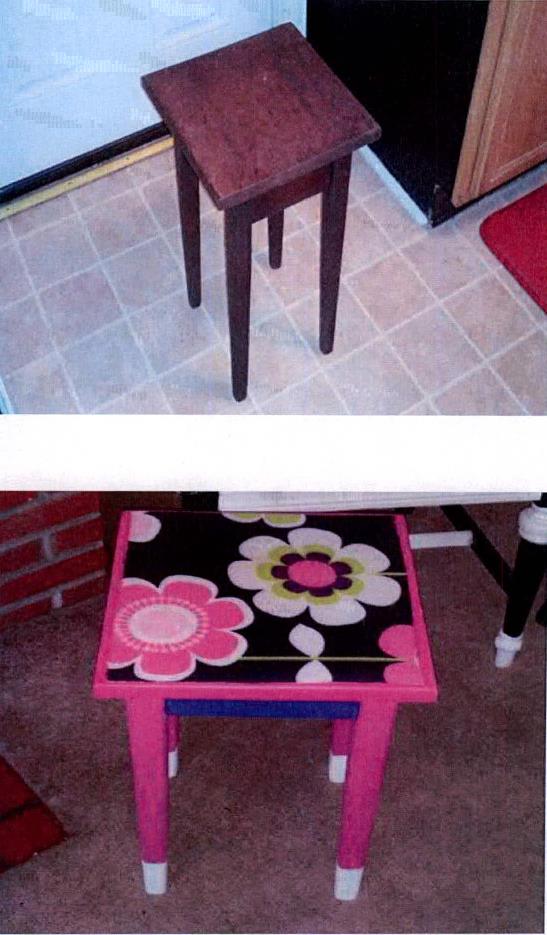
I picked up a lovely wooden basket at Goodwill about two weeks ago.  When I made my purchase, I was unsure on what I was going to do with it.  Some items I pick up are best left alone, while others benefit from a bit of “sprucing up.”

I decided to find a middle ground.  The lid needed quite a bit of TLC, but the inter woven wood on the basket looked great, so I did not want to alter this part in anyway, only try and compliment it.

20160114_192050

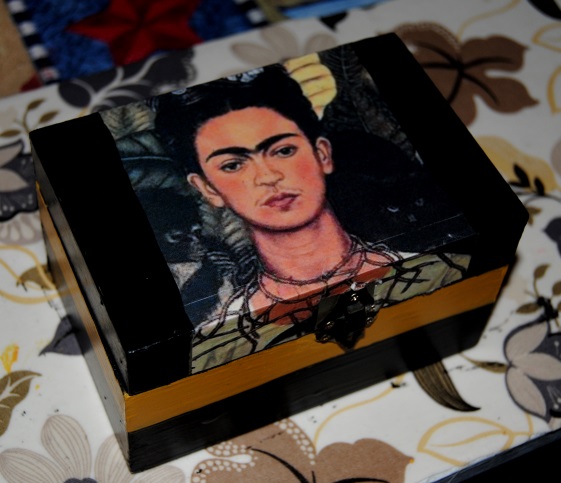
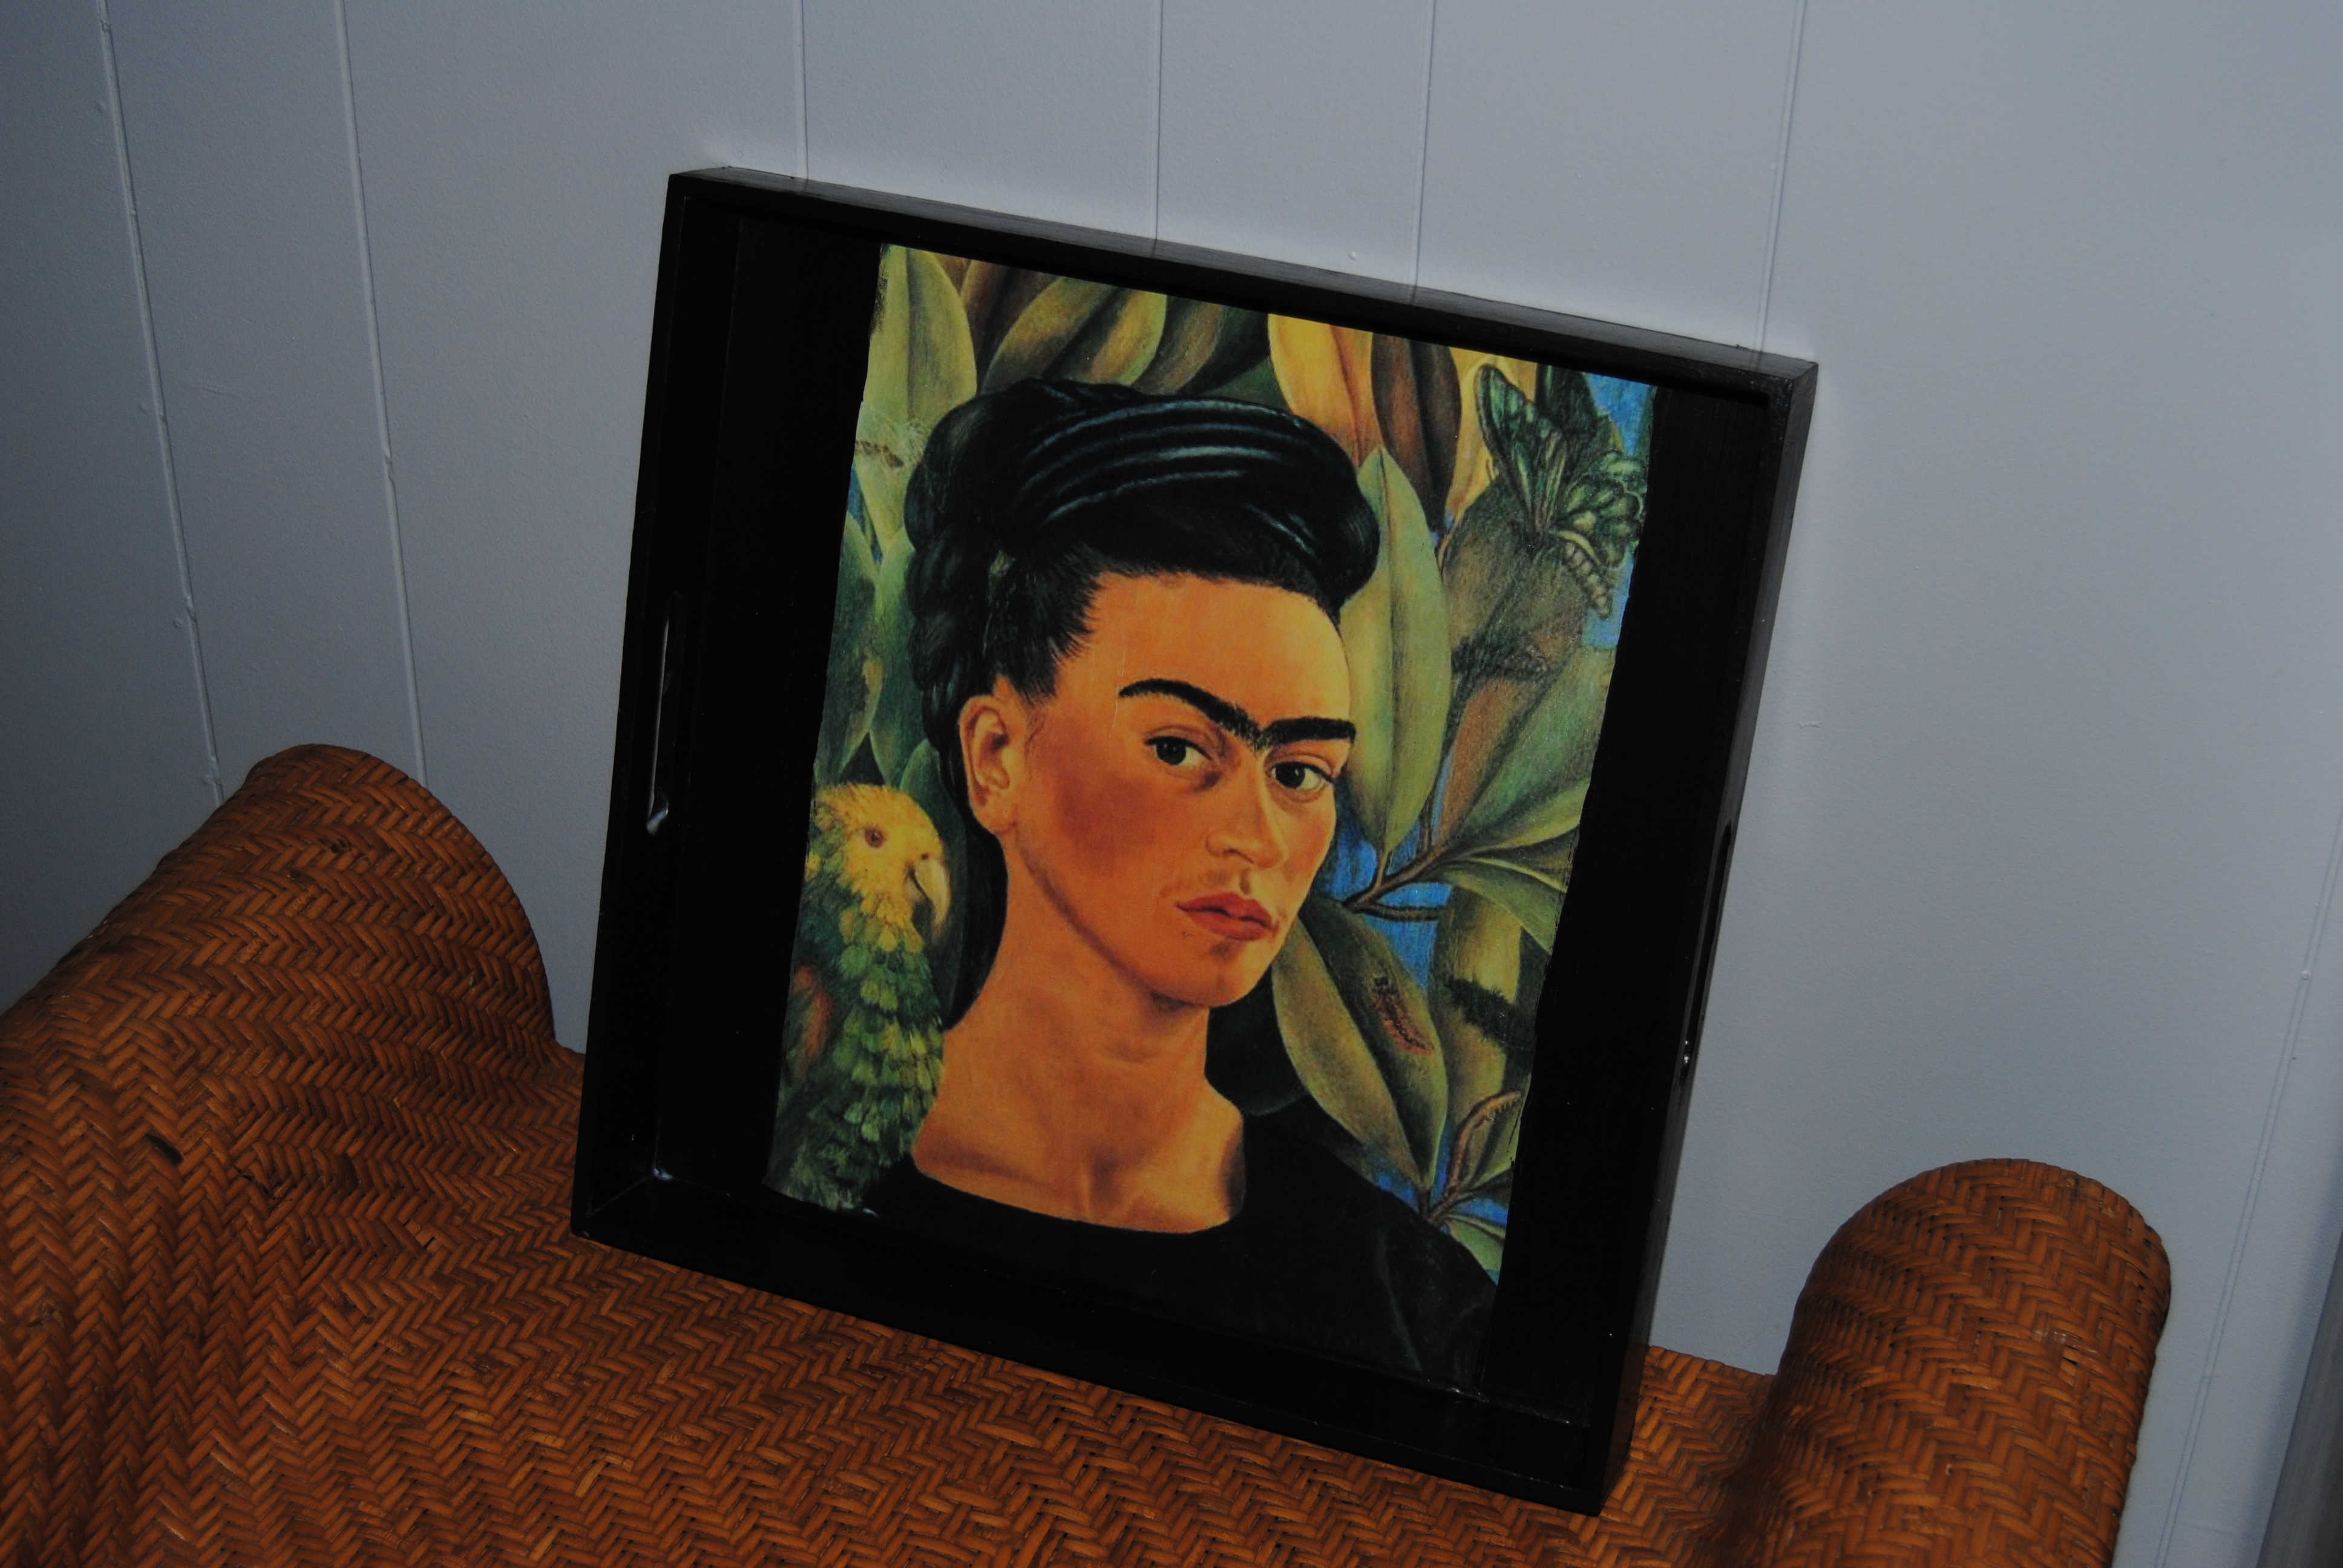
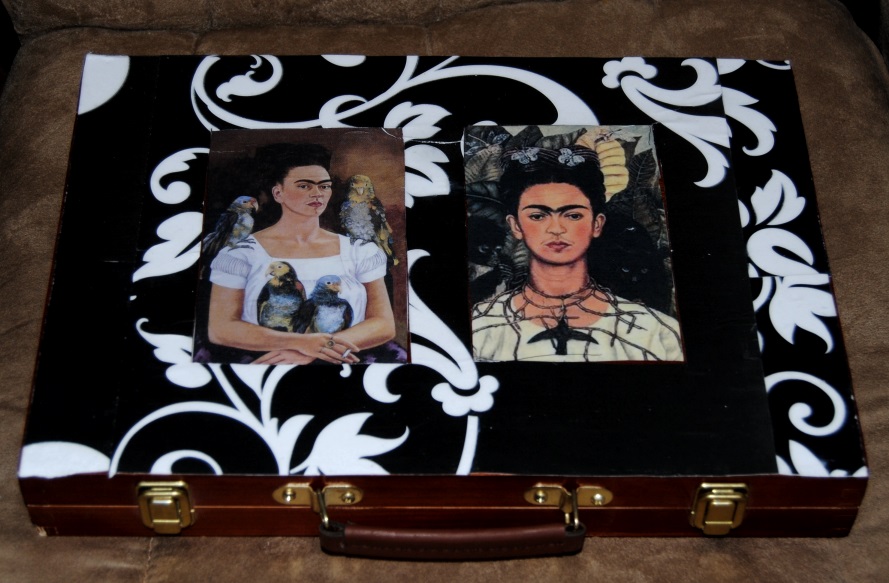
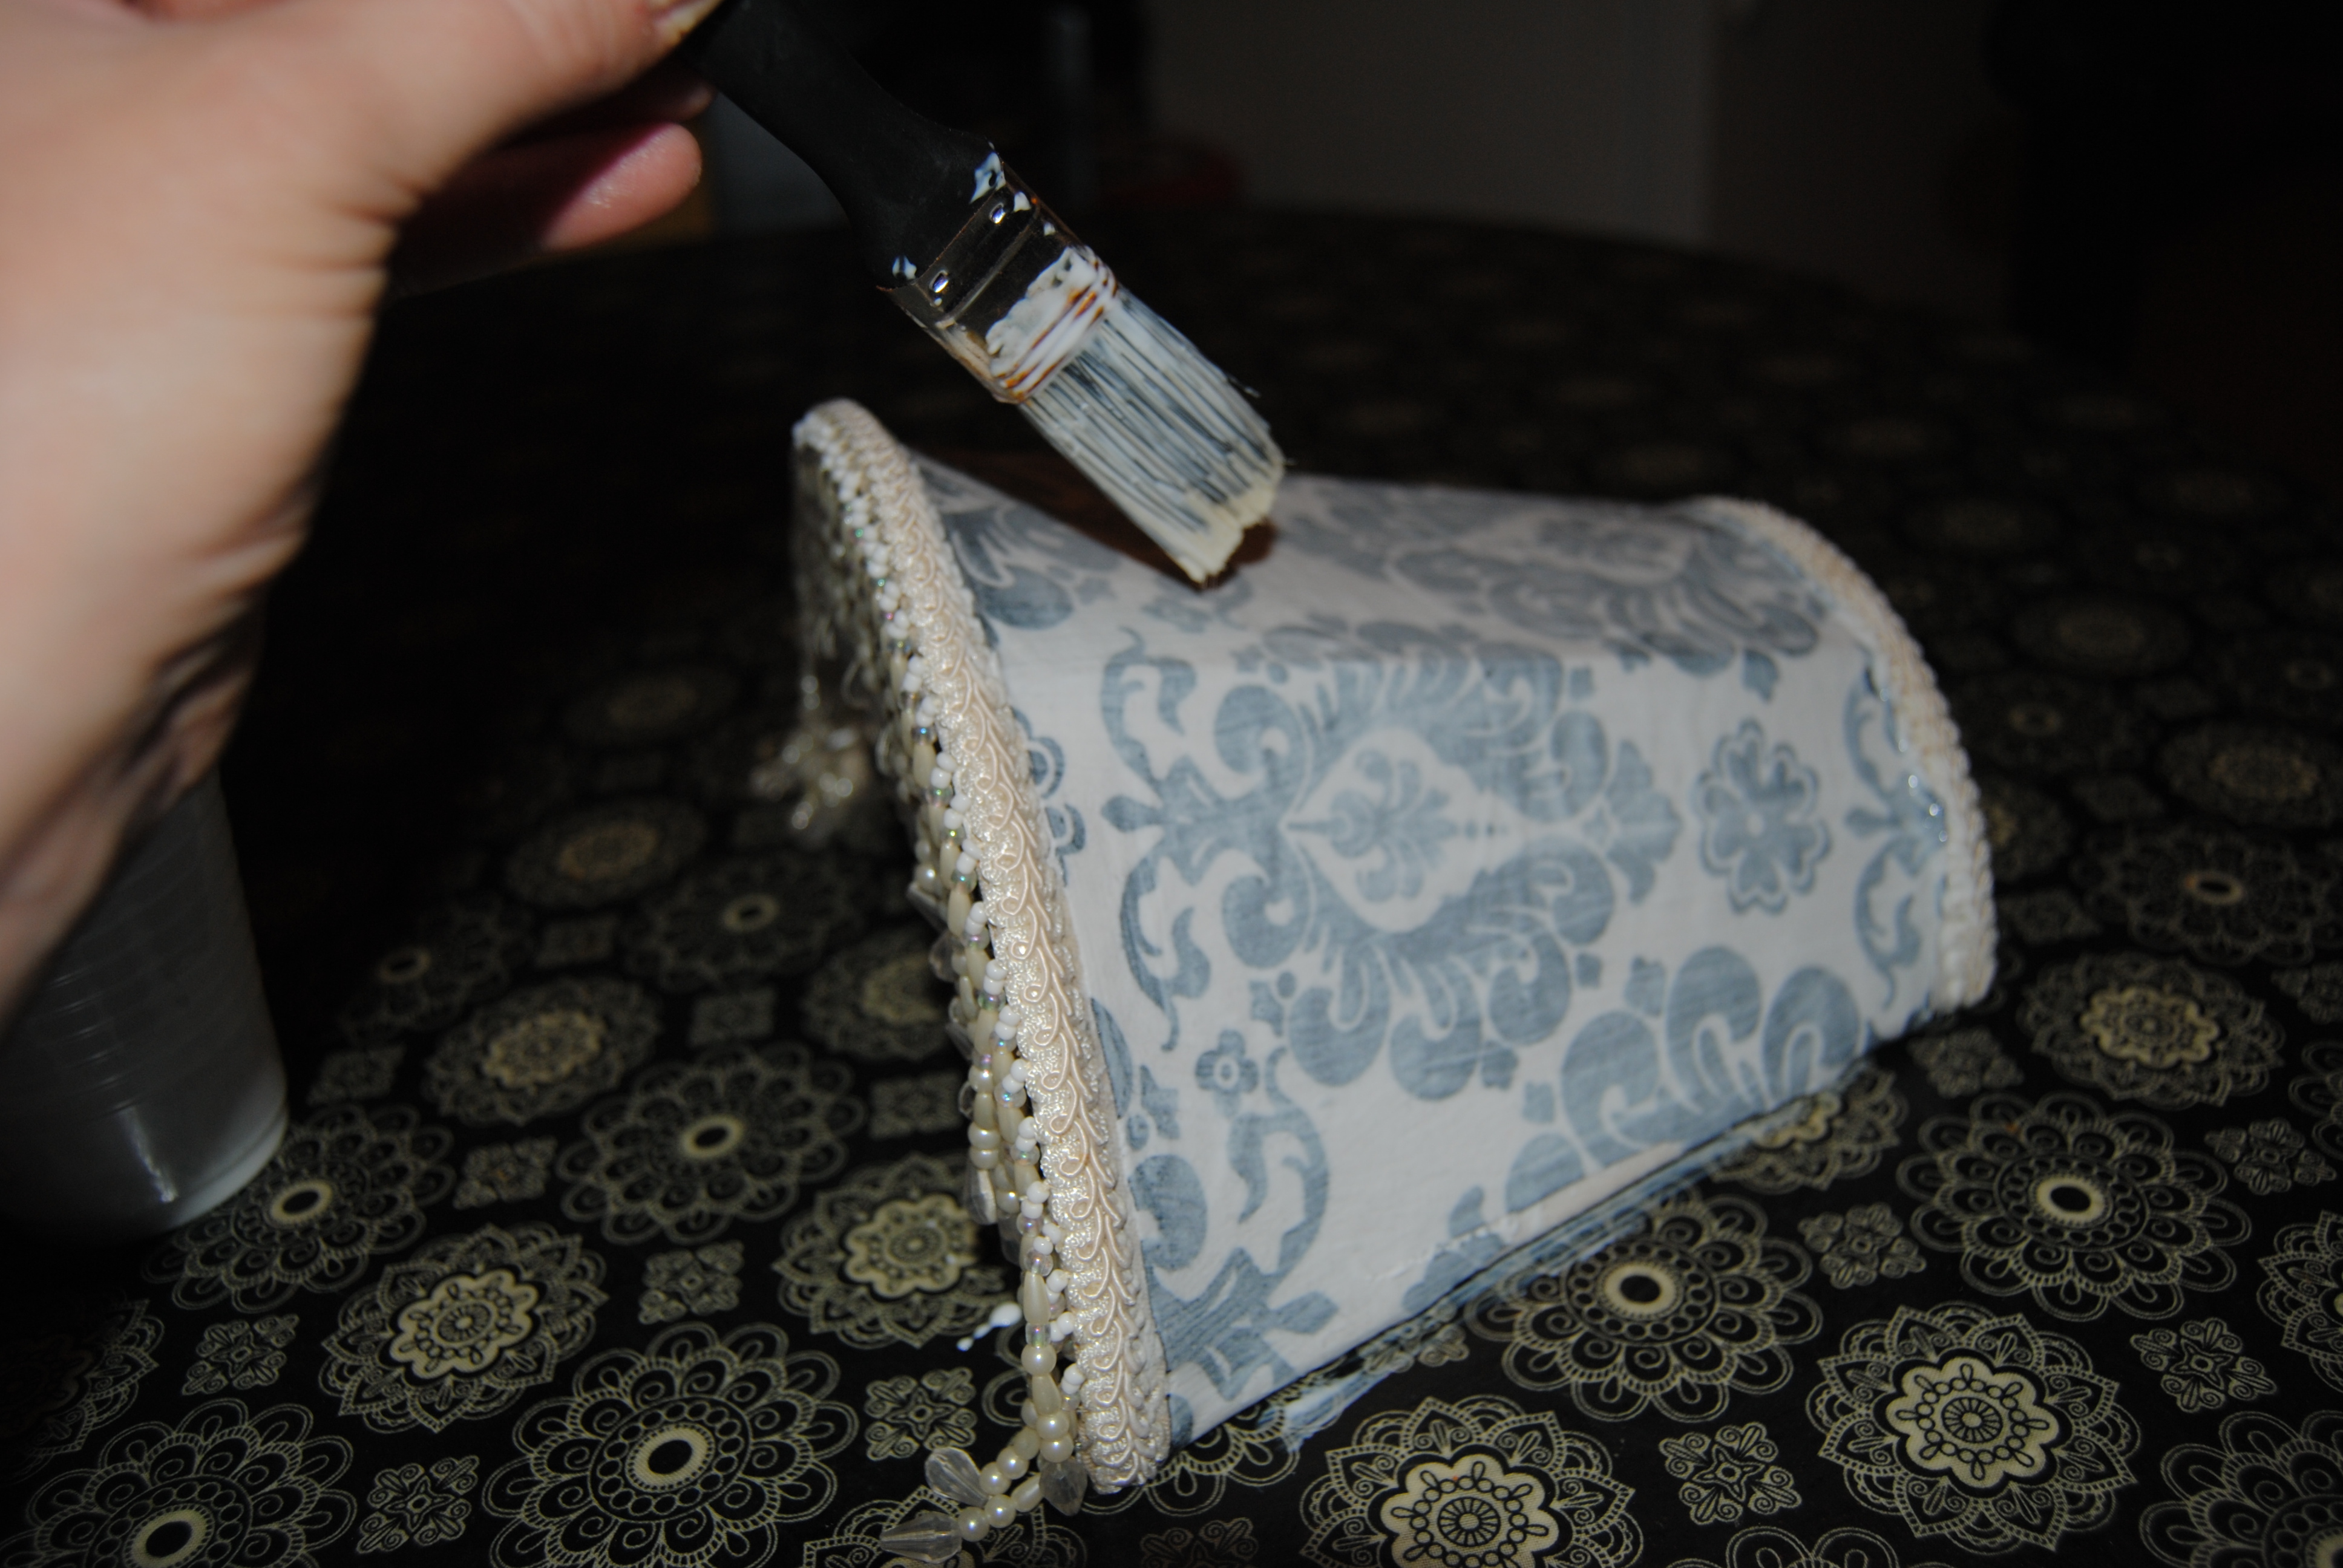
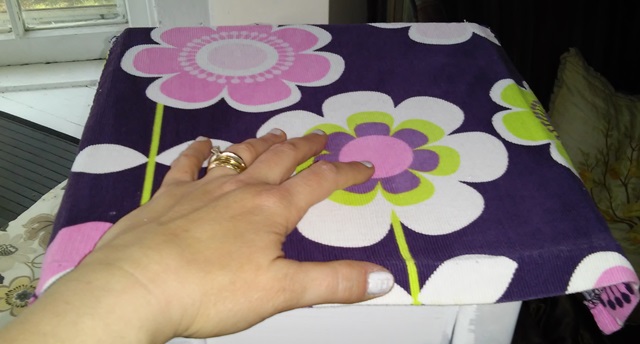
I decided to decoupage the lid, and accent the handles with black paint.  I struggled a bit with choosing a fabric that I thought would go well with the caramel colored wood.  I finally decided on a swatch of fabric that I purchased some time ago at a thrift shop.  It had earthy tones that I felt would mesh well with the original design elements on the basket.

I turned the basket upside down and used a black, fine tipped market to trace the lid on to the back of the fabric.  I then cut fabric tracing out with a pair of scissors. I painted the lid with white paint.  Once dry,  I generously applied the Mod Podge to the lid surface with a paint brush.  I applied the fabric, and smoothed it out with both hands.  This helps minimize wrinkles and air bubbles.  Once dry, I applied three more layers of Mod Podge on the top of the piece, and allowed it to dry between coats.

Once the lid was dry, I lightly sanded the areas I planned on painting.

I took a narrow bristled paint brush and painted the handles, and some of the detailing with black acrylic paint.  I applied three coats of paint total.  Once the paint was dry, I applied a layer of Mod Podge to the painted areas to seal it.

DSC_0333

In the winter, this basket will be a perfect place to store hats, scarves and gloves, and in summer it will be the perfect picinic basket or an accent piece with storage.

Materials:

Wooden Basket

White and Black Acrylic Paint

Mod Podge

Fabric of choice

Scissors/Sharpie marker/Paint Brushes (various)


Take These Broken Wings: Fairy In A Jar Kids Craft

My dutiful husband was mowing our front lawn the other day, and accidentally broke one of our plastic solar lights.  The top of the light still continued to function, and when day turned into night, it glowed as if to say “don’t throw me away, I am not done yet!”

I often struggle to find new ideas for projects, but I have come to realize the best ideas come to me without even trying. I began to think about a way I could re-purpose the light.  Then, my mind wandered off as it often does, and I also pondered a separate incident that occurred during a trip to Joann Fabric earlier in the week.  My daughter picked up a small ceramic yard fairy. She wanted to carry it around the store.  It was small enough, so I allowed it.  She accidentally dropped the fairy and it broke in two. Exercising the “break it and you bought it moral policy”, I paid for the item hoping I could glue it back together when we got home. Then both memories collided and an idea to merge these broken items together was born. I would make a “lighted fairy in a jar” A paradise for a convalescing fairy with a broken wing.  I didn’t have a jar handy, so I used a glass vase I had lying around.  I also had some decorative marbles and sprinkled them on the bottom of the vase.

I then began to create a suitable home for our little fairy.  I used artificial flowers, trimmed and glued them inside the vase to create a suitable habitat for our little broken friend.

DSC_1578

I carefully placed the fairy inside the glass vase.  Before dropping her in, I used hot glue to cover the bottom of the statue to properly set her in place.  I intentionally applied random droplets of glue to give the appearance of condensation thus providing a drink for our little “pet”

Now that the scene was set inside the glass, I  began to come up with a way to use the solar light to illuminate the vase,  I had a plastic lid handy, and decided to use the hot glue gun to adhere the plastic light to it.  I traced the light with a black sharpie onto the lid and cut a hole in the top to expose the solar panel. I glued the modified light and lid to the top of the vase, allowing the solar light to drop in place and illuminate the jar.  I added some additional blue marbles around the top rim of the jar for decoration.

It all came together something like this:

fairy in a jar

I would recommend this project is done under strict adult supervision due to the hot glue involved.  I actually dread using the high heat gun, because I always manage to burn myself with it at least once no matter how careful I am!

When I showed my daughter her fairy jar gift she loved it and decided to give it a kiss.  My heart just melted!  What little girl wouldn’t love her own “pet garden fairy”

20150718_165653-1[1]

As the night turned into day her fascination only grew as the jar began to glow.  Then it occurred to me all the possibilities and jar themes you could come up with.  Let your imagination run wild and create a wonderful garden keepsake.. and remember broken things are beautiful!!!!

DSC_1579

Materials needed:

Jar or Vase

Plastic Lid

Solar Light (top)

High Heat Hot Glue Gun/Glue Sticks

Decorative items for your Jar:

Child’s toys figurines

Rocks, Plants, Marbles:

Create any scene you wish!

Sultans of Swap: Flea Market Fun In The Sun

This past Saturday, I had the opportunity to participate in my first ever Flea Market.  The sale of spaces benefited my daughter’s school, so of course I jumped at the chance to get involved.  I was a bit nervous.  It was the first time I have attempted to sell my projects.  I also had some additional spring cleaning items to sell as well and anything I can do to create additional space in my overloaded craft room is a definite plus.

Let me start off by saying, I have been to a lot of swap meets, yard sales and flea markets as a buyer, but never as a seller.  It is hard work preparing, pricing and hauling your goods to the sale location.  I have a new respect for those who can make a living at it and participate in sales on a regular basis.

I am in no way an expert at this, but I thought I would share with you all what I learned from this experience.

So, How did the modern flea market get its name?

The first flea markets were in Paris and they were called marché aux puces which translates to ‘market with fleas’. Flea market first appeared in English in 1922 as a translation of the French market’s name.

When Preparing, Take Care of as much as you can the night before

Since most flea markets start bright and early, and I am a night owl by nature,  I loaded the car and any other items needed for my sale the previous night.  This allowed me to get a good night sleep and wake up and leave the next day without scrambling at the last-minute.

Show up on time or early for set up

This was the fun part.  Setting it all up so it is pleasing to the eye.  Leave yourself enough time so as to not feel rushed.

20150502_080200

Mark all prices clearly and have a backup plan

I devised a color coding system.  Also when marking your prices, keep a mental note of how low you are willing to go with price.  I marked my prices a little higher so that I had some “wiggle” room.

Plan for a long day in the hot sun

If you have a canopy or beach umbrella, it is a good idea to bring it.  Make sure to bring plenty of sun block, dress accordingly (avoid dark colors that attract the sun) Wear a hat and sunglasses and bring plenty of fluids and a snack.

Bring tables or other items to properly display your merchandise

I found that items more visible, and that didn’t require a lot of effort to look through sold better.  A clothes rack, table or even a sheet or mat placed on the ground is essential when displaying your items.  If people have too put a lot of effort in they will move on quickly to a competitor’s table.

20150502_080152

Don’t Just Sit There… Get up and Sell!!

I found I gained more interest in my items when I talked to people and said “Hi”  Sitting their idle watching people come and go doesn’t sell stuff, but being a social butterfly DOES even when the turn out is low.

Talk about what you do and PROMOTE

I created plenty of business cards, and even sign explaining what Upcycling is.  People’s curiosity would get the better of them and they would stop to read the sign.  It was a great conversation starter!

20150502_075927

Bring Singles and 5 dollar bills to make change and wear a fanny pack!

I brought about $40 dollars in cash.  I used 25 singles and four 5 dollar bills and found this to be enough to make change.  It is better to wear a fanny pack or apron to keep change, pens and tape in.  Leaving money unsupervised in a box even for a minute, creates a potential for theft.

Make Friends and Connections!

Even though the turn out was less than spectacular, I still managed to socialize with other vendors and make personal connections.  I met a really nice woman who runs a local consignment shop, and my flea market neighbor and I helped each other when the other had to take a bathroom break.  The nice lady next to me even helped complete a sale while I walked away for a moment!

20150502_081633

Oh and Don’t Forget to take a Flea Market Selfie!

What are you doing to prepare for this Flea Market Season? Do you have any tips for sellers not mentioned here?  Do you have willpower when it comes to buying things at a flea market when you are there to sell?

Crazy for Corduroy: Girls Flower Power Decoupage Side Table

It has been a very hectic week in the “On The Upcycle” household.  I have been working late into the night to prepare for my first flea market this Saturday.  I am happy to report, that my crafting area is looking more like a usable work space, and less like a storage closet!  My hope is clearing out some older items will make way for new projects.

I have also been working on a few projects specifically to use in the sale.  I picked up this nice, wooden side table at Goodwill for a couple of dollars.

20150419_200300

The original idea, was to use a black and white scarf I had for the decoupage and then paint the table with neutral colors.  It is amazing how quickly a plan can change!  I used a white, spray on primer to prepare the table.  I applied the scarf and instantly was not all that impressed with the result.  Scarves can be tricky because the fabric is very thin, and once it is glued to the table top, it has a tendency to show any imperfections on the wood underneath.  That is exactly what happened in this case.  Once the Mod Podge was dry, I removed the fabric and decided to start over.  Then it hit me:  I had this great flower power corduroy fabric from an old dress that looked very cute on my daughter but no longer fit her.  I saved it in the hopes that I would find a use for it someday.  That time was now!

20150421_175548

I cut the fabric and measured out a large enough piece to cover the top of the table.  I applied a generous amount of Mod Podge to the table surface.  The general rule is the thicker the material the more Mod Podge you will need to use to achieve the desired effect.

20150421_180715

Once the glue was dry, I hand painted the table with pink, purple and white acrylic paint.  This was turning out to be a much different table then I had originally anticipated.  After a few more coats of paint,  I added generous amounts of Mod Podge to the table top to seal the fabric.  I repeated this process three times allowing it to dry between coats. I also applied Mod Podge to the painted surfaces, to seal the entire piece.

20150421_195011

Once dry, I trimmed off the excess fabric on the edges and applied more Mod Podge to seal those edges.

20150422_074658

This is a side table with a lot of flower power and 1960’s appeal.  I am hoping this table makes some little girl very happy!  It will be just one of the items for sale this weekend.  I also loved working with corduroy!  Because of the thickness of the fabric, I was unsure as to how it would turn out and was more than pleased with the end result!

Before:

2015-04-28 (1)

After:

Materials Used:

Old kids Garment

Mod Podge

Spray or brush on white primer

Acrylic Paint

Paint Brushes (Various sizes)

Scissors and Box Cutter knife (to trim edges)

Two Years, One Sale- On The Upcycle

This April 27th 2015 marks the two-year anniversary of this blog and my creative mission to reuse, re-purpose and restyle.

2-years-old

For me, Upcycling is all about having fun and being creative with items that would otherwise be discarded.  The biggest challenge for me has been the writing. I love to craft, but I struggle with writer’s block from time to time.  The ideas for projects often come but the words to adequately describe them do not. Although I am not blogging with quite the same frequency as I once was, I am still happy that I was able to continue and complete a few larger and more challenging projects this past year, like my Lane Cedar Hope Chest. After two years of creating I am inevitably left with too many items and not enough room to keep them all. I was excited to hear that my daughter’s school is sponsoring a flea market in early May.  This seemed like a great oppurtunity to have my first “flea market experience.” I have never tried to sell my projects before, so this is a huge first step for me.  What better way to re-energize and make room for new projects?

It’s spring cleaning time for On The Upcycle. That being said, it’s also a fun time to squeeze in a few smaller projects in the days leading up to the sale.

I love wooden boxes and picked this one up for 99 cents at Goodwill.  I didn’t care for the boxes original design, but the box itself was in great shape.

20150419_201455[1]

I used a spray on white primer to properly cover the previous design on the box.

20150419_212220[1]

I had a nice celestial print.  I have been in a colorful mood lately and wanted to utilize a design with a lot of color

20150419_212452[1]

I applied Mod Podge with a brush, and placed the print on the box top and front.

20150419_212639[1]

I painted the box blue and pink to match colors contained within the print

20150420_212842[1]

This whimsical celestial themed box is one of the items crafted specifically for the sale.

20150420_212650[1]

Here are a few photo’s of previous projects I have agreed to part with for the upcoming sale:

Peacock Table
peacock table before and after

Star Wars Kid Chair:

Star Wars Themed Fabric Decoupage Chair

Strawberry Shortcake Kids Chair:

Upcycled Strawberry Shortcake Kids Record Chair

Kids School Desk:
Upcycled Kids School Desk

Happy Earth day to all of my friends!! How are you celebrating today? Do any of you have experience with Flea Market sales? I would love to hear from you! Any tricks of the trade or friendly advice?

My Neighbor Let it Go: Disney’s Frozen Wooden Toy Chest and Bench

My neighbor approached me one Saturday morning last spring. He was cleaning out his garage and asked if I wanted to look at a few items before he put them out on the curb. One of these items was an unfinished toy chest/bench that had been sitting in the back of his garage taking up precious space.  It had been purchased with good intentions, but he had never gotten around to finishing it. I immediately jumped at the chance to own such a wonderful piece of furniture.  It was unfinished wood, so this meant no scraping, stripping or priming.  My kind of project!

20150329_132009

I am always amazed at the generosity of people.  When it comes to neighbors, I am truly blessed.  I thanked him profusely and happily took in the unfinished item. It immediately filled a dire need. My daughter had accumulated many toys, and this was a great way to store and organize them.  So, there it sat unfinished and full of toys for almost a year in our daughters playroom.  I had no idea how I would finish it. I entertained various ideas that went nowhere.  Sports themes, traditional refinishing, Disney Princesses, just to name a few.  Then it hit me one day after my daughter had viewed the movie Frozen for the 50th time!  Why didn’t I think about it until now?  I emptied her toys out and placed them in bags.  I went online and looked up a Frozen color palate.  I chose 4 colors from Joann Fabric and Craft Stores Craft Essentials acrylic paint collection. I ended up using three bottles of each color, except for the pink (I only used 2) I went online and printed out some Frozen graphics that I wanted to use.  I set my printer to the largest setting possible.

20150329_145754

20150329_151745

The toy box needed about 2 coats with some minor touch ups after drying. Once the final coat was applied, I allowed the piece to dry thoroughly overnight.

20150329_144245

The next day, I applied Mod Podge to the front and lid with a foam brush, and carefully applied the prints.

20150329_150645

20150329_194011

The piece needed some “pop” so I decided to purchase some wall decals from Babies R Us to use as accents.  If you do not have access to a printer some of these images would also work great for decoupage.  I decided to apply the left over decals to my daughters bedroom wall.

pTRU1-19067669enh-z6

I then applied Mod Podge to the entire piece to seal it. For the majority of the toy box I used a foam brush to apply the Mod Podge, on the lid I used a “fluffy” mini paint roller which gave a snowy effect when the Mod Podge dried.

DSC_1095

I was happy how the piece turned out, and it looks great in the playroom!  When my daughter saw it finished the smile on her face said it all!

DSC_1086

DSC_1096

Materials:

Wooden toy box

Mod Podge

Paint/Brushes large and small

Foam craft brush, scissors

Frozen Prints Or Decals

(Colors used from Craft Essentials sold by Joann Fabric)

Mediterranean Blue

Panic Pink

Caribbean Coast

Sailing Sky

Length of project: 2 days (total)

Fabulous Frida: Dollar Store Decoupage

Beauty can present itself in many forms.  That is why I find the works of Frida Kahlo so intriguing.  The subject matter of her paintings are often grotesque and painful, but one can’t help being drawn to it.  Despite the many adversities life had to offer her, Kahlo never let it defeat her. She was a modern woman, ahead of her time, and created artwork that remains relevant today. Born in Mexico City around the start of the Mexican revolution,  At age 6 she contracted Polio which caused her to walk with a limp. As a young women, she was involved in a nearly fatal bus accident that left her with severe lifelong and painful injuries including her inability to carry a child.  Her heart was broken and this was reflected in many of her paintings, most of which were self portraits.

Self-Portrait-1926

Frida Kahlo pictured below with her partner and muse, painter Diego Rivera in 1932.

Frida_Kahlo_Diego_Rivera_1932

My sister is also a fan of Frida.  She recently had a surgery that would take some time and perseverance to recover from.  I wanted to make her something special to lift her spirits and inspire her while she was convalescing. I thought something with a Frida Kahlo theme could do just that.  I had a small wooden box that was far from special, but would be perfect to store her medications in.

DSC_0762

First, I cleaned the box thoroughly removing dust and dirt that accumulated during storage.  I printed out a 4×6 Frida print, and applied Mod Podge to the box with a paint brush.  I then carefully applied the print to the box.

DSC_0763

I used black and golden rod acrylic paint to finish off the box redesign. Once the box dried, I used Mod Podge to seal the project.

DSC_0765

Make your own art inspired box Dollar Store Craft

Imagine the possibilities!

Materials:

Mod Podge

Print of choice for decoupage

Acrylic Paint

Scissors and paint brushes

Feeling the Frida Frenzy?  Check out these other On the Upcycle Frida Kahlo inspired projects

Frida Kahlo Decoupage TrayFrida Kahlo Decoupage Art Case

Made in the Shade-Lamp Shade Fabric Restyle

Many years ago, my mom gifted me a stylish lamp that she no longer had a use for.  I am a big  fan of decorative lighting, so I was happy to have it.  The lamp attached directly to the wall, so it was also a wonderful space saver.  The decor of the lamp was fairly neutral, so it fit most of my living room design changes through the years.  The lamp shade was a cream color with hanging beads along the shade rim.

wall lamp

For a long time, I had wanted to try a lamp shade decoupage, and I felt this would be the perfect lamp for my first attempt.  I had some smaller pieces of black and white damask fabric left over from several previous projects.  These projects were:  The Broken Chair ChallengeYou Had Me At Half Table, and Vintage Sewing Box (Just to name a few)

Upcycled chair with half moon table

Keep in mind, if you plan on restyling a lamp shade it is important that the shade is light in color, and there are no dark designs on it.   Otherwise, when the shade is illuminated the previous pattern will show through the new fabric.

Before getting started, I removed the shade from the lamp and gently cleaned it with a damp cloth.  It is important to remove any dust and dirt from the shade before applying the Mod Podge.  Once this was complete and the shade was dry, I generously applied Mod Podge to the outside of the shade with a broad paint brush.


DSC_0721

I then placed a piece of the damask fabric over the lamp shade smoothing it out carefully with my hands to avoid wrinkles.  Since fabric is being applied to cloth, it is important to apply enough pressure so that the fabric adheres well to the shade.

DSC_0720

I placed the shade in front of the fan so that it would dry quickly.  Once this step was complete, I applied a generous amount of Mod Podge over top of the fabric.  I allowed it to dry thoroughly between coats, adding three coats of Mod Podge in total.

DSC_0726

Once the shade was completely dry, I carefully trimmed away the excess fabric with a pair of scissors, and added additional Mod Podge along the edges of the fabric.

Restyled Fabric Decoupage Lamp Shade

The lamp looks amazing, and now matches my current living room decor perfectly!  This entire project was a quick one too! Overall completion took about one hour!

Decorate a boring lampshade with fabric

Materials:

Light Colored Lamp Shade

Mod Podge

Paint Brush

Fabric Of Choice

Scissors

Car Part Art: Turning Scrap Into Sculpture

I am always intrigued when I  find art in unlikely places.   This past weekend I made an appointment to have front brakes installed on my car.  I planned my day accordingly and woke up bright and early. Meineke is currently having a sale on brakes, and although I had never gone there before for repairs, the allure of saving $50.00 compared to a previous quote I had received was too good to pass up.

When I arrived at the shop I was greeted unexpectedly by a piece of upcycled art.  Of course I had to snap a picture of this pleasant little door greeter and his loyal pup.  This little man and his dog were made from recycled car parts, mufflers, brake parts and the like.  Of course I fell in love with them instantly.

20140628_095404

It seems that one or more of the mechanics has a creative side! Apparently, this is not a new concept as upcycling car parts into works of art is more common than one might think.  Roadside America an online guide to offbeat tourist attractions has a great article featuring some of these so-called “muffler men” who populate the auto shops and roadsides of America.  You may have already seen some of these sculptures on your travels already!

There are also some truly amazing upcycle artists in the world and they take this art form to a whole new level!  One such artist is Australia’s James Corbett.   He has been creating sculptures from spare auto parts and junk since 1999.  Below is an example of his work.  Look at all those spark plugs!

12353_997

Below is James, pictured with one of his many creations.  The eyes are made of headlights…genius!

other5b

To see more of his work visit the Crimson Reason Blog.  They feature several of Jame’s intricate creations.

Another talented scrap artist is Frenchman  Edouard Martinet.  As a young student he became somewhat “obsessed” with insects.  Later, he chose to incorporate his love of insects and other animals in sculpture.  The detail and artistry here is off the charts!

wasp

pigeon

Check out this interview with Edouard Martinet below.

“Art is not what you see, but what you make others see.”
― Edgar Degas


Play it again, Kid: Upcycled Vintage Jaymar Kids Piano

When I take a trip to an antique shop or thrift store, the thing I enjoy the most is the element of surprise.  Sometimes I come away with nothing and other times when I least expect it I find something rare.  Speaking from experience antique shops tend to have pieces that are in better physical condition. Thrift stores such as Goodwill often times are stocked with basement throw aways and estate sale clean-ups.  Many of these items are not well cared for and in some cases downright abused.  I have come across items that I wanted to rescue, but I felt with my skill level I could not save them.  It always leaves me with mixed emotions.  On this day I was about to leave the store.  The husband and I have been regularly stopping in searching for a vintage rotary phone.  Not only have I always wanted to upcycle one of these phones, My husband and I love the loud ring it produced from our childhood memories.  We have missed many calls at home unable to hear our landline phone ring if we are in a certain part of our house. Upon taking one last stroll through the cluttered furniture aisle, my eyes wandered and there it was staring back at me! It seemed too good to be true: a vintage Jaymar Kids Piano. The toddler apprentice and I had been out shopping last year around Christmas at The Christmas Tree Shop, and stumbled upon an adorable kids baby grand piano.  She loved playing it and I could barely peel her off it at the store.  The price tag was a bit hefty weighing in at $89.99.  When we left the store without it,   I couldn’t get that little piano out of my mind and finding the vintage Jaymar at Goodwill seemed a bit like the product of fate. As with any upcycling story there are challenges to be faced and this adorable piano was no different.  The wood in many places was peeled away, It had its share of loose nails, and a large crack spreading across the base and back of the piano.  Incredibly, all the white keys worked perfectly and all, but one of the black keys worked perfectly.  The plastic keys were more yellow than white as is what happens to plastic stored under certain conditions with age.  It did not have a price tag so I took it up to the associate at the register. Even in rough shape I was surprised it was priced at a mere $5.99!

Vintage Kids Jaymar Piano Est 1960's

I snatched it up and brought it home.  I may not have found the rotary phone that I was searching  for that day, but I was surprised and delighted to find the piano.

Despite its charms, I knew very little about the toy.  I grabbed my laptop and did some research.  Thanks to Old Wood Toys.com  I was able to read about the history of the Jaymar company.  The toy company produced wooden novelty trinket toy through World War II.  After the war the company exclusively produced kids pianos and puzzles.  The company officially closed it’s doors in 1990. When I searched on Ebay, there were a few for sale, many of them in rough shape with price tags ranging from $39.99-$89.99.  On most, keys were broken. I concluded I had gotten a very good deal on this toy!

Jaymar Kids Piano

Since the piano did not come with a bench, I had a kids unfinished step stool that I thought would repurpose and stand in nicely as a piano seat.

Unfinished Step  Stool

I decided the cracked area of the piano would benefit from decoupage.  I believed the Mod Podge and fabric would reinforce the cracked wood and prevent it from spitting further.  I chose black and white music note fabric from Joann Fabric.  I used a white brush on acrylic primer to paint the entire piano after cleaning it thoroughly with a damp cloth.  I measured the area I wanted to decoupage and cut a piece of fabric to fit.  Once the paint was dry, I applied Mod Podge generously to the cracked area underneath with a foam craft brush, and carefully applied the fabric smoothing it put with my hands.  Once dry, I applied three more coats of Mod Podge over top of the fabric allowing it to dry between coats.  I then painted the entire piano with several coats of black acrylic paint with an appropriate sized paint brush.  I painted parts of the piano white for emphasis.  While the piano dried between coats, I worked on repurposing the step stool into a piano seat.  I traced the seat surface on to the back of the music note fabric with a pencil.  I cut out the fabric with scissors and placed it aside.  I painted the entire chair black except for the seat which I planned to decoupage with fabric. Once dry, I applied Mod Podge to the seat and applied the traced fabric.  I applied three coats over top of it to seal it.  Once the Mod Podge was dry I used a Polyurethane clear semi-gloss sealer to add a final protective coat over the piano and the piano chair.

Upcycled Vintage Kid's Piano

The one frustration with this project was the yellowed plastic piano keys.  I would have preferred a method to whiten them, but after doing some research decided not to mess with the patina on the keys.  I have read everything from sanding the keys with fine sandpaper or cleaning them white toothpaste.  In the end, I decided the risk of damaging the function of the piano was too great and simply used the corner of a Magic Erasure pad to throughly clean the keys.

Play it again kid, restyled kids piano


Have any safe plastic whitening tips?  I would love to hear them!

Materials used:

Black and White Acrylic Paint

White Acrylic Primer

Large and Small Paint Brushes/Foam Craft Brush

Mod Podge

Polyurethane Clear Sealer

Fabric Of Choice

Scissors

Wet Cloth or Magic Erasure Pad for cleaning

Kids Piano/Kid Step Stool (for seat)