Fabulous Frida: Dollar Store Decoupage

Beauty can present itself in many forms.  That is why I find the works of Frida Kahlo so intriguing.  The subject matter of her paintings are often grotesque and painful, but one can’t help being drawn to it.  Despite the many adversities life had to offer her, Kahlo never let it defeat her. She was a modern woman, ahead of her time, and created artwork that remains relevant today. Born in Mexico City around the start of the Mexican revolution,  At age 6 she contracted Polio which caused her to walk with a limp. As a young women, she was involved in a nearly fatal bus accident that left her with severe lifelong and painful injuries including her inability to carry a child.  Her heart was broken and this was reflected in many of her paintings, most of which were self portraits.

Self-Portrait-1926

Frida Kahlo pictured below with her partner and muse, painter Diego Rivera in 1932.

Frida_Kahlo_Diego_Rivera_1932

My sister is also a fan of Frida.  She recently had a surgery that would take some time and perseverance to recover from.  I wanted to make her something special to lift her spirits and inspire her while she was convalescing. I thought something with a Frida Kahlo theme could do just that.  I had a small wooden box that was far from special, but would be perfect to store her medications in.

DSC_0762

First, I cleaned the box thoroughly removing dust and dirt that accumulated during storage.  I printed out a 4×6 Frida print, and applied Mod Podge to the box with a paint brush.  I then carefully applied the print to the box.

DSC_0763

I used black and golden rod acrylic paint to finish off the box redesign. Once the box dried, I used Mod Podge to seal the project.

DSC_0765

Make your own art inspired box Dollar Store Craft

Imagine the possibilities!

Materials:

Mod Podge

Print of choice for decoupage

Acrylic Paint

Scissors and paint brushes

Feeling the Frida Frenzy?  Check out these other On the Upcycle Frida Kahlo inspired projects

Frida Kahlo Decoupage TrayFrida Kahlo Decoupage Art Case

Made in the Shade-Lamp Shade Fabric Restyle

Many years ago, my mom gifted me a stylish lamp that she no longer had a use for.  I am a big  fan of decorative lighting, so I was happy to have it.  The lamp attached directly to the wall, so it was also a wonderful space saver.  The decor of the lamp was fairly neutral, so it fit most of my living room design changes through the years.  The lamp shade was a cream color with hanging beads along the shade rim.

wall lamp

For a long time, I had wanted to try a lamp shade decoupage, and I felt this would be the perfect lamp for my first attempt.  I had some smaller pieces of black and white damask fabric left over from several previous projects.  These projects were:  The Broken Chair ChallengeYou Had Me At Half Table, and Vintage Sewing Box (Just to name a few)

Upcycled chair with half moon table

Keep in mind, if you plan on restyling a lamp shade it is important that the shade is light in color, and there are no dark designs on it.   Otherwise, when the shade is illuminated the previous pattern will show through the new fabric.

Before getting started, I removed the shade from the lamp and gently cleaned it with a damp cloth.  It is important to remove any dust and dirt from the shade before applying the Mod Podge.  Once this was complete and the shade was dry, I generously applied Mod Podge to the outside of the shade with a broad paint brush.


DSC_0721

I then placed a piece of the damask fabric over the lamp shade smoothing it out carefully with my hands to avoid wrinkles.  Since fabric is being applied to cloth, it is important to apply enough pressure so that the fabric adheres well to the shade.

DSC_0720

I placed the shade in front of the fan so that it would dry quickly.  Once this step was complete, I applied a generous amount of Mod Podge over top of the fabric.  I allowed it to dry thoroughly between coats, adding three coats of Mod Podge in total.

DSC_0726

Once the shade was completely dry, I carefully trimmed away the excess fabric with a pair of scissors, and added additional Mod Podge along the edges of the fabric.

Restyled Fabric Decoupage Lamp Shade

The lamp looks amazing, and now matches my current living room decor perfectly!  This entire project was a quick one too! Overall completion took about one hour!

Decorate a boring lampshade with fabric

Materials:

Light Colored Lamp Shade

Mod Podge

Paint Brush

Fabric Of Choice

Scissors

Vintage Wooden Wall Shelf Redesigned

Most of my recent trips to the thrift stores have been utterly disappointing.  It would seem that spring cleaning is the last thing on anyone’s mind.  It’s bitterly cold outside, yard sale season is long over, and the streets are blanketed in snow from our most recent weather event Hercules (Since when did we start naming snow storms??) Everyone seems to be walking around with a post holiday hangover causing many (myself included) to limp into the New Year. Luckily, I still have a few projects up my extremely bundled and layered sleeve to share with you.

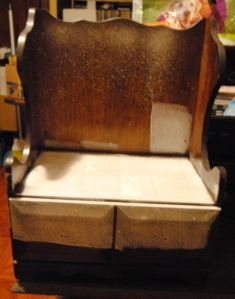
Although most of my thrift store trips have been uneventful, Every once in a while I still manage to find something unique.  I came across a really lovely and unique vintage wall shelf with a drawer.  I especially loved the curved sides and the drawer for storage.  It was in rough shape, but that didn’t deter me from placing it inside my cart.

Vintage Wooden Wall Shelf

When I originally purchased the shelf I had every intention of keeping it.  A blunder made during another project intended as a Christmas gift changed that and I had shift the original intention of this piece.

I lightly sanded the item with sand paper, and used a white latex primer to cover the piece.  I left the inside of the drawer alone as it was still in very good condition.  I decided to paint the piece black. This shelf has the potential to be hung in any room, so I wanted the color to go with any decor, and black is neutral. I painted all of the piece except for the drawer and shelf.  I planned to decoupage these areas later and didn’t want the dark color to bleed through the fabric. I used two coats of black acrylic paint and once it was completely dry added a layer of Mod Podge over top to seal it. I had some left over black and white damask fabric from a previous project.  I applied Mod Podge to the front of the door and shelf with a foam craft brush, I cut the fabric to fit as best I could as I would trim away any excess fabric later.  I made sure to line up the fabric design so that the piece would appear symmetrical.  I applied Mod Podge over top of the fabric allowing my nail to work the fabric into any grooves and once it was dry, carefully trimmed any excess fabric with a box cutter knife.

Black and White Damask Decorative Wall Shelf

Decoupage Black and White Damask Wall Shelf with drawer

I love damask designs and this was a tough piece to part with. My favorite project is draped in damask and this would match it beautifully. In the end I was happy to gift it to my sister to go with the chair I made for her in her bedroom, or perhaps it will go in her kitchen?  We shall see, as I offered my services free of charge to help her hang it!

A Lively Computer Tablet: Decoupage Makeover

Decoupage Tablet

I remember a time before computers.  Sure, actual computers have been around since as early as the mid 1930’s, but most computers were not accessible to the general public until the later 1990’s when I was already out of High School and beginning college. It wasn’t until the internet came in to play that everything changed, and computers began to get smaller and smaller.  I also remember a time when the closest thing to a computer in school was a book or a type writer.  I looked forward to getting new books every year, just so I could cover them with a brown paper bag!  I loved to draw designs on these paper jackets, pay tribute to my favorite music groups, and draw just about anything my teenage mind could come up with.  This was the inspiration behind this project.  Why not  “cover” the modern book, my little MID brand tablet.  I loved the result I achieved with decoupage smart phone makeover  So, I decided to give it a try.  I prepped the tablet cleaning it and removing any dust.   I then traced the tablet onto the scrapbook paper.  I picked a nice brightly-colored scrapbook design.   Keep in mind the design possibilities are endless! Joann Fabric had a great sale, five sheets of selected papers for only $1.00!   Once traced, I cut the it out, carefully cutting away the speaker area with an X-Acto knife.  I also paid close attention to  any other areas I did not want to cover with the paper.

Next, I applied Mod Podge to the back of the tablet, carefully avoiding any areas that might not tolerate glue, like the speaker for example.  I carefully glued the scrapbook paper to the back of the tablet, mind fully and with a smaller paintbrush.  This kept the glue from getting into any of the important areas.  If you are worried, you can also put a small piece of scotch tape over those areas to protect them, carefully peeling it off later.  Once dry, I covered the outside with multiple coats of Mod Podge Matte finish allowing to dry thoroughly between coats.

Materials used:

DSC_0602

I love the new look!  Who says an ugly tablet doesn’t deserve a decoupage makeover?

Live on the UPCYCLE!

Summertime Crafts- Restyled Flower Pots made with Outdoor Mod Podge

Image

This my favorite time of year. Our living spaces expand and we can now utilize backyards, patios, and balconies. Flower pots are an inexpensive addition to any outdoor space, and look just as good inside the home. Flower pots can be found at your local dollar store or just about anywhere, and restyling them is a simple, and easy craft.   I had this one hanging around and thought a little sprucing up was in order.  I had some Jacquard style scrapbook paper scraps I had used from a previous project.   As you can tell I love Jacquard designs!  I have just about used up this book of  scrap-book paper designs I purchased from Michael’s Crafts.  I will be our searching for some new scrapbook paper designs in the near future.  I simply cut the paper into a long strip and used Outdoor Mod Podge to glue the paper to the top rim of the ceramic pot.  I  then applied the Mod Podge to the outside, applying a few coats.  A very simple project that you can share with the kids.  You can use fabric, wrapping paper, magazine clippings, personal photographs just about anything.  I recommend using Outdoor Mod Podge even if you plan on keeping your flower-pot inside.  Every time you water the plant you run the risk of getting it wet, and the Outdoor Mod Podge works great under these conditions and will seal it beautifully!  The key is to have fun no matter what design you choose!

Another Large Wooden Tray Restyle

I picked up this tray for just a couple of dollars at Goodwill and had no initial plans for it.  I admit I love rescuing old trays even if I have no idea what to do with them.  It sat in our spare room for quite sometime primed, but unfinished.  I then picked up some Victorian inspired black with white fabric during a second Goodwill trip.  I liked it because it had trees on it with children playing.  It reminded me of some of the decor we had in my house growing up in the late 70’s early 80’s. I decided to use the fabric on the tray. I thought it would be a great way to display the fabric and keep the scene intact. I painted the tray with white acrylic paint and then applied the Mod Podge.  Since the fabric was dark, I couldn’t trace it, so I applied the fabric I had to the tray, and when the Mod Podge dried and the fabric hardened I used a box cutter knife to remove the excess fabric. Once dry I used about two more coats of Mod Podge over the entire piece.  If you are just starting out working with Mod Podge, trays are definitely the way to go!  They are a great starter project and the possibilities for styling are endless.

Image

Materials:

Mod Podge

Tray

Fabric

Box Cutter style knife

White acrylic paint and primer