The Shirt That Didn’t Fit: Clothing Repurpose

I was up late shopping one night when I came across a lovely shirt on Ebay.  I usually don’t purchase clothes unless I can try them on first, but I had recently ordered something and it worked out perfectly, so I was feeling braver than usual.

I received the item, and to my dismay it did not fit.  The seller had a no refund policy, so I attempted to relist the item for sale. Unfortunately, I didn’t have any luck reselling the item,  so I decided to utilize the shirt in a different way.  I loved the pattern and material, so I decided to re-purpose the item and use the fabric for decoupage.

20160114_191835

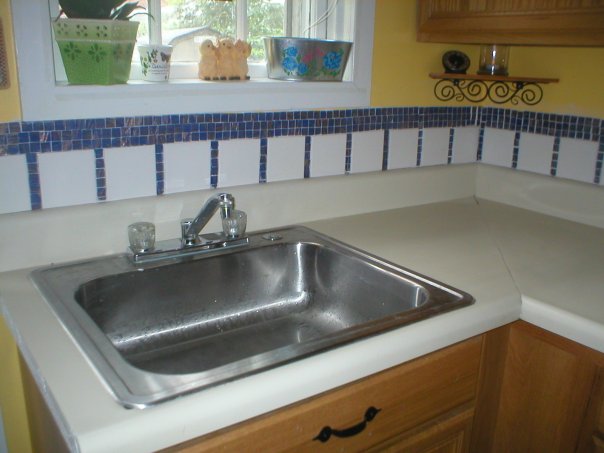
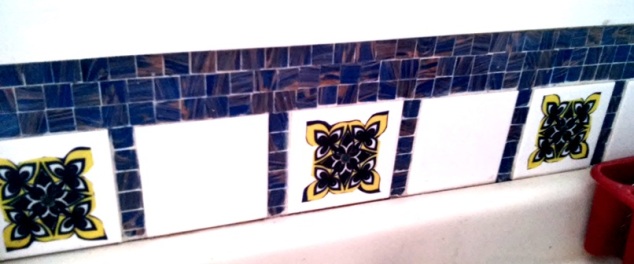
I carefully cut out the gold star pattern, and used a little Mod Podge to apply these to my kitchen back splash.  This added a much needed “pop” of color, and matched the kitchen decor perfectly.

Before:

DIY Kitchen Back Splash

After:

20160131_113806

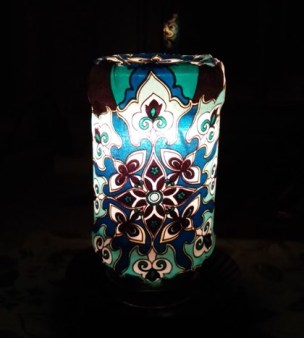
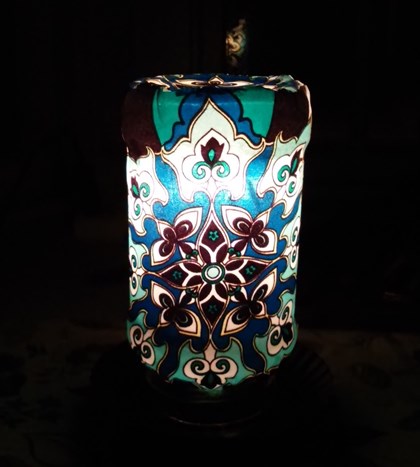
I had some fabric left over, so I decided to use it to make an accent lamp for my office.  I had an empty spaghetti jar which would work perfectly for this project.  I applied Mod Podge to the exterior of the jar and used some twine to add a decorative quality to the base. I applied the twine with hot glue.

20160216_074721

20160218_215538

For more details on how to create a decoupage jar lamp, check out some previous On The Upcycle decorative lighting projects…

Spaghetti Jar Lamp

Pickle Jar Lamp


Decoupage I Must: Star Wars Inspired Laptop Made With Mod Podge

With the new Star Wars Episode VII set to be released in 2015, the franchise is more popular than ever. I am sure not even George Lucas himself, could have imagined just how big Star Wars would become. The wise Yoda said it best, “Impossible to see, the future is.”

Yoda

The husband and I are children of the 70’s and 80’s and remember a time before CGI (Computer Generated Imagery) and digital effects came of age. For it’s time the original Star Wars was innovative and visually impressive compared to other science fiction movies.  It touched many aspects of pop culture, and was heavily marketed toward children with action figures and tons of merchandise.  It is the third most popular movie franchise in history according to The Numbers.com.  Is it any wonder that when I came across Star Wars Fabric at Jo-ann Fabric, I couldn’t resist buying it?  The fabric was colorful, fun and had a bit of childhood nostalgia thrown in. This fabric inspired such projects as Creative Blast Off: Star Wars Kids Chair, and the Dollar Store Craft, Star Wars Candles.  My husband has an beat up laptop that he uses to surf You Tube.  It is old and scratched and could use a makeover.  I thought the left over Star Wars fabric would be a perfect decoupage material.  I had also wanted to try using decoupage on a laptop for quite sometime as I already decoupaged cell phones, and computer tablets previously.

DSC_0736

What you will need to decoupage your Lap Top:

Fabric (Can Also Use Paper, Scrapbook paper)

Mod Podge

Scissors

Paint Brush

Box Cutter Knife

Carefully apply Mod Podge to the top of the computer with a paint brush. Be mindful of the Mod Podge it is important that it not drip into the computer crevices and openings.

DSC_0737

Apply the fabric, smoothing it out with your hands.  Trim away any excess fabric with the scissors. Once it is dry apply more Mod Podge over the fabric to seal it.  I applied three coats total, allowing time to dry between each coat.

DSC_0740

Once dry, I carefully trimmed any excess fabric with the box cutter knife, and then sealed the edges of the fabric with more Mod Podge.

DSC_0746

A laptop that a Jedi would approve of and, the hubby seems to like it too. Here’s to the kid in all of us!

“Truly wonderful, the mind of a child is.”

An Accident Waiting To Happen: Upcycled Pringles Can Lamp

              Decorative Decoupage Pringles Lamp

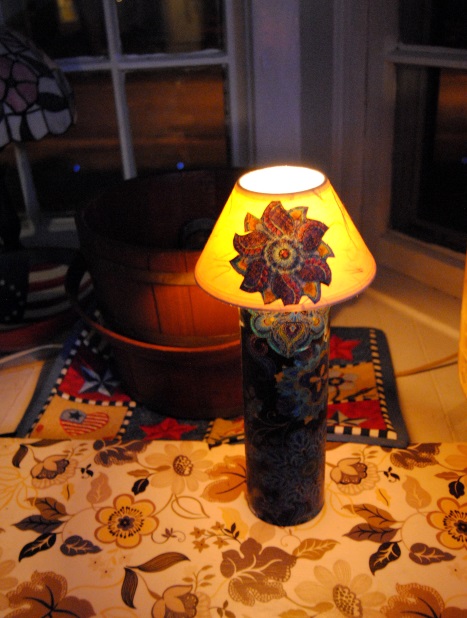
This project idea started out as a 99 cent purchase at Goodwill.  An adorable miniature ceramic lamp with a round base that would require a minor  fabric decoupage makeover to make the perfect table top night-light for our bedroom.   However; thanks to the toddler apprentice’s rather curious hands it was simply not to be.  She climbed up on the ottoman, reached out her arms, and knocked it off the shelf. It broke the ceramic base into a million pieces. More importantly, she was not hurt in the accident, just a bit startled and remorseful   Although I was initially upset,  my cross demeanor faded quickly as I thought of ways to reuse the unbroken pieces of the lamp and shade.  I searched the craft room for some recycled items I was saving for a crafting rainy day.   I searched and looked for what I thought would make great lamp bases. It then occurred to me…I had a fever for a Pringles can lamp!

Minimalist Pringles Lamp Upcycle

An Upcycled Pringles Can Lamp For The Minimalist

The Pringles can was a great choice because it didn’t require a glass cutter to feed the wire through like a glass bottle or jar would.  I used a box cutter knife to VERY carefully cut a cross through the plastic lid.  I popped the light in and it fit nicely.   Before I placed the lid back on the can I filled the bottom with a few decorative marbles I had lying around. This added some weight and stability to the lamp.  I cut a hole at the base of the can using the UPC on the can as a guide, so I could properly feed the wire through the bottom.  For those of you who are practical, and love Pringles, you may want to stop right here.  I call this the minimalist version.

How to Create An Upcycled Pringles Can Lamp That’s A Little More Decorative

Decorative Upcycled Pringles Lamp

For those who want to create a more decorative piece, You can use a little fabric decoupage to decorate the Pringles can and lamp shade.  I used some scrap Peacock inspired fabric I had lying around the craft room.  I used Mod Podge to apply the measured fabric to the can and cut out designs to place on either side of the lamp shade to add some symmetry.  Once dry, I applied more Mod Podge over the fabric to properly seal the lamp base.  I placed it in front of our fan to dry.   Now it was ready to be plugged in and illuminated.  The possibilities here are endless.  If you don’t have fabric handy you can also use scrapbook paper.  You can create seasonal cans and interchange them with the light and lid to transform the look of the lamp.

Upcycled Pringles Can Lamp

A lesson in life and living on the Upcycle, the greatest mistakes can have the greatest rewards!  That is how I feel about this project. If it wasn’t for my overly curious toddler, I would have never known the fun of this Pringles can craft.  Thank heaven for overly curious little girls!

Have you had any crafting disasters that turned into triumphs?  What was your favorite craft mishap?

Materials Used:

Broken miniature lamp

Pringles can with lid

Box Cutter Knife

Handful of marbles

Fabric or Scrapbook Paper Of Choice

Foam brush or Paint Brush

Scissors

Mod Podge

Thrift Store Surprise: Vintage Wood Sewing Box Upcycle

When I see something at a thrift shop that is unique and catches my attention, I will often purchase it even when I am unsure of what it is.  As was with the case of this little wooden box with legs. I imagined what it could have been used for. Perhaps it was intended to hold hats, gloves and scarves, or it simply sat by the door and was used to sort daily mail.  To me it didn’t matter, it was intriguing and best of all, priced right at $3.99!

DSC_0485

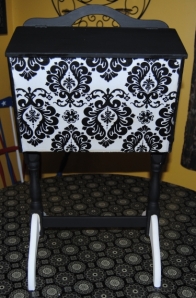
Sure, I had my smart phone handy, I could have googled the item and had my answer right away, but for some strange reason,  I didn’t.  I simply brought it home and stored it in my craft room.  It patiently waited its turn to learn its crafting fate until this weekend, I blew the dust off and decided to come up with a plan of attack.  I like to utilize materials I have handy as much as can. I tend to accumulate unused fabric scraps from previous projects and I prefer to use this fabric to the last thread.  One of my favorite designs was the black and white damask fabric I purchased at Joann Fabric.  I used this fabric on previous projects including The Broken Chair Challenge, and You had me at “Half Table” Yard Sale Rescue. I still had a rather large scrap piece left and decided to use it to upcycle this item.  I began by cleaning the item thoroughly.  Once the dust and dirt had been removed, I used a latex spray on primer and spray painted it white.

DSC_0496

I cut the fabric to fit both sides of the piece. I generously applied Mod Podge to the area with a foam craft brush.

DSC_0497

I then applied the fabric and repeated this step for both sides of the box.

DSC_0498

Once this dried, I applied three total coats of Mod Podge over top allowing each side to dry thoroughly between coats.

DSC_0499

I then painted the entire piece in a black and white scheme using acrylic paint.  The piece took about three coats of paint. I allowed the piece to dry over night and applied a final layer of Mod Podge to the entire piece to seal it.

DSC_0502

I am very happy with the final result;  However, I also want to share with you my mistake during this process.  Halfway through the project, I finally did what I should have done in the very beginning, research the piece online before you upcycle!  What you discover may alter your plans.  Granted in this case, I do not believe I would have done anything differently, but it really got me thinking about these pieces and how research plays an important, but often unspoken role in crafting.  A few pieces along the way, I decided to keep in their natural state, and some purists may have done the same in the case of this vintage box.  Turns out this little box with legs is a Priscilla style sewing box most likely from the depression era 1930’s to 1940’s. I saw a few online in various states, some painted and upcycled and others in their original condition range in price between $35 and $80 dollars on Etsy. My antique radar must have been working that day!  Despite having no clue about what this items’ purpose was I sensed it was something special.

What would you have done with this piece?  Have you ever had something special, but didn’t know it? Do you have crafting regrets? I would love to hear from you!

DSC_0509

Materials:

Vintage Sewing Box Stand

Fabric Of Choice

Mod Podge

Acrylic Paint/White Latex Primer

Scissors, Paint Brushes, Foam Craft Brush


Pack my Bags! Fun and Easy Decoupage Vintage Suitcases

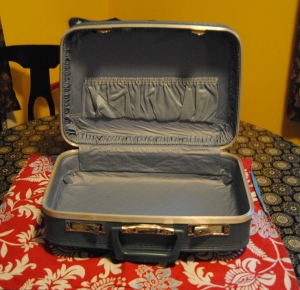
When shopping in thrift stores, I am always on the lookout for certain items on my personal wish list.   Many times I leave empty-handed as these items tend to be harder to find and that is why they remain on my list.  It is the search for these and other welcomed surprises that make thrifting so much fun.  Every now and again I get lucky, and it was truly my lucky day when I stumbled upon three lovely hard case, blue vintage suitcases reasonably priced at Goodwill.  I was also delighted to find the interiors of this cases in excellent condition.  For the larger case, I chose a blue and white fabric from Joann Fabrics, and decoupaged it onto the suitcase surface for my first ever restyled suitcase.  I wanted to make each suitcase unique, so I patiently waited for ideas to come along for cases two and three.

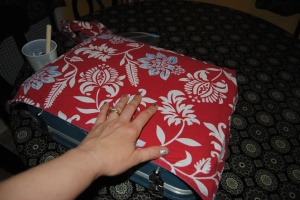
I was walking around Goodwill by my work the other day and stumbled upon a lovely pillow sham.  It was priced right at $1.99.  Usually when it comes to linens and fabrics at Goodwill, it is hit or miss.  This was a lovely pattern of white , red, and a touch of blue.  Whenever I see blue I think of those suitcases and thought this would be a perfect fit for one of them.  The question was if I would have enough fabric to complete the project. Unfortunately they only had one pillow sham in this pattern for sale.

Vintage suitcase pillow sham decoupage makeover

It turns out when I got it home,  I had just the right amount of fabric to restyle the second largest case, and I was thrilled!

First, I cut the decorative fabric away from the plain blue fabric on the pillow cases underside.

DSC_0465

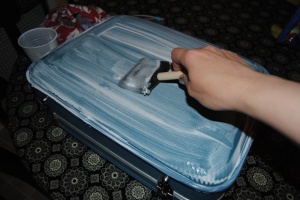
I placed the suitcase on the top of the fabric to get an idea of how much fabric I would need for both sides.  It was easiest to cut it in half.  I allow the fabric to hang over slightly, as I planned on trimming away the excess fabric later.  I applied Mod Podge generously with a foam craft brush to the suitcase surface.

DSC_0468

I then carefully laid the fabric over it,  repeating the same process twice for both sides of the suitcase.

DSC_0469

Once dry, I applied Mod Podge generously over it to seal the fabric.  I also generously applied Mod Podge to the edges where I planned on trimming the excess fabric.

DSC_0473

Once dry, the fabric stiffens and I carefully used a box cutter knife to trim the extra fabric using the suitcase crevice/seam as a guide.  Keep in mind to use just enough pressure as too much can damage the suitcase.

DSC_0472

I applied two more layers of Mod Podge to each side of the suitcase. Working the glue once again in around the suit case edges.

Decoupage suitcase using a pillow sham

I loved how this little suitcase turned out!  Stay tuned for suitcase number three coming soon!

decoupage vintage suitcases with fabric and Mod Podge


 Material Used:

Hard Top Suitcase

Fabric of choice (For this project I used an old pillow sham)

Scissors

Foam Craft Brush

Box Cutting Knife

Mod Podge

Clear Varnish (Optional add for extra protection)

Play it again, Kid: Upcycled Vintage Jaymar Kids Piano

When I take a trip to an antique shop or thrift store, the thing I enjoy the most is the element of surprise.  Sometimes I come away with nothing and other times when I least expect it I find something rare.  Speaking from experience antique shops tend to have pieces that are in better physical condition. Thrift stores such as Goodwill often times are stocked with basement throw aways and estate sale clean-ups.  Many of these items are not well cared for and in some cases downright abused.  I have come across items that I wanted to rescue, but I felt with my skill level I could not save them.  It always leaves me with mixed emotions.  On this day I was about to leave the store.  The husband and I have been regularly stopping in searching for a vintage rotary phone.  Not only have I always wanted to upcycle one of these phones, My husband and I love the loud ring it produced from our childhood memories.  We have missed many calls at home unable to hear our landline phone ring if we are in a certain part of our house. Upon taking one last stroll through the cluttered furniture aisle, my eyes wandered and there it was staring back at me! It seemed too good to be true: a vintage Jaymar Kids Piano. The toddler apprentice and I had been out shopping last year around Christmas at The Christmas Tree Shop, and stumbled upon an adorable kids baby grand piano.  She loved playing it and I could barely peel her off it at the store.  The price tag was a bit hefty weighing in at $89.99.  When we left the store without it,   I couldn’t get that little piano out of my mind and finding the vintage Jaymar at Goodwill seemed a bit like the product of fate. As with any upcycling story there are challenges to be faced and this adorable piano was no different.  The wood in many places was peeled away, It had its share of loose nails, and a large crack spreading across the base and back of the piano.  Incredibly, all the white keys worked perfectly and all, but one of the black keys worked perfectly.  The plastic keys were more yellow than white as is what happens to plastic stored under certain conditions with age.  It did not have a price tag so I took it up to the associate at the register. Even in rough shape I was surprised it was priced at a mere $5.99!

Vintage Kids Jaymar Piano Est 1960's

I snatched it up and brought it home.  I may not have found the rotary phone that I was searching  for that day, but I was surprised and delighted to find the piano.

Despite its charms, I knew very little about the toy.  I grabbed my laptop and did some research.  Thanks to Old Wood Toys.com  I was able to read about the history of the Jaymar company.  The toy company produced wooden novelty trinket toy through World War II.  After the war the company exclusively produced kids pianos and puzzles.  The company officially closed it’s doors in 1990. When I searched on Ebay, there were a few for sale, many of them in rough shape with price tags ranging from $39.99-$89.99.  On most, keys were broken. I concluded I had gotten a very good deal on this toy!

Jaymar Kids Piano

Since the piano did not come with a bench, I had a kids unfinished step stool that I thought would repurpose and stand in nicely as a piano seat.

Unfinished Step  Stool

I decided the cracked area of the piano would benefit from decoupage.  I believed the Mod Podge and fabric would reinforce the cracked wood and prevent it from spitting further.  I chose black and white music note fabric from Joann Fabric.  I used a white brush on acrylic primer to paint the entire piano after cleaning it thoroughly with a damp cloth.  I measured the area I wanted to decoupage and cut a piece of fabric to fit.  Once the paint was dry, I applied Mod Podge generously to the cracked area underneath with a foam craft brush, and carefully applied the fabric smoothing it put with my hands.  Once dry, I applied three more coats of Mod Podge over top of the fabric allowing it to dry between coats.  I then painted the entire piano with several coats of black acrylic paint with an appropriate sized paint brush.  I painted parts of the piano white for emphasis.  While the piano dried between coats, I worked on repurposing the step stool into a piano seat.  I traced the seat surface on to the back of the music note fabric with a pencil.  I cut out the fabric with scissors and placed it aside.  I painted the entire chair black except for the seat which I planned to decoupage with fabric. Once dry, I applied Mod Podge to the seat and applied the traced fabric.  I applied three coats over top of it to seal it.  Once the Mod Podge was dry I used a Polyurethane clear semi-gloss sealer to add a final protective coat over the piano and the piano chair.

Upcycled Vintage Kid's Piano

The one frustration with this project was the yellowed plastic piano keys.  I would have preferred a method to whiten them, but after doing some research decided not to mess with the patina on the keys.  I have read everything from sanding the keys with fine sandpaper or cleaning them white toothpaste.  In the end, I decided the risk of damaging the function of the piano was too great and simply used the corner of a Magic Erasure pad to throughly clean the keys.

Play it again kid, restyled kids piano


Have any safe plastic whitening tips?  I would love to hear them!

Materials used:

Black and White Acrylic Paint

White Acrylic Primer

Large and Small Paint Brushes/Foam Craft Brush

Mod Podge

Polyurethane Clear Sealer

Fabric Of Choice

Scissors

Wet Cloth or Magic Erasure Pad for cleaning

Kids Piano/Kid Step Stool (for seat)


Bed Skirt Craft Table Makeover

May is turning out to be a rather hectic month.  My daughter’s 3rd birthday is just around the corner, not to mention she is about to start pre-school for the first time next week.  At the risk of sounding cliché, time is flying by and filled with things to do, forms to sign, and errand filled lunch breaks.   Despite this, I have been busy working in the background on a few projects though at a slower pace than usual.  One of these projects was resurfacing my craft table and organizing the space. Despite my best efforts, my craft room has become a cluttered nightmare of various holiday decorations, toys and kids clothes which never made their way up to the attic.  I was once again determined to clean it up and work on the craft table.

Craft table has seen better days


This old desk top computer table had seen better days but worked well as a crafting table. Of course a table used for this purpose is going to bare the scars of crafting, but I had a lot of left over fabric from an old bed skirt that I had used for a few previous projects. The pattern and color scheme also happened to match the room nicely.  I cut two pieces of fabric to fit over the table surface.  I applied Mod Podge generously with a foam craft brush.  I carefully applied the fabric to the table surface creating a seam to connect the two pieces together.  I then applied Mod Podge to the top of the fabric.

DSC_1529

I applied several layers of Mod Podge allowing it to dry clear between coats. I painted the areas I could not decoupage black.  Once it was dry it created a workable surface that was much more attractive than before.

craft table resurface before and after

Table Before and After

Craft room shot

Craft Room Shot featuring “On The Upcycle” Projects  

Getting better with organization Lets hope I can keep it that way-Finally!

Mod Podge Your Cottage: Window Sills Accented With Fabric

One of the features I loved when we first saw our house was our front living room window. It was a large half hexagon shape with a deep window sill.  It is a nice accent area, and fun to decorate during the various holidays.  During other times of the year our Tiffany knock off lamp illuminates the window and the front of the house outside. Our cat loves to climb in and chase after various bugs who find themselves unlucky once he discovers them. It is also the perfect spot to place my stereo cabinet, which also acts as a nice window seat.  The downside is the ledge often gets dirty and is difficult to keep clean. I also wanted to add an accent and brighten the dingy white paint that constantly needed a touch up. I thought decoupage would be a nice option here. I had used a similar technique in a previous project Decoupage Mania Restyling your home with Mod Podge.  For that project I used scrapbook paper to cover a built-in wall vanity.  I decided to use fabric on this window sill project due to more decorative variety and the larger project area. Our living room is a neutral sandstone color and I chose a neutral flower pattern.  The advantage of using fabric makes it easier to remove if you want a change the look as opposed to using paper which tends to tear apart when you attempt to remove it.

I used a magic erasure to thoroughly clean the area before getting started.

DSC_0167

I cut two pieces of  fabric and lined up the images to create a seamless appearence in the middle of the sill.  The best part? The cut fabric doesn’t have to be perfect. Once the Mod Podge dries it is stiffer and easier to trim with a box-cutter knife.  Any excess fabric can be removed later.  I applied Mod Podge with a foam brush and placed the fabric over top.  I then applied Mod Podge over the top of the fabric.

DSC_0170

I allowed the Mod Podge to dry, trimmed away any excess fabric with the knife and applied an additional layer of Mod Podge over top and around the edges.

DSC_0171

Once dry, Mod Podge leaves a nice, clear protective and easy to clean surface.  It also adds a decorative touch in any room.  The styles of fabric and possibilities are without limits, and suddenly I have to urge to do more decorative sills throughout the house!

DSC_0193


Finished Decorative Fabric Decoupage Window Sill

DSC_0194


Neutral Floral Pattern-Fabric Purchased at Joann Fabric


DSC_0195


Materials:

Mod Podge

Fabric

Foam Brush

Box Cutter Knife

The Toilet Paper Roll Experiment: Part Two

Just think of all the toilet paper rolls that are discarded each day!  They serve their purpose and are tossed in the trash can without a thought. When I walked into the bathroom at work, I noticed a few sitting there waiting to be discarded.  Since my upcycling mission started, I tend to look at things a bit different.  I especially love to take something that most certainly would end up in the garbage and give it a second life. I snatched a roll and went home to craft The Spare a Square Project.

DSC_1122

The initial project was a success, and I realized these card board rolls can be used in organizing my craft room items.  There are many upcycle ideas on the web when it comes to cardboard rolls. One amazing example, can be found here.  Word got out around the office that I was starting to save these rolls from the trash for a project to be determined later.  Suddenly, they started appearing on my desk and before I knew it, I had quite a few of them thanks to my recycling and equally curious friends.  I think they were curious to see what exactly I planned to do with them!

DSC_1508

I was sitting in craft room pondering the idea and I decided to create craft supply wall storage. Initially, I was not sure what I would store inside them, that idea would come to me later.

First, I painted the inside of the tubes white with acrylic paint.

DSC_1509

Next, I looked through the fabric that I had available and decided on a “fun” colorful pattern to decoupage. I cut pieces of fabric that would be enough to cover the outside of the roll.  I applied Mod Podge to the it with a foam craft brush, and placed it on to the fabric.

DSC_1513

Once the Mod Podge was applied I “rolled” the toilet paper roll on the fabric, and it adhered nicely.

DSC_1514

I trimmed away any excess fabric with a pair of scissors.

DSC_1515

I repeated this process with all of them.  Once they were done, I used a high temp hot glue to glue them together. I arranged them in rows. Three at the bottom, then two then one. Like this:

DSC_1521

I touched up the white paint in spots particularly around the edges, and once dry, added a Mod Podge finish to the entire project.

DSC_1533

Now that the project was complete, I had to figure out what to store in it!  It didn’t take me long to come up with the idea of storing my smaller containers of paint, and it created easy access to any color I need.

And…I decided to hang it like this:

DSC_1540

Who needs a square, when you can have the whole roll?

Materials:

Six Large toilet paper rolls

Mod Podge

Fabric

Hi Temp Hot Glue Gun

White Acrylic Paint

Scissors/Foam Craft Brush, and a Paint Brush.
Vintage Wooden Wall Shelf Redesigned

Most of my recent trips to the thrift stores have been utterly disappointing.  It would seem that spring cleaning is the last thing on anyone’s mind.  It’s bitterly cold outside, yard sale season is long over, and the streets are blanketed in snow from our most recent weather event Hercules (Since when did we start naming snow storms??) Everyone seems to be walking around with a post holiday hangover causing many (myself included) to limp into the New Year. Luckily, I still have a few projects up my extremely bundled and layered sleeve to share with you.

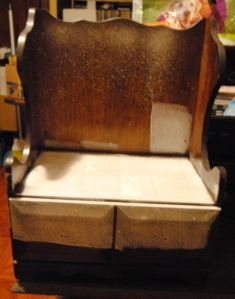
Although most of my thrift store trips have been uneventful, Every once in a while I still manage to find something unique.  I came across a really lovely and unique vintage wall shelf with a drawer.  I especially loved the curved sides and the drawer for storage.  It was in rough shape, but that didn’t deter me from placing it inside my cart.

Vintage Wooden Wall Shelf

When I originally purchased the shelf I had every intention of keeping it.  A blunder made during another project intended as a Christmas gift changed that and I had shift the original intention of this piece.

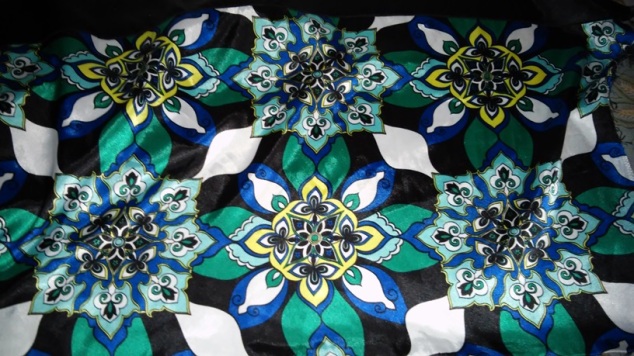
I lightly sanded the item with sand paper, and used a white latex primer to cover the piece.  I left the inside of the drawer alone as it was still in very good condition.  I decided to paint the piece black. This shelf has the potential to be hung in any room, so I wanted the color to go with any decor, and black is neutral. I painted all of the piece except for the drawer and shelf.  I planned to decoupage these areas later and didn’t want the dark color to bleed through the fabric. I used two coats of black acrylic paint and once it was completely dry added a layer of Mod Podge over top to seal it. I had some left over black and white damask fabric from a previous project.  I applied Mod Podge to the front of the door and shelf with a foam craft brush, I cut the fabric to fit as best I could as I would trim away any excess fabric later.  I made sure to line up the fabric design so that the piece would appear symmetrical.  I applied Mod Podge over top of the fabric allowing my nail to work the fabric into any grooves and once it was dry, carefully trimmed any excess fabric with a box cutter knife.

Black and White Damask Decorative Wall Shelf

Decoupage Black and White Damask Wall Shelf with drawer

I love damask designs and this was a tough piece to part with. My favorite project is draped in damask and this would match it beautifully. In the end I was happy to gift it to my sister to go with the chair I made for her in her bedroom, or perhaps it will go in her kitchen?  We shall see, as I offered my services free of charge to help her hang it!