The Shirt That Didn’t Fit: Clothing Repurpose

I was up late shopping one night when I came across a lovely shirt on Ebay.  I usually don’t purchase clothes unless I can try them on first, but I had recently ordered something and it worked out perfectly, so I was feeling braver than usual.

I received the item, and to my dismay it did not fit.  The seller had a no refund policy, so I attempted to relist the item for sale. Unfortunately, I didn’t have any luck reselling the item,  so I decided to utilize the shirt in a different way.  I loved the pattern and material, so I decided to re-purpose the item and use the fabric for decoupage.

20160114_191835

I carefully cut out the gold star pattern, and used a little Mod Podge to apply these to my kitchen back splash.  This added a much needed “pop” of color, and matched the kitchen decor perfectly.

Before:

DIY Kitchen Back Splash

After:

20160131_113806

I had some fabric left over, so I decided to use it to make an accent lamp for my office.  I had an empty spaghetti jar which would work perfectly for this project.  I applied Mod Podge to the exterior of the jar and used some twine to add a decorative quality to the base. I applied the twine with hot glue.

20160216_074721

20160218_215538

For more details on how to create a decoupage jar lamp, check out some previous On The Upcycle decorative lighting projects…

Spaghetti Jar Lamp

Pickle Jar Lamp


A Blizzard of Ideas: Basket Makeover

Getting snowed in has its privileges.  The family and I had a great weekend, despite being completely snowed in, during the East Coast blizzard of 2016. When mother nature gives you lemons, what else can you do but make some lemonade?  It was a perfect time for cooking, baking, and crafting, and the toddler apprentice and I did just that!

I picked up a lovely wooden basket at Goodwill about two weeks ago.  When I made my purchase, I was unsure on what I was going to do with it.  Some items I pick up are best left alone, while others benefit from a bit of “sprucing up.”

I decided to find a middle ground.  The lid needed quite a bit of TLC, but the inter woven wood on the basket looked great, so I did not want to alter this part in anyway, only try and compliment it.

20160114_192050

I decided to decoupage the lid, and accent the handles with black paint.  I struggled a bit with choosing a fabric that I thought would go well with the caramel colored wood.  I finally decided on a swatch of fabric that I purchased some time ago at a thrift shop.  It had earthy tones that I felt would mesh well with the original design elements on the basket.

I turned the basket upside down and used a black, fine tipped market to trace the lid on to the back of the fabric.  I then cut fabric tracing out with a pair of scissors. I painted the lid with white paint.  Once dry,  I generously applied the Mod Podge to the lid surface with a paint brush.  I applied the fabric, and smoothed it out with both hands.  This helps minimize wrinkles and air bubbles.  Once dry, I applied three more layers of Mod Podge on the top of the piece, and allowed it to dry between coats.

Once the lid was dry, I lightly sanded the areas I planned on painting.

I took a narrow bristled paint brush and painted the handles, and some of the detailing with black acrylic paint.  I applied three coats of paint total.  Once the paint was dry, I applied a layer of Mod Podge to the painted areas to seal it.

DSC_0333

In the winter, this basket will be a perfect place to store hats, scarves and gloves, and in summer it will be the perfect picinic basket or an accent piece with storage.

Materials:

Wooden Basket

White and Black Acrylic Paint

Mod Podge

Fabric of choice

Scissors/Sharpie marker/Paint Brushes (various)


Gone But Hopefully Not Forgotten: On The Upcycle on brief hiatus

You may or may have not noticed that I have been on hiatus.  I suffered a serious shoulder injury about a month ago which had sidelined me from crafting and blogging for a while.  I had several bigger projects lined up (Stay Tuned) that have been delayed for the moment while I recover.  That being said, even an injured crafting hand cannot remain dormant for long!  That means I have been concentrating on smaller projects to keep busy, and aid me in my therapy.  The injury afforded me the opportunity to focus on my new On the Upcycle Etsy shop.  I created several new trinket boxes, and decorative decoupage light switch covers.  Be sure to stop in to my Etsy Shop and check out these reasonably priced handmade items!

Click below to visit my page on Etsy

en_isell_1

New Items Added:

il_570xN.827535432_cbii

Whimsical Celestial Trinket Box

il_570xN.839586146_f2cl

Bichon Frise Decorative Outlet Cover

il_570xN.827343487_ktsl

And Much More….

Thank you for your continued support and readership!

What’s Old Is New Again: Decoupage TV Trays Are Back!!!

The wooden TV tray.  A functional piece of furniture.  Although I think we can all agree these tables are useful, but they lack the design qualities seen in other pieces of furniture.

TV Tray before

Way back in 2013, I came up with an idea to turn these boring tables into something fun.  My first tutorial Decoupage Team Sports Trays explored the option of decoupaging these trays with Mod Podge.  It was a huge success and since then, It remains one of my most requested items.

dsc_0097

They also make wonderful gifts for the sports fan in your life! Recently I made two new tables. Both were gifts, one for a friend’s birthday, and the other was presented as a Christmas present.   Nothing new here, but thought I would share the new additions so you know what I have been up too!

20141217_212059

Philadelphia Flyers TV Tray

20150715_223709

New York Giants TV Tray

Want to See more?  Check out these past blog entries on Decoupage TV Trays!

Have a special someone on your gift list that is a sports fan?  Then this is the table for you…

Sports Trays…Revisited!

Yankees Decoupage Sports TV Tray

Washington Redskins Decoupage TV Tray

Want to show off your school pride?  TV trays are great for doing homework too!

Smells Like Team Spirit! 

DSC_0841

20140601_191920 (1)

Not a sports fan? No school spirit?  No Problem!  There are many other themes you can use to create a personalized tray table.  LP liner notes make great decoupage and are unique!

Rescued Vinyl TV Tray Decoupage

DSC_1270

Take These Broken Wings: Fairy In A Jar Kids Craft

My dutiful husband was mowing our front lawn the other day, and accidentally broke one of our plastic solar lights.  The top of the light still continued to function, and when day turned into night, it glowed as if to say “don’t throw me away, I am not done yet!”

I often struggle to find new ideas for projects, but I have come to realize the best ideas come to me without even trying. I began to think about a way I could re-purpose the light.  Then, my mind wandered off as it often does, and I also pondered a separate incident that occurred during a trip to Joann Fabric earlier in the week.  My daughter picked up a small ceramic yard fairy. She wanted to carry it around the store.  It was small enough, so I allowed it.  She accidentally dropped the fairy and it broke in two. Exercising the “break it and you bought it moral policy”, I paid for the item hoping I could glue it back together when we got home. Then both memories collided and an idea to merge these broken items together was born. I would make a “lighted fairy in a jar” A paradise for a convalescing fairy with a broken wing.  I didn’t have a jar handy, so I used a glass vase I had lying around.  I also had some decorative marbles and sprinkled them on the bottom of the vase.

I then began to create a suitable home for our little fairy.  I used artificial flowers, trimmed and glued them inside the vase to create a suitable habitat for our little broken friend.

DSC_1578

I carefully placed the fairy inside the glass vase.  Before dropping her in, I used hot glue to cover the bottom of the statue to properly set her in place.  I intentionally applied random droplets of glue to give the appearance of condensation thus providing a drink for our little “pet”

Now that the scene was set inside the glass, I  began to come up with a way to use the solar light to illuminate the vase,  I had a plastic lid handy, and decided to use the hot glue gun to adhere the plastic light to it.  I traced the light with a black sharpie onto the lid and cut a hole in the top to expose the solar panel. I glued the modified light and lid to the top of the vase, allowing the solar light to drop in place and illuminate the jar.  I added some additional blue marbles around the top rim of the jar for decoration.

It all came together something like this:

fairy in a jar

I would recommend this project is done under strict adult supervision due to the hot glue involved.  I actually dread using the high heat gun, because I always manage to burn myself with it at least once no matter how careful I am!

When I showed my daughter her fairy jar gift she loved it and decided to give it a kiss.  My heart just melted!  What little girl wouldn’t love her own “pet garden fairy”

20150718_165653-1[1]

As the night turned into day her fascination only grew as the jar began to glow.  Then it occurred to me all the possibilities and jar themes you could come up with.  Let your imagination run wild and create a wonderful garden keepsake.. and remember broken things are beautiful!!!!

DSC_1579

Materials needed:

Jar or Vase

Plastic Lid

Solar Light (top)

High Heat Hot Glue Gun/Glue Sticks

Decorative items for your Jar:

Child’s toys figurines

Rocks, Plants, Marbles:

Create any scene you wish!

On The Upcycle Shop- Now Open On Etsy!

il_570xN.794141738_h6em

This Month, “On The Upcycle” has launched a small shop on Etsy!

On The Upcycle Shop will feature small decoupage items with additional items coming soon!  Each item is handmade and priced to sell!  Be sure and check us out and check back often!  Items will be featured as they become available. This month I am featuring various stained and painted wooden trinket boxes.

il_570xN.793913161_a2z2

These lovely boxes have metal hinges and magnetic enclosures.  Sizes and styles vary.

Stay tuned: On The Upcycle has a few interesting projects on the horizon. I have picked up a couple of really nice chairs,  and a beautiful early century window with multi colored glass I am eager to start. Hope everyone is enjoying there summer so far!

To visit the OntheUpcycleShop on Etsy—-Click Here!

Hot Summer Nights: Paradise By The Back Porch Light

This past memorial day weekend, my husband and I were determined to get the yard ready for summer.  My daughter received an Easy Set Intex Pool from her Uncle and Aunt for Christmas and we could not wait to get the pool setup and operational.  My daughter’s 4th birthday this year will have a pool party theme, and the date for the party is quickly approaching.  My husband and I leveled out the ground in the area the pool would be placed.  We laid down a tarp and spread the pool out.  These inflatable Easy Set’s are great starter pools, and in our case the simpler the better since this is our first attempt at putting up a pool.

20150523_141004

We inflated the ring with a pump, and from the inside smoothed out the lining.  It took all day to fill.  The next day, we hooked up the filter, placed chlorine tabs in the floater, and assembled the ladder.  The water was very cold, so I hopped in to the pool for a test run.  For the most part everything went great and the set up was easy.  I was disappointed to find some parts in the lining that were not as smooth as we had wanted.  I can’t stress enough the importance of making sure the ground is clear of any debris and level.  Even after all our careful work, what seemed smooth at the surface was not always the case.  Once the weight of the water pressed the ground flat, some rocks and roots underground seemed to appear out of nowhere through the lining.  That being said the only way to remedy this would be to drain the pool and remove the debris from the area to smooth it out.  Until it is necessary to do so, we are going to take our chances.  I would feel guilty wasting all that water!  Luckily the pool came with plenty of patches if needed.

20150524_131400[1]

We purchased a few fun summer signs from Dollar Tree and lined the fence with them for added decoration.

I  also accomplished a few smaller projects.  I had a decorative metal star that I picked up at Christmas Tree Shop.  It was on clearance and I was never happy with the tan color.  I surmised that this was most likely the reason why it was on clearance.

20141108_172420[1]

Since it was Memorial day and the house was decorated in Americana….

20150509_132943-1[1]

I had some extra Rust-Oleum red spray paint, and I sprayed on a quick coat.  I like the star better now that it is red and I purchased it for half the price!

20141108_201050[1]

The other area I wanted to address was the corner of the yard by the pool. There is a rather large tree stump in this area.  Some time ago, I blogged about ideas here.

I struggled with what to do with this stump for some time.  This weekend that changed.  I decided to make it a fun project for my daughter and I to do together.  I had an old broken wooden TV tray.  I removed the table top from the legs and screwed it on to the tree stump surface.  My neighbor had given me some decorative, shells, glass pebbles and decorative rock. I thought it would be fun for us to create a mosaic table top for it.  I used some old tile grout and glue in one and spread it onto the table surface evenly.  The toddler apprentice and I then applied the rocks and glass pebbles.  We wiped off any excess grout and allowed it to dry overnight.  I used the unused legs of the TV tray as a garden trellis, another great re-purpose!  My goal was to use as much of the table as possible. Mission accomplished!

20150525_172623[1]

I placed the shells around for decoration.   Now Mommy has a place to put “her” sippy cup and relax by the pool, while my daughter has fun exploring and playing with the various sea shells.

20150525_173659[1]

20150525_172714[1]

Since this spring has been a bit sparse in the rain department, our grass took a hit and much of it died.  Once all the yard work was done, we raked the yard and spread out grass seed in the hopes of bringing our lawn back to life!  Once the grass grows under our feet, our little backyard oasis will be complete!

What do you have planned for your backyard oasis?  Do you have any summer projects you are eager to complete?  How do you like to kick off summer?

On The Upcycle Revival: Vintage 1934 Lane Waterfall Art Deco Hope Chest

Every once in a while that special piece of furniture falls into your lap unexpectedly and without warning.  Now that the word is out and friends and family are aware of my blog, I have had interesting items rescued and brought to me to experiment on.  That was the case with this next project which also proved to be my most challenging yet. The same friend and co-worker who brought me my “You had me at half table” project approached me about a cedar chest she had sitting in her garage.  She needed to make room and could no longer keep it, and wanted to know if I would be interested in giving it a good home, and taking it off her hands. The outside of the chest was in rough shape, but the inside was still perfect.  After all these years, it managed to maintain its trademark cedar smell.  She inherited the hope chest from a neighbor who was about to place it out on the curbside. My friend rescued it, recognizing this diamond in the rough deserved a second chance at life. Adding to the excitement was the fact that I had always wanted a hope chest of my own.  I didn’t mind having to put some work into restoring one, and I graciously accepted the offer.  I was really excited and looking forward to working on a special piece like this.   Initially I was concerned about transport, but I was relieved when it fit in the backseat of my car.  I already had a spot for it in my bedroom. It seemed like it was fate.  For a while,  it sat untouched and the veneer began to peel, and I peeled it off little by little, while I figured out a plan to bring it back to life.

DSC_1002

I began researching the piece online. I opened the trunk and inside I found a card outlining the moth insurance policy.  The card also encouraged it’s customers to “buy victory war bonds.”  I knew from that moment on this was a vintage piece.

lane 2Lane Card

The tag also listed the maker of the piece.  The Lane Company Altavista, VA.  The name was also burned into the inside of the lid.

DSC_1058

Founded in 1912 by John and Ed Lane, The Lane Company of Virginia, became one of the leading makers of Hope chests in the United States during World War I and World War II.  During that time, it was tradition for young girls to have a hope chest to bring with them into a marriage.  The company launched a massive ad campaign which even included child star Shirley Temple  as a popular spokesperson for the company.

20c67b90a939d58165359ab106c7e366

Every piece was stamped with a unique serial number and style number. Reversing the serial numbers is what helped me determine its age. This one was manufactured on 8/18/1934.  The chest was waterfall design done in an art deco style which was also popular during this time.

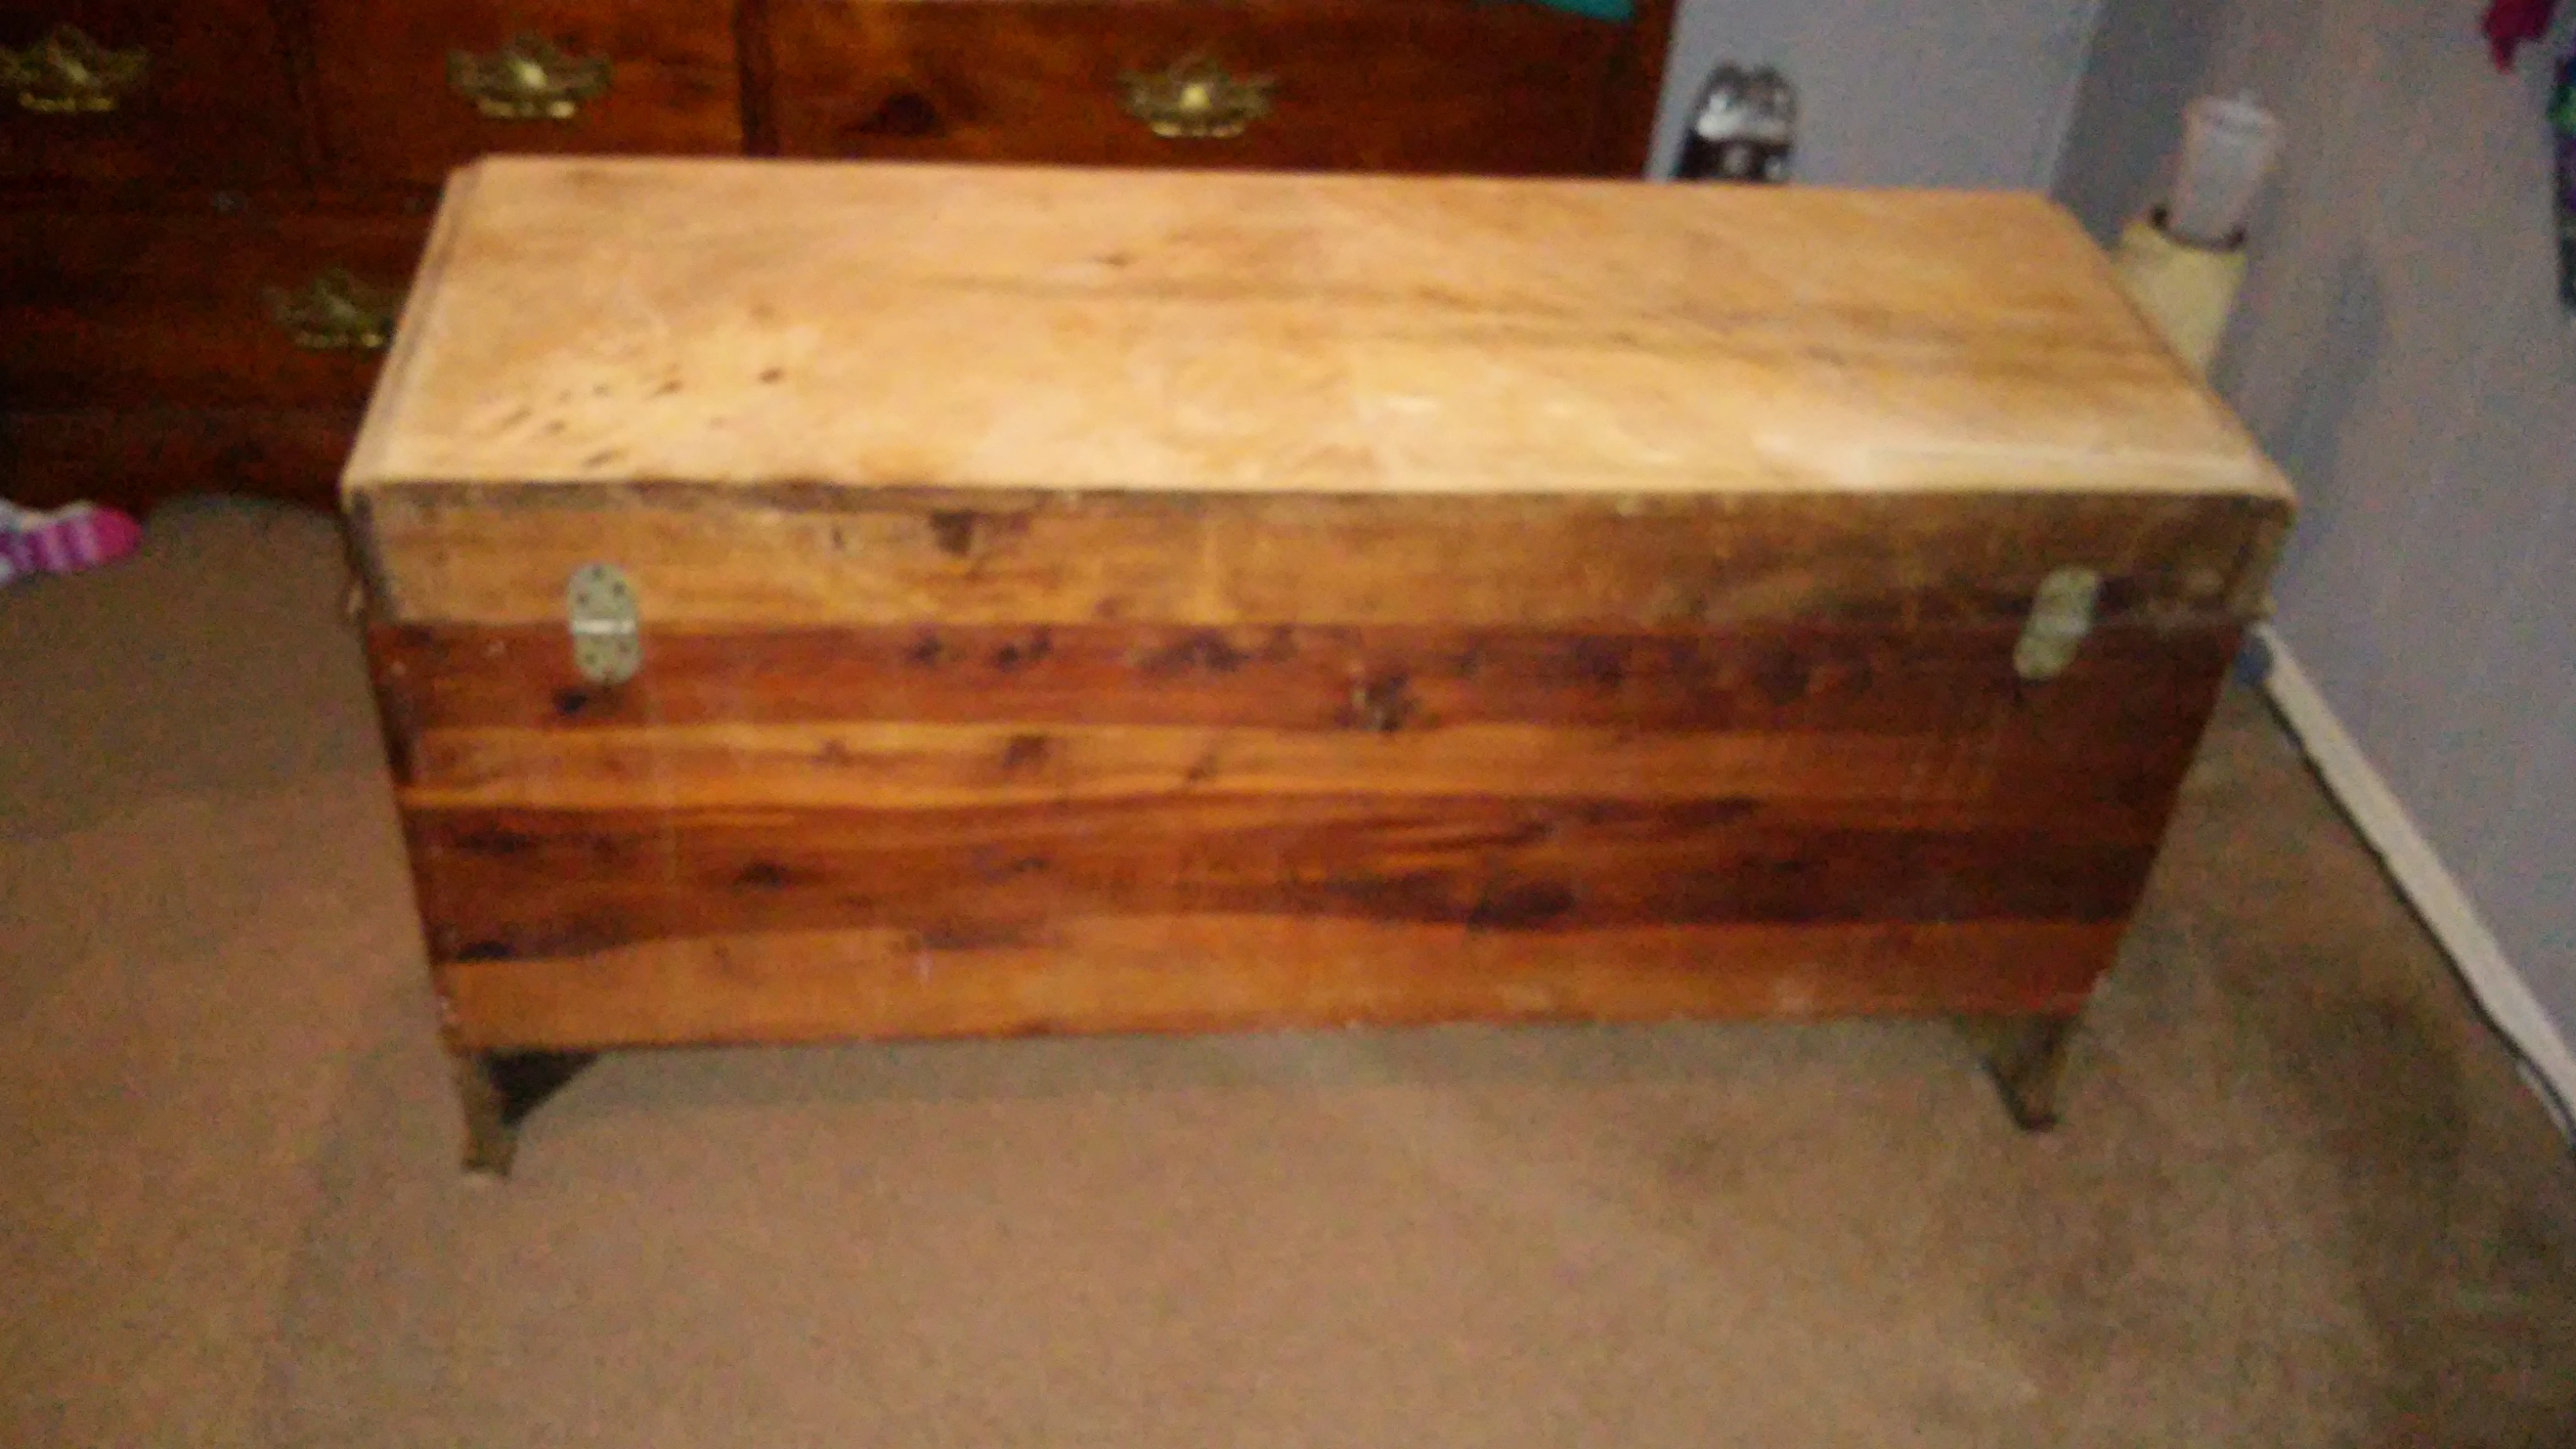
The chest itself was in good shape, but the veneer was not.  It was stored in a damp place for a long time,  and much of it was peeling or bubbling up. I knew removing this would take a lot of work.  I also discovered that the original lock had been recalled. Sadly there have been cases of children suffocating inside after becoming trapped as recently as 2014. The good news is Lane still has replacement locks available on their website.  Due to safety concerns, I went online to order one here.  The lock ships in 4-6 weeks.  It is important when purchasing vintage furniture to pay attention to recalls.  I was glad to have stumbled upon this fact during my research by pure accident.

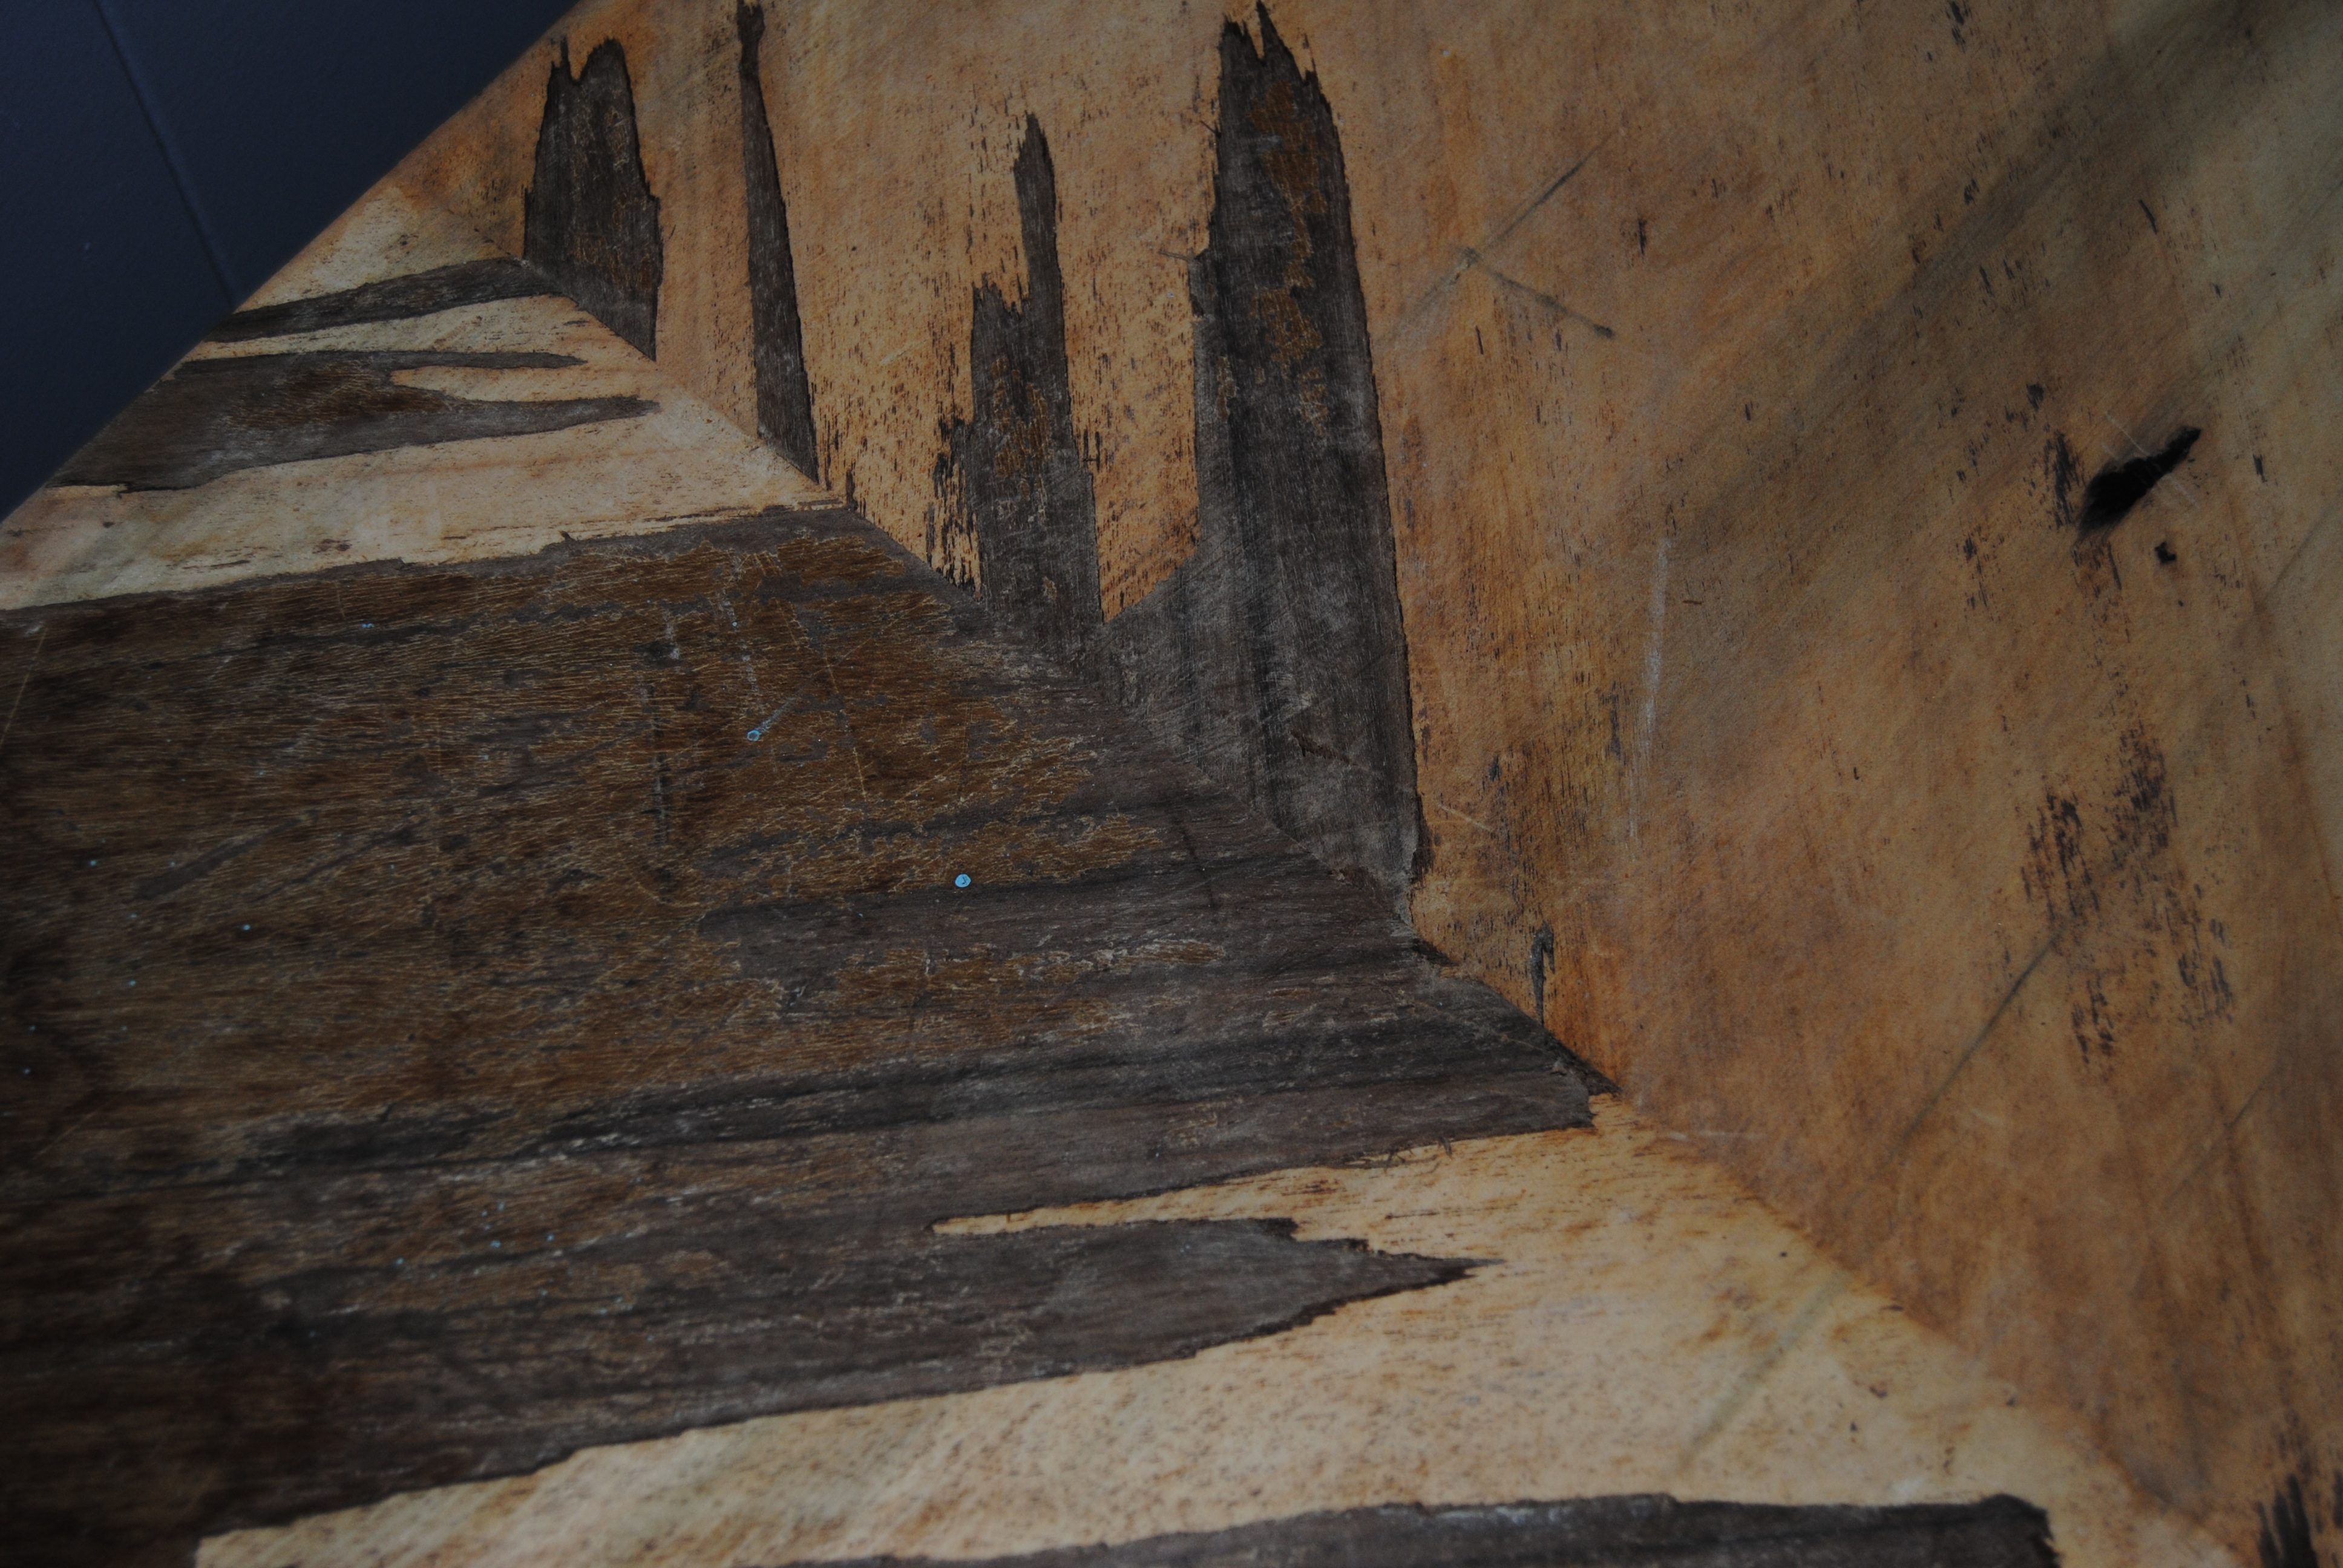
With minor cracks in veneer, it is possible to buy wood filler/puddy and “patch” and sand the areas, but in this case the veneer would have to be removed entirely in some areas. I read a few articles online, and I tried various techniques for easily removing veneer.  Let me start off by saying there is no easy way to remove veneer. I found it to be a long, risky and tedious task.  The one technique  that worked best was using a hot iron and a damp towel. I soaked the towel in warm water and placed it on the area of veneer I wanted to remove.

DSC_1004

I then heated up the iron and placed it on the area allowing it to sit for several minutes.  This softened the glue enough to allow me to use a scraper to remove large pieces of the veneer.  unfortunately, smaller pieces broke off and I ended up repeating this process many times.  The biggest challenge was scraping and removing the veneer without damaging the wood underneath.

DSC_1000

Please also note that once you use your iron for this task, it becomes designated only for this task.  The glue from the veneer burns the iron permanently and it can never be used to iron clothing again. This process was completed during the course of a few days.  I would work on a small area nightly.  The veneer removal seemed to be taking forever until it was boosted by a snow day and some unexpected free time.

20150305_222555

I used a belt sander to even out the larger areas and hand sanded the more delicate and smaller areas. The areas on the piece that still had veneer I carefully hand sanded.  Using a belt sander can cause damage to the veneer.  Once the sanding was completed, The piece was ready to stain and seal.

20150305_225309-1

20150305_175139

I trudged up to Home Depot in the snowy slush and shopped for a suitable stain and polyurethane seal for the exterior.  The colors that I initially wanted they did not seem to have in stock.  This did not make the aisle look any less intimidating to me.

20150306_093046

I decided on a color called “Cognac” and a clear semi-gloss polyurethane sealer.  I already had a small can of Minwax Jacobean at home that I was planning on using for some of the trim.

20150306_112823

I began applying the stain and it was a little darker than I expected, but it closely matched our bedroom furniture like I had hoped.

20150306_113835

I then painted the entire piece.  I was happy with the Varathane brand stains as it dried quickly and had less odor compared to other stains I have used in the past.

20150306_124502-1

I  used the Jacobean colored stain to paint the trim and highlight the grooves and detail in the lighter wood trim.  To me adding the darker color helped bring out some of the unique design qualities of the piece.  It took about two coats of stain to cover all the areas.  Once the stain was dry (It took about 24 hrs) I applied two coats of the clear semi gloss polyurethane to seal the chest.

DSC_1061

Although I could not restore the chest to its original state, I am pleased with how elegant the piece looks now.  It fits in beautifully in our bedroom and I look forward to storing special items inside it and treasuring it for years to come.

DSC_1060

Before and After

1934 Lane Hope Chest Before and After

Materials used:

Old Iron

Old Towel

Paint Scraper

Paint Brush Large and Small (for detail)

Wood Stain (color of choice) and Polyurethane Sealer

Sand Paper

Belt Sander (Optional)

Fabulous Frida: Dollar Store Decoupage

Beauty can present itself in many forms.  That is why I find the works of Frida Kahlo so intriguing.  The subject matter of her paintings are often grotesque and painful, but one can’t help being drawn to it.  Despite the many adversities life had to offer her, Kahlo never let it defeat her. She was a modern woman, ahead of her time, and created artwork that remains relevant today. Born in Mexico City around the start of the Mexican revolution,  At age 6 she contracted Polio which caused her to walk with a limp. As a young women, she was involved in a nearly fatal bus accident that left her with severe lifelong and painful injuries including her inability to carry a child.  Her heart was broken and this was reflected in many of her paintings, most of which were self portraits.

Self-Portrait-1926

Frida Kahlo pictured below with her partner and muse, painter Diego Rivera in 1932.

Frida_Kahlo_Diego_Rivera_1932

My sister is also a fan of Frida.  She recently had a surgery that would take some time and perseverance to recover from.  I wanted to make her something special to lift her spirits and inspire her while she was convalescing. I thought something with a Frida Kahlo theme could do just that.  I had a small wooden box that was far from special, but would be perfect to store her medications in.

DSC_0762

First, I cleaned the box thoroughly removing dust and dirt that accumulated during storage.  I printed out a 4×6 Frida print, and applied Mod Podge to the box with a paint brush.  I then carefully applied the print to the box.

DSC_0763

I used black and golden rod acrylic paint to finish off the box redesign. Once the box dried, I used Mod Podge to seal the project.

DSC_0765

Make your own art inspired box Dollar Store Craft

Imagine the possibilities!

Materials:

Mod Podge

Print of choice for decoupage

Acrylic Paint

Scissors and paint brushes

Feeling the Frida Frenzy?  Check out these other On the Upcycle Frida Kahlo inspired projects

Frida Kahlo Decoupage TrayFrida Kahlo Decoupage Art Case

A Pre-Christmas Miracle: Altered Upcycling’s Holiday Giveaway!

I couldn’t wait to share the news with all of you! The very talented Mahe Zehra Husain (MZ) from Altered Upcycling fame is at it again!  This year she is organizing the biggest holiday giveaway EVER! From the 15th of November to the 25th of December.  Altered Upcycling is giving away different e-books and products weekly.  All you have to do is visit: http://www.alteredupcycling.com/christmas-giveaway join Altered Upcycling’s Facebook Page and sign up on the right to have the links sent to your inbox.  It’s that simple!

1451464_674360959264580_1206827235_n

The Green Craft Lifestyle Christmas Addition available November 15th through the 21st of November features an “On The Upcycle” Project Pickled Lamp: “On The Upcycle” Christmas Craft

DSC_1088

Other Freebies include:

ALICE IN WONDERLAND DIGITAL DIORAMA KIT
THE MIXED MEDIA COOKBOOK
PAPER DOLL BONANZA
PLANNERS

Be sure and check it out!  I can’t think of a better way to treat yourself for the holidays!