Where is Summer? The Birds Are Angry: Decoupage Kids Craft Bird House

It hasn’t felt much like summer over here.  The pool is up, the flowers are planted and beginning to blossom, but it is 52 degrees and the rain is cold! I am left to ponder the question, where is summer?

The good news: Rainy days are a great time for kids crafts.  All the more reason to plan a project the toddler apprentice and I could accomplish together.  The little one loves to watch The Disney Collector on You Tube. The DC Collector has become a bit of an internet phenomenon among the five and under crowd, and my daughter is no exception.  She enjoys watching those carefully manicured hands opening and revealing various toys and treasures. It was while watching these videos my daughter discovered her love of Angry Birds.  The birds must be angry that the weather has not been cooperating!  They could sure use a house I thought to myself!

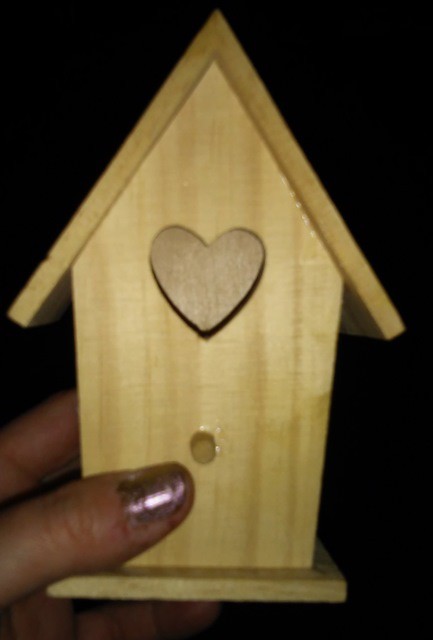
I also thought decorating a bird house would be fun project to do together. I purchased an unfinished,  wooden bird house at Joann Fabric.  They were on sale for .99 cents.

20150514_225726

I then went online and downloaded some Angry Bird images.  You can use character stickers if a printer is not available.

20150514_224224[1]

I cut the images out with a pair of scissors and placed them aside.

20150514_225456[1]

We painted the bird house together using red and blue acrylic paint.  It required two coats.  We then placed the painted bird house aside to dry.

20150514_232054[1]

Once it was dry, I used Outdoor Mod Podge to apply the images to the bird house.  I then added a layer of Mod Podge over top of the image. Although Outdoor Mod Podge provides added protection from the elements, if left out it will eventually weather.  I added a coat of polyurethane to provide additional protection and prolong the life of the bird house.

20150518_185404[1]

Once the bird house was dry we used a “C” Shaped hook like this one to hang it.  Lets hope that now that our little backyard friends have a place to call home, they won’t be such “Angry” little birds anymore….

Materials Needed:

Unfinished Wooden Bird House

Angry Birds, images or stickers

Outdoor Mod Podge

Red and Blue Acrylic Paint

Clear Polyurethane (optional)

Paint Brushes/Scissors

C Shaped Hook (For Hanging)

Two Years, One Sale- On The Upcycle

This April 27th 2015 marks the two-year anniversary of this blog and my creative mission to reuse, re-purpose and restyle.

2-years-old

For me, Upcycling is all about having fun and being creative with items that would otherwise be discarded.  The biggest challenge for me has been the writing. I love to craft, but I struggle with writer’s block from time to time.  The ideas for projects often come but the words to adequately describe them do not. Although I am not blogging with quite the same frequency as I once was, I am still happy that I was able to continue and complete a few larger and more challenging projects this past year, like my Lane Cedar Hope Chest. After two years of creating I am inevitably left with too many items and not enough room to keep them all. I was excited to hear that my daughter’s school is sponsoring a flea market in early May.  This seemed like a great oppurtunity to have my first “flea market experience.” I have never tried to sell my projects before, so this is a huge first step for me.  What better way to re-energize and make room for new projects?

It’s spring cleaning time for On The Upcycle. That being said, it’s also a fun time to squeeze in a few smaller projects in the days leading up to the sale.

I love wooden boxes and picked this one up for 99 cents at Goodwill.  I didn’t care for the boxes original design, but the box itself was in great shape.

20150419_201455[1]

I used a spray on white primer to properly cover the previous design on the box.

20150419_212220[1]

I had a nice celestial print.  I have been in a colorful mood lately and wanted to utilize a design with a lot of color

20150419_212452[1]

I applied Mod Podge with a brush, and placed the print on the box top and front.

20150419_212639[1]

I painted the box blue and pink to match colors contained within the print

20150420_212842[1]

This whimsical celestial themed box is one of the items crafted specifically for the sale.

20150420_212650[1]

Here are a few photo’s of previous projects I have agreed to part with for the upcoming sale:

Peacock Table
peacock table before and after

Star Wars Kid Chair:

Star Wars Themed Fabric Decoupage Chair

Strawberry Shortcake Kids Chair:

Upcycled Strawberry Shortcake Kids Record Chair

Kids School Desk:
Upcycled Kids School Desk

Happy Earth day to all of my friends!! How are you celebrating today? Do any of you have experience with Flea Market sales? I would love to hear from you! Any tricks of the trade or friendly advice?

Scrap Fabric Upcycled Candle/Tea Light Holders

There is nothing I love more than decorative lighting and candles!  They help create a cozy, relaxing environment in any room and some candles are aromatic as well.  I especially enjoy the pumpkin and apple pie scented candles.  Once the candles burn down, you are left with the glass and some left over wax.  Sadly, these items often get discarded, but each of these can be restyled into decorative tea light holders using a bit of Mod Podge and fabric scraps.

First, I used a butter knife to carefully chip away at the leftover wax.  Once the wax was removed I used a damp paper towel to clean the inside.  I applied Mod Podge to the outside of the candle holder with a paint brush.  I cut a small piece of scrap fabric measured to fit the outside of the candle.    I wrapped the fabric around the outside of the glass and applied Mod Podge over top of the fabric to seal it.  These are simple to make and are a great way to recycle used candles and fabric scraps.

Recycled Candles made into decorative tea light holders

Upcycled Candle holders made with fabric and Mod Podge

DIY Walkway Character Happy Birthday Signs

What a day yesterday! There is nothing like a 2 yr old’s birthday party! Fun and Exhausting.  Certainly worth it to make our daughter’s day as special as possible!  Our theme this year was “American Sprout”  My daughter is a HUGE fan of the PBS run Sprout channel.  http://www.sproutonline.com/

Since it was Memorial Day weekend, we decided to incorporate her favorite Sprout characters with a Patriotic Theme.  Our original plan was to have an outdoor BBQ.  We changed this because as incredible as this may sound, It was cold and windy outside!  (Yes, I did say it was Memorial day weekend!)  Not very summer like weather.  Of course the kids could still play outside, but not your typical summer activities. It became an indoor/outdoor event. The kids didn’t seem to mind.

One of the home made decorations I wanted to share with you are the Sprout character pathway signs.  I was very happy with how these turned out and they held up extremely well despite the windy weather.  I found some great birthday character pictures.  I used cardboard, cutting the pieces into squares.  I painted the front various colors (Erin’s theme was red, white and blue) and the backs I painted black for continuity and to cover the cardboard.  I glued the images to the cardboard.  In this case, since I had the Mod Podge handy I used a light coating to glue them down.  I then tried to think of a way to anchor them into the ground and I am not sure what made me think of it, but I had these wooden BBQ skewers that I thought would work perfectly!  They are basically just a long toothpick and I slipped the skewer through the middle of the cardboard leaving half exposed to go into the ground no glueing required!

Image

I also recycled some some old party decorations.  I made this Birthday sign featuring Chica from the Good Morning Show and Jim Henson’s The Pajanimals.

Image

Remember that Mod Podge character tray?  Well it went to good use and the cupcakes didn’t last very long!

Image

It was a great time to celebrate Erin!  Happy Birthday to me XOXOXO

P.S. Do you like the dress?  Another money saving tip: Once Upon A Child. Great bargains on kids clothes and toys gently used.  Erin is wearing spring dress with detachable bolero jacket and  pink tights only $9.50 at Once Upon a Child http://www.onceuponachild.com/ check them out!

Image

Sesame Street Birthday decorations made from construction paper

Image
As we get closer to our daughter’s 2nd birthday party this Saturday, I thought I would share some tips from last year’s party.  One of the more expensive elements of throwing a party, other than food is the party decorations.  My husband and I always try to follow a budget the best we can.  We plan, make lists and try to keep costs down, but in this current economy that can sometimes be difficult.  Our theme last year was Sesame Street and since my daughter is still obsessed with these characters, I didn’t stray too far this year from her 1st birthday theme.  Her theme this year is all her favorite Sprout channel characters with a patriotic twist in celebration of Memorial Day.  Stay tuned for more on this idea.

Last year, I created most of her decorations from construction paper and glue.  I searched the internet for all her favorite Sesame characters and used the more basic cartoon images as a guide for making the different characters.  Most of the characters are based on simple shapes, so I drew these shapes onto the construction paper, cut them out and glued together to form the individual characters.  Pretty simple, cost effective, and I think they turned out great and are unique in their own way. I also summoned my old elementary school days cutting out strips of construction paper and making paper chains.  I also used re-cycled gift bags and anything else I could get my hands on, cut out and make into a party decoration.  There are so many great ideas on Pinterest as well, much more than I could ever try myself.  Let your imagination run wild and in the process save a little money!

Elmo Birthday Decoration

Sesame Street sign made from construction paper

Bert and Ernie Birthday Decoration

Oscar Trash Can

Sesame Street Decorations