The Shirt That Didn’t Fit: Clothing Repurpose

I was up late shopping one night when I came across a lovely shirt on Ebay.  I usually don’t purchase clothes unless I can try them on first, but I had recently ordered something and it worked out perfectly, so I was feeling braver than usual.

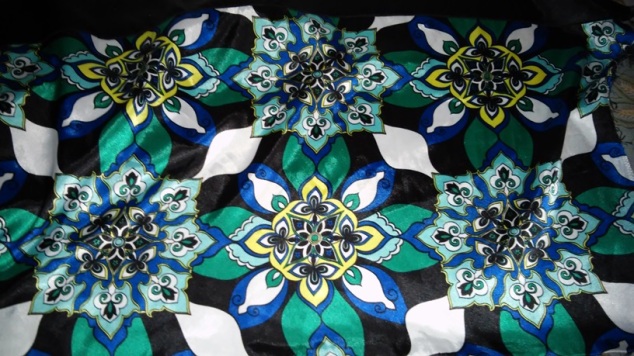
I received the item, and to my dismay it did not fit.  The seller had a no refund policy, so I attempted to relist the item for sale. Unfortunately, I didn’t have any luck reselling the item,  so I decided to utilize the shirt in a different way.  I loved the pattern and material, so I decided to re-purpose the item and use the fabric for decoupage.

20160114_191835

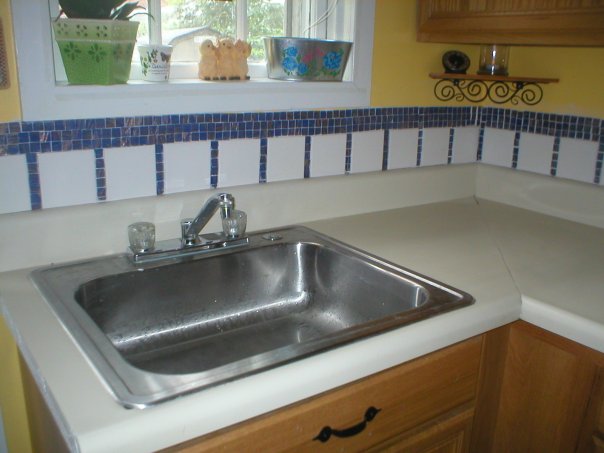
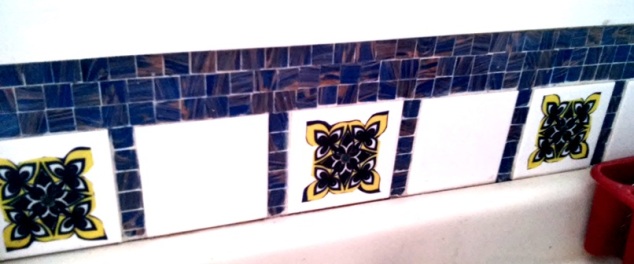
I carefully cut out the gold star pattern, and used a little Mod Podge to apply these to my kitchen back splash.  This added a much needed “pop” of color, and matched the kitchen decor perfectly.

Before:

DIY Kitchen Back Splash

After:

20160131_113806

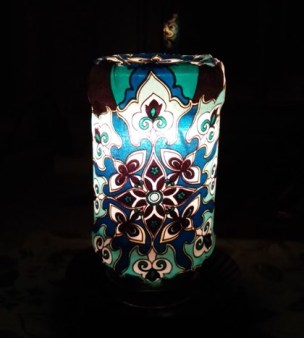
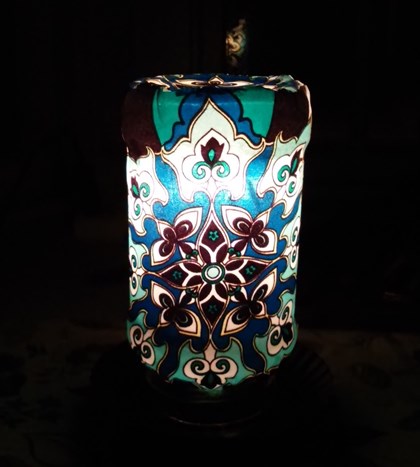
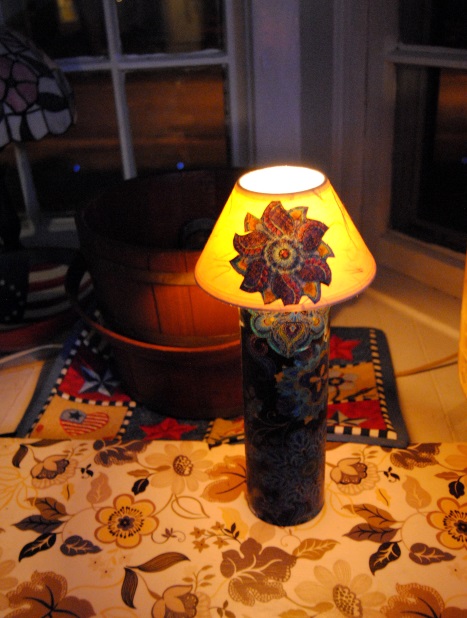
I had some fabric left over, so I decided to use it to make an accent lamp for my office.  I had an empty spaghetti jar which would work perfectly for this project.  I applied Mod Podge to the exterior of the jar and used some twine to add a decorative quality to the base. I applied the twine with hot glue.

20160216_074721

20160218_215538

For more details on how to create a decoupage jar lamp, check out some previous On The Upcycle decorative lighting projects…

Spaghetti Jar Lamp

Pickle Jar Lamp


What’s Old Is New Again: Decoupage TV Trays Are Back!!!

The wooden TV tray.  A functional piece of furniture.  Although I think we can all agree these tables are useful, but they lack the design qualities seen in other pieces of furniture.

TV Tray before

Way back in 2013, I came up with an idea to turn these boring tables into something fun.  My first tutorial Decoupage Team Sports Trays explored the option of decoupaging these trays with Mod Podge.  It was a huge success and since then, It remains one of my most requested items.

dsc_0097

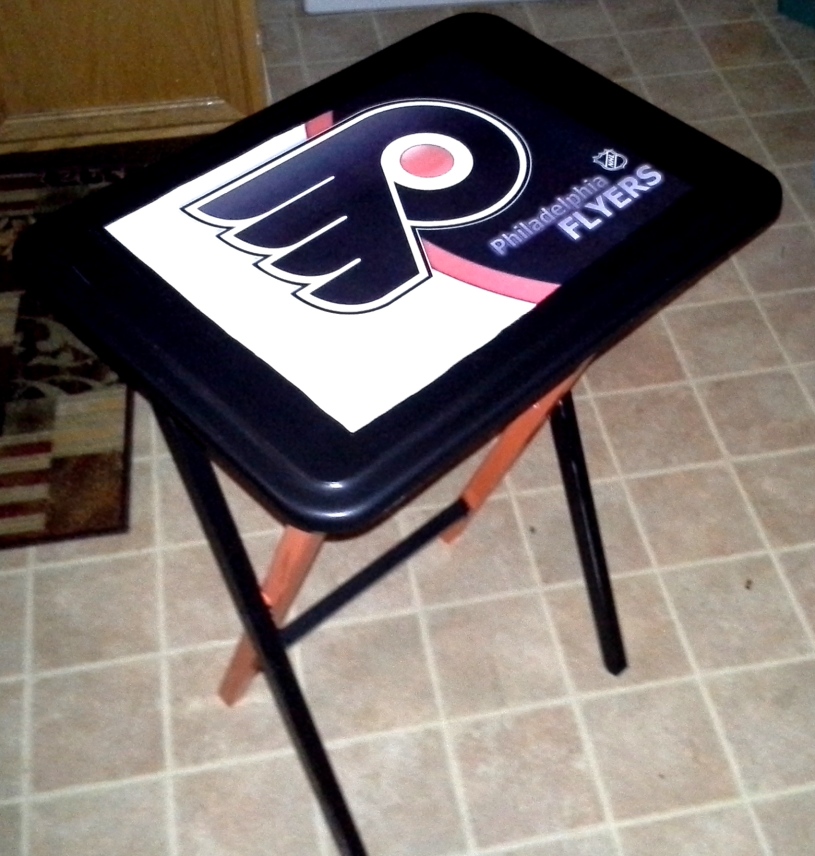
They also make wonderful gifts for the sports fan in your life! Recently I made two new tables. Both were gifts, one for a friend’s birthday, and the other was presented as a Christmas present.   Nothing new here, but thought I would share the new additions so you know what I have been up too!

20141217_212059

Philadelphia Flyers TV Tray

20150715_223709

New York Giants TV Tray

Want to See more?  Check out these past blog entries on Decoupage TV Trays!

Have a special someone on your gift list that is a sports fan?  Then this is the table for you…

Sports Trays…Revisited!

Yankees Decoupage Sports TV Tray

Washington Redskins Decoupage TV Tray

Want to show off your school pride?  TV trays are great for doing homework too!

Smells Like Team Spirit! 

DSC_0841

20140601_191920 (1)

Not a sports fan? No school spirit?  No Problem!  There are many other themes you can use to create a personalized tray table.  LP liner notes make great decoupage and are unique!

Rescued Vinyl TV Tray Decoupage

DSC_1270

Take These Broken Wings: Fairy In A Jar Kids Craft

My dutiful husband was mowing our front lawn the other day, and accidentally broke one of our plastic solar lights.  The top of the light still continued to function, and when day turned into night, it glowed as if to say “don’t throw me away, I am not done yet!”

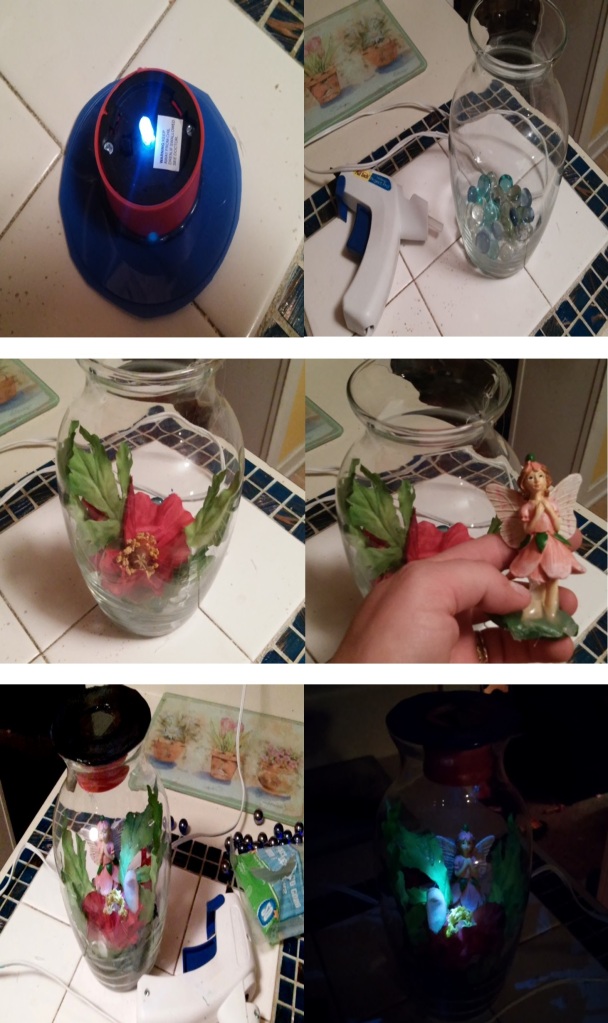
I often struggle to find new ideas for projects, but I have come to realize the best ideas come to me without even trying. I began to think about a way I could re-purpose the light.  Then, my mind wandered off as it often does, and I also pondered a separate incident that occurred during a trip to Joann Fabric earlier in the week.  My daughter picked up a small ceramic yard fairy. She wanted to carry it around the store.  It was small enough, so I allowed it.  She accidentally dropped the fairy and it broke in two. Exercising the “break it and you bought it moral policy”, I paid for the item hoping I could glue it back together when we got home. Then both memories collided and an idea to merge these broken items together was born. I would make a “lighted fairy in a jar” A paradise for a convalescing fairy with a broken wing.  I didn’t have a jar handy, so I used a glass vase I had lying around.  I also had some decorative marbles and sprinkled them on the bottom of the vase.

I then began to create a suitable home for our little fairy.  I used artificial flowers, trimmed and glued them inside the vase to create a suitable habitat for our little broken friend.

DSC_1578

I carefully placed the fairy inside the glass vase.  Before dropping her in, I used hot glue to cover the bottom of the statue to properly set her in place.  I intentionally applied random droplets of glue to give the appearance of condensation thus providing a drink for our little “pet”

Now that the scene was set inside the glass, I  began to come up with a way to use the solar light to illuminate the vase,  I had a plastic lid handy, and decided to use the hot glue gun to adhere the plastic light to it.  I traced the light with a black sharpie onto the lid and cut a hole in the top to expose the solar panel. I glued the modified light and lid to the top of the vase, allowing the solar light to drop in place and illuminate the jar.  I added some additional blue marbles around the top rim of the jar for decoration.

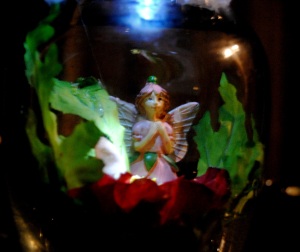
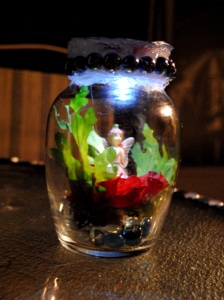
It all came together something like this:

fairy in a jar

I would recommend this project is done under strict adult supervision due to the hot glue involved.  I actually dread using the high heat gun, because I always manage to burn myself with it at least once no matter how careful I am!

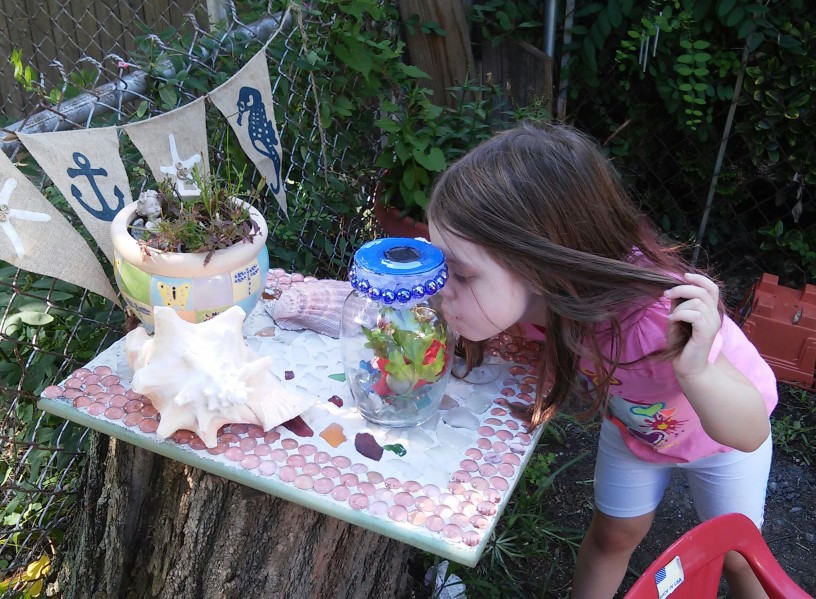
When I showed my daughter her fairy jar gift she loved it and decided to give it a kiss.  My heart just melted!  What little girl wouldn’t love her own “pet garden fairy”

20150718_165653-1[1]

As the night turned into day her fascination only grew as the jar began to glow.  Then it occurred to me all the possibilities and jar themes you could come up with.  Let your imagination run wild and create a wonderful garden keepsake.. and remember broken things are beautiful!!!!

DSC_1579

Materials needed:

Jar or Vase

Plastic Lid

Solar Light (top)

High Heat Hot Glue Gun/Glue Sticks

Decorative items for your Jar:

Child’s toys figurines

Rocks, Plants, Marbles:

Create any scene you wish!

Sultans of Swap: Flea Market Fun In The Sun

This past Saturday, I had the opportunity to participate in my first ever Flea Market.  The sale of spaces benefited my daughter’s school, so of course I jumped at the chance to get involved.  I was a bit nervous.  It was the first time I have attempted to sell my projects.  I also had some additional spring cleaning items to sell as well and anything I can do to create additional space in my overloaded craft room is a definite plus.

Let me start off by saying, I have been to a lot of swap meets, yard sales and flea markets as a buyer, but never as a seller.  It is hard work preparing, pricing and hauling your goods to the sale location.  I have a new respect for those who can make a living at it and participate in sales on a regular basis.

I am in no way an expert at this, but I thought I would share with you all what I learned from this experience.

So, How did the modern flea market get its name?

The first flea markets were in Paris and they were called marché aux puces which translates to ‘market with fleas’. Flea market first appeared in English in 1922 as a translation of the French market’s name.

When Preparing, Take Care of as much as you can the night before

Since most flea markets start bright and early, and I am a night owl by nature,  I loaded the car and any other items needed for my sale the previous night.  This allowed me to get a good night sleep and wake up and leave the next day without scrambling at the last-minute.

Show up on time or early for set up

This was the fun part.  Setting it all up so it is pleasing to the eye.  Leave yourself enough time so as to not feel rushed.

20150502_080200

Mark all prices clearly and have a backup plan

I devised a color coding system.  Also when marking your prices, keep a mental note of how low you are willing to go with price.  I marked my prices a little higher so that I had some “wiggle” room.

Plan for a long day in the hot sun

If you have a canopy or beach umbrella, it is a good idea to bring it.  Make sure to bring plenty of sun block, dress accordingly (avoid dark colors that attract the sun) Wear a hat and sunglasses and bring plenty of fluids and a snack.

Bring tables or other items to properly display your merchandise

I found that items more visible, and that didn’t require a lot of effort to look through sold better.  A clothes rack, table or even a sheet or mat placed on the ground is essential when displaying your items.  If people have too put a lot of effort in they will move on quickly to a competitor’s table.

20150502_080152

Don’t Just Sit There… Get up and Sell!!

I found I gained more interest in my items when I talked to people and said “Hi”  Sitting their idle watching people come and go doesn’t sell stuff, but being a social butterfly DOES even when the turn out is low.

Talk about what you do and PROMOTE

I created plenty of business cards, and even sign explaining what Upcycling is.  People’s curiosity would get the better of them and they would stop to read the sign.  It was a great conversation starter!

20150502_075927

Bring Singles and 5 dollar bills to make change and wear a fanny pack!

I brought about $40 dollars in cash.  I used 25 singles and four 5 dollar bills and found this to be enough to make change.  It is better to wear a fanny pack or apron to keep change, pens and tape in.  Leaving money unsupervised in a box even for a minute, creates a potential for theft.

Make Friends and Connections!

Even though the turn out was less than spectacular, I still managed to socialize with other vendors and make personal connections.  I met a really nice woman who runs a local consignment shop, and my flea market neighbor and I helped each other when the other had to take a bathroom break.  The nice lady next to me even helped complete a sale while I walked away for a moment!

20150502_081633

Oh and Don’t Forget to take a Flea Market Selfie!

What are you doing to prepare for this Flea Market Season? Do you have any tips for sellers not mentioned here?  Do you have willpower when it comes to buying things at a flea market when you are there to sell?
An Accident Waiting To Happen: Upcycled Pringles Can Lamp

              Decorative Decoupage Pringles Lamp

This project idea started out as a 99 cent purchase at Goodwill.  An adorable miniature ceramic lamp with a round base that would require a minor  fabric decoupage makeover to make the perfect table top night-light for our bedroom.   However; thanks to the toddler apprentice’s rather curious hands it was simply not to be.  She climbed up on the ottoman, reached out her arms, and knocked it off the shelf. It broke the ceramic base into a million pieces. More importantly, she was not hurt in the accident, just a bit startled and remorseful   Although I was initially upset,  my cross demeanor faded quickly as I thought of ways to reuse the unbroken pieces of the lamp and shade.  I searched the craft room for some recycled items I was saving for a crafting rainy day.   I searched and looked for what I thought would make great lamp bases. It then occurred to me…I had a fever for a Pringles can lamp!

Minimalist Pringles Lamp Upcycle

An Upcycled Pringles Can Lamp For The Minimalist

The Pringles can was a great choice because it didn’t require a glass cutter to feed the wire through like a glass bottle or jar would.  I used a box cutter knife to VERY carefully cut a cross through the plastic lid.  I popped the light in and it fit nicely.   Before I placed the lid back on the can I filled the bottom with a few decorative marbles I had lying around. This added some weight and stability to the lamp.  I cut a hole at the base of the can using the UPC on the can as a guide, so I could properly feed the wire through the bottom.  For those of you who are practical, and love Pringles, you may want to stop right here.  I call this the minimalist version.

How to Create An Upcycled Pringles Can Lamp That’s A Little More Decorative

Decorative Upcycled Pringles Lamp

For those who want to create a more decorative piece, You can use a little fabric decoupage to decorate the Pringles can and lamp shade.  I used some scrap Peacock inspired fabric I had lying around the craft room.  I used Mod Podge to apply the measured fabric to the can and cut out designs to place on either side of the lamp shade to add some symmetry.  Once dry, I applied more Mod Podge over the fabric to properly seal the lamp base.  I placed it in front of our fan to dry.   Now it was ready to be plugged in and illuminated.  The possibilities here are endless.  If you don’t have fabric handy you can also use scrapbook paper.  You can create seasonal cans and interchange them with the light and lid to transform the look of the lamp.

Upcycled Pringles Can Lamp

A lesson in life and living on the Upcycle, the greatest mistakes can have the greatest rewards!  That is how I feel about this project. If it wasn’t for my overly curious toddler, I would have never known the fun of this Pringles can craft.  Thank heaven for overly curious little girls!

Have you had any crafting disasters that turned into triumphs?  What was your favorite craft mishap?

Materials Used:

Broken miniature lamp

Pringles can with lid

Box Cutter Knife

Handful of marbles

Fabric or Scrapbook Paper Of Choice

Foam brush or Paint Brush

Scissors

Mod Podge

On The Upcycle Restyle

on-the-upcycle.jpg

This weekend I decided to give “On The Upcycle” a much-needed reboot.  I felt the old blog layout was getting a bit stale. Last night I experienced an evening of insomnia, and decided it was the perfect time to explore new ideas. I hope you all like the new look!  Happy 4th of July weekend everyone!


Car Part Art: Turning Scrap Into Sculpture

I am always intrigued when I  find art in unlikely places.   This past weekend I made an appointment to have front brakes installed on my car.  I planned my day accordingly and woke up bright and early. Meineke is currently having a sale on brakes, and although I had never gone there before for repairs, the allure of saving $50.00 compared to a previous quote I had received was too good to pass up.

When I arrived at the shop I was greeted unexpectedly by a piece of upcycled art.  Of course I had to snap a picture of this pleasant little door greeter and his loyal pup.  This little man and his dog were made from recycled car parts, mufflers, brake parts and the like.  Of course I fell in love with them instantly.

20140628_095404

It seems that one or more of the mechanics has a creative side! Apparently, this is not a new concept as upcycling car parts into works of art is more common than one might think.  Roadside America an online guide to offbeat tourist attractions has a great article featuring some of these so-called “muffler men” who populate the auto shops and roadsides of America.  You may have already seen some of these sculptures on your travels already!

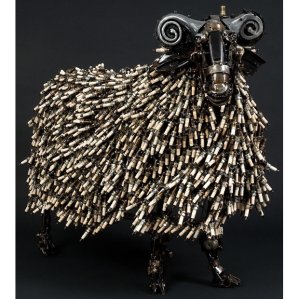
There are also some truly amazing upcycle artists in the world and they take this art form to a whole new level!  One such artist is Australia’s James Corbett.   He has been creating sculptures from spare auto parts and junk since 1999.  Below is an example of his work.  Look at all those spark plugs!

12353_997

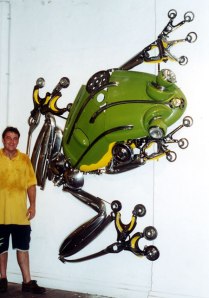
Below is James, pictured with one of his many creations.  The eyes are made of headlights…genius!

other5b

To see more of his work visit the Crimson Reason Blog.  They feature several of Jame’s intricate creations.

Another talented scrap artist is Frenchman  Edouard Martinet.  As a young student he became somewhat “obsessed” with insects.  Later, he chose to incorporate his love of insects and other animals in sculpture.  The detail and artistry here is off the charts!

wasp

pigeon

Check out this interview with Edouard Martinet below.

“Art is not what you see, but what you make others see.”
― Edgar Degas


Crib Rail Repurpose: Children’s Book Wall Rack

Recently, we began preparation to move my daughter from her crib to a toddler bed.  When we chose a crib for our registry, we made sure it was a convertible style crib that would grow with her.  We were looking for what most consumers want, quality at a reasonable price.  We chose   the Graco convertible crib in espresso finish.

Graco Crib

It appeared sturdy on the showroom floor and was priced right.  Initially, I was happy with the crib.  Then 18 months later, I notice a few of the metal springs had broken off the frame they were welded on.  One by one the springs broke off.  The crib needed to be reinforced with bungee cords.  We knew this bed would not last like we had previously anticipated. We were forced to come up with an alternative and purchased a new mattress and a toddler bed.  The original mattress was torn by sharp edges left where the springs used to reside.  This was a big disappointment.  We were expecting to use this convertible through her toddler years, but it was not to be.  The crib finally gave way and it was obvious it was no longer safe.  Luckily, the new bed was purchased and was on standby and we were able to quickly make the switch.

I am happy to report that the toddler apprentice loves her new “big girl” bed and the toddler bed experiment has gone surprisingly well!  She lays down and falls right to sleep! We were surprised how quickly she has adjusted.

Toddler Bed

When I dismantled the crib, most of it was broken and not salvageable.  The rail was still in decent shape.  I had seen some ideas online upcycling old cribs ranging from Repurposed crib benches  to crib rail Garden Trellis’s.  I wanted to keep this project simple.  I was preoccupied by a much larger, more daunting, task cleaning my daughter’s messy playroom!  I filled one trash bag with broken items and another with items to donate to those in need. This emptied one toy box for additional storage which reduced clutter.

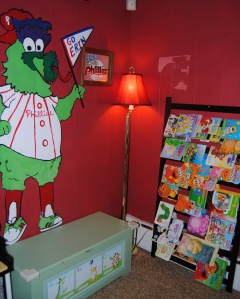
My daughter has a large book collection she acquired before she was even born.  At my baby shower, the guests brought a signed book instead of a card. I loved this idea, but I did not have an ideal way to store all the books we received.  They basically sat in a wooden box on the playroom floor.

I thought the crib rail would be a great alternative way to display her books, and keep them off the floor.  Since I was struggling to get her room organized, and did not have the time,  I decided to leave the crib rail in its original finish.  It also matched the playroom well.

crib rail

If you would like to change the original color, a can of white latex primer works well.  Once dry, paint as desired.    I also suggest using longer screws to anchor each side of the crib rail to the wall. When doing this, lean the crib against the wall on a slight angle so the books can hang over the rails.  I did not have the proper screws handy, so I had to improvise and use one smaller screw through the first rail.  This worked, but the trade-off  is that the first rail cannot be used for display.

Repurposed Crib Rail Book Rack

I love it!   Being the sentimental fool that I am, it also is nice to keep a piece of the crib for nostalgia!  I also repurposed her changing table into a kitchen shelf.  If you missed it,   You can view that project here.


DSC_0440


Repurposed Crib into a children's book rack


Repurpose and Remember: Ideas for The Backyard

This weekend officially kicked off the start of summer in our household.  On Saturday, we celebrated our daughter’s 3rd birthday with a small family BBQ.  I am usually big on party planning, but this time I was forced to pull it all together last-minute.  This week has been hectic to say the least, as our daughter also started Preschool.  I am happy to report that things went well and the only tears shed were our own!  She handled going to school and riding the bus with ease and excitement, and asked us several times throughout the weekend if she was going to school!  Mission accomplished!

On Sunday, the hubby and I decided to do something we rarely get a chance to do:  Enjoy our backyard.  I like to think of our outdoor area as an extension of our indoor living space, but we very rarely get to relax and enjoy it together.  This weekend, with the holiday in full swing we decided to enjoy some time outside.   Sunday night in our area was absolutely beautiful.  No mosquitos and a cool evening breeze tickled the trees.  It was the perfect evening to sit and enjoy what Mother Nature had to offer. We put the little one to bed,  hooked up the monitor outside to listen for her, and  we lit a fire in our outdoor fireplace, sat back and enjoyed a relaxing much-needed evening together.

DSC_0322

I thought I would share some simple ideas to creating the scene for a relaxing evening at home.  Kudos to my husband, who came up with a simple but very useful idea.  A popular item at kid’s parties are glow sticks and bracelets. The sticks that continued to glow, he used to line our back porch stairs.  Not only did it look cool, but helped us navigate the stairs safely in the dark.

Glowsticks

Over the years we have received quite a few decorative candle holders as gifts.  As much as I would like to display each and every one in our home, there just isn’t enough wall space.  This particular gifted item was originally a decorative fireplace screen that was also a candle holder.  Although it was a lovely idea, we could no longer safely use it with our three-year old.  I decided to repurpose it as an outdoor wall hanging.  I attached it to our patio area wall with screws and used flameless tea lights to illuminate it.  It adds a festive and romantic feel to our seating area, and was a great way to repurpose an old decoration previously destined to attic exile.

DSC_0305

DSC_0304

I have always been a fan of the neighborhood Dollar Store.  Dollar Tree in particular has some great affordable decorations.  Patriotic decorations are no exception.  Since our daughter’s party is held close to the Memorial day holiday, I always incorporate patriotic decorations with her birthday décor.  I picked up these great round paper patriotic decorations.  Dollar tree sells a version of these that light up online, but the ones that I purchased did not.  To remedy this I added flameless battery operated tea light to illuminate them.  This added such a lovely look.  Battery operated tea lights are a great way to add decorative lighting without the dangers.  Having a three-year old roaming around, open flame candles and tiki torches become a hazard.  Despite this I still love the look and feel of luminaries and this is a great way to enjoy them without the danger.

DSC_0332

When my husband and I sat back and soaked it all in, we spoke of, and were thankful for all the men and woman who sacrifice so much to protect our freedoms.  If it wasn’t for these sacrifices, we would not be able to have moments like these.  Thank you to all those who have sacrificed so much so we can live in freedom and have a quality of life that we often take for granted.

Remember

Fun with Chalkboard Paint: Kitchen Cabinet Memo Board

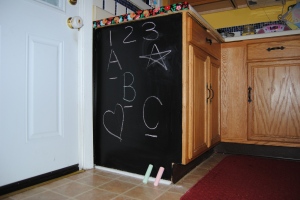
One day I was standing in my kitchen staring at my boring cabinets when the idea came to me! My daughter loves playing with chalk and drawing.  The hubby and I often have the need to communicate through various “notes” left around the house.  We could really use a better way to communicate.  What better way then to create a family chalkboard?  I had often thought about modifying our kitchen cabinets in some way and this was a fun first step.   I was eager to try one of the most talked about craft items on the web, chalkboard paint.   My idea was to use the paint to create a chalkboard on the side of the kitchen sink cabinet, but the ideas for its use don’t end there.  Be sure and check out Brit and Co  40 Creative uses for Chalkboard paint and you will be amazed at all the fun possibilities.

I went to Joann Fabric and picked up some black chalkboard paint.  It was regular priced at around 6 dollars, but I used a 50% off one regular priced item coupon which knocked the price down to below 3 dollars!

DSC_0166

When I got home I cleaned and prepped the area of cabinet I planned to paint.  The bottle recommends 2 coats, but I used 4 total as I was attempting to paint over laminate.

DSC_0165

The project was relatively easy.  I used a brush to apply the paint allowing it  to dry thoroughly between coats.  The top side of the sink was damaged so I used a strip of fabric across the top to cover the area and add a little “pop” to the chalkboard.  I applied the fabric strip using Mod Podge and covered it in Polyurethane since it could be exposed to water being in such close proximity with the faucet.

DSC_0174

I waited about 24 hours for the final coat to dry before using the chalk. It worked beautifully!

DSC_0196

Now we can leave each other messages, post  holiday greetings, and our daughter can use her imagination and draw!

DSC_0198

And yes if you are wondering those are Peeps on a stick my daughter is holding.  Happy Easter Everyone!