Inexpensive Storage Ideas: Repurposed Wooden Boxes

I am always on a mission to organize our family home, but with an active 2 year-old it is usually easier said then done.  When I come across wooden boxes, and any items I can upcycle into storage containers,  I jump at the chance to buy them.  Thrift Stores, or even items you already have in your home can be  altered to fit any style and repurposed into inexpensive storage containers.  Today, I chose to upcycle an ex Melissa and Doug Toy Box.  I believe at one time it housed an elaborate wooden puzzle, and somehow ended up a simple, empty,  wooden box on a thrift store shelf.  Our biggest storage issues at the moment are kids toys and books.  I decided to repurpose this into a kid’s toy storage/book box.  I had purchased this lettered scrapbook paper for a previous project, but decided not to use it. It was a perfect fit for this project.

Image

Materials:

Scrapbook paper

Box

Mod Podge

Scissors

Foam craft brush

Pink Acrylic paint/Brush

pen or pencil

I traced the bottom of the box onto the back of the scrapbook paper cutting it out with scissors.  I applied Mod Podge with a foam brush and glued the scrapbook paper to the wood. while it dried, I painted the remainder of the box pink. Once the piece is completely dry,  A final coat of Mod Podge is all that is needed to seal the entire piece

Image

Colorful and Bright storage options at a fraction of the cost!

Goodwill Lunches- A Vintage Wooden Bucket

It has become a bit of a ritual to “pop in” to a GoodWill store or two during my lunch break. Most times my trips consist of  a quick look around and leaving the store empty-handed.  I usually go in with a mission in mind, and gravitate toward certain areas: Housewares, Furniture, Records and Fabrics. Even though some days are disappointing, lately I have been running into an interesting phenomenon.  Great Vintage items simply in need of a little TLC.

It all started with the Vintage Dixie Seating Company Kids Rocking Chair. A great find at a great price only $4.99!

Then I noticed this Wooden Bucket with metal straps that looked like a vintage piece to me.  The price was right, only $3.99.

Vintage Wooden Bucket

It had a few scuffs, but was generally in great shape.  I found myself taking it home with no real plans on what I was going to do with it.  I just really liked it, and I have not seen a wooden bucket like this before.  I felt like it was best to keep the bucket in its original state. I cleaned it thoroughly with a damp cloth, removing any dust and dirt. Once dry,  I simply used petroleum jelly on a cloth to buff the entire piece. (This works great on wood surfaces) The Vaseline even removed some of the scuff marks and scratches.

Upcyled Wooden Bucket

It cleaned up great, and the inside is in excellent condition!  A great find that just needed a little love.

Wooden Bucket inside

The uses for this bucket are endless, but for the moment this sits on my fireplace mantle. It’s nice little finds like these that keep me coming back for Goodwill lunches!

Think before you Toss: Upcycled Product Boxes

I have started to look at things differently.  Most of the change has been born out of necessity. People all over the world have been struggling to make ends meet more than ever before.   We are certainty included in this, and I have made it my mission from both an economical and environmental standpoint to think before I throw something out.  The questions I ask myself are:  Can I re-purpose this item and make it into something beautiful?  Can I use this item to better organize my home? Obviously, not everything can be saved and shouldn’t be.  No one wants to enter “hoarders territory.”  That being said, I have simply modified my way of thinking.  Why go out and spend money on storage items, when plenty of these items can be re-purposed from previously used boxes and storage bags?  That is the question I ask myself.  When I was cleaning out my closet, I came across the box that my tablet PC came in.  It was made from a heavy laminated cardboard, with a magnetic closure. A perfect little box to store items in, all it needed was a bit of decoupage to make it pretty. I had some left over scrap-book paper from Lively Computer Tablet Makeover that was fun and thought it would be great for this. Upcycled Boxes

Materials:

Box

Scrapbook paper

Mod Podge

Scissors

Black felt tip marker

Foam Craft Brush

First, Use a marker to trace all sides of the box on the scrapbook paper. Trace on the blank side.  Then cut them out with scissors.  Apply the Mod Podge to the sides and lid and carefully glue the paper to the box, smoothing out any air bubbles as you go.  Once dry, apply the Mod Podge to seal the outside of the box. Simple, Stylish, Money Saving, and one less piece of garbage in the landfill. A win, win in my book! Upcycled Product Boxes Great for keepsake storage Decoupage Product box

Repurposed Umbrella Holder Made With Fabric and Mod Podge

I’ll admit even with all the rain lately, I never seem to have an umbrella handy. It was pouring when I left work earlier this evening and if it weren’t for the generosity of a friend, I would have been completely soaked! So, it would seem silly, that I would buy an umbrella holder.  It was sitting there mixed in with the lamps at a local thrift store.  I was at first, drawn to the shape of the item. Not to mention the price: Only $2.99!

I thought it would make a great toy holder.  Anyone with a little one knows  you can never have too much storage for toys and books. I also jumped at the chance to use the mod fabric I had left over from The 1960’s inspired Coffee Table Makeover , Step Stool Restyle, and Whimsical Garden Pig. When I purchased the fabric at Goodwill, I had no idea these textiles were created by artist and designer Helen Trast.  In 2007 she designed “Fredrika” line for Ikea.  I was originally attracted to the bright colors and retro feel of the fabric.  It would also match the coffee table in our playroom/family room.

First, I turned the piece on its side and traced the sides the fabric with a black marker. I repeated this step for all four sides.

DSC_1039

I cut the material with scissors and set aside.  I planned on painting the inside, so I used a white latex primer to prepare the item for painting.  While that was drying, I applied Mod Podge with a foam brush to each side of the piece applying the fabric panels, and smoothing out any wrinkles with my hands.

Decoupage with Mod Podge

I then painted the inside of the piece with three coats of red acrylic paint.  Once the entire piece was dry, It was time for more  Mod Podge.  Three full coats of it over the inside and outside of the piece.  After it was finished, I used an X-Acto knife to slice off any strings or fabric overlaps on the edges.

I then applied some additional Mod Podge to the areas where I trimmed away the excess fabric.

Repurposed umbrella holder

I may not be able to fill this box with umbrella’s but I have plenty of toddler toys to keep it full!

Toy Holder

What is it? The 50 Cent Wooden Mini Pallet Makeover

Buy now ask questions later! The price was certainly right, only 50 cents, but what was this item and what was it’s original use?  It looked like a miniature pallet, but felt a little like a tray. Whatever it was didn’t really matter. I loved the fact that it was a fresh unstyled piece and I was determined to give it a new look. After searching the Goodwill shelves a bit more and leaving disappointed, I took a trip down the fabric aisle and found a nice old bed skirt with a triangular pattern that would be a perfect restyle fabric.

I gathered the materials I would need. Firstly, I traced the pallet slats onto the fabric with a black sharpie marker. I repeated this a total of 3 times once for each slat.  I then cut the fabric out with scissors.

Image

I applied the Mod Podge to each slat with a foam brush and glued down the fabric smoothing it out gently with my hand.  I used black acrylic to paint the non decoupaged areas. Once the piece was completely dry, I applied Mod Podge over the entire tray to seal it.  Not bad for 50 cents!

Before/After:

Image

Image

It’s Sunday, Have a Seat: Upcycled, Hand Painted Decoupage Football Lover’s Chair

I can assure you this will not be the last chair upcycle you will see on this blog.  I have really grown fond of Upcycling old chairs.  Not only do they look great when finished, They are a manageable pieces of furniture that fit easily in my smaller car. (I dream of someday having a truck or van to go for the bigger pieces) They also tend to be priced right.  Many of them are chair orphans separated from their original set.  On this day of thrifty shopping I came across two chairs priced very reasonably at $5.99 each. My husband had suggested since the Sports Team TV Trays turned out great, to do a matching sports themed chair.  Of course me being me I said sure!  I had picked up a perfect X back chair that would work well  for this latest project.

First, I cleaned the chair removing any dust or dirt.  I then painted the entire chair with a white latex primer.  I applied two coats of primer total. This was important since I did not sand the chair and it had a bit of a lacquer finish.  The Latex primer helps the paint to adhere to the chair better.  While the chair dried I prepared The Philadelphia Eagles logo I had printed.  I cut out the image.  Once the seat was dry I used Mod Podge Matte to glue the decal to the seat carefully smoothing out any air bubbles. I then added a few layers of Mod Podge over top of the decal.  When you hand paint using brushes sometimes the paint will splatter.  Protect your decal by covering it with Mod Podge (Once dry any paint can be wiped away with a wet cloth.) Or cover it with a plastic shopping bag.

Image

Now it was time to paint the chair.  The Philadelphia Eagles colors are Hunter Green, Black and White and those are the colors I wanted to use for this chair. I used about 2 coats of Acrylic paint allowing to dry thoroughly between coats in front of a stand up fan.

The next day, I used the Mod Podge Matte to completely cover the chair to seal it to prevent chipping.  I covered the chair in 2 coats of Mod Podge and the seat received 4 coats. I always add a bit of extra protection in areas I know will get the most use.

Before and After:

Image

Recap of Materials Used:

Chair

Mod Podge Matte

Sponge Brush to apply Mod Podge

Print Sports Team Decal of your choice

Scissors

Acrylic Paint/Various sized brushes

Image

Sports ChairSports Fan Chair Made with Mod Podge-On The Upcycle

Fabric and Mod Podge Mania- Upcycled Kids Wooden School Desk

What to do? Yesterday, the hubby had to go off to work so it was just me and the daughter dear all day. I decided to take a trip up to the new Joann Fabric  mega store that just opened up down the street from my house (I now have a craft store practically within walking distance, this could be dangerous!)  Usually, as you all know, I am a “thrifty” shopper, but today I had a few crafting supplies I had to pick up and I figured why not give it a look?  They had a great coupon I found online,  30% off total purchase (except for sale items of course) Which was icing on the cake –if I decided to buy anything.  I walked into the store and it was HUGE!  The place was filled with aisles, upon aisles of fabric.  I am used to Goodwill prices, so I was shocked at how expensive fabric can be! One fabric in particular  was $49.99 per yard… yikes!  Thank goodness they had good sales and aisles filled with fabric at $4.99 a yard phew!

Image

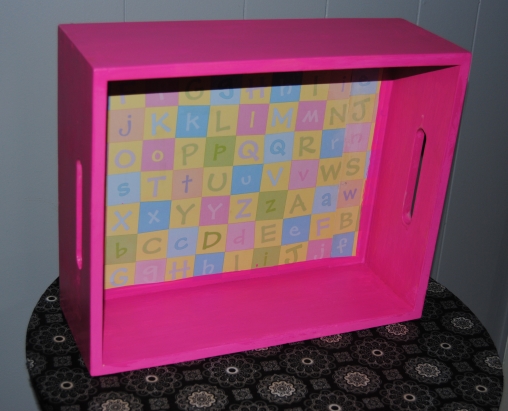
I found this great school themed material. I had purchased a wooden school desk at an outdoor flea market some time ago, and had no idea how or with what material I was going to restyle it.  Now it was no question the winner was… fabric! I picked up a yard for about $5.89 on sale.  Once me and the giggle-goo got home, nap time was approaching so, I put the little one to bed and gathered my materials I would need to get started.

Image

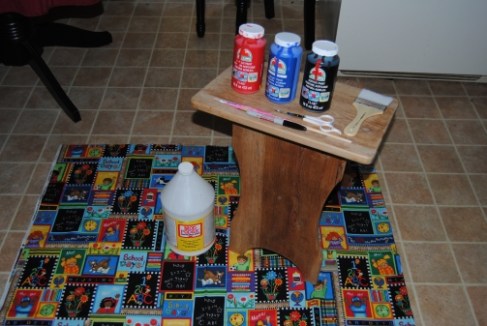
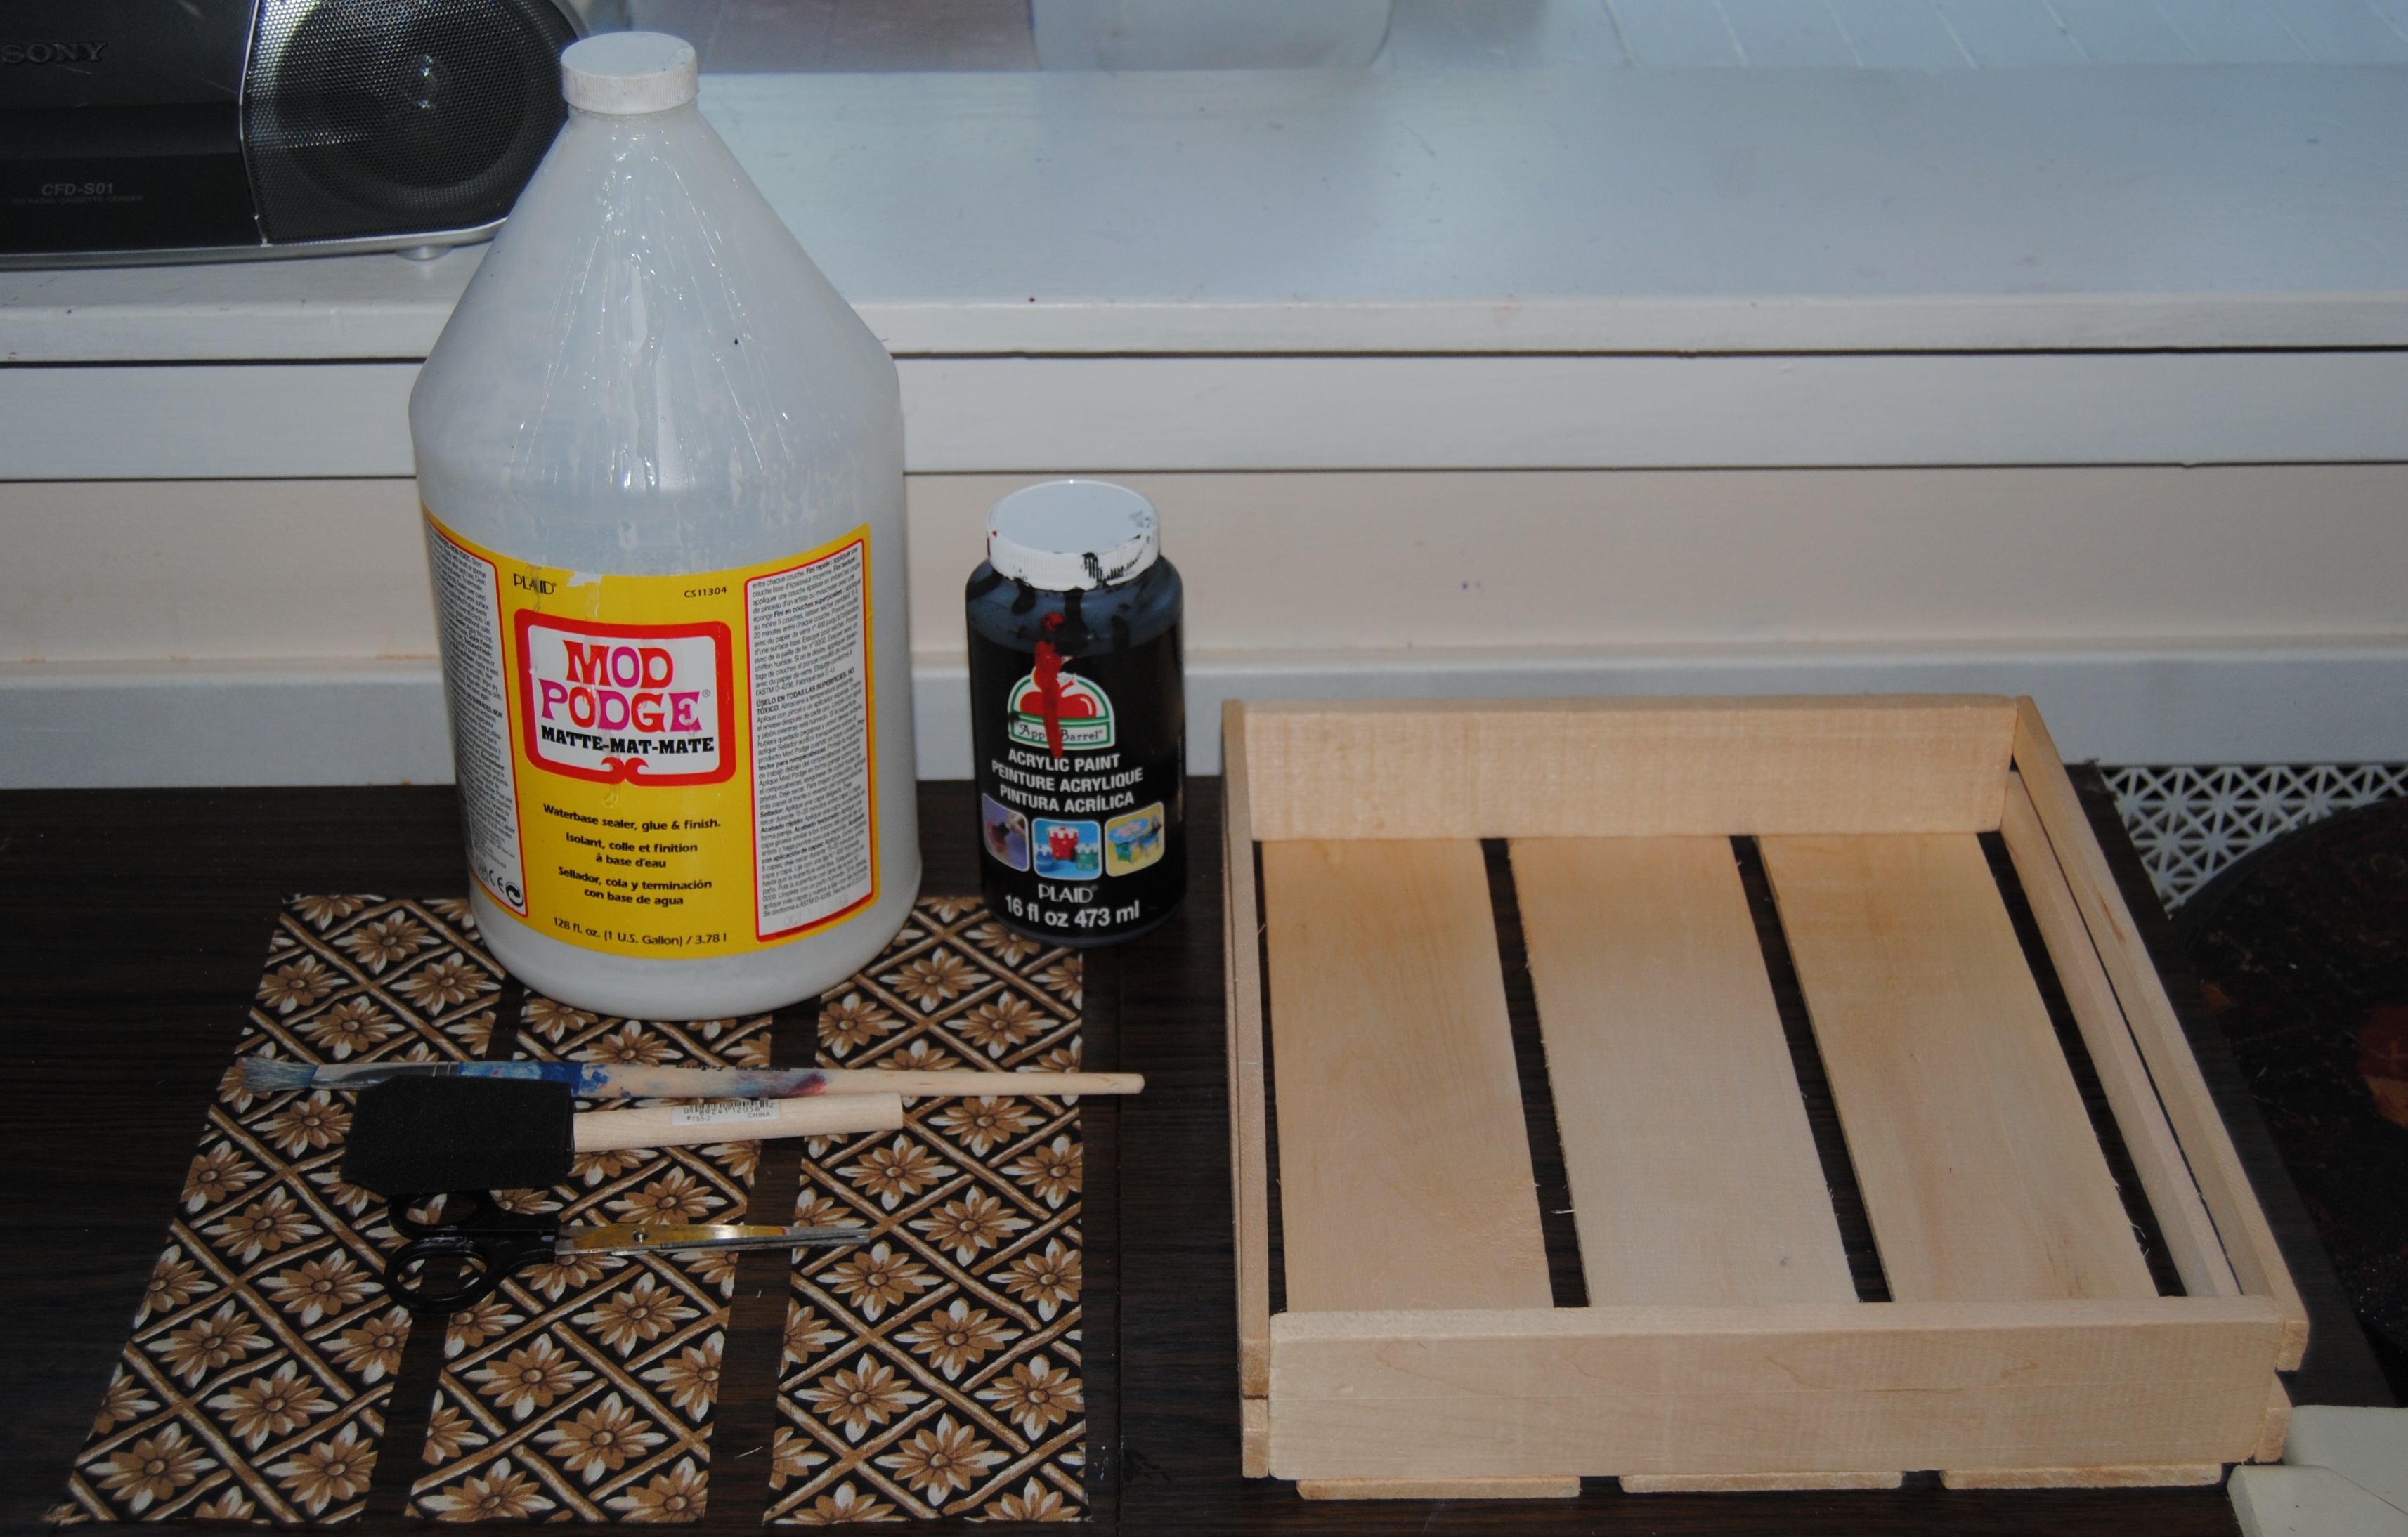
First thing was to make sure the piece was clean and free of dust.  Then I used a black marker to trace the desk top and seat onto the fabric.  Once this was done, I carefully cut the cloth with a pair of scissors. I then generously applied the Mod Podge Matte finish on the desk top and on the seat using a larger paint brush to smooth it out.  Then I applied it to the fabric, using my hands to smooth out any air bubbles.  Messy you say?  Absolutely, but I feel with fabric it gives me more control, than using the Mod Podge tools.  Besides, I have never been afraid to get my hands dirty!  Once it was smoothed out, I then applied a layer of Mod Podge over top of the fabric. While that was dying, I painted the piece.  I used Red, Black, and Blue all colors featured in the fabric. The wood was ready to paint and not in need of priming, but it was very dry and soaked the paint in initially.  It took about 3 coats overall to get the desired result. I brought the piece back upstairs and allowed it to dry for several hours under a stand up fan.

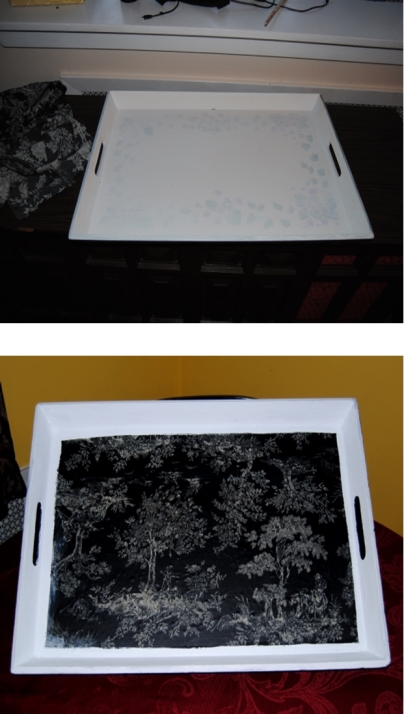
Fast forward to later in the evening.,with the daughter asleep for the night and the hubby finally home, I worked on finishing the piece. I decided to cut out some swatches from the material and Mod Podge these onto the sides to add a little more life to that area.  I then covered the entire desk with 2 coats of Mod Podge.  I usually add more coats to the areas that will get more use and where the cloth was applied.  I used 4 coats on the seat and the desk top areas.  Pictured below is the wooden desk before and after:

Image

The hubby loved how it turned out and I can’t wait for the little one to use it!  She loves sitting at her little table and chair so I think she will enjoy this just as much and it will grow with her.  I also love the neutrality of the desk a boy or girl could use it!

Image

Stay calm and happy crafting my friends : 0 )

Mail Call: Upcycled, Decoupage Mail and Key Holder

Image

I found this little wooden mail and key holder for two bucks at an outdoor swap meet.   I decided to use it by our front door so we could have a centralized place for our keys, cell phones and any other small items we take with us to work each day.  Initially, I was unsure of the design I would choose.  Then I remembered,  I still had some of the recycled gift bag I had used for my living room switch plate and outlet covers.  It became evident , the key/mail holder would be hanging  in close proximity to the switch plate and I thought it would look better if they matched.

Decoupage Switch Plate, Outlet

I measured and cut the gift bag to fit the mail slots. I then applied Mod Podge to glue the gift bag tracings to the slots.  While drying, I painted the rest of the piece black with acrylic paint.  Once the paint was completely dry I applied about three coats of Mod Podge over the entire piece to seal it. This was a very simple project with dramatic resulst!  It really stands out nicely against the Sandstone background and keeps electronics and other important items out of little toddler hands.

Before

Materials:

Mail/Key Holder

Mod Podge Matte finish

Gift bag/Scrapbook  paper

Black Acrylic Paint

Pen/Scissors/Paint Brushes

Decoupage key holder

Another Large Wooden Tray Restyle

I picked up this tray for just a couple of dollars at Goodwill and had no initial plans for it.  I admit I love rescuing old trays even if I have no idea what to do with them.  It sat in our spare room for quite sometime primed, but unfinished.  I then picked up some Victorian inspired black with white fabric during a second Goodwill trip.  I liked it because it had trees on it with children playing.  It reminded me of some of the decor we had in my house growing up in the late 70’s early 80’s. I decided to use the fabric on the tray. I thought it would be a great way to display the fabric and keep the scene intact. I painted the tray with white acrylic paint and then applied the Mod Podge.  Since the fabric was dark, I couldn’t trace it, so I applied the fabric I had to the tray, and when the Mod Podge dried and the fabric hardened I used a box cutter knife to remove the excess fabric. Once dry I used about two more coats of Mod Podge over the entire piece.  If you are just starting out working with Mod Podge, trays are definitely the way to go!  They are a great starter project and the possibilities for styling are endless.

Image

Materials:

Mod Podge

Tray

Fabric

Box Cutter style knife

White acrylic paint and primer