My neighbor approached me one Saturday morning last spring. He was cleaning out his garage and asked if I wanted to look at a few items before he put them out on the curb. One of these items was an unfinished toy chest/bench that had been sitting in the back of his garage taking up precious space. It had been purchased with good intentions, but he had never gotten around to finishing it. I immediately jumped at the chance to own such a wonderful piece of furniture. It was unfinished wood, so this meant no scraping, stripping or priming. My kind of project!
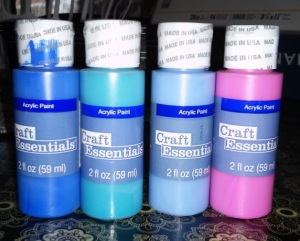
I am always amazed at the generosity of people. When it comes to neighbors, I am truly blessed. I thanked him profusely and happily took in the unfinished item. It immediately filled a dire need. My daughter had accumulated many toys, and this was a great way to store and organize them. So, there it sat unfinished and full of toys for almost a year in our daughters playroom. I had no idea how I would finish it. I entertained various ideas that went nowhere. Sports themes, traditional refinishing, Disney Princesses, just to name a few. Then it hit me one day after my daughter had viewed the movie Frozen for the 50th time! Why didn’t I think about it until now? I emptied her toys out and placed them in bags. I went online and looked up a Frozen color palate. I chose 4 colors from Joann Fabric and Craft Stores Craft Essentials acrylic paint collection. I ended up using three bottles of each color, except for the pink (I only used 2) I went online and printed out some Frozen graphics that I wanted to use. I set my printer to the largest setting possible.
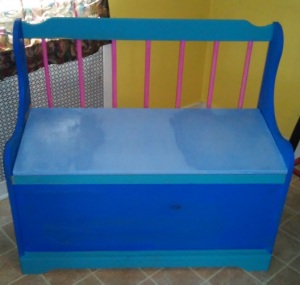
The toy box needed about 2 coats with some minor touch ups after drying. Once the final coat was applied, I allowed the piece to dry thoroughly overnight.
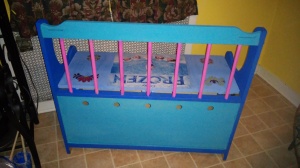
The next day, I applied Mod Podge to the front and lid with a foam brush, and carefully applied the prints.
The piece needed some “pop” so I decided to purchase some wall decals from Babies R Us to use as accents. If you do not have access to a printer some of these images would also work great for decoupage. I decided to apply the left over decals to my daughters bedroom wall.
I then applied Mod Podge to the entire piece to seal it. For the majority of the toy box I used a foam brush to apply the Mod Podge, on the lid I used a “fluffy” mini paint roller which gave a snowy effect when the Mod Podge dried.
I was happy how the piece turned out, and it looks great in the playroom! When my daughter saw it finished the smile on her face said it all!
Materials:
Wooden toy box
Mod Podge
Paint/Brushes large and small
Foam craft brush, scissors
Frozen Prints Or Decals
(Colors used from Craft Essentials sold by Joann Fabric)
Mediterranean Blue
Panic Pink
Caribbean Coast
Sailing Sky
Length of project: 2 days (total)


You have the perfect touch, my friend. The finished toy chest looks fabulous. Your daughter should cherish this Disney find forever, and pass it down to her’s in due time. Way to go!
LikeLike
Can i buy this from you if so how much?
LikeLike
hi there wasnt planning on selling it but…. email me about it, if you happen to live close we may be able to work something out shipping would be too difficult… ontheupcycle@gmail.com
LikeLike