Repurpose and Remember: Ideas for The Backyard

This weekend officially kicked off the start of summer in our household.  On Saturday, we celebrated our daughter’s 3rd birthday with a small family BBQ.  I am usually big on party planning, but this time I was forced to pull it all together last-minute.  This week has been hectic to say the least, as our daughter also started Preschool.  I am happy to report that things went well and the only tears shed were our own!  She handled going to school and riding the bus with ease and excitement, and asked us several times throughout the weekend if she was going to school!  Mission accomplished!

On Sunday, the hubby and I decided to do something we rarely get a chance to do:  Enjoy our backyard.  I like to think of our outdoor area as an extension of our indoor living space, but we very rarely get to relax and enjoy it together.  This weekend, with the holiday in full swing we decided to enjoy some time outside.   Sunday night in our area was absolutely beautiful.  No mosquitos and a cool evening breeze tickled the trees.  It was the perfect evening to sit and enjoy what Mother Nature had to offer. We put the little one to bed,  hooked up the monitor outside to listen for her, and  we lit a fire in our outdoor fireplace, sat back and enjoyed a relaxing much-needed evening together.

DSC_0322

I thought I would share some simple ideas to creating the scene for a relaxing evening at home.  Kudos to my husband, who came up with a simple but very useful idea.  A popular item at kid’s parties are glow sticks and bracelets. The sticks that continued to glow, he used to line our back porch stairs.  Not only did it look cool, but helped us navigate the stairs safely in the dark.

Glowsticks

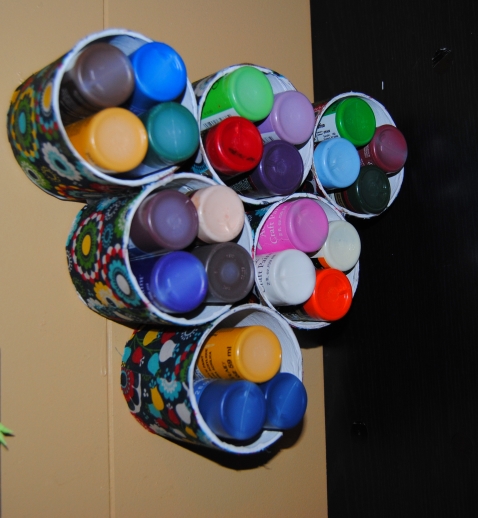
Over the years we have received quite a few decorative candle holders as gifts.  As much as I would like to display each and every one in our home, there just isn’t enough wall space.  This particular gifted item was originally a decorative fireplace screen that was also a candle holder.  Although it was a lovely idea, we could no longer safely use it with our three-year old.  I decided to repurpose it as an outdoor wall hanging.  I attached it to our patio area wall with screws and used flameless tea lights to illuminate it.  It adds a festive and romantic feel to our seating area, and was a great way to repurpose an old decoration previously destined to attic exile.

DSC_0305

DSC_0304

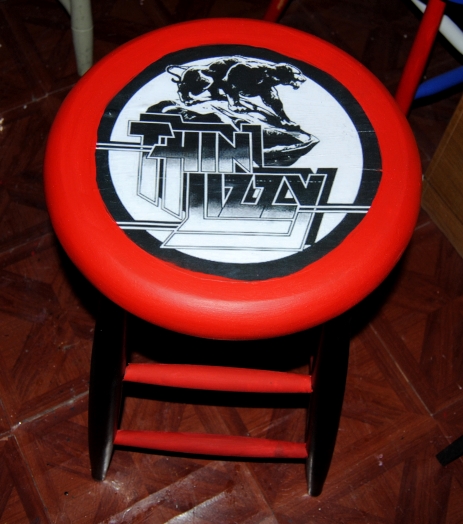
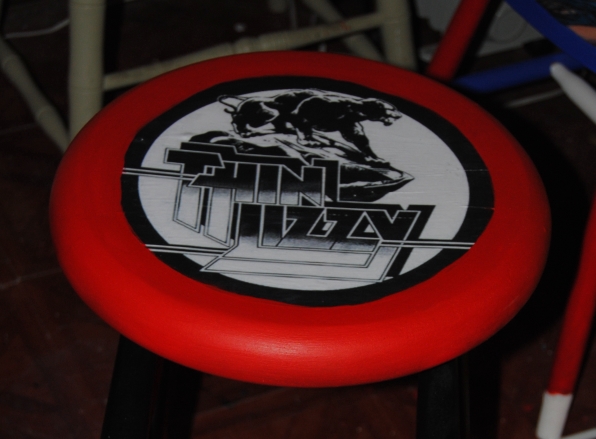
I have always been a fan of the neighborhood Dollar Store.  Dollar Tree in particular has some great affordable decorations.  Patriotic decorations are no exception.  Since our daughter’s party is held close to the Memorial day holiday, I always incorporate patriotic decorations with her birthday décor.  I picked up these great round paper patriotic decorations.  Dollar tree sells a version of these that light up online, but the ones that I purchased did not.  To remedy this I added flameless battery operated tea light to illuminate them.  This added such a lovely look.  Battery operated tea lights are a great way to add decorative lighting without the dangers.  Having a three-year old roaming around, open flame candles and tiki torches become a hazard.  Despite this I still love the look and feel of luminaries and this is a great way to enjoy them without the danger.

DSC_0332

When my husband and I sat back and soaked it all in, we spoke of, and were thankful for all the men and woman who sacrifice so much to protect our freedoms.  If it wasn’t for these sacrifices, we would not be able to have moments like these.  Thank you to all those who have sacrificed so much so we can live in freedom and have a quality of life that we often take for granted.

Remember

Bed Skirt Craft Table Makeover

May is turning out to be a rather hectic month.  My daughter’s 3rd birthday is just around the corner, not to mention she is about to start pre-school for the first time next week.  At the risk of sounding cliché, time is flying by and filled with things to do, forms to sign, and errand filled lunch breaks.   Despite this, I have been busy working in the background on a few projects though at a slower pace than usual.  One of these projects was resurfacing my craft table and organizing the space. Despite my best efforts, my craft room has become a cluttered nightmare of various holiday decorations, toys and kids clothes which never made their way up to the attic.  I was once again determined to clean it up and work on the craft table.

Craft table has seen better days


This old desk top computer table had seen better days but worked well as a crafting table. Of course a table used for this purpose is going to bare the scars of crafting, but I had a lot of left over fabric from an old bed skirt that I had used for a few previous projects. The pattern and color scheme also happened to match the room nicely.  I cut two pieces of fabric to fit over the table surface.  I applied Mod Podge generously with a foam craft brush.  I carefully applied the fabric to the table surface creating a seam to connect the two pieces together.  I then applied Mod Podge to the top of the fabric.

DSC_1529

I applied several layers of Mod Podge allowing it to dry clear between coats. I painted the areas I could not decoupage black.  Once it was dry it created a workable surface that was much more attractive than before.

craft table resurface before and after

Table Before and After

Craft room shot

Craft Room Shot featuring “On The Upcycle” Projects  

Getting better with organization Lets hope I can keep it that way-Finally!

Mod Podge Your Cottage: Window Sills Accented With Fabric

One of the features I loved when we first saw our house was our front living room window. It was a large half hexagon shape with a deep window sill.  It is a nice accent area, and fun to decorate during the various holidays.  During other times of the year our Tiffany knock off lamp illuminates the window and the front of the house outside. Our cat loves to climb in and chase after various bugs who find themselves unlucky once he discovers them. It is also the perfect spot to place my stereo cabinet, which also acts as a nice window seat.  The downside is the ledge often gets dirty and is difficult to keep clean. I also wanted to add an accent and brighten the dingy white paint that constantly needed a touch up. I thought decoupage would be a nice option here. I had used a similar technique in a previous project Decoupage Mania Restyling your home with Mod Podge.  For that project I used scrapbook paper to cover a built-in wall vanity.  I decided to use fabric on this window sill project due to more decorative variety and the larger project area. Our living room is a neutral sandstone color and I chose a neutral flower pattern.  The advantage of using fabric makes it easier to remove if you want a change the look as opposed to using paper which tends to tear apart when you attempt to remove it.

I used a magic erasure to thoroughly clean the area before getting started.

DSC_0167

I cut two pieces of  fabric and lined up the images to create a seamless appearence in the middle of the sill.  The best part? The cut fabric doesn’t have to be perfect. Once the Mod Podge dries it is stiffer and easier to trim with a box-cutter knife.  Any excess fabric can be removed later.  I applied Mod Podge with a foam brush and placed the fabric over top.  I then applied Mod Podge over the top of the fabric.

DSC_0170

I allowed the Mod Podge to dry, trimmed away any excess fabric with the knife and applied an additional layer of Mod Podge over top and around the edges.

DSC_0171

Once dry, Mod Podge leaves a nice, clear protective and easy to clean surface.  It also adds a decorative touch in any room.  The styles of fabric and possibilities are without limits, and suddenly I have to urge to do more decorative sills throughout the house!

DSC_0193


Finished Decorative Fabric Decoupage Window Sill

DSC_0194


Neutral Floral Pattern-Fabric Purchased at Joann Fabric


DSC_0195


Materials:

Mod Podge

Fabric

Foam Brush

Box Cutter Knife

Fun with Chalkboard Paint: Kitchen Cabinet Memo Board

One day I was standing in my kitchen staring at my boring cabinets when the idea came to me! My daughter loves playing with chalk and drawing.  The hubby and I often have the need to communicate through various “notes” left around the house.  We could really use a better way to communicate.  What better way then to create a family chalkboard?  I had often thought about modifying our kitchen cabinets in some way and this was a fun first step.   I was eager to try one of the most talked about craft items on the web, chalkboard paint.   My idea was to use the paint to create a chalkboard on the side of the kitchen sink cabinet, but the ideas for its use don’t end there.  Be sure and check out Brit and Co  40 Creative uses for Chalkboard paint and you will be amazed at all the fun possibilities.

I went to Joann Fabric and picked up some black chalkboard paint.  It was regular priced at around 6 dollars, but I used a 50% off one regular priced item coupon which knocked the price down to below 3 dollars!

DSC_0166

When I got home I cleaned and prepped the area of cabinet I planned to paint.  The bottle recommends 2 coats, but I used 4 total as I was attempting to paint over laminate.

DSC_0165

The project was relatively easy.  I used a brush to apply the paint allowing it  to dry thoroughly between coats.  The top side of the sink was damaged so I used a strip of fabric across the top to cover the area and add a little “pop” to the chalkboard.  I applied the fabric strip using Mod Podge and covered it in Polyurethane since it could be exposed to water being in such close proximity with the faucet.

DSC_0174

I waited about 24 hours for the final coat to dry before using the chalk. It worked beautifully!

DSC_0196

Now we can leave each other messages, post  holiday greetings, and our daughter can use her imagination and draw!

DSC_0198

And yes if you are wondering those are Peeps on a stick my daughter is holding.  Happy Easter Everyone!


Travel the Old Fashioned Way: Vintage Decoupage Suitcase

I love vintage suitcases!  I especially love all of the decoupage and repurposed vintage suitcase ideas I have seen while strolling through the web. I was eager to restyle a suitcase of my own, but hard case luggage proved to be a challenging find.   Over the last two years, I searched for suitable suitcases in every thrift store, yard sale, and managed to stumble across only one along the way.   You can imagine my surprise recently, when I came across not one, but three vintage blue suitcases in the same shopping trip.  The small case was inside the medium case, and the large case was empty. The set was not priced.  I asked for a price check and expected an individual price on each piece of luggage.  Instead, Goodwill decided to price the small and medium cases together for only $3.99!  I checked with them twice, because I could not believe it!  The larger case (pictured below) was priced at a reasonable $7.99.

Vintage Blue Suitcase


For my first suitcase decoupage, I decided to keep it simple. I purchased a yard of fabric from Joann Fabric.  I searched for material that would blend with the color of the suitcase, and found a nice blue and white floral pattern. I cleaned the case to remove any dust or dirt. I generously applied Mod Podge with a foam craft brush.

DSC_0116


I carefully laid the fabric on glue, smoothing out any wrinkles or air bubbles with my hands along the way.  I carefully worked the fabric in the creases of the case, and covered the entire area with another layer of Mod Podge.

DSC_0117


Once dry, I trimmed any excess fabric with a box cutting knife applying minimal pressure using the natural crease of the suitcase as my guide.  I added a 2nd coat of Mod Podge. I repeated the same process for the opposite side of the suitcase.

DSC_0125


Decoupage Fabric Suitcase


Now, what to do with the other two?

“Be Mine Daddy”…. Valentine’s Day Kid’s Craft Ideas

On this Valentine’s day morning, many areas of the country are beginning the task of “digging out” after yet another treacherous winter storm hit the east coast overnight.  Just days before the same winter Nor’Easter  wreaked havoc in other parts of the country such as Georgia and the Carolinas. On top of it,  the little one and I have been battling a series of winter colds and are being forced to spend much of our time in the house due to the lousy weather.  Despite this, we have managed to make the best of these situations and have spent a lot of quality time together as a family.

I wanted to make my husband something special for Valentine’s day this year, and as with most of my creations,  I like to get my 2 1/2 year-old daughter (Also known as the toddler apprentice) involved in the process. I also knew that my husband being the wonderful dad he is, would appreciate the fact that his daughter helped mommy make his gift with “her own little hands.”  I have seen many great Valentine’s day kid’s crafts online via Pinterest and other sites, and I had many ideas swirling around in my head. I saw a great project courtesy of the Roylco kids craft blog (which I follow, and love) and although I decided to create my own version,  The Roylco project was quite inspiring.  Be sure to check it out!

For this project you will need:

Black, Pink, Red and White Construction Paper

Scissors

Kids White School Glue

Black Marker

White Non Toxic Kids Craft Paint

Frame (Optional)

First, I dipped my daughter’s hand in the white paint after pouring it on a paper plate. I pressed her hand on the black construction paper.  This was challenging and it took a few tries after the first two attempts became slightly smudged.  There is no greater excitement to a little one then “messy fun” so she didn’t seem to mind the multiple attempts at getting it right! Once I achieved the desired effect I allowed the construction paper to dry. After about an hour, the paper was dry and ready.  I drew different sized hearts on the red, white and pink paper and carefully cut them out.  The little one enjoyed squeezing the glue on the hearts and sticking them to the paper!

Valenine's Day Kid's  Craft fun!

Such a Good Helper……

Next, I wrote little sayings in the hearts.  I thought this would be cute, but if you prefer it, you can skip this step.  I wanted to make it more personalized for him.  I then found a great glass frame in our attic to frame it in. Now we have a great piece of Valentine’s Day wall art for years to come, permanently immortalizing our daughters little two year-old hands forever. (Can’t you tell I am an overly sentimental person?)

Valentine's Day Kids Craft For Daddy

The apprentice and I also made a Valentine’s Day glass jar lamp.  I had some great left over heart themed scrapbook paper I won courtesy of Ray’s So Crafty’s Labor Day Giveaway.  I have made several jar lamps, and like to interchange them on the light bases, depending on the mood, or for holidays.  I simply cut the paper, applied Mod Podge to the glass and adhered it around the jar carefully matching up the seam.  An easy, simple decoration guaranteed to warm hearts during this frigid Valentine’s Day.

Valentine's Day Jar Lamp made with Scrapbook paper and Mod Podge

“On The Upcycle” would like to wish everyone a safe and happy Valentine’s Day.  Hoping you are able to spend it with those you love today!

The Craft Must Go On: Upcycled Rock N’ Roll Bar Stool

A few months back, I came across a wooden bar stool at Goodwill for $5.99. I liked the size and design of the stool, and thought it would make a great decoupage piece.

DSC_0884

I decided to upcycle the stool with a Rock N’ Roll theme,  and since it was to be a gift for my husband, I chose the Irish Rock band Thin Lizzy as a subject. The band is one of our favorites and have a vast catalog of great music.  This initial vision took a back seat to the holidays, and various other projects. The idea seemed doomed afer one mishap after another involving this project.  I abused this stool, and used it to allow smaller painted projects to dry.  When I attempted to prime it, the spray can malfunctioned splattering the primer.  (I believe the can may have been too cold) After the bar stool was dry, I sanded off the “lumpy” paint by hand.  Creating yet more work for myself, while attempting to smooth out an air bubble on the initial decoupage print, I tore a hole in it and had to scrape it off only to start all over again.  Despite all of these blunders,  the project managed to come together.  Turns out I found a much nicer print, based on the album cover for “Nightlife” The print featured a black panther on the prowl like the one featured on the cover below.

Thin Lizzy Night Life

I painted the entire chair in black and red alternating the colors.  It took several coats to obtain good coverage.  Once dry I applied Mod Podge to the seat with a foam brush.  I carefully applied the printed logo and smoothed it out carefully with my hands doing my best to avoid tearing or wrinkling.  I painted the area not covered by the print red, creating a bull’s eye effect on the seat.  Once all the paint was dry, I used Mod Podge to cover the entire bar stool.

DSC_1581

Finally, my crafting nightmare showed some “Nightlife” after much adversity.  More importantly my husband seems happy with the result. Now we just need the bar..

Wanna see more chair restyles from “On The Upcycle?  Click Here

DSC_1583

Happy To Be A Sunshine Blogger

sunshine-award

I am always extremely flattered when a fellow blogger takes the time out of their day to nominate my humble little blog for an award.  It means a lot to know that others enjoy what I am doing, and helps me to keep going.  I would like to personally thank Kim from  http://craftcreateconnect.com/ for nominating “On The Upcycle” for a Sunshine blogger award. According to Google consensus, this award is given to those bloggers who positively and creatively inspire others.  It is also a great way for bloggers to get to know one another.  Please be sure and visit Kim’s blog and say “hello”!  She has a site you can get lost on, so many amazing ideas!

Rules For this Award are:

1. Share 11 facts about yourself.

2. Answer the 11 questions that were asked by the blogger who nominated you.
3. Include 11 questions for your nominees to answer.
4. Notify your nominees about this post.

Lets see 11 facts about myself…

1. I love animals and have a dog and two cats (and my daughter’s goldfish Dorothy)

2. My favorite food is Eggplant Parm

3. I have one tattoo, a set of paw prints on my foot

4. I have a Diet Soda addiction.  I know “not” good..

5. My husband and I have been “together” for almost 13 years.

6. We eloped and were married in Virgina.

7.  I went to college for art, but dropped out to pursue an animal health sciences career.

8.  I have  donated my hair 5 times to “Locks of Love”

9.  I have been to over 50 music concerts in my lifetime.  I lost count!

10.  I love vinyl, and I love to collect LP’s

11.  I prefer all things retro and I am a “throwback” at heart!

Now, I answer the 11 proposed questions about myself.

1) Let’s start with something important… White, Milk or Dark Chocolate?

Milk Chocolate is my favorite, but I have rarely met a “chocolate” I didn’t like.

2) Coffee or Tea (or something totally different?)

If I had to choose, I would say Coffee, but I also love hot chocolate!

3) Where do you find your inspiration?

The miracle that is my daughter inspires me and all the great bloggers and crafters all over the world.

4) Monday mornings… love em or loathe them?

I would love to meet the person who answers “love them”  I am a typical Monday “hater”

5) What is it that keeps you blogging?

I love inspiring others to craft, it is also a HUGE stress reliever for me!

6) Curl up on the couch or night on the town?

Right now, a night on the town!  Such a rare luxury with a 2 year-old!

7) Who would you say is your hero?

My husband.  He works so hard and is an amazing dad, and sometimes I wonder what he sees in me!

8) Best film of all time?

Goodfellas although I am a huge fan of movies and I only pick that one because, it is always the first one that comes to mind!

9) How would you describe yourself in 10 words or less?

An Easy Going, Caring, Creative, Mom who loves life!

10) Do you have a job not associated with your blog?  If so, what is it?

Yes, I am a full-time working mom who works secretarial  in the health care industry.

11) Where else can we find and follow you?

On The Upcycle is on  Facebook, Twitter and Pinterest.

The hardest part comes next, I must choose only 11 bogs.  This is the most difficult, because so many of you touch me in so many ways and I wish I could nominate everyone.  Please also know that if you decide not to forward the Sunshine award on that is OK too. I am simply glad I am able to visit each and every one of you and thanks for sharing a bit of who you are with the world.

And the Sunshine Blogger award nominees are:

A Hundred Years Ago

Story By Modcloth

Crochet Adventures

Crafty Staci

Alison Brickman Makes It Work

Confessions Of A Refashionista

Mod Flowers

Brave New Home

Source Of Inspiration

Making A Life

A Curious Gal

Want to pass along the award?  Here are 11 questions:

  1. Why and When did you decide to start a blog?
  2. Tell us something interesting about you.
  3. What is your favorite TV Show?
  4. Dog or Cat Person (or neither or both!)
  5. What is your favorite season?
  6. What inspires you the most?
  7. Do you have a nickname?  If so how did you acquire it?
  8. What is your favorite sport?
  9. What is your favorite Holiday and Why?
  10. Sports car or Pickup Truck?
  11. If you could live anywhere in the world, where would that be?
  12. M&M’s or Reese Pieces?  Have a wonderful Week!

The Toilet Paper Roll Experiment: Part Two

Just think of all the toilet paper rolls that are discarded each day!  They serve their purpose and are tossed in the trash can without a thought. When I walked into the bathroom at work, I noticed a few sitting there waiting to be discarded.  Since my upcycling mission started, I tend to look at things a bit different.  I especially love to take something that most certainly would end up in the garbage and give it a second life. I snatched a roll and went home to craft The Spare a Square Project.

DSC_1122

The initial project was a success, and I realized these card board rolls can be used in organizing my craft room items.  There are many upcycle ideas on the web when it comes to cardboard rolls. One amazing example, can be found here.  Word got out around the office that I was starting to save these rolls from the trash for a project to be determined later.  Suddenly, they started appearing on my desk and before I knew it, I had quite a few of them thanks to my recycling and equally curious friends.  I think they were curious to see what exactly I planned to do with them!

DSC_1508

I was sitting in craft room pondering the idea and I decided to create craft supply wall storage. Initially, I was not sure what I would store inside them, that idea would come to me later.

First, I painted the inside of the tubes white with acrylic paint.

DSC_1509

Next, I looked through the fabric that I had available and decided on a “fun” colorful pattern to decoupage. I cut pieces of fabric that would be enough to cover the outside of the roll.  I applied Mod Podge to the it with a foam craft brush, and placed it on to the fabric.

DSC_1513

Once the Mod Podge was applied I “rolled” the toilet paper roll on the fabric, and it adhered nicely.

DSC_1514

I trimmed away any excess fabric with a pair of scissors.

DSC_1515

I repeated this process with all of them.  Once they were done, I used a high temp hot glue to glue them together. I arranged them in rows. Three at the bottom, then two then one. Like this:

DSC_1521

I touched up the white paint in spots particularly around the edges, and once dry, added a Mod Podge finish to the entire project.

DSC_1533

Now that the project was complete, I had to figure out what to store in it!  It didn’t take me long to come up with the idea of storing my smaller containers of paint, and it created easy access to any color I need.

And…I decided to hang it like this:

DSC_1540

Who needs a square, when you can have the whole roll?

Materials:

Six Large toilet paper rolls

Mod Podge

Fabric

Hi Temp Hot Glue Gun

White Acrylic Paint

Scissors/Foam Craft Brush, and a Paint Brush.

I am “Thankful” For My Readers: Decoupage Wooden Tray Giveaway!

The Thanksgiving holiday is a time to reflect on the many blessings a person has in their life. Many times the stresses of everyday life cloud our thinking and distract us from what really matters. I am so deeply blessed to have connected with so many wonderful people in my life past and present. This includes all those who have taken the time out of their day to stop by  “On The Upcycle” to read, comment and share ideas with me. It has been a little over 6 months since I started my blog and the response has been overwhelming.  A special “thank you” to those in the Word Press community whom helped lend a helping hand to yours truly along the way!

I thought to myself, that this would be a great time to show a small token of appreciation to my readers who have inspired me to keep going even after feeling discouraged. What better way to show it than a Thanksgiving day drawing and giveaway?!

Stay Calm and Craft- A Simple Wooden Tray Decoupage

Image

Win The Decorative Victorian Inspired Wooden Tray Decoupage Pictured Above:

All you have to do to enter the drawing is “Like” On The Upcycle on Facebook, and comment on this post.  I would love to hear what you are thankful for in life or if you have a favorite “On The Upcycle” project what is it and what do you like about it?  I will draw one winner on Thanksgiving day and announce the winner on my blog.  I ask that the winner contact me with their address, and I will happily mail your prize. Thanks again to all my readers and  Good Luck!