Notre Dame Fighting Irish Decoupage College Football Chair

This Saturday, two impressive college football teams will square off in what proves to be an epic battle.  # 2 Florida State is favored over the 6-0 5th ranked Notre Dame.  The Fighting Irish are clear underdogs in this matchup, and the history behind these two teams and prior matchups, seem to support this fact.  Looking for the upset, Notre Dame coach Brian Kelly will surly be put to the test.  They will need to play their best football yet. They will need to…..

Play_like_a_champion_sign

My husband grew up watching Notre Dame and rooting for the Irish along with his father.  Like many teams Notre Dame has had its share of ups and downs through the years, but despite this my father in law’s love for his Irish never waned. Every game win or lose.. it didn’t matter, It was a celebration. It was Notre Dame Saturday!  If you root for and follow a team you know that it becomes a part of your life and present during many important memories.  My husband and I often think of our father fondly, and though he passed many years ago, Watching the games and following his favorite team brings us closer to him.  I wanted to make my husband a special gift, and it never seemed like a better time than for one of their biggest games. I picked up a lovely solid maple ladder back chair at Goodwill that had seen better days.  It was priced under five dollars, and I was drawn to its design immediately.  The chair has a stamp from a furniture company under the seat: Louis Albert and Company, Philadelphia PA.

Thrift Store Ladder Back Maple Chair

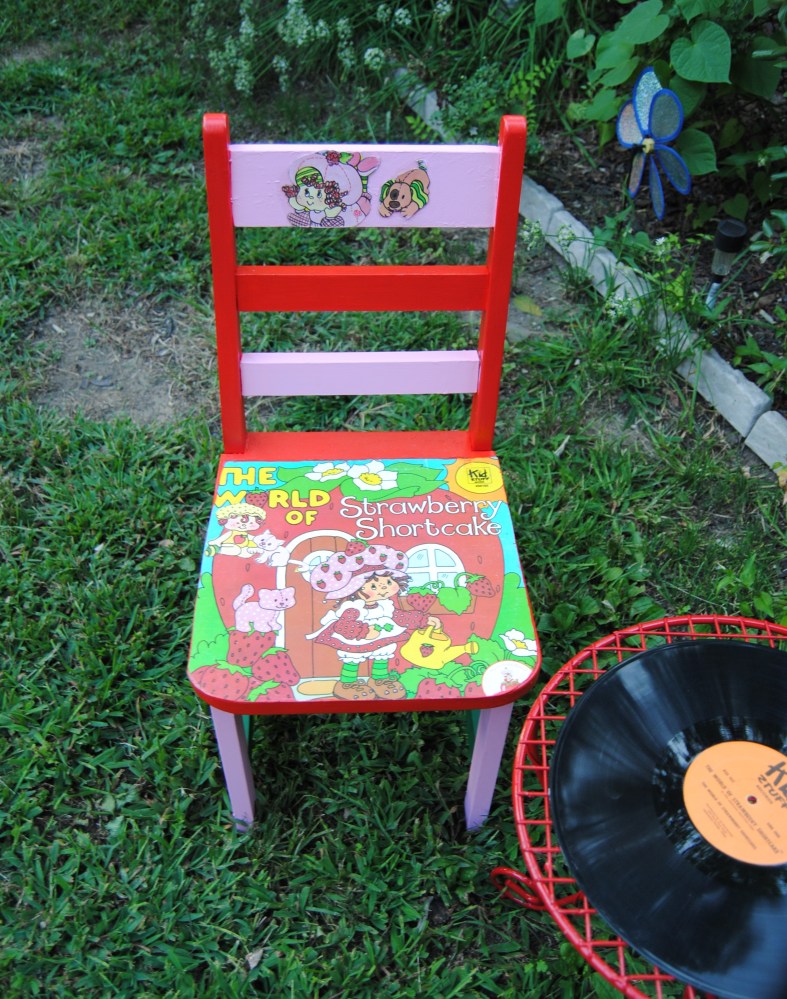
It seemed the perfect project chair, and with that the Fighting Irish Notre Dame chair, was born.  If you have followed my blog, you know I have a special place in my crafty heart for chairs.  I am drawn to functional pieces of art and to me a chair embodies both these elements nicely.  I printed out the college decal of choice on my printer. I then cleaned and prepped the chair with a white spray on primer.

Primed Chair

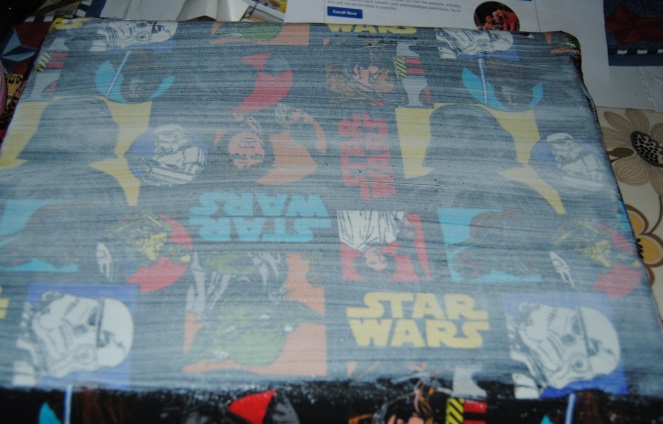
I applied Mod Podge to the seat with a foam craft brush.  I then added the print, gently smoothing out any air bubbles with my hands.

Apply Mod Podge

DSC_0827

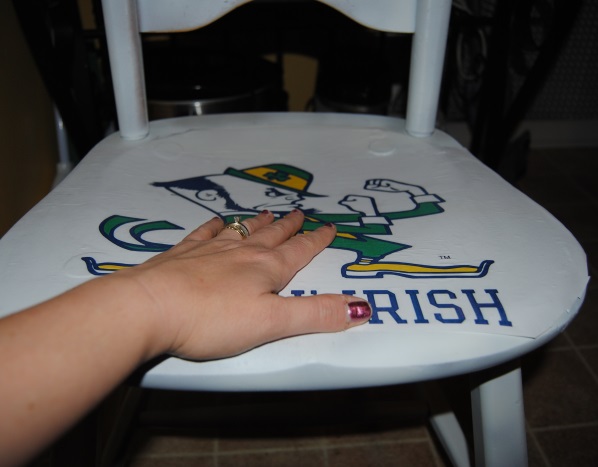
I added a thin layer of Mod Podge over the top of the print to seal it.  Once dry, I began the lengthy process of painting the chair.  I used the team colors, gold, blue and green for the color scheme.  It took several coats to obtain proper coverage.  I carefully painted the area around the image, and although time-consuming, it made the image appear to flow with the seat. Because of the small areas, I decided to paint rather than to cut the image out.  Adding Mod Podge before painting the paper prevented damage and curling.  Two coats of Mod Podge over the painted area, properly sealed it. I decided to give the feet of the chair some character by adding the gold dipped legs. Once the paint was dry over the span of about two nights, I covered the entire chair in Mod Podge to seal the acrylic paint.

Decoupage Notre Dame Fighting Irish College Sports Chair

Notre Dame College Football Chair

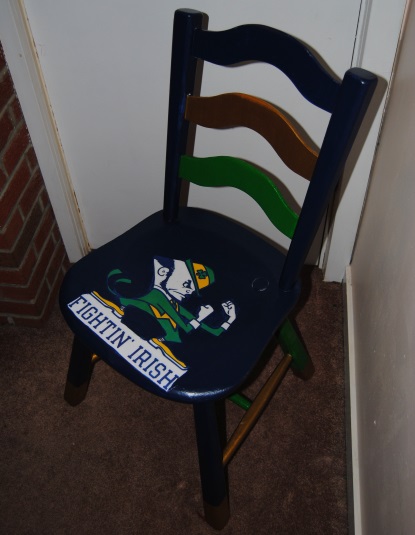
Now my husband has a special chair to sit upon and watch the game this weekend.  Another Notre Dame Saturday of family memories with our own daughter, and a Fighting Irish college football chair to enjoy for many years and games to come!
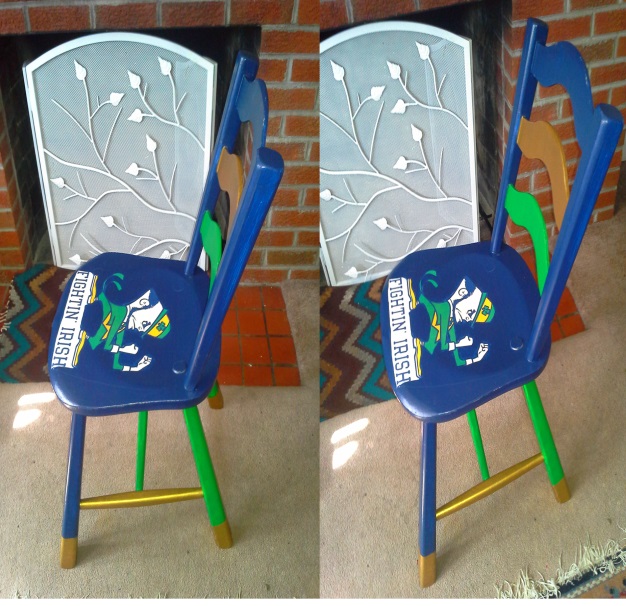
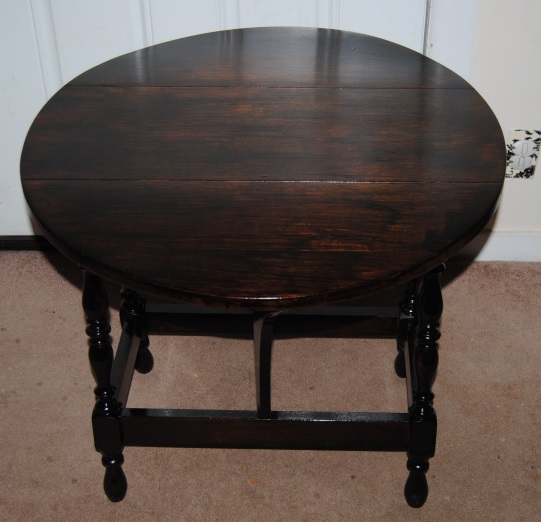
notre dame chair

Before and After:

before after

Not a fan of the Irish?  Make your own college football chair:

Materials:

Decal or Team Print Of Choice

Old Wooden Chair

White Spray On Primer
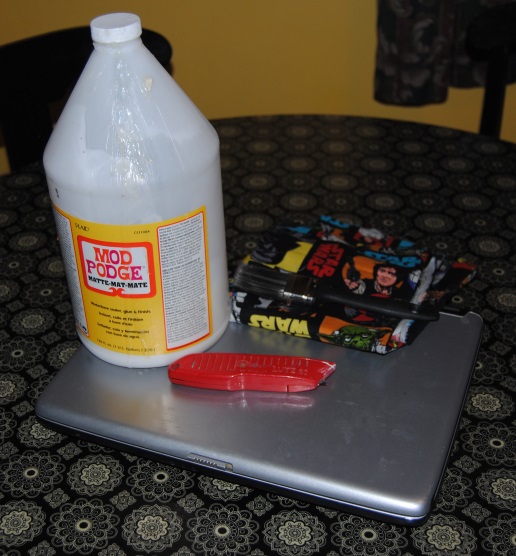
Mod Podge

Acrylic Paint (Team Colors of Choice)

Craft Brush, Paint Brushes

Scissors

Lighten Up: DIY Painted Fireplace Screen

Winter is quickly approaching, and now is the time to prepare and accomplish last-minute projects around the house before the frigid air takes hold. One such project on my fall to do list was preparing our fireplace for another possible harsh winter.

When my husband and I saw our house for the first time for me it was love at first sight, and this fireplace had me at “Hello.”  Some would, consider red brick outdated, but I loved its throwback flare and vowed never to change it. Fast forward years later, and my proclamation proved true. I managed to do absolutely nothing with the fireplace! We even had the same boring black fireplace screen we purchased at Target on clearance in 2007. The depth of our hearth made the unlit fireplace appear as if it were a “black hole.”  The dark screen blended in with the background and it’s vine detailing was lost in the fray.  As beautiful as the red brick was, it was missing something.  It is surprising that it took all this time to come to the realization that the fireplace needed some “pop”, after all it was the focal point of our living room.   Of course, a redo of the red brick was out of the question, so the hubby and I decided the screen needed a change. Instead of buying a new more exciting fireplace screen we vowed to do something to upcycle the old one!

Old Black Fireplace screen

I immediately took it outside and before I even bought the paint cleaned it thoroughly with the garden hose and allowed it to dry.  Since the screen would experience the extreme heat coming off the fireplace I decided to stop by Lowes and pick up 2 cans of white Rust-Oleum high heat paint.

High Heat Paint

According to the paint specs, it is intended for use in temperatures up to 1,200 degrees fahrenheit. The paint is also rust and corrosion resistant for durability.   I applied one can allowed it to dry overnight and then applied the other.  This DIY project is about as simple as it gets.  For me,  it made a dramatic difference. Painting the screen white, succesfully brought out the detail and added an extra dimension. Is their anything a fresh coat of paint can’t fix?

Repaint an old fireplace screen with high heat paint

The screen also went well with the neutral sandstone walls, and former upcycle project black and white damask chair which currently resides as extra seating in our living room.

Lighten up up your fireplace

A special thank you to Nikkimarie at My People in History.  She is a family historian and genealogy buff like me, and if you are a lover of history, family stories and vintage photo’s stop by her blog and say hello!  Thank you for nominating “On The Upcycle” for the One Lovely Blog Award, and a big thank you to all my readers for the continued support and encouragement!

Wanna see more white fireplace screens?  Click Here

Decoupage I Must: Star Wars Inspired Laptop Made With Mod Podge

With the new Star Wars Episode VII set to be released in 2015, the franchise is more popular than ever. I am sure not even George Lucas himself, could have imagined just how big Star Wars would become. The wise Yoda said it best, “Impossible to see, the future is.”

Yoda

The husband and I are children of the 70’s and 80’s and remember a time before CGI (Computer Generated Imagery) and digital effects came of age. For it’s time the original Star Wars was innovative and visually impressive compared to other science fiction movies.  It touched many aspects of pop culture, and was heavily marketed toward children with action figures and tons of merchandise.  It is the third most popular movie franchise in history according to The Numbers.com.  Is it any wonder that when I came across Star Wars Fabric at Jo-ann Fabric, I couldn’t resist buying it?  The fabric was colorful, fun and had a bit of childhood nostalgia thrown in. This fabric inspired such projects as Creative Blast Off: Star Wars Kids Chair, and the Dollar Store Craft, Star Wars Candles.  My husband has an beat up laptop that he uses to surf You Tube.  It is old and scratched and could use a makeover.  I thought the left over Star Wars fabric would be a perfect decoupage material.  I had also wanted to try using decoupage on a laptop for quite sometime as I already decoupaged cell phones, and computer tablets previously.

DSC_0736

What you will need to decoupage your Lap Top:

Fabric (Can Also Use Paper, Scrapbook paper)

Mod Podge

Scissors

Paint Brush

Box Cutter Knife

Carefully apply Mod Podge to the top of the computer with a paint brush. Be mindful of the Mod Podge it is important that it not drip into the computer crevices and openings.

DSC_0737

Apply the fabric, smoothing it out with your hands.  Trim away any excess fabric with the scissors. Once it is dry apply more Mod Podge over the fabric to seal it.  I applied three coats total, allowing time to dry between each coat.

DSC_0740

Once dry, I carefully trimmed any excess fabric with the box cutter knife, and then sealed the edges of the fabric with more Mod Podge.

DSC_0746

A laptop that a Jedi would approve of and, the hubby seems to like it too. Here’s to the kid in all of us!

“Truly wonderful, the mind of a child is.”

Ghosts of Furniture Past: Refinished Drop Leaf Table

My husband has very few mementos from his childhood, so for this project the pressure was on.   This round, drop leaf table was used for just about every purpose in my husband’s family home.  It had seen better days.  It survived over 30 years of wear,  dirty hands, spilled drinks and more.  If only a little table could talk!  I could only imagine the stories it would tell!

I wanted to restore this table to its original state before all its scratches, and dings, but it would prove to be my most time-consuming project to date, and also the most rewarding.

Cleaning over 30 years of dirt and grime is not easy, but a necessary step when preparing a table for restoration.  I cleaned it throughly with a damp cloth and used a scrubber sponge for tough to clean areas.  Once clean and dry, it was time to sand it and I did so by hand with sandpaper!  This was very messy and time-consuming.  I suggest wearing a mask, and doing this in an area you don’t mind getting dirty. Completing this part of the project outside would be preferable.  All the more reason to invest in an electric sander having one would have accelerated this process.  In between other projects I worked tirelessly to get the table completely sanded and ready for staining.

Round Drop Leaf Table

I chose Minwax  Jacobean 2750 for the stain.  I wanted a dark rich color, which would contrast nicely with the sandstone colored walls.  While working with oil based paint be sure to have a proper solvent nearby for clean-up.  I use Safer Paint Thinner which is more environmentally friendly than traditional cleaners.  I applied the Minwax stain with a brush, following along with the wood grain.  Unfortunately, for me,  I applied too much stain and due to the humid summer weather, the table took over a week to dry!  At this point, I was in no rush, and it rested quietly in the craft room locked away and out of reach from curious toddler hands.

Once the table was completely dry, I sealed it with quick drying Minwax Semi-Gloss Polyurethane.  I applied two coats, for a smooth finish.

Restored Family table

Finally!  After many weeks and many more pieces of sandpaper, the family table was complete and ready for its permanent place of honor in our family home.

Before and After Drop Leaf Table:

Before and After Refinished Drop Leaf Table

Watching The Paint Dry: 50 Questions With “On The Upcycle”

It has been hectic to say the least behind the scenes.  I have several projects to share, but this week, I have been working on a family table re-finish.  It has been extremely humid in my area, and it is taking forever and a day for the oil based paint to dry.  Not to mention, I added a little too much stain, which made the table a nice dark color, but only added to the length of time it took for the piece to dry!  In the meantime, I have been catching up in between projects,  and an increasingly busy schedule on my WordPress reading.   

Last year, I was invited by Elise at  Cheeky Geeks  to take part in her blog’s annual Geek month.

In the spirit of Throw Back Thursday, and for those who missed the original post you may want to check it out (especially if you are an “1980’s geek” like I am.)  I upcycled an old kid’s chair using an old Strawberry Shortcake record.

Upcycled Strawberry Shortcake Kids Record Chair

Be sure and stop by Elise’s blog for this year’s geek month.  If you are anything like me and have a “Geeky” side you will enjoy following Elise on her Geek Month journey.

Cheeky Geeks : Geek Month Celebration

Elise also had a challenge for me if I was willing to accept:  Answer 50 questions about myself.   It would seem that she is interested to know a bit more about the women behind the Upcycle.  Seemed like a great time to accept this challenge, while I quite literally wait for the paint to dry….

  1. What are you wearing?-Yoga pants and a rock tee. I am all about comfort!
  2. Ever been in love? Yes, and I love, love!
  3. Ever had a terrible breakup? I went through a divorce, what do you think?
  4. How tall are you? 5 feet 4 inches
  5. How much do you weigh? It’s never polite to ask a lady her weight!
  6. Any tattoos? Two black animal paw prints on the top of my foot
  7. Any piercings? 3 piercings in one ear, two on the other
  8. OTP (one true pair, favorite fictional couple)? Kristoff and Anna from Frozen.  My daughter is into Disney at the moment!
  9. Favorite show? Game of Thrones
  10. Favorite bands? Too many to list, but Rock N Roll is my first love
  11. Something you miss?- My Grandfather Vincent
  12. Favorite song? Right now? “I Got A Name” Jim Croce
  13. How old are you? 39 and holding on for dear life!
  14. Zodiac sign? Aries
  15. Quality you look for in a partner? No question sense of humor!
  16. Favorite Quote? “Life is what happens while you are busy making other plans” John Lennon
  17. Favorite actor? Peter Dinklage I love, love him!
  18. Favorite color? Purple
  19. Loud music or soft? Loud
  20. Where do you go when you’re sad? Unfortunately, inside my head.
  21. How long does it take you to shower? 10 minutes I have to be quick I have a toddler!
  22. How long does it take you to get ready in the morning? 30 minutes
  23. Ever been in a physical fight? yes, but I was forced
  24. Turn on? Kindness
  25. Turn off? Elitism
  26. The reason I started blogging? I wanted to share my thriftiness with others, and I love to write!
  27. Fears? Not being able to see my daughter grow up
  28. Last thing that made you cry? My daughter
  29. Last time you said you loved someone? Today
  30. Meaning behind the name of your blog?It popped in my head one day. I kept thinking of the song “Little Suzi’s on the Up” by the band PhD.
  31. Last book you read? OMG embarrassing, All my reading is on the computer!
  32. The book you’re currently reading? Ummm refer to # 31
  33. Last show you watched? Big Bang Theory
  34. Last person you talked to?-My husband
  35. The relationship between you and the person you last texted? My sister
  36. Favorite food? Eggplant parm and Spaghetti
  37. Place you want to visit? Ireland
  38. Last place you were? At Work
  39. Do you have a crush? Do girl crushes count? Check out this awesome blog: AussaLorens.com
  40. Last time you kissed someone? Today
  41. Last time you were insulted? LOL probably every day, but most likely I don’t know about it!
  42. Favorite flavor of sweet? Sour Patch Kids
  43. What instruments do you play? I tried guitar, but could never catch on, I played the clarinet in elementary school
  44. Favorite piece of jewelry? My wedding ring
  45. Last song you sang? Heart “Magic Man”
  46. Favorite chat up line? I don’t have one! It’s whatever pops into my head at any given time.
  47. Have you ever used it? N/A
  48. Last time you hung out with anyone? Last weekend.
  49. Who should answer these questions next? I wanna know more about Daniela Joe If she’s willing to give it a go!
  50. LOL 50 Questions?  I think I am missing something here…

Made in the Shade-Lamp Shade Fabric Restyle

Many years ago, my mom gifted me a stylish lamp that she no longer had a use for.  I am a big  fan of decorative lighting, so I was happy to have it.  The lamp attached directly to the wall, so it was also a wonderful space saver.  The decor of the lamp was fairly neutral, so it fit most of my living room design changes through the years.  The lamp shade was a cream color with hanging beads along the shade rim.

wall lamp

For a long time, I had wanted to try a lamp shade decoupage, and I felt this would be the perfect lamp for my first attempt.  I had some smaller pieces of black and white damask fabric left over from several previous projects.  These projects were:  The Broken Chair ChallengeYou Had Me At Half Table, and Vintage Sewing Box (Just to name a few)

Upcycled chair with half moon table

Keep in mind, if you plan on restyling a lamp shade it is important that the shade is light in color, and there are no dark designs on it.   Otherwise, when the shade is illuminated the previous pattern will show through the new fabric.

Before getting started, I removed the shade from the lamp and gently cleaned it with a damp cloth.  It is important to remove any dust and dirt from the shade before applying the Mod Podge.  Once this was complete and the shade was dry, I generously applied Mod Podge to the outside of the shade with a broad paint brush.


DSC_0721

I then placed a piece of the damask fabric over the lamp shade smoothing it out carefully with my hands to avoid wrinkles.  Since fabric is being applied to cloth, it is important to apply enough pressure so that the fabric adheres well to the shade.

DSC_0720

I placed the shade in front of the fan so that it would dry quickly.  Once this step was complete, I applied a generous amount of Mod Podge over top of the fabric.  I allowed it to dry thoroughly between coats, adding three coats of Mod Podge in total.

DSC_0726

Once the shade was completely dry, I carefully trimmed away the excess fabric with a pair of scissors, and added additional Mod Podge along the edges of the fabric.

Restyled Fabric Decoupage Lamp Shade

The lamp looks amazing, and now matches my current living room decor perfectly!  This entire project was a quick one too! Overall completion took about one hour!

Decorate a boring lampshade with fabric

Materials:

Light Colored Lamp Shade

Mod Podge

Paint Brush

Fabric Of Choice

Scissors

An Accident Waiting To Happen: Upcycled Pringles Can Lamp

              Decorative Decoupage Pringles Lamp

This project idea started out as a 99 cent purchase at Goodwill.  An adorable miniature ceramic lamp with a round base that would require a minor  fabric decoupage makeover to make the perfect table top night-light for our bedroom.   However; thanks to the toddler apprentice’s rather curious hands it was simply not to be.  She climbed up on the ottoman, reached out her arms, and knocked it off the shelf. It broke the ceramic base into a million pieces. More importantly, she was not hurt in the accident, just a bit startled and remorseful   Although I was initially upset,  my cross demeanor faded quickly as I thought of ways to reuse the unbroken pieces of the lamp and shade.  I searched the craft room for some recycled items I was saving for a crafting rainy day.   I searched and looked for what I thought would make great lamp bases. It then occurred to me…I had a fever for a Pringles can lamp!

Minimalist Pringles Lamp Upcycle

An Upcycled Pringles Can Lamp For The Minimalist

The Pringles can was a great choice because it didn’t require a glass cutter to feed the wire through like a glass bottle or jar would.  I used a box cutter knife to VERY carefully cut a cross through the plastic lid.  I popped the light in and it fit nicely.   Before I placed the lid back on the can I filled the bottom with a few decorative marbles I had lying around. This added some weight and stability to the lamp.  I cut a hole at the base of the can using the UPC on the can as a guide, so I could properly feed the wire through the bottom.  For those of you who are practical, and love Pringles, you may want to stop right here.  I call this the minimalist version.

How to Create An Upcycled Pringles Can Lamp That’s A Little More Decorative

Decorative Upcycled Pringles Lamp

For those who want to create a more decorative piece, You can use a little fabric decoupage to decorate the Pringles can and lamp shade.  I used some scrap Peacock inspired fabric I had lying around the craft room.  I used Mod Podge to apply the measured fabric to the can and cut out designs to place on either side of the lamp shade to add some symmetry.  Once dry, I applied more Mod Podge over the fabric to properly seal the lamp base.  I placed it in front of our fan to dry.   Now it was ready to be plugged in and illuminated.  The possibilities here are endless.  If you don’t have fabric handy you can also use scrapbook paper.  You can create seasonal cans and interchange them with the light and lid to transform the look of the lamp.

Upcycled Pringles Can Lamp

A lesson in life and living on the Upcycle, the greatest mistakes can have the greatest rewards!  That is how I feel about this project. If it wasn’t for my overly curious toddler, I would have never known the fun of this Pringles can craft.  Thank heaven for overly curious little girls!

Have you had any crafting disasters that turned into triumphs?  What was your favorite craft mishap?

Materials Used:

Broken miniature lamp

Pringles can with lid

Box Cutter Knife

Handful of marbles

Fabric or Scrapbook Paper Of Choice

Foam brush or Paint Brush

Scissors

Mod Podge

The Past Called… And It’s For You

There is nothing I love more than nostalgia!  As a child of the 1980’s I remember talking on the phone for hours with my best friend. Our phone was attached to the wall with a rather long cord that I could never seem to get untangled.   Answering machines were also becoming popular around this time, but not everyone had one.  If the phone rang (That loud distinct ring we all know and love) you had to answer it!  Oh and by the way you had to answer it without knowing who was on the other end,  no caller id yet either!  This is before cell phones, texting, Skype and the internet, when people actually had to pick up the phone when it rang, and..well actually talk to each other!

In a  recent post, I mentioned my quest to find the rather elusive vintage, rotary phone.  I had seen some really great examples of vintage phones restyled with decoupage on the web,  and I was eager to try a project myself. In my area, rotary phones are rare.  During many trips to thrift stores, it was always on my mental wish list, but I never seemed to come across one.  Then one day my luck started to change.  First, I was able to find a vintage  red, Trimline desk phone, with tone dialing.  It was not the rotary dialer I was looking for, but still a great find.  At least I was getting warmer! Then about two weeks later I wandered into the same Goodwill.  I quickly scanned the electronics aisle as I always do during my walk throughs.  As I was about to turn around and leave, my eyes dropped and their it was in all it’s splendor a black 1950’s Western Electric Rotary Phone in excellent condition.  I couldn’t hold back my excitement and squealed out loud.  The lady next to me smiled and we struck up a conversation.  I had been looking for this for a long time.  It was priced right too, only $5.99!  Now, I had two great vintage phones that would make great projects!

Western Electric  and Trimline Phones

Both phones function well, and are in excellent condition.   Although due to my digital line, my rotary phone rings and receives calls, but cannot dial out without a special filter attachment which costs about 50 dollars.  This apparatus converts rotary pulses into tones modern digital lines can recognize.  The black rotary phone works well and rings loudly; Unlike my current, modern cordless phone.  I have not yet decided what I am going to do with the rotary phone.  I did decide however; that the red phone would make a great first attempt at decoupage.  A phone of this type which has many more angles and curves to work with I anticipated, would be more difficult than a previous cell phone decoupage.  project I had tried.

I chose a 1960’s inspired fabric I had used in previous projects that I thought would go well with the red color and fit in nicely with the phone’s vintage flare. I decided to cut out the circular shapes with a pair of sharp scissors.

Groovy Fabric

I applied Mod Podge to the back of the fabric with a paint brush.

DSC_0571

One by one, I placed them on the surface of the phone receiver gently smoothing out any wrinkles with my fingers. I also applied them on various other parts of the phone such as the base, and phone cradle.

decoupage phone

DSC_0575

I then added a few coats of Mod Podge over top the fabric to seal it allowing it to dry between coats.

Decoupage Vintage Trimline Phone Made With Fabric

Now we have a groovy vintage landline phone popping with color!  Look for a  rotary re-do coming soon once I build up enough courage of course!

DSC_0591DSC_0587

Materials:

Fabric of choice

Scissors

Mod Podge

Paint brush with coarse bristles

Old Phone

The Genealogy Series: The Plummer’s Of The Weald: A Butler And A Gentleman.

I admit, I have been a bit distracted lately.  Life has taken over and it has been very hectic, which has interrupted any hopes of completing crafting projects.  In the midst of all the chaos, I made a huge break through when it comes to my British ancestry.  Through various Google searches, I discovered a website called The Weald.  The Weald is named after an area in England, South of London that encompasses the counties of Sussex, Hampshire, Kent and Surrey. The website focuses on this heavily forested, historic area and includes genealogical information on British families from the region.  I reached out to the webmaster via e-mail and he was gracious enough to provide information on relatives going back several generations for the surnames Plummer and Long.  Both of my families surnames originated in the Sussex area.  Today,  I focus on the Plummer surname and family line.  The Plummer’s originated in ancient Anglo-Saxon culture.  It was a surname originally bestowed upon someone who worked with Plumes, or feathers.  It is my Great-Grandmother’s maiden name on my Mother’s Father’s side of the family.

There are very few items around our house that I would call “priceless” As a family historian there is nothing more precious than old family pictures, and documents. One of the most precious documents is my great-grandfather and great grandmother’s wedding certificate and photo album.  My great-grandparents married in The Christ Church in Tunbridge Wells in November of 1905.  This document was passed down in my family and offered many clues that helped me get started with my family research.  It listed the names of my Great, Great Grandfather’s and their occupations.  Henry Long a Coachman and William Plummer a butler.

Plummer, Long Wedding Cert 1905

William Plummer was born in about 1835 in Shottisham, Norfolk England to parents William Plummer Sr, and Mary Plummer (Maiden name currently unknown) Not much is known regarding William’s childhood.  On November 1, 1859 he married Martha Flood in Norfolk, England.  They went on to have 12 children: William, Laura, Maria, James, John, Ruth, George, Benjamin, Ellen, Ethel, Alice, and Daisy.    William supported a rather large family as a butler.  In England wealthy and even some middle class families had servants.  The butler was the most prestigious occupation among servants and was often considered a position of “respect”.  Although the traditional role of butler was to tend to the wine cellar, they had many other responsibilities around the household and oversaw the Servant staff.  Traditionally the butler and master had a solid relationship and friendship, and would often share a drink at the end of the evening.  The butler was the most trusted of all household servants and carried the most responsibility.  In many cases, entering a life of servitude was a decent opportunity for the working man in England due to the class system.  Servants if placed in the correct household,  had decent living accommodations not otherwise afforded to the common man.  As with many instances in England at the time,  a hierarchy even existed among servants with the roles of butler and coachman among the most prestigious.

According to the 1881 English Census, William Plummer and his family lived at The Priory on Parsonage lane in Lamberhurst  The property was owned by Arthur M. Brookfield, a war hero, diplomat, and author. He was also a conservative politician who sat in the House of Commons from 1885 to 1903.  My great-grandmother Daisy was born soon after the 1881 English Census was taken, in December 1882.

1881 English Census

Pictured above the 1881 English Census featuring the Plummer family residing at The Priory in Lamberhurst, England.

windancer1975_4403791

Pictured above: My great-grandmother Daisy (and dog) with sister’s Alice, Ethel and Ruth posing in Tunbridge Wells, England

Pictured Below:  Daisy with brother John Plummer

Daisy and Brother John H Plummer

My Great Grandmother was close to her brother John and her sister’s.  Even after immigrating with her husband Harry Long, an electrical engineer and family in 1925, she still visited England regularly.  My Great Grandmother lived to be over 100 years-old and resided in Vermont during her later years and is said to be buried there.  I remember her son Vincent (my grandfather) showing me a form letter from then president Ronald Reagan, congratulating his mother Daisy for living past the age of one hundred.   Harry Long her husband passed away in 1946 from a heart attack while on their way to their vacation home in Putney, Vermont and is buried with his daughter Eva Long in Englewood, New Jersey.

20318548_118377138937

Pictured above: Harry Long and Daisy Long during happier times, pictured prior Harry’s death in 1946

Pictured Below: The only picture that exists of my great-grandmother Daisy (Plummer) Long and me.  

Taken when I was 3 years-old in 1978 Vermont.  I actually have some memory of this day.

Danielle and Great Grandmother

What was your biggest family research break through?  Have you had success researching your British ancestors? What was your greatest family discovery?

A Decoupage Trilogy: Vintage Suitcase Number Three

I love vintage suitcases!  That may seem surprising coming from someone like me who doesn’t travel much.  The truth is suitcases aren’t just for “packing your bags”  They are also a wonderful way to store keepsakes and other items.  I was lucky enough to find three vintage blue suitcases for $5.99 at Goodwill.  This was an incredible deal, and I have not seen a suitcase purchase worthy since. My first attempt at restyling a suitcase, Travel The Old Fashioned Way I used fabric I purchased from Joann Fabric.  I chose a blue and white floral pattern, and it turned out great for a first attempt.   For the second suitcase,  Pack My Bags Fun And Easy Decoupage Vintage Suitcases I found a great pillow case with a floral red, white and blue color scheme that was perfect.  That left the smallest of the three.

decoupage vintage suitcases with fabric and Mod Podge

This suitcase is special, because inside the lid it has a built-in mirror.  The lining inside is also in perfect condition, another plus! (Please excuse the reflection of the mirror in the photograph)

DSC_0548

For this suitcase I decided to use blue and purple floral sheet that I found in a thrift shop.  I initially wanted to use a scarf, but the material was too thin and I was afraid the blue color of the suitcase would show through the material.

DSC_0533

To see a full tutorial on how to decoupage a suitcase Click Here

Now I have a wonderful set to use for travel or a decorative storage option.

DSC_0542

The search for more luggage continues….