The Happy Card Project: Put A Little Love In Your Art

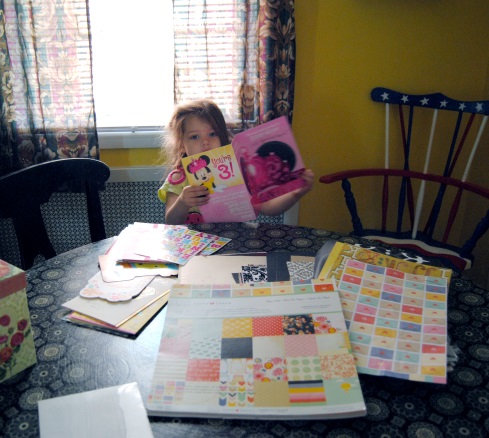
We all know how wonderful it feels when you have a chance to brighten someone’s day.  Sometimes, it is a simple gesture, lending a hand to someone in need, or a few words of encouragement when someone around us is feeling down.  Although many of us would like to contribute to those in need financially, there are times when this is not possible.  That doesn’t mean it is impossible to give.  One of the most precious gifts you can give is time.  This past July 4th weekend, the toddler apprentice and I put aside some time between bbq’s, fireworks and swimming, to sit down and make cards together.  I recently reconnected with an old friend on Facebook who brought a positive movement to my attention.   It was started by her daughter Corinne Mattia.  Corrinne is a psychology student and describes herself as an animal lover, and eternal optimist.  The idea is called  The Happy Card Project.

10426680_567028680074831_4640953951286492227_n

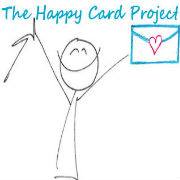
The Happy Card Project’s mission and message is simple:  We brighten our own lives through brightening the lives of others.  They aren’t looking for money or donated goods.  Their motto? Some pursue happiness while others create it.  The Happy Card Project want your homemade, or store-bought cards you may have around the house.  These cards can then be personalized with encouraging words, stories, or anything  intended to brighten someone’s day.   Donated cards are then delivered by the Happy Card Project Team to local hospitals, pediatric facilities, homeless shelters and senior living homes.  Their goal is to simply brighten the spirits of others.

The first 200 cards collected will be donated to the Homeless Bus a charity based in New York City.  The  Homeless Bus, Inc. has made over a 1000 trips to Manhattan providing immediate needs to the homeless from a passenger bus every Saturday night since 1992.  To learn more about this wonderful example of what just a few people can do to make the world a better place, and for ways you can help please visit: The Homelessbus.org

1001506_458858027542918_1251277114_n

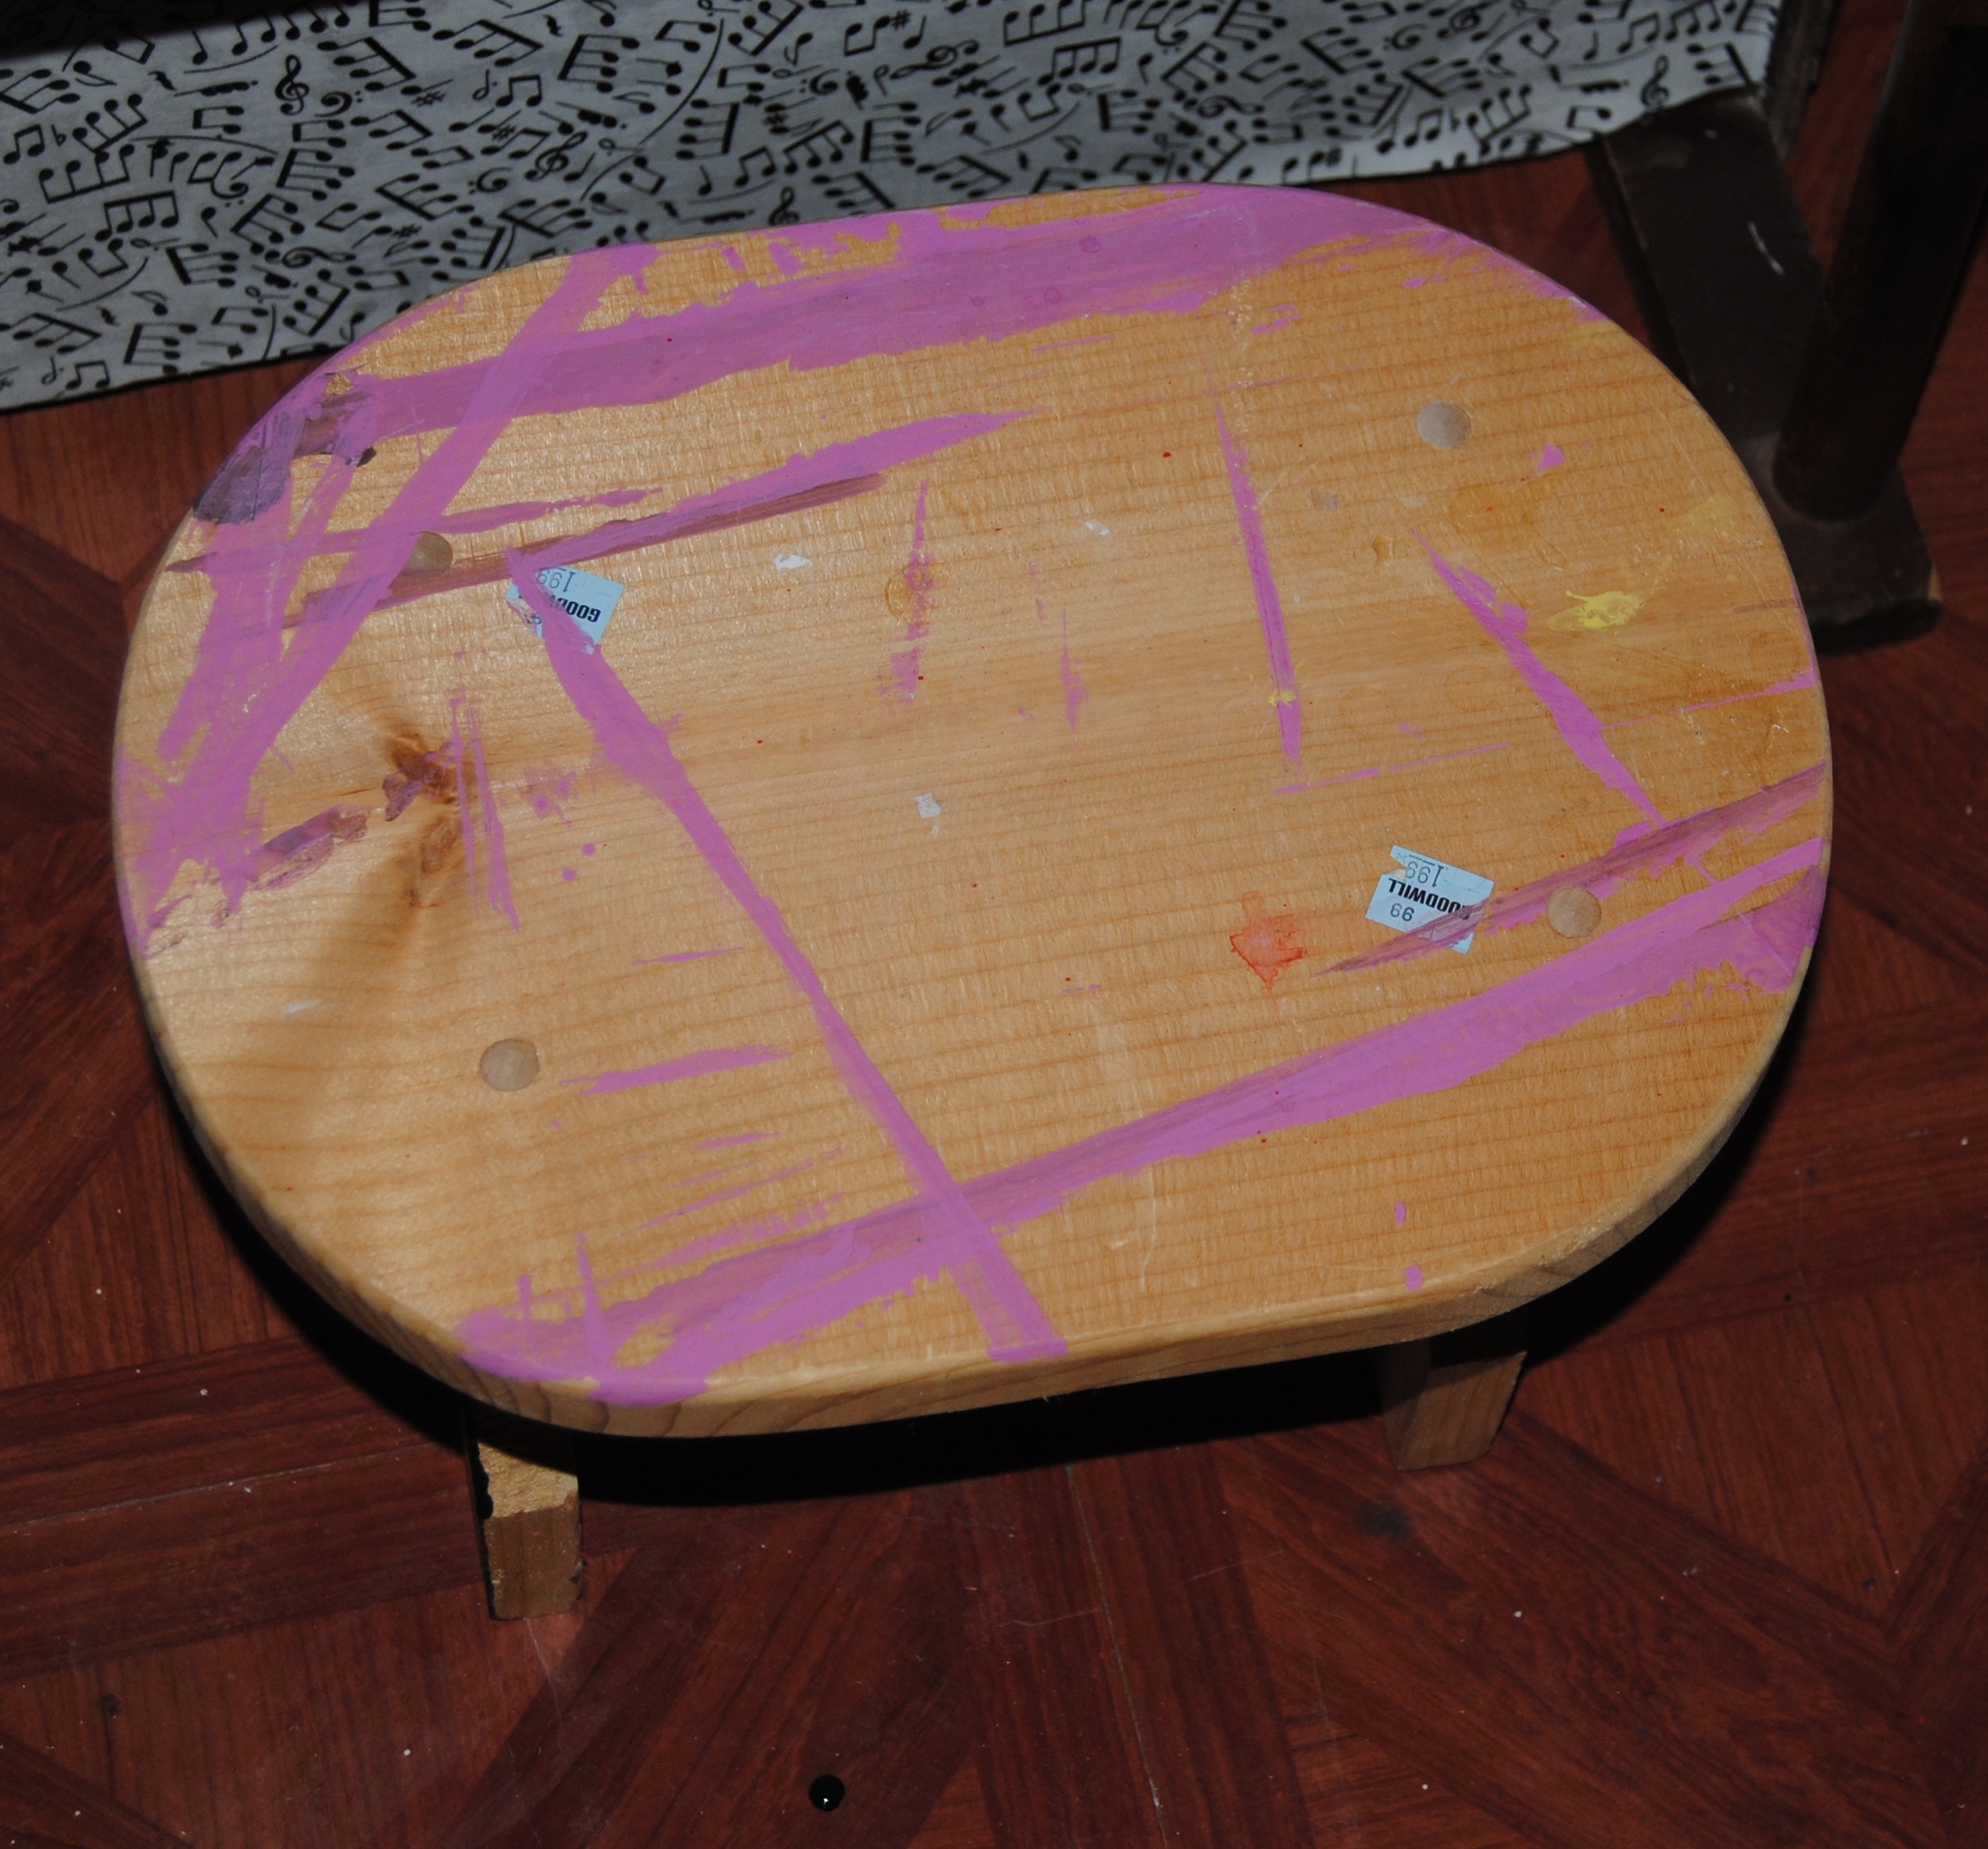
Continuing to follow along with the “On The Upcycle” tradition, I decided to recycle some old greeting cards.   The little toddler apprentice and I sifted through an enormous amount of craft scraps, old cards, stickers and scrap-book paper.  She enjoyed going through these items, and chose a few cards that she liked.

DSC_0480

This was my first attempt at making handmade upcycled cards.  I have seen some beautiful examples of card making on the web and in the WordPress community.  One such artist resides at  The Cobweb Emporium.    These cards are well crafted, elegant and detailed.  Please be sure and stop by and pay Cob Webs a visit.  Trust me, my card crafting skills pale in comparison!

The apprentice and I worked together using the hand over hand technique. She helped me cut the images we planned to use from the old greeting cards with her safety scissors.  I had some unused card stock and it fit the envelopes I had perfectly.

DSC_0489

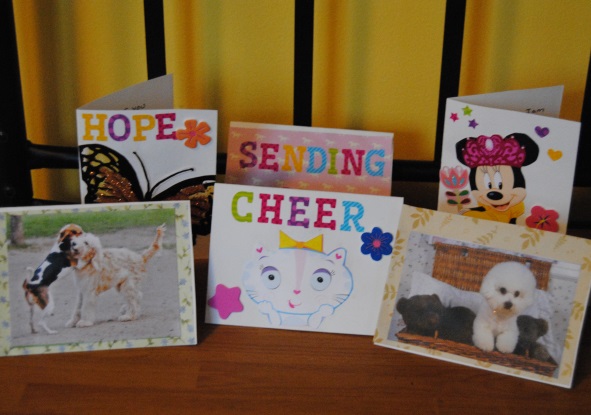
We then decorated each card and added the words Hope,  Cheer and Love. She especially enjoyed gluing the various pieces on the card stock and applying stickers.   Once the glue on the cards was dry we wrote notes of encouragement inside.  The more “adult” cards we signed from the family, and for the others we told a brief story from our three year-old’s point of view.  On the back of the cards we wrote “Made with love and little hands helped.”  We created a total of six cards using materials we already had available at home.  The cost was minimal and consisted of the postage needed to mail the cards.   I can’t think of a better way to spend an afternoon with your kids then doing crafts, and at the same time brighten someone’s else’s day!

DSC_0528

If you would like to spread some good cheer and encouragement to those in need, The Happy Card Project will continue to collect cards going forward for various charity organizations.

You can follow The Happy Card Project on Facebook Here.

If you would like to get involved and have cards you would like to donate to the cause, please send them to:

The Happy Card Project

PO Box 3802

Cherry Hill, NJ 08034

We mailed our cards today!

On The Upcycle Restyle

on-the-upcycle.jpg

This weekend I decided to give “On The Upcycle” a much-needed reboot.  I felt the old blog layout was getting a bit stale. Last night I experienced an evening of insomnia, and decided it was the perfect time to explore new ideas. I hope you all like the new look!  Happy 4th of July weekend everyone!


Car Part Art: Turning Scrap Into Sculpture

I am always intrigued when I  find art in unlikely places.   This past weekend I made an appointment to have front brakes installed on my car.  I planned my day accordingly and woke up bright and early. Meineke is currently having a sale on brakes, and although I had never gone there before for repairs, the allure of saving $50.00 compared to a previous quote I had received was too good to pass up.

When I arrived at the shop I was greeted unexpectedly by a piece of upcycled art.  Of course I had to snap a picture of this pleasant little door greeter and his loyal pup.  This little man and his dog were made from recycled car parts, mufflers, brake parts and the like.  Of course I fell in love with them instantly.

20140628_095404

It seems that one or more of the mechanics has a creative side! Apparently, this is not a new concept as upcycling car parts into works of art is more common than one might think.  Roadside America an online guide to offbeat tourist attractions has a great article featuring some of these so-called “muffler men” who populate the auto shops and roadsides of America.  You may have already seen some of these sculptures on your travels already!

There are also some truly amazing upcycle artists in the world and they take this art form to a whole new level!  One such artist is Australia’s James Corbett.   He has been creating sculptures from spare auto parts and junk since 1999.  Below is an example of his work.  Look at all those spark plugs!

12353_997

Below is James, pictured with one of his many creations.  The eyes are made of headlights…genius!

other5b

To see more of his work visit the Crimson Reason Blog.  They feature several of Jame’s intricate creations.

Another talented scrap artist is Frenchman  Edouard Martinet.  As a young student he became somewhat “obsessed” with insects.  Later, he chose to incorporate his love of insects and other animals in sculpture.  The detail and artistry here is off the charts!

wasp

pigeon

Check out this interview with Edouard Martinet below.

“Art is not what you see, but what you make others see.”
― Edgar Degas


Crib Rail Repurpose: Children’s Book Wall Rack

Recently, we began preparation to move my daughter from her crib to a toddler bed.  When we chose a crib for our registry, we made sure it was a convertible style crib that would grow with her.  We were looking for what most consumers want, quality at a reasonable price.  We chose   the Graco convertible crib in espresso finish.

Graco Crib

It appeared sturdy on the showroom floor and was priced right.  Initially, I was happy with the crib.  Then 18 months later, I notice a few of the metal springs had broken off the frame they were welded on.  One by one the springs broke off.  The crib needed to be reinforced with bungee cords.  We knew this bed would not last like we had previously anticipated. We were forced to come up with an alternative and purchased a new mattress and a toddler bed.  The original mattress was torn by sharp edges left where the springs used to reside.  This was a big disappointment.  We were expecting to use this convertible through her toddler years, but it was not to be.  The crib finally gave way and it was obvious it was no longer safe.  Luckily, the new bed was purchased and was on standby and we were able to quickly make the switch.

I am happy to report that the toddler apprentice loves her new “big girl” bed and the toddler bed experiment has gone surprisingly well!  She lays down and falls right to sleep! We were surprised how quickly she has adjusted.

Toddler Bed

When I dismantled the crib, most of it was broken and not salvageable.  The rail was still in decent shape.  I had seen some ideas online upcycling old cribs ranging from Repurposed crib benches  to crib rail Garden Trellis’s.  I wanted to keep this project simple.  I was preoccupied by a much larger, more daunting, task cleaning my daughter’s messy playroom!  I filled one trash bag with broken items and another with items to donate to those in need. This emptied one toy box for additional storage which reduced clutter.

My daughter has a large book collection she acquired before she was even born.  At my baby shower, the guests brought a signed book instead of a card. I loved this idea, but I did not have an ideal way to store all the books we received.  They basically sat in a wooden box on the playroom floor.

I thought the crib rail would be a great alternative way to display her books, and keep them off the floor.  Since I was struggling to get her room organized, and did not have the time,  I decided to leave the crib rail in its original finish.  It also matched the playroom well.

crib rail

If you would like to change the original color, a can of white latex primer works well.  Once dry, paint as desired.    I also suggest using longer screws to anchor each side of the crib rail to the wall. When doing this, lean the crib against the wall on a slight angle so the books can hang over the rails.  I did not have the proper screws handy, so I had to improvise and use one smaller screw through the first rail.  This worked, but the trade-off  is that the first rail cannot be used for display.

Repurposed Crib Rail Book Rack

I love it!   Being the sentimental fool that I am, it also is nice to keep a piece of the crib for nostalgia!  I also repurposed her changing table into a kitchen shelf.  If you missed it,   You can view that project here.


DSC_0440


Repurposed Crib into a children's book rack


Prayers For Savannah

Thank Heaven For The WordPress Community

Today, I put away the paint and the Mod Podge to speak from the heart. When I began this humble little blog over a year ago, I really had no idea how wonderful the Word Press community would be!  You all have taught me so much, and although we have never met in the “real” world, your experiences and willingness to share, has helped me through some tough times.    As people we are all faced with different challenges every day and it really is all about the attitude we choose in order to get through it.  I am so grateful to anyone who stops by to read or leave a comment and if you have, you already know that I will gladly return the good will with a blog follow, and try my best to stop by all of these wonderful blogs to keep in touch.  I find myself snuggling up in bed at night with my lap top, desperately trying to wind down from the average hectic day reading about your lives, stories, ideas and it is truly inspiring. One blog in particular has inspired me like no other and I thought I would share that blog with you today.  That blog is The Crayon Box Chronicles. cropped-colored-crayons-macro-wallpapers_35031_2560x16004 My toddler apprentice has been enrolled in a prekindergarten special education program.  She has been getting speech and occupational therapy.  We try to exist day-to-day, hoping with the continued success and progress our daughter is making, that one day we will be able to put this behind us.  Of course the future is still unknown, and that is the hardest part.    Her therapists  have encouraged us to engage her in sensory play activities.  I created a DIY version of a Sensory Play Table.    I began searching  Pinterest and other Word Press blogs for ideas and that is how I discovered the Crayon Box Chronicles.   Heather shares some amazing play activities that she enjoys with her son and I have enjoyed reading and following.   She was overjoyed to find out she was pregnant with a girl, but during a routine 19 week ultrasound, it was discovered little Savannah Hope had  CDH, congenital diaphragmatic hernia.   It is a birth defect in which the diaphragm does not close as it should allowing the organs to crowd the chest cavity.  This does not allow the lungs to fully develop.  A heartbreaking diagnosis during what is usually a time of joy. I have never met Heather or her family, but was amazed to see the amount of love and grace in which this family is handling the many daily obstacles, and those which lie ahead.  There is nothing more inspiring than love for a child and HOPE which just happens to be this little blessing’s middle name.  It puts life in prospective, and it certainly reminds us all to live life to the fullest every day, and not take one day on this earth for granted. For those who wish to donate, they have an active fundraiser campaign going on now.  For anyone that has gone through the devastating effects of a chronic illness, understand not only the emotional toll, but the financial one as well.  That being said, if you are able to donate you can do so here.  Any amount is appreciated by the family, but if it is impossible to give, There is something this little girl needs now more than anything and that is your positive thoughts and prayers. 10463061_10152144293807006_5027494006055771139_n Little Savannah and her family are in the battle of their lives and are requesting as many prayer warriors as they can to fight this battle along with them. They have set up a  facebook page that documents Savannah Hope’s CDH  journey, and brings further awareness to this horrible birth defect which according to the CDH awareness website  CHERUBS  effects 1 in every 2,500 births (1,600 cases in the U.S. alone each year). Stop by for a visit, like and share.  This amazing family is looking forward to your kind words, and prayers for their little girl.  It will give them strength during the toughest of times.  Show them why the Word Press blogging community is the best there is! Peace and love to you all Danielle (On The Upcycle Mom) Precious Baby Girl e3bf3223-3da4-4527-b078-2d1e288ace9a Prayers For Savannah Hope

Thrift Store Surprise: Vintage Wood Sewing Box Upcycle

When I see something at a thrift shop that is unique and catches my attention, I will often purchase it even when I am unsure of what it is.  As was with the case of this little wooden box with legs. I imagined what it could have been used for. Perhaps it was intended to hold hats, gloves and scarves, or it simply sat by the door and was used to sort daily mail.  To me it didn’t matter, it was intriguing and best of all, priced right at $3.99!

DSC_0485

Sure, I had my smart phone handy, I could have googled the item and had my answer right away, but for some strange reason,  I didn’t.  I simply brought it home and stored it in my craft room.  It patiently waited its turn to learn its crafting fate until this weekend, I blew the dust off and decided to come up with a plan of attack.  I like to utilize materials I have handy as much as can. I tend to accumulate unused fabric scraps from previous projects and I prefer to use this fabric to the last thread.  One of my favorite designs was the black and white damask fabric I purchased at Joann Fabric.  I used this fabric on previous projects including The Broken Chair Challenge, and You had me at “Half Table” Yard Sale Rescue. I still had a rather large scrap piece left and decided to use it to upcycle this item.  I began by cleaning the item thoroughly.  Once the dust and dirt had been removed, I used a latex spray on primer and spray painted it white.

DSC_0496

I cut the fabric to fit both sides of the piece. I generously applied Mod Podge to the area with a foam craft brush.

DSC_0497

I then applied the fabric and repeated this step for both sides of the box.

DSC_0498

Once this dried, I applied three total coats of Mod Podge over top allowing each side to dry thoroughly between coats.

DSC_0499

I then painted the entire piece in a black and white scheme using acrylic paint.  The piece took about three coats of paint. I allowed the piece to dry over night and applied a final layer of Mod Podge to the entire piece to seal it.

DSC_0502

I am very happy with the final result;  However, I also want to share with you my mistake during this process.  Halfway through the project, I finally did what I should have done in the very beginning, research the piece online before you upcycle!  What you discover may alter your plans.  Granted in this case, I do not believe I would have done anything differently, but it really got me thinking about these pieces and how research plays an important, but often unspoken role in crafting.  A few pieces along the way, I decided to keep in their natural state, and some purists may have done the same in the case of this vintage box.  Turns out this little box with legs is a Priscilla style sewing box most likely from the depression era 1930’s to 1940’s. I saw a few online in various states, some painted and upcycled and others in their original condition range in price between $35 and $80 dollars on Etsy. My antique radar must have been working that day!  Despite having no clue about what this items’ purpose was I sensed it was something special.

What would you have done with this piece?  Have you ever had something special, but didn’t know it? Do you have crafting regrets? I would love to hear from you!

DSC_0509

Materials:

Vintage Sewing Box Stand

Fabric Of Choice

Mod Podge

Acrylic Paint/White Latex Primer

Scissors, Paint Brushes, Foam Craft Brush


Pack my Bags! Fun and Easy Decoupage Vintage Suitcases

When shopping in thrift stores, I am always on the lookout for certain items on my personal wish list.   Many times I leave empty-handed as these items tend to be harder to find and that is why they remain on my list.  It is the search for these and other welcomed surprises that make thrifting so much fun.  Every now and again I get lucky, and it was truly my lucky day when I stumbled upon three lovely hard case, blue vintage suitcases reasonably priced at Goodwill.  I was also delighted to find the interiors of this cases in excellent condition.  For the larger case, I chose a blue and white fabric from Joann Fabrics, and decoupaged it onto the suitcase surface for my first ever restyled suitcase.  I wanted to make each suitcase unique, so I patiently waited for ideas to come along for cases two and three.

I was walking around Goodwill by my work the other day and stumbled upon a lovely pillow sham.  It was priced right at $1.99.  Usually when it comes to linens and fabrics at Goodwill, it is hit or miss.  This was a lovely pattern of white , red, and a touch of blue.  Whenever I see blue I think of those suitcases and thought this would be a perfect fit for one of them.  The question was if I would have enough fabric to complete the project. Unfortunately they only had one pillow sham in this pattern for sale.

Vintage suitcase pillow sham decoupage makeover

It turns out when I got it home,  I had just the right amount of fabric to restyle the second largest case, and I was thrilled!

First, I cut the decorative fabric away from the plain blue fabric on the pillow cases underside.

DSC_0465

I placed the suitcase on the top of the fabric to get an idea of how much fabric I would need for both sides.  It was easiest to cut it in half.  I allow the fabric to hang over slightly, as I planned on trimming away the excess fabric later.  I applied Mod Podge generously with a foam craft brush to the suitcase surface.

DSC_0468

I then carefully laid the fabric over it,  repeating the same process twice for both sides of the suitcase.

DSC_0469

Once dry, I applied Mod Podge generously over it to seal the fabric.  I also generously applied Mod Podge to the edges where I planned on trimming the excess fabric.

DSC_0473

Once dry, the fabric stiffens and I carefully used a box cutter knife to trim the extra fabric using the suitcase crevice/seam as a guide.  Keep in mind to use just enough pressure as too much can damage the suitcase.

DSC_0472

I applied two more layers of Mod Podge to each side of the suitcase. Working the glue once again in around the suit case edges.

Decoupage suitcase using a pillow sham

I loved how this little suitcase turned out!  Stay tuned for suitcase number three coming soon!

decoupage vintage suitcases with fabric and Mod Podge


 Material Used:

Hard Top Suitcase

Fabric of choice (For this project I used an old pillow sham)

Scissors

Foam Craft Brush

Box Cutting Knife

Mod Podge

Clear Varnish (Optional add for extra protection)

Forgotten Angels: A Horse Rescue With A lot Of Heart

This past weekend, I took my daughter to a wonderful, non-profit, local horse rescue called Forgotten Angels Equine Rescue.     The rescue saves healthy horses that are sent to slaughter and sick and abused horses in need of intervention and care.  Their mission is to promote public awareness of needless horse slaughter and animal abuse.   They involve the local community through events, and activities teaching patience and kindness to all creatures.  You can also follow the cause on Facebook.

We could not have asked for a more perfect weather.  The sun was shining and it was a perfect day to spend on the farm.  The toddler apprentice was particularly enchanted by Snowflake a 7 year-old mini mare up for adoption.  She enjoyed feeding all the horses and donkeys carrots, and handfuls of plucked grass.  She even had a chance to sit on Snowflake’s back.  For those of you unfamiliar with my past, for many years I worked as a Vet Tech and have a deep love for helping sick, unwanted and abused animals.  It is especially sad how we treat our horses who evolved with us through time and have contributed so much to our evolution and humanity.   I want to pass this love, and respect on to my daughter, and it made me smile to see her face light up just being around these gentle creatures.

DSC_0391

My daughter feeding Snowflake, a miniature horse currently up for adoption.

DSC_0399

We had great conversation with one of the volunteers on the farm about all its residents and learned about the rescue which has been operating for the last two years.  I also had an opportunity to engage another hobby of mine photography.   I photographed the animals and they did not disappoint and seemed to love all the attention, and “Ham It Up” for the camera.

DSC_0413

PHOTOS: Residents of The Forgotten Angels Equine Rescue

DSC_0420


“Dreamer”

DSC_0427


“Noel”

DSC_0429

“Glory” The rescue is raising money so this blind horse can have eye surgery.  You can donate here.

DSC_0401

“Wendy”

DSC_0377

“Stanley”

Currently, The Rescue Sponsors a program where you can adopt a horse for the month for a donation.  Please see the following link for more information. http://forgottenangelsequinerescue.com/photo.html    They also accept donations large or small, and you can also purchase Rescue “Swag” at their online store to help raise money for the cause.

DSC_0428

Our daughter was especially good on Saturday, and her daddy gave her a small reward which she “happily” donated to her horse friends.  I was told that thanks to our daughter’s efforts, the horses would have more carrots to snack on.

In Memory Of

Pickles


“Pickles” Photo courtesy of Forgotten Angels Equine Rescue

This post is dedicated to Pickles.  We met Pickles during our visit briefly, but she was not feeling well.  Pickles was an elderly horse who sadly developed colic that due to her age, she could not recover from.   She passed away later that evening.   It was a huge loss to all those who loved her as Pickles was a kids and rescue favorite.  We are blessed to have had a chance to meet Pickles on her final day.  God Bless this beautiful horse forever free crossing the Rainbow Bridge.


Play it again, Kid: Upcycled Vintage Jaymar Kids Piano

When I take a trip to an antique shop or thrift store, the thing I enjoy the most is the element of surprise.  Sometimes I come away with nothing and other times when I least expect it I find something rare.  Speaking from experience antique shops tend to have pieces that are in better physical condition. Thrift stores such as Goodwill often times are stocked with basement throw aways and estate sale clean-ups.  Many of these items are not well cared for and in some cases downright abused.  I have come across items that I wanted to rescue, but I felt with my skill level I could not save them.  It always leaves me with mixed emotions.  On this day I was about to leave the store.  The husband and I have been regularly stopping in searching for a vintage rotary phone.  Not only have I always wanted to upcycle one of these phones, My husband and I love the loud ring it produced from our childhood memories.  We have missed many calls at home unable to hear our landline phone ring if we are in a certain part of our house. Upon taking one last stroll through the cluttered furniture aisle, my eyes wandered and there it was staring back at me! It seemed too good to be true: a vintage Jaymar Kids Piano. The toddler apprentice and I had been out shopping last year around Christmas at The Christmas Tree Shop, and stumbled upon an adorable kids baby grand piano.  She loved playing it and I could barely peel her off it at the store.  The price tag was a bit hefty weighing in at $89.99.  When we left the store without it,   I couldn’t get that little piano out of my mind and finding the vintage Jaymar at Goodwill seemed a bit like the product of fate. As with any upcycling story there are challenges to be faced and this adorable piano was no different.  The wood in many places was peeled away, It had its share of loose nails, and a large crack spreading across the base and back of the piano.  Incredibly, all the white keys worked perfectly and all, but one of the black keys worked perfectly.  The plastic keys were more yellow than white as is what happens to plastic stored under certain conditions with age.  It did not have a price tag so I took it up to the associate at the register. Even in rough shape I was surprised it was priced at a mere $5.99!

Vintage Kids Jaymar Piano Est 1960's

I snatched it up and brought it home.  I may not have found the rotary phone that I was searching  for that day, but I was surprised and delighted to find the piano.

Despite its charms, I knew very little about the toy.  I grabbed my laptop and did some research.  Thanks to Old Wood Toys.com  I was able to read about the history of the Jaymar company.  The toy company produced wooden novelty trinket toy through World War II.  After the war the company exclusively produced kids pianos and puzzles.  The company officially closed it’s doors in 1990. When I searched on Ebay, there were a few for sale, many of them in rough shape with price tags ranging from $39.99-$89.99.  On most, keys were broken. I concluded I had gotten a very good deal on this toy!

Jaymar Kids Piano

Since the piano did not come with a bench, I had a kids unfinished step stool that I thought would repurpose and stand in nicely as a piano seat.

Unfinished Step  Stool

I decided the cracked area of the piano would benefit from decoupage.  I believed the Mod Podge and fabric would reinforce the cracked wood and prevent it from spitting further.  I chose black and white music note fabric from Joann Fabric.  I used a white brush on acrylic primer to paint the entire piano after cleaning it thoroughly with a damp cloth.  I measured the area I wanted to decoupage and cut a piece of fabric to fit.  Once the paint was dry, I applied Mod Podge generously to the cracked area underneath with a foam craft brush, and carefully applied the fabric smoothing it put with my hands.  Once dry, I applied three more coats of Mod Podge over top of the fabric allowing it to dry between coats.  I then painted the entire piano with several coats of black acrylic paint with an appropriate sized paint brush.  I painted parts of the piano white for emphasis.  While the piano dried between coats, I worked on repurposing the step stool into a piano seat.  I traced the seat surface on to the back of the music note fabric with a pencil.  I cut out the fabric with scissors and placed it aside.  I painted the entire chair black except for the seat which I planned to decoupage with fabric. Once dry, I applied Mod Podge to the seat and applied the traced fabric.  I applied three coats over top of it to seal it.  Once the Mod Podge was dry I used a Polyurethane clear semi-gloss sealer to add a final protective coat over the piano and the piano chair.

Upcycled Vintage Kid's Piano

The one frustration with this project was the yellowed plastic piano keys.  I would have preferred a method to whiten them, but after doing some research decided not to mess with the patina on the keys.  I have read everything from sanding the keys with fine sandpaper or cleaning them white toothpaste.  In the end, I decided the risk of damaging the function of the piano was too great and simply used the corner of a Magic Erasure pad to throughly clean the keys.

Play it again kid, restyled kids piano


Have any safe plastic whitening tips?  I would love to hear them!

Materials used:

Black and White Acrylic Paint

White Acrylic Primer

Large and Small Paint Brushes/Foam Craft Brush

Mod Podge

Polyurethane Clear Sealer

Fabric Of Choice

Scissors

Wet Cloth or Magic Erasure Pad for cleaning

Kids Piano/Kid Step Stool (for seat)


Repurpose and Remember: Ideas for The Backyard

This weekend officially kicked off the start of summer in our household.  On Saturday, we celebrated our daughter’s 3rd birthday with a small family BBQ.  I am usually big on party planning, but this time I was forced to pull it all together last-minute.  This week has been hectic to say the least, as our daughter also started Preschool.  I am happy to report that things went well and the only tears shed were our own!  She handled going to school and riding the bus with ease and excitement, and asked us several times throughout the weekend if she was going to school!  Mission accomplished!

On Sunday, the hubby and I decided to do something we rarely get a chance to do:  Enjoy our backyard.  I like to think of our outdoor area as an extension of our indoor living space, but we very rarely get to relax and enjoy it together.  This weekend, with the holiday in full swing we decided to enjoy some time outside.   Sunday night in our area was absolutely beautiful.  No mosquitos and a cool evening breeze tickled the trees.  It was the perfect evening to sit and enjoy what Mother Nature had to offer. We put the little one to bed,  hooked up the monitor outside to listen for her, and  we lit a fire in our outdoor fireplace, sat back and enjoyed a relaxing much-needed evening together.

DSC_0322

I thought I would share some simple ideas to creating the scene for a relaxing evening at home.  Kudos to my husband, who came up with a simple but very useful idea.  A popular item at kid’s parties are glow sticks and bracelets. The sticks that continued to glow, he used to line our back porch stairs.  Not only did it look cool, but helped us navigate the stairs safely in the dark.

Glowsticks

Over the years we have received quite a few decorative candle holders as gifts.  As much as I would like to display each and every one in our home, there just isn’t enough wall space.  This particular gifted item was originally a decorative fireplace screen that was also a candle holder.  Although it was a lovely idea, we could no longer safely use it with our three-year old.  I decided to repurpose it as an outdoor wall hanging.  I attached it to our patio area wall with screws and used flameless tea lights to illuminate it.  It adds a festive and romantic feel to our seating area, and was a great way to repurpose an old decoration previously destined to attic exile.

DSC_0305

DSC_0304

I have always been a fan of the neighborhood Dollar Store.  Dollar Tree in particular has some great affordable decorations.  Patriotic decorations are no exception.  Since our daughter’s party is held close to the Memorial day holiday, I always incorporate patriotic decorations with her birthday décor.  I picked up these great round paper patriotic decorations.  Dollar tree sells a version of these that light up online, but the ones that I purchased did not.  To remedy this I added flameless battery operated tea light to illuminate them.  This added such a lovely look.  Battery operated tea lights are a great way to add decorative lighting without the dangers.  Having a three-year old roaming around, open flame candles and tiki torches become a hazard.  Despite this I still love the look and feel of luminaries and this is a great way to enjoy them without the danger.

DSC_0332

When my husband and I sat back and soaked it all in, we spoke of, and were thankful for all the men and woman who sacrifice so much to protect our freedoms.  If it wasn’t for these sacrifices, we would not be able to have moments like these.  Thank you to all those who have sacrificed so much so we can live in freedom and have a quality of life that we often take for granted.

Remember