“Be Mine Daddy”…. Valentine’s Day Kid’s Craft Ideas

On this Valentine’s day morning, many areas of the country are beginning the task of “digging out” after yet another treacherous winter storm hit the east coast overnight.  Just days before the same winter Nor’Easter  wreaked havoc in other parts of the country such as Georgia and the Carolinas. On top of it,  the little one and I have been battling a series of winter colds and are being forced to spend much of our time in the house due to the lousy weather.  Despite this, we have managed to make the best of these situations and have spent a lot of quality time together as a family.

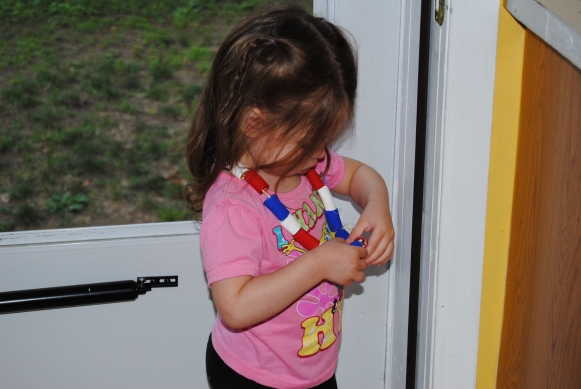
I wanted to make my husband something special for Valentine’s day this year, and as with most of my creations,  I like to get my 2 1/2 year-old daughter (Also known as the toddler apprentice) involved in the process. I also knew that my husband being the wonderful dad he is, would appreciate the fact that his daughter helped mommy make his gift with “her own little hands.”  I have seen many great Valentine’s day kid’s crafts online via Pinterest and other sites, and I had many ideas swirling around in my head. I saw a great project courtesy of the Roylco kids craft blog (which I follow, and love) and although I decided to create my own version,  The Roylco project was quite inspiring.  Be sure to check it out!

For this project you will need:

Black, Pink, Red and White Construction Paper

Scissors

Kids White School Glue

Black Marker

White Non Toxic Kids Craft Paint

Frame (Optional)

First, I dipped my daughter’s hand in the white paint after pouring it on a paper plate. I pressed her hand on the black construction paper.  This was challenging and it took a few tries after the first two attempts became slightly smudged.  There is no greater excitement to a little one then “messy fun” so she didn’t seem to mind the multiple attempts at getting it right! Once I achieved the desired effect I allowed the construction paper to dry. After about an hour, the paper was dry and ready.  I drew different sized hearts on the red, white and pink paper and carefully cut them out.  The little one enjoyed squeezing the glue on the hearts and sticking them to the paper!

Valenine's Day Kid's  Craft fun!

Such a Good Helper……

Next, I wrote little sayings in the hearts.  I thought this would be cute, but if you prefer it, you can skip this step.  I wanted to make it more personalized for him.  I then found a great glass frame in our attic to frame it in. Now we have a great piece of Valentine’s Day wall art for years to come, permanently immortalizing our daughters little two year-old hands forever. (Can’t you tell I am an overly sentimental person?)

Valentine's Day Kids Craft For Daddy

The apprentice and I also made a Valentine’s Day glass jar lamp.  I had some great left over heart themed scrapbook paper I won courtesy of Ray’s So Crafty’s Labor Day Giveaway.  I have made several jar lamps, and like to interchange them on the light bases, depending on the mood, or for holidays.  I simply cut the paper, applied Mod Podge to the glass and adhered it around the jar carefully matching up the seam.  An easy, simple decoration guaranteed to warm hearts during this frigid Valentine’s Day.

Valentine's Day Jar Lamp made with Scrapbook paper and Mod Podge

“On The Upcycle” would like to wish everyone a safe and happy Valentine’s Day.  Hoping you are able to spend it with those you love today!

Mini Terracotta Christmas Tree Decorations

I am always on the lookout for great kid’s craft ideas. Tis the season with the holidays around to corner, to take a break from the hustle and bustle and sit down with the kids for quality time. A great blog I follow, Easy Crafts For Children, posted a wonderful and unique christmas craft I think you will all love! Be sure and stop by to say hello to Izabel from the UK!

Character Fabric Fun: Star Wars Candle Made With Mod Podge

Recently, I posted a kids chair project dedicated to the eternal kid in me.  A part of me that lives on despite my quickly advancing age. The chair was based on a favorite movie of my husband and I, The George Lucas Sci Fi classic Star Wars.  I always wanted to make an item dedicated to the classic movie, but I had no idea of what direction to go in. The thrift store circuit is hit or miss and lately I have been off the mark.  To pass the time, I have been browsing around a Joann Fabric store during my lunch break.  I tend to stay away because buying fabric in such a setting can get expensive. I like to keep project costs at the very minimum and recycle as much as I can.  Even when I chose only to browse I was often inspired by all of the fabric colors and creative possibilities.  All the choice and accessibility can be hard to resist!

It was to my amazement one day that I stumbled upon character fabric.  They have everything from Hello Kitty, Marvel, Family Guy, just to name a few, and best of all they had three different styles dedicated to Star Wars!  The fabric was a bit pricey ($14.99 a yard), but as luck would have it,  I was able purchase a large”scrap” piece for just under five dollars! I finally had my idea and “Star Wars Kid’s Chair” was born.

Star Wars Fabric Decoupage Kids Chair

What to do with the extra fabric?  I actually have quite a bit of it left, and I decided to use a smaller piece and make my hubby a Star Wars candle. Then it hit me!  With the holiday’s quickly approaching,  character candles made with fabric make fun gifts.  The best part about the candle is when lit it illuminates the characters and they glow, once again fun for the kid in all of us.

I purchased a few glass pillar candles from the dollar store and applied Mod Podge to the outside glass.  I trimmed a piece of fabric large enough to wrap the candle, but with minimal over lap. Any seams or overlapping of fabric will be visible once the candle is lit. I applied the fabric to the glass and applied a layer of Mod Podge over it to seal it onto the glass.  Allow to dry and it is ready to light!  Once the candle is used up, just remove any excess wax and drop a tea light in to illuminate it.

Star Wars Mod Podge candle chracter fabric

If  Star Wars isn’t your thing, no need to worry because with all the character fabric out there, you can make any novelty candle you like! May the force be with you….

“On The Upcycle” Top 5 Free Kids Craft and Educational Websites

Recently, I find myself  seeking out new ideas and activities for my two year-old that are both educational and fun.  My daughter loves to draw, play on the computer and sing along to music, Old McDonald Had A Farm, Elmo’s Song and Twinkle Twinkle Little Star just to name a few!  Incorporating the activities she loves and enjoys with learning has proved to be a very effective.  There are many sites on the web dedicated to educating through various activities and games.  Some websites require fees while others are totally free!

Today, I share with you my top five favorite kids websites in no particular order, but equally wonderful!

leading to reading_thumb[1]

Leading to Reading: is a child education site for children from 0-5 that offers games, online activities and resources for grown-ups.  They encourage language developement and learning through reading.

abcya_logo

ABCya.com: is a free educational site for kids ages 5 and up.  This free site features computer games and educational activities. All of the activities on the site were created or approved by school teachers!

2013-hoawg-logo-200

Hands On As We Grow: This blog style site is packed with kids craft ideas and activities.  What better way to explore a child’s imagination than by making crafts together? This site promotes sensory, and creative development through fun family arts and crafts.

sesame_street_wallpaper_1278413620

Sesame Street.Org: Monsters, Muppets and Friends Oh My!  The gang from Sesame Street, (my personal favorite) promote learning through free games and activities, such as word and number games, and online coloring and painting.

bg-logo

Super Simple Learning and Songs: A wonderful website featuring both free and paid content, my favorite part of this site is their You Tube channel, packed with simple songs for you and your toddler to sing along with together that promote learning and language skills.

My daughter’s personal favorite? Twinkle Twinkle Little Star

A Halloween Treat

We had a great time tonight, handing out candy to the kids, and taking our daughter trick or treating in our neighborhood.  It brought me back to when I was just a kid with a pillow case and a dream!  I remembered the excitement I felt running from house to house collecting candy.  Our little butterfly seemed to get the hang of the art of trick or treating easily and was happily carrying her bucket which seemed to fill up rather quickly!

Trick Or Treat


Hope everyone had a Safe and Happy Halloween!

Looking for some fun Halloween crafts?  Check out: Kitty Cat Halloween Candy Tray and Decorative Black Cat Halloween lamp.

Purrific Candy Cats: Upcycled Halloween Candy Tray

While I was out thrifting yesterday, I picked up this great little wicker tray with a hard unfinished wooden bottom, and two handles. This tray was stamped underneath as made by Corning.  It was a bit of a mystery as to what this tray was used for in its current state.  It was certainly priced right and stamped with a red tag marked 50% off and cost only $1.00.

Mystery Wicker Tray

I had an idea since it is close to Halloween to repurpose this item into a Halloween candy tray.  Using a flat tray instead of a deep one, enables the kids to pick the candy that they like best.  I had some great left over Halloween themed spooky black cat fabric I purchased at Joann Fabric.  The same fabric I used for DIY Upcycled Decorative Halloween Lamp.  I gathered the materials needed for this project.

Wooden Tray

Mod Podge

Black Acrylic Paint

Spooky Halloween Fabric

Paint Brush/Fine Tipped Marker

Foam Craft Brush/Scissors

First, I painted the tray areas that would not be covered by fabric with a medium-sized paint brush,  I used a couple of coats and allowed it to dry thoroughly between coats.

Painted Tray

Once dry, I traced the bottom of the tray on to the back of the fabric with the black fine tipped marker.  I carefully cut the fabric out with a pair of scissors.  I placed the fabric aside and applied Mod Podge to the tray surface with a foam craft brush.  I carefully placed the fabric on the tray surface and smoothed out any wrinkles with my hands.  I allowed this to dry and then applied Mod Podge over the painted areas, and the fabric surface.

Upcycled Halloween Candy Tray-Black Cats

Now the hubby and I can pass out candy in spooky black cat style! This can also be used as a serving tray for ghastly goodies. What crafts do you have planned this Halloween?

Halloween Tray made with Mod Podge

Super Hero Seat: Decoupage Justice League Of America Kids Chair

My husband and I are kids at heart, and when I told him my plans to creat a “super heroes” decoupage kids chair, he was excited to see the final result. After a trying week and a busy weekend, I figured it was a good idea to jump right back on the “crafting horse”, and keep the upcycle going.

I passed this chair up many times.  I stop by the Goodwill right down the street from our house periodically.  It is usually a quick walk through,  and this chair sat, un purchased through several of these “walk throughs”,  The chair was in very rough shape and was doused in a heavy lacquer finish, that I suspected, would not be easy to apply paint to. It is difficult for me to pass up kids furniture because I love it so much, so during this particular walk through with my daughter in tow, I finally decided to buy it.

Old Beat Up Kids Chair

First, I tightened the chair and legs,  and used sand paper to smooth any rough edges on the chair.  I cleaned it with a damp cloth to remove any dust and dirt, and boy this chair was very dirty!  Once that was done, I used a white, latex primer to paint the chair from top to bottom. This was essential and even with the chair’s lacquered finish, it covered nicely.

After the primed chair was completely dry,  I painted the chair with a red and blue color scheme to mimic the Justice League of America colors. The Justice league of America is great because it incorporates the best superhero characters from DC, Comics.

I applied Mod Podge to the chair seat with a large paint brush. I then placed the prints onto the chair seat, slowly smoothing it out with my hands to avoid wrinkles. I repeated the same process for the chair back,  I decoupaged the Justice League symbol and two additional characters I could not fit onto the chair seat, These characters were The flash and The Green Lantern. I cut them out with scissors and applied them so they would appear as though they were “leaping” off the chair seat.  I made three white, printer paper stars to add some “pop” to the top of the chair back.

I placed the chair in front of a stand up fan to dry.  The next day, I applied Mod Podge to the entire piece to seal it and repeated this process twice, allowing the chair to dry in between coats.

My husband loved how it turned out, and it was nice to complete a strictly “just for fun” project.  I hope you enjoy it too!

Justice League Of America Decoupage Kids Chair

Materials:

Kids Chair

Comic books,or Comic Prints

Mod Podge

Red and Blue Acrylic Paint

White Latex Primer

brushes, scissors, pen

sandpaper

Inexpensive Storage Ideas: Repurposed Wooden Boxes

I am always on a mission to organize our family home, but with an active 2 year-old it is usually easier said then done.  When I come across wooden boxes, and any items I can upcycle into storage containers,  I jump at the chance to buy them.  Thrift Stores, or even items you already have in your home can be  altered to fit any style and repurposed into inexpensive storage containers.  Today, I chose to upcycle an ex Melissa and Doug Toy Box.  I believe at one time it housed an elaborate wooden puzzle, and somehow ended up a simple, empty,  wooden box on a thrift store shelf.  Our biggest storage issues at the moment are kids toys and books.  I decided to repurpose this into a kid’s toy storage/book box.  I had purchased this lettered scrapbook paper for a previous project, but decided not to use it. It was a perfect fit for this project.

Image

Materials:

Scrapbook paper

Box

Mod Podge

Scissors

Foam craft brush

Pink Acrylic paint/Brush

pen or pencil

I traced the bottom of the box onto the back of the scrapbook paper cutting it out with scissors.  I applied Mod Podge with a foam brush and glued the scrapbook paper to the wood. while it dried, I painted the remainder of the box pink. Once the piece is completely dry,  A final coat of Mod Podge is all that is needed to seal the entire piece

Image

Colorful and Bright storage options at a fraction of the cost!

The Patriotic Pasta Necklace~ Fun With Paint

I love getting my daughter interested in creative endeavours, and there is nothing more exciting for a 2-year-old than finger painting!  My little girl loves color!    There are many non toxic, and washable paints and markers available that are safe for young children. Making sure they are non toxic is key.  I looked down to find my little toddler apprentice lips were blue!  There is a great recipe to make your own edible toddler finger paint at Momtastic Be sure and check it out!

My daughter’s art room is our kitchen, which is the easiest area to clean, since inevitably the walls will get their own bit of artwork on them.  Once the painting was done, it was off to the bath and bed.  The artwork left to dry on the front of the fridge.

Vincet Van Goo Goo

What day of crafting would be complete without some sort of pasta art project.  I decided to make a pasta necklace in celebration of the 4th of July holiday. I thought it would be something fun for my daughter to play with and wear.  This was a pretty simple craft in which the kids can help make too!

Patriotic Pasta Necklace

I used three plastic cups.  I poured Red, White and Blue paint into the cups and dipped the dry Rigatoni noodles in each color.  I repeated this until I had enough to make the necklace my desired length.  It seemed like it was taking a while for them to dry, so I decided to I let them dry overnight.  Once they were dry, I threaded them onto the twine Red, White and Blue in that order, tied a good knot and Poof! Instant Patriotic Pasta Necklace!

Kids Craft Necklace

And Erin seemed to like it too!

When Crafts Go Wrong: Restyling the Upcycle

On May 12th, I posted a Time Out chair I restyled.  Truth is I was never happy with how it turned out.  I think I know why it didn’t turn out as I planned.  I forced it. I was determined to finish the project even when I felt I should put it aside.  One thing I lack is patience and that can be a crafter’s undoing.  Sometimes it is just better to set a project that is frustrating aside to finish at a later date.The Time Out chair is an example of restyling a restyle.(You could say)

My upcycled 70’s inspired girls table has so far been Erin’s favorite.  It is the perfect size table, but lacked a chair.  We caught her pulling the table up to the step in an attempt to sit at the table. That is when I thought of the time out chair. We are very blessed so far.  We rarely have to put her in Time Out, so we haven’t really used the chair, and I thought if I restyled the chair, it would go great with the table.  I used the same 70’s fabric as the table, and re-painted the chair to match. Now Erin has the perfect place to sit and read her book, and I have a chair I can live with!

70's inspired KidsTable and Chair