A Manic Monday: Rock N’ Roll Themed Candles made with Mod Podge

Anyone who knows me well, knows one thing: “I don’t like Monday’s!”  It’s always tough saying goodbye to the weekend and I always seem especially sluggish coming off the weekend.  As much as I love bigger projects, sometimes it is fun, and refreshing to complete a smaller, simpler one.  This craft seemed a perfect one to share especially on a rainy Monday.

I love Rock and Roll and am a big fan of music in general.  My husband and I were sitting around on a Saturday night, Watching “That Metal Show on VH1 Classic” kicking around ideas for projects. I thought it would be cool to make Rock and Roll candles.  The dollar stores sell long white glass candles. They are perfect and literally any image can be put on them with a little Mod Podge. We chose Iron Maiden and Thin Lizzy images and printed them out 5×7 on photo paper.  We cut them out and placed them aside.

I applied Mod Podge Matte onto the glass.  I centered the photo and glued the image down. slowly smoothing out any creases. Once dry, I applied 2 coats of Mod Podge with a medium brush over top of the image to seal it.  If Rock N Roll isn’t your thing.  Any image will work so let your mind run wild.  Family photos, scrapbook paper, sports images- Maybe Monday’s aren’t so bad  after all!

Materials:

candles

printed image of choice

scissors

Mod Podge Matte Finish

thick paint brush

Image

Image

The Patriotic Pasta Necklace~ Fun With Paint

I love getting my daughter interested in creative endeavours, and there is nothing more exciting for a 2-year-old than finger painting!  My little girl loves color!    There are many non toxic, and washable paints and markers available that are safe for young children. Making sure they are non toxic is key.  I looked down to find my little toddler apprentice lips were blue!  There is a great recipe to make your own edible toddler finger paint at Momtastic Be sure and check it out!

My daughter’s art room is our kitchen, which is the easiest area to clean, since inevitably the walls will get their own bit of artwork on them.  Once the painting was done, it was off to the bath and bed.  The artwork left to dry on the front of the fridge.

Vincet Van Goo Goo

What day of crafting would be complete without some sort of pasta art project.  I decided to make a pasta necklace in celebration of the 4th of July holiday. I thought it would be something fun for my daughter to play with and wear.  This was a pretty simple craft in which the kids can help make too!

Patriotic Pasta Necklace

I used three plastic cups.  I poured Red, White and Blue paint into the cups and dipped the dry Rigatoni noodles in each color.  I repeated this until I had enough to make the necklace my desired length.  It seemed like it was taking a while for them to dry, so I decided to I let them dry overnight.  Once they were dry, I threaded them onto the twine Red, White and Blue in that order, tied a good knot and Poof! Instant Patriotic Pasta Necklace!

Kids Craft Necklace

And Erin seemed to like it too!

Repurposing Glass Bottles: Celestial Dish Soap Dispenser

While at the new Joann Fabric Store the other day, I found this great little glass bottle with a liquid dispenser top.  It was a bargain at only .99 cents!  Seeing the dispenser, reminded me of a wine bottle re-purpose I saw on Pinterest from the  Mom 4 Real Blog.  It took a wine bottle and restyled it into a liquid dish soap dispenser.  I thought this was pure genius and it looked great!  The only problem for  me was counter top space, so rather than use a wine bottle for my attempt at the project, I decided to use this smaller square glass bottle. A simple decoupage restyle was in order! I gathered up the items I would need to make this project happen.  I decided to go with a celestial themed print I loved, and it matched the colors in my kitchen perfectly!

Image

I decided to use Outdoor Mod Podge for this project.  My reasoning behind this was the close proximity  this bottle would be to the sink.  I thought it might hold up better with the added protection.  I simply printed the image, cut it out, and glued it to the glass with the Mod Podge.  Once dry, I then added 2 more coats over the image to seal it.  I believe the liquid/stopper/dispensers are sold separately so any glass bottle in which one of these stoppers would fit the opening would work for this project, a wine bottle is a fine example of that. I posted a photo below of the finished product.  This was an easy project and I am loving the whimsical celestial imagery!

Image

Fabric and Mod Podge Mania- Upcycled Kids Wooden School Desk

What to do? Yesterday, the hubby had to go off to work so it was just me and the daughter dear all day. I decided to take a trip up to the new Joann Fabric  mega store that just opened up down the street from my house (I now have a craft store practically within walking distance, this could be dangerous!)  Usually, as you all know, I am a “thrifty” shopper, but today I had a few crafting supplies I had to pick up and I figured why not give it a look?  They had a great coupon I found online,  30% off total purchase (except for sale items of course) Which was icing on the cake –if I decided to buy anything.  I walked into the store and it was HUGE!  The place was filled with aisles, upon aisles of fabric.  I am used to Goodwill prices, so I was shocked at how expensive fabric can be! One fabric in particular  was $49.99 per yard… yikes!  Thank goodness they had good sales and aisles filled with fabric at $4.99 a yard phew!

Image

I found this great school themed material. I had purchased a wooden school desk at an outdoor flea market some time ago, and had no idea how or with what material I was going to restyle it.  Now it was no question the winner was… fabric! I picked up a yard for about $5.89 on sale.  Once me and the giggle-goo got home, nap time was approaching so, I put the little one to bed and gathered my materials I would need to get started.

Image

First thing was to make sure the piece was clean and free of dust.  Then I used a black marker to trace the desk top and seat onto the fabric.  Once this was done, I carefully cut the cloth with a pair of scissors. I then generously applied the Mod Podge Matte finish on the desk top and on the seat using a larger paint brush to smooth it out.  Then I applied it to the fabric, using my hands to smooth out any air bubbles.  Messy you say?  Absolutely, but I feel with fabric it gives me more control, than using the Mod Podge tools.  Besides, I have never been afraid to get my hands dirty!  Once it was smoothed out, I then applied a layer of Mod Podge over top of the fabric. While that was dying, I painted the piece.  I used Red, Black, and Blue all colors featured in the fabric. The wood was ready to paint and not in need of priming, but it was very dry and soaked the paint in initially.  It took about 3 coats overall to get the desired result. I brought the piece back upstairs and allowed it to dry for several hours under a stand up fan.

Fast forward to later in the evening.,with the daughter asleep for the night and the hubby finally home, I worked on finishing the piece. I decided to cut out some swatches from the material and Mod Podge these onto the sides to add a little more life to that area.  I then covered the entire desk with 2 coats of Mod Podge.  I usually add more coats to the areas that will get more use and where the cloth was applied.  I used 4 coats on the seat and the desk top areas.  Pictured below is the wooden desk before and after:

Image

The hubby loved how it turned out and I can’t wait for the little one to use it!  She loves sitting at her little table and chair so I think she will enjoy this just as much and it will grow with her.  I also love the neutrality of the desk a boy or girl could use it!

Image

Stay calm and happy crafting my friends : 0 )

A Lively Computer Tablet: Decoupage Makeover

Decoupage Tablet

I remember a time before computers.  Sure, actual computers have been around since as early as the mid 1930’s, but most computers were not accessible to the general public until the later 1990’s when I was already out of High School and beginning college. It wasn’t until the internet came in to play that everything changed, and computers began to get smaller and smaller.  I also remember a time when the closest thing to a computer in school was a book or a type writer.  I looked forward to getting new books every year, just so I could cover them with a brown paper bag!  I loved to draw designs on these paper jackets, pay tribute to my favorite music groups, and draw just about anything my teenage mind could come up with.  This was the inspiration behind this project.  Why not  “cover” the modern book, my little MID brand tablet.  I loved the result I achieved with decoupage smart phone makeover  So, I decided to give it a try.  I prepped the tablet cleaning it and removing any dust.   I then traced the tablet onto the scrapbook paper.  I picked a nice brightly-colored scrapbook design.   Keep in mind the design possibilities are endless! Joann Fabric had a great sale, five sheets of selected papers for only $1.00!   Once traced, I cut the it out, carefully cutting away the speaker area with an X-Acto knife.  I also paid close attention to  any other areas I did not want to cover with the paper.

Next, I applied Mod Podge to the back of the tablet, carefully avoiding any areas that might not tolerate glue, like the speaker for example.  I carefully glued the scrapbook paper to the back of the tablet, mind fully and with a smaller paintbrush.  This kept the glue from getting into any of the important areas.  If you are worried, you can also put a small piece of scotch tape over those areas to protect them, carefully peeling it off later.  Once dry, I covered the outside with multiple coats of Mod Podge Matte finish allowing to dry thoroughly between coats.

Materials used:

DSC_0602

I love the new look!  Who says an ugly tablet doesn’t deserve a decoupage makeover?

Live on the UPCYCLE!

The Pillow Case Makeover: Upcycled, Pink and Brown Hand Painted Decoupage Chair

Image

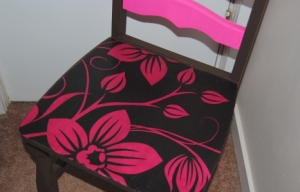
I am always attracted furniture bargains.  On this day, as I often do, I took a quick look around the local Goodwill on my lunch break. It just so happened that all red tagged items were 50% off.  In the corner, toward the back of the store,  I noticed a wooden chair with a ladder back, red sticker taped on the front.  It was a little diamond in the rough.  I was surprised the original price was only $4.99, and with the discount this chair would only cost $2.50!  I had been wanting to try a full-sized chair project for a while, and this chair seemed like the perfect candidate.

It just so happened my sister had noticed some of my furniture projects the last time she was over the house. She asked me to make her something, but was not sure what she wanted.  When she saw this chair among the other furniture candidates, she thought perhaps I could design it based on her bedroom which is pink and brown.  It was then I came across a pink and brown flowered pillow case while looking through used textile bin and I thought it would be perfect for this project.  I texted her a picture of it to see if she liked it, and she did. I then began to plan…

Image

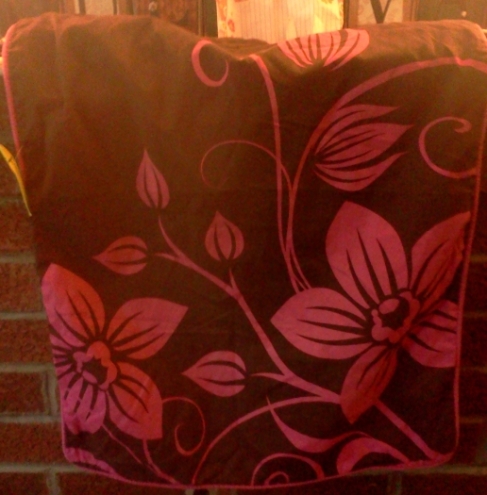
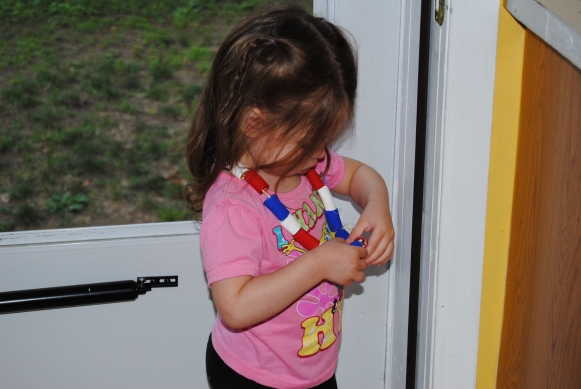
Fast forward to today…I went to JoAnn fabrics and bought some Apple Barrel Acrylic paint.  I matched the pink and brown pretty well against the pillow case.   The pink appears slightly darker in person than in the photos and matched it nicely.  My daughter managed to open one of the bottles of pink paint with the plastic still intact!  Thank goodness the store had wipes handy!  It was some sort of miracle she only managed to get it on her hands and avoided her clothes entirely!

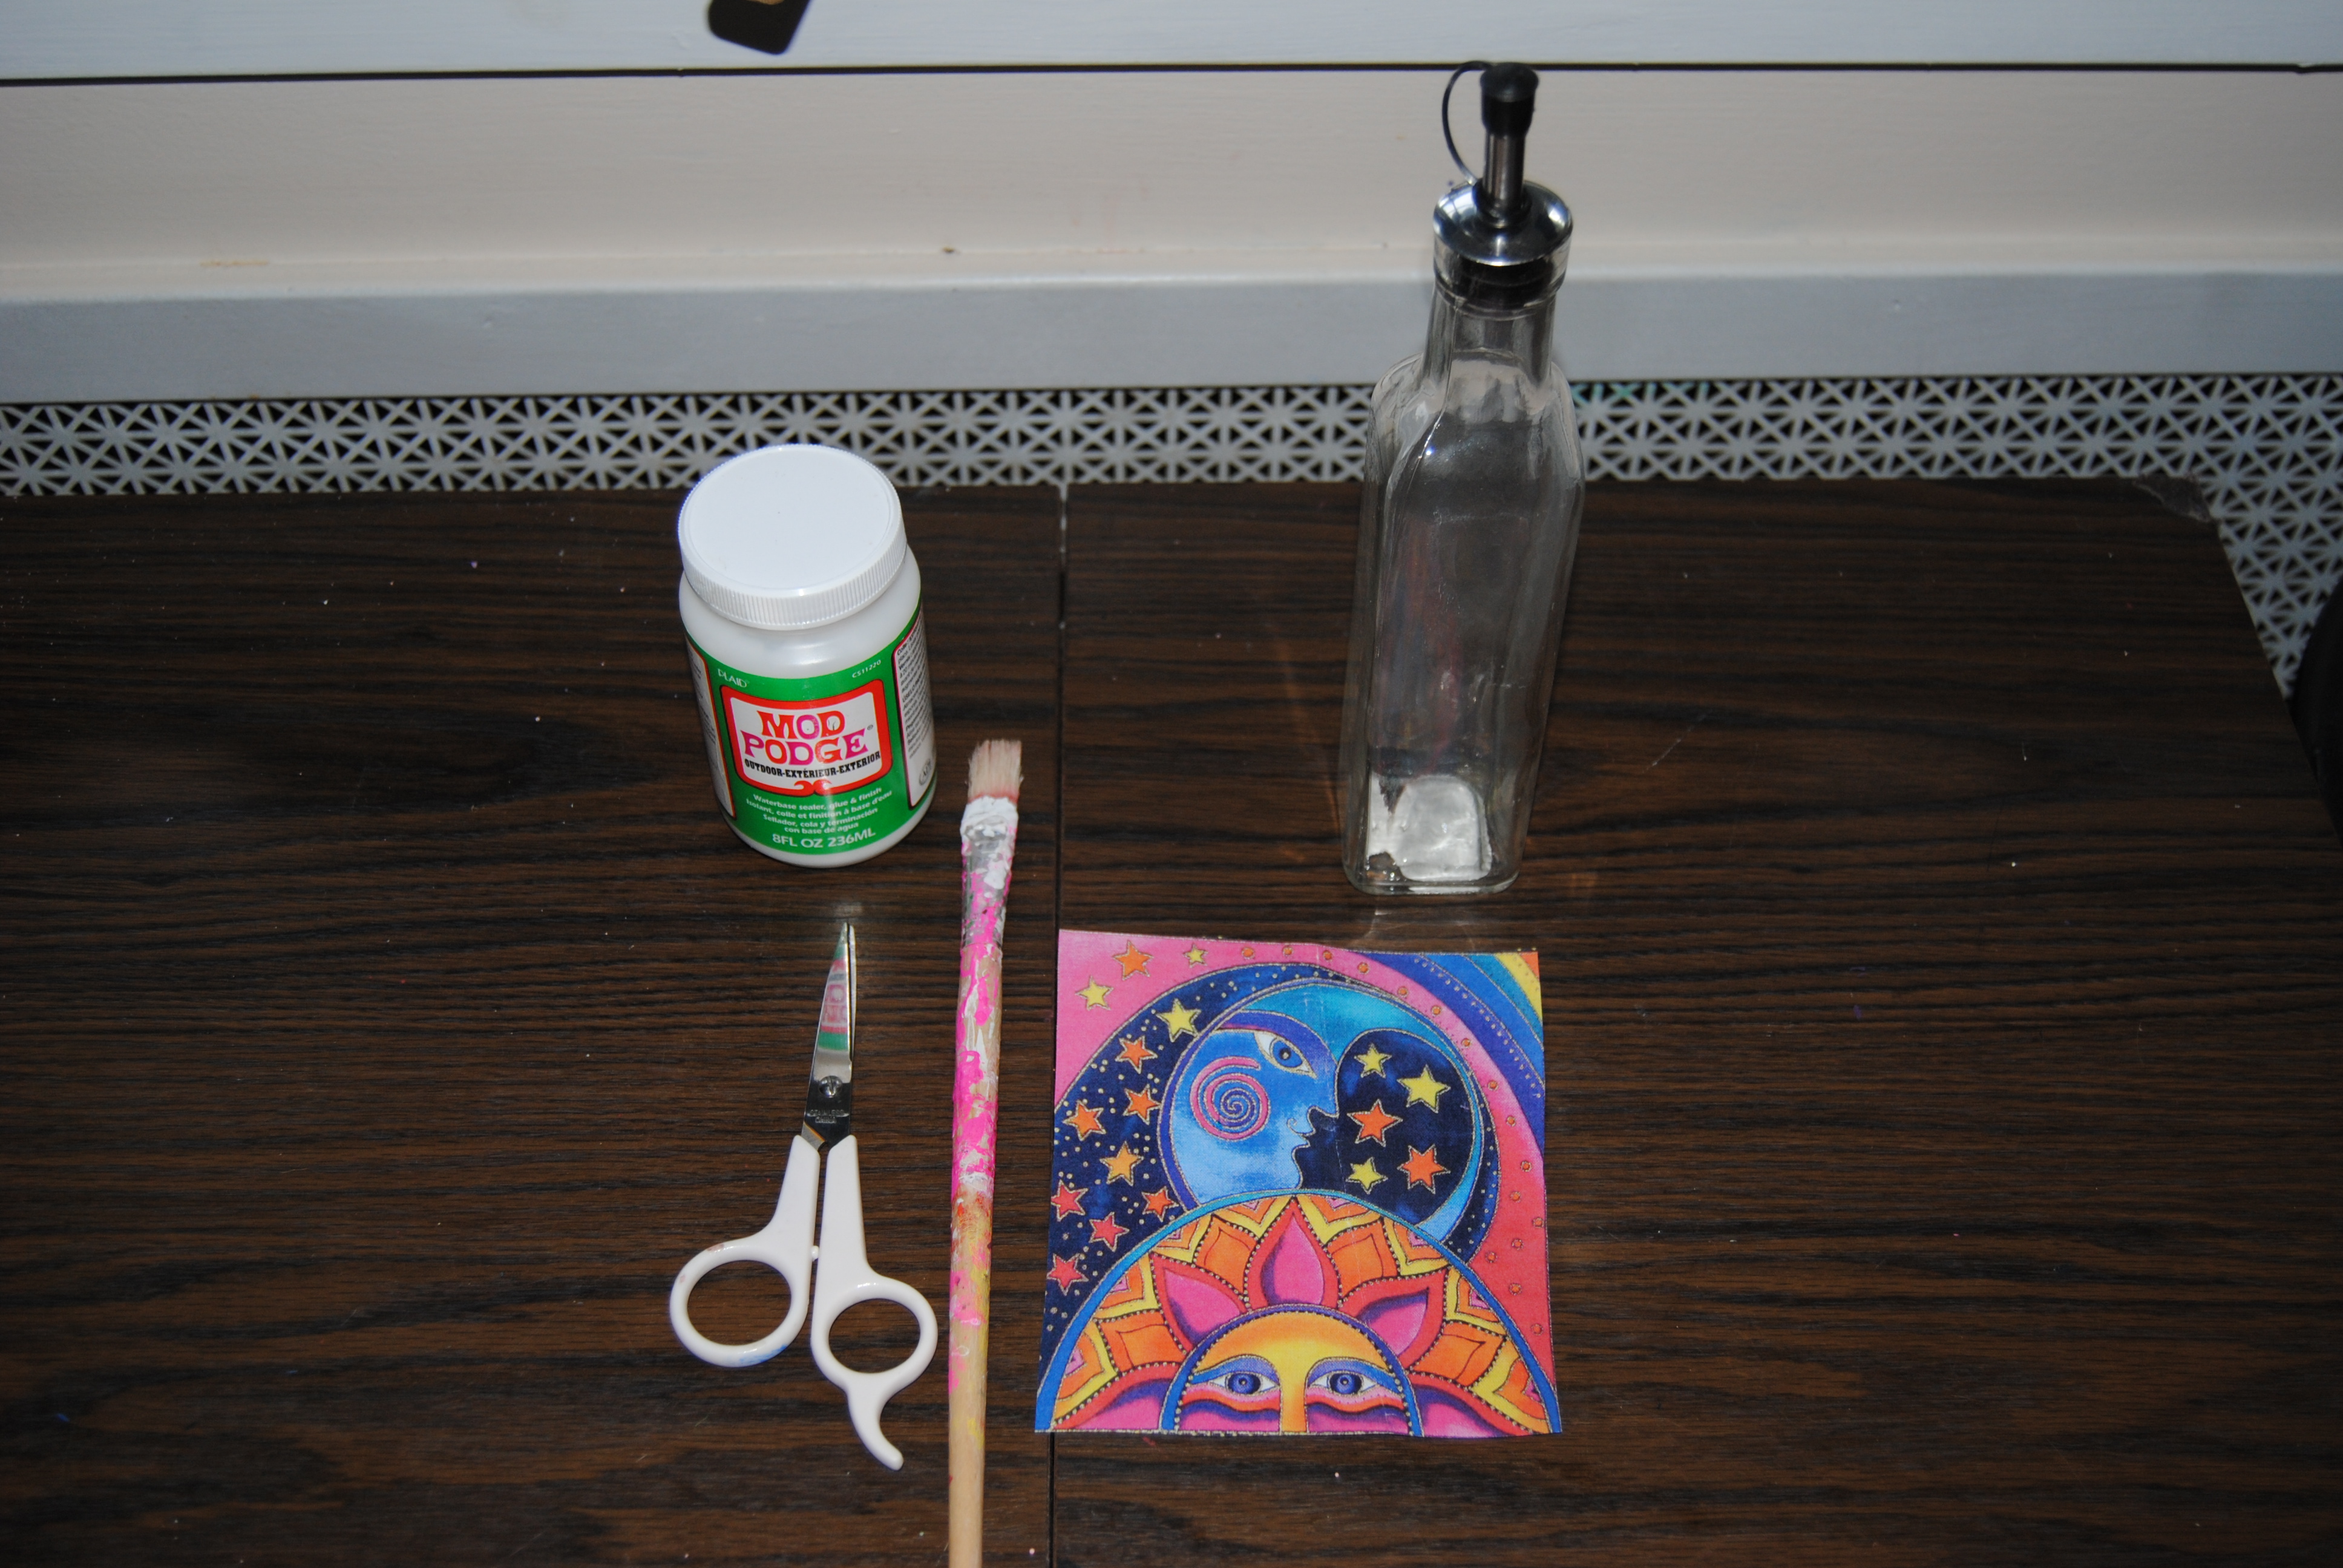
When we got home, I put the princess down for a nap, and got to work.  I traced the chair seat onto the fabric with a black marker.  I carefully cut the tracing with a sharp pair of scissors.  I then applied Mod Podge, using a medium-sized paint brush to the seat.  I spread the fabric out over the seat stretching and smoothing out any creases with my hands.  Once dry, I applied another coat of Mod Podge over the top of the fabric.  While this dried, I used a white latex primer to paint the chair so that I could apply the acrylic paint onto a good base.    I then carefully hand painted the chair and used several coats until I achieved my desired result.

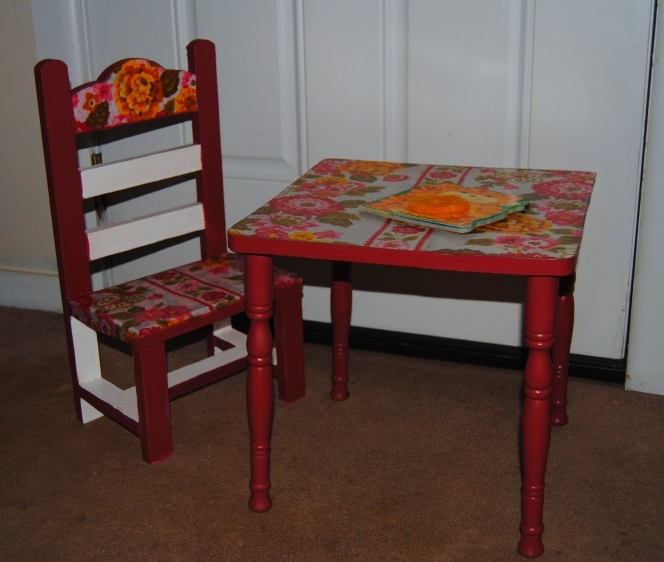
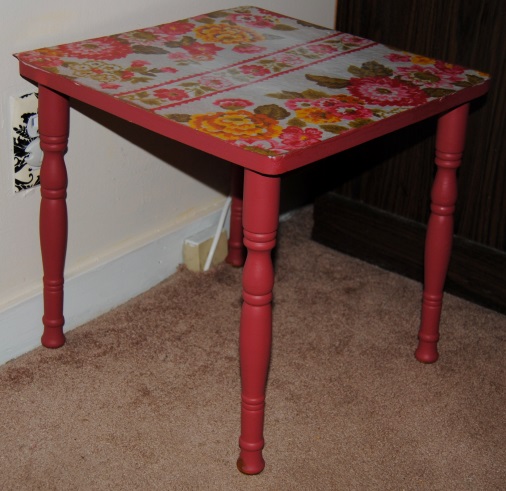
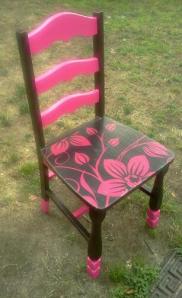
I sat the chair in front of a fan to dry and waited.  Once the paint was dry, I could apply the Mod Podge.  I  allowed it to dry between coats.  This chair needed about three coats over the entire piece to seal it.  I am hoping my sister likes the result!  I had seen the color dipped legs online, on other crafted chairs and I  love this design! I decided to incorporate it into this chair.  Now she has a stylish place to sit and read or put on a favorite pair of shoes, and it perfectly matches her bedroom decor!

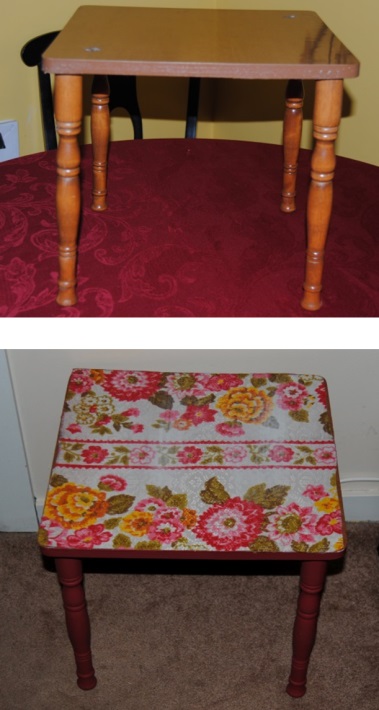
$2.50 chair Before and after:

Image

Upcycled chair

Materials:

Wooden Chair

Pillow Case for decoupage

Mod Podge Matte Finish

Scissors/Fine Tipped Marker

Pink and Brown Acrylic Paint

Paint brushes various sizes

DSC_0555

Summertime Crafts- Restyled Flower Pots made with Outdoor Mod Podge

Image

This my favorite time of year. Our living spaces expand and we can now utilize backyards, patios, and balconies. Flower pots are an inexpensive addition to any outdoor space, and look just as good inside the home. Flower pots can be found at your local dollar store or just about anywhere, and restyling them is a simple, and easy craft.   I had this one hanging around and thought a little sprucing up was in order.  I had some Jacquard style scrapbook paper scraps I had used from a previous project.   As you can tell I love Jacquard designs!  I have just about used up this book of  scrap-book paper designs I purchased from Michael’s Crafts.  I will be our searching for some new scrapbook paper designs in the near future.  I simply cut the paper into a long strip and used Outdoor Mod Podge to glue the paper to the top rim of the ceramic pot.  I  then applied the Mod Podge to the outside, applying a few coats.  A very simple project that you can share with the kids.  You can use fabric, wrapping paper, magazine clippings, personal photographs just about anything.  I recommend using Outdoor Mod Podge even if you plan on keeping your flower-pot inside.  Every time you water the plant you run the risk of getting it wet, and the Outdoor Mod Podge works great under these conditions and will seal it beautifully!  The key is to have fun no matter what design you choose!

When Crafts Go Wrong: Restyling the Upcycle

On May 12th, I posted a Time Out chair I restyled.  Truth is I was never happy with how it turned out.  I think I know why it didn’t turn out as I planned.  I forced it. I was determined to finish the project even when I felt I should put it aside.  One thing I lack is patience and that can be a crafter’s undoing.  Sometimes it is just better to set a project that is frustrating aside to finish at a later date.The Time Out chair is an example of restyling a restyle.(You could say)

My upcycled 70’s inspired girls table has so far been Erin’s favorite.  It is the perfect size table, but lacked a chair.  We caught her pulling the table up to the step in an attempt to sit at the table. That is when I thought of the time out chair. We are very blessed so far.  We rarely have to put her in Time Out, so we haven’t really used the chair, and I thought if I restyled the chair, it would go great with the table.  I used the same 70’s fabric as the table, and re-painted the chair to match. Now Erin has the perfect place to sit and read her book, and I have a chair I can live with!

70's inspired KidsTable and Chair

Upcycled Little Girls 1970’s inspired side table

I have been blogging for over a month now and I am so thankful to you all for the encouraging words and thoughts.  I am also blown away by the amount of talent and creativity I have seen from others on here! Creativity is key!  For me, things don’t always work out as you envision them.  This forum allows me to feel free and unafraid even if I make a mistake!  For that I am grateful!

I am back from my two day hiatus; However a lot of craftiness and shopping has taken place in those days!  The family went thift shopping yesterday, two Goodwills and a Walmart! It was a very productive day!  I picked up a few future projects, and pined and dreamed over other future projects that I could not fit in our little Hyundai!

I saw this little brown, particle board,  table and I picked it up,  I am obsessed with small furniture, as I am always thinking about items that Erin can use that are perfect for toddlers just starting to utilize furniture. She also loves to imitate us and it is wonderful seeing Erin sitting at her kid’s table reading a book like the little person she is becoming.

I also found this great funky floral fabric that screamed 1970.  In it’s previous incarnation it was a window drape.  I can’t imagine! A bit too funky for curtains according to my taste, but not funky enough to use to redo kids furniture!

Materials:

$5.99 table

Fabric

Mod Podge

paint brushed various sizes

acrylic paint

black marker

scissors

First, I turned the table upside down onto the fabric and traced with a black felt tipped marker.  I carefully cut out the fabric.  I then used Mod Podge Matte finish to glue the fabric to the table top.  I set aside to dry.  I wanted the paint the table pink to match part of the fabric, but I didn’t have any pink handy.  I was able to mix red, purple, and yellow, and came up with the color you see here! I primed the piece and then covered the legs and sides with pink paint. Once dry I used Mod Podge to seal the entire piece using about three coats total.

Image

Before and After:

Image

Our cat Nucky seemed to be fascinated with what I was doing.  He was my cat apprentice as Erin was napping at the time!

Image

Bedside table restyled with decoupage

In this little table, I saw much hidden potential.  I can’t remember how I came across it.  I found it up in our attic. It was the perfect little project.  I brought it down, and it sat in my bedroom, waiting it’s turn to be upcycled.  Tonight seemed like the perfect night!  While the little toddler apprentice slept, I gathered all my materials together.  (Including my mess of a table cloth strewn with paint and Mod Podge of projects past.)

Image

First I tightened the table and cleaned it removing any dust or dirt.  Once dry, I primed the areas I planned to paint with a latex primer. I put aside the table to dry.  I took the scrapbook paper and cut it into the various sizes,  In this case the drawer could not be removed.  I could remove the knob,  so I pressed the paper up against the outside of the drawer creating a crease in the paper where it would need to be cut. Once the paper was cut I glued it down to the surfaces I wanted to decoupage.  I then painted the remaining areas black with black acrylic paint.  Once the entire piece was completely dry, I  covered the entire piece with Mod Podge Matte finish.  I used a medium sized paint brush for the larger areas and a smaller brush for the smaller areas.  Once dry, I applied two coats to the smaller painted areas and four coats to the decoupaged areas. The result is what you see here:

Image

Little tip: I had a few air bubbles appear on the table surface.  I used a sewing needle, poking a tiny hole in the air bubble.  I  smoothed it out and then applied more Mod Podge over top of it. Definitely helped!

Before and after:

Image