From “Odd To Mod” Upcycled Thrift Store Mystery Wall Hanging

Recently, I have made quite a few thrift store walk throughs, without finding much of anything to stimulate my creativity.  My pockets are lighter, and even the amount of freebie finds have dwindled. Sure, my attic is filled with items all screaming “Repurpose me, me, meee!”, but our attic is a bit of an organizational nightmare I can’t seem to wake up from, not to mention it is unheated and freezing cold up there! When I go up there, I have to bundle up like I am going for a mile walk across the tundra!  I also feel the secret is out now and when I pull up to the Goodwill store, I am lucky if I can find a parking space!

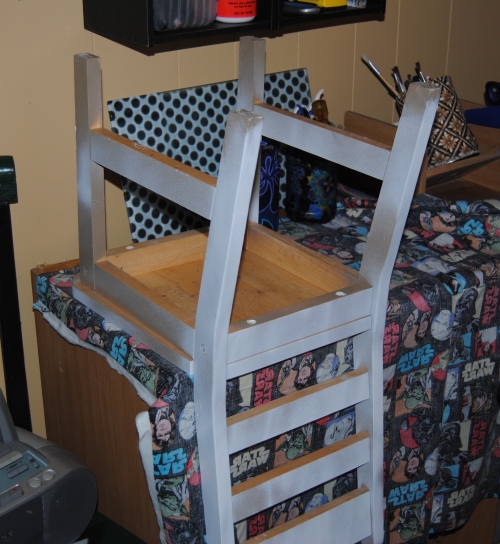
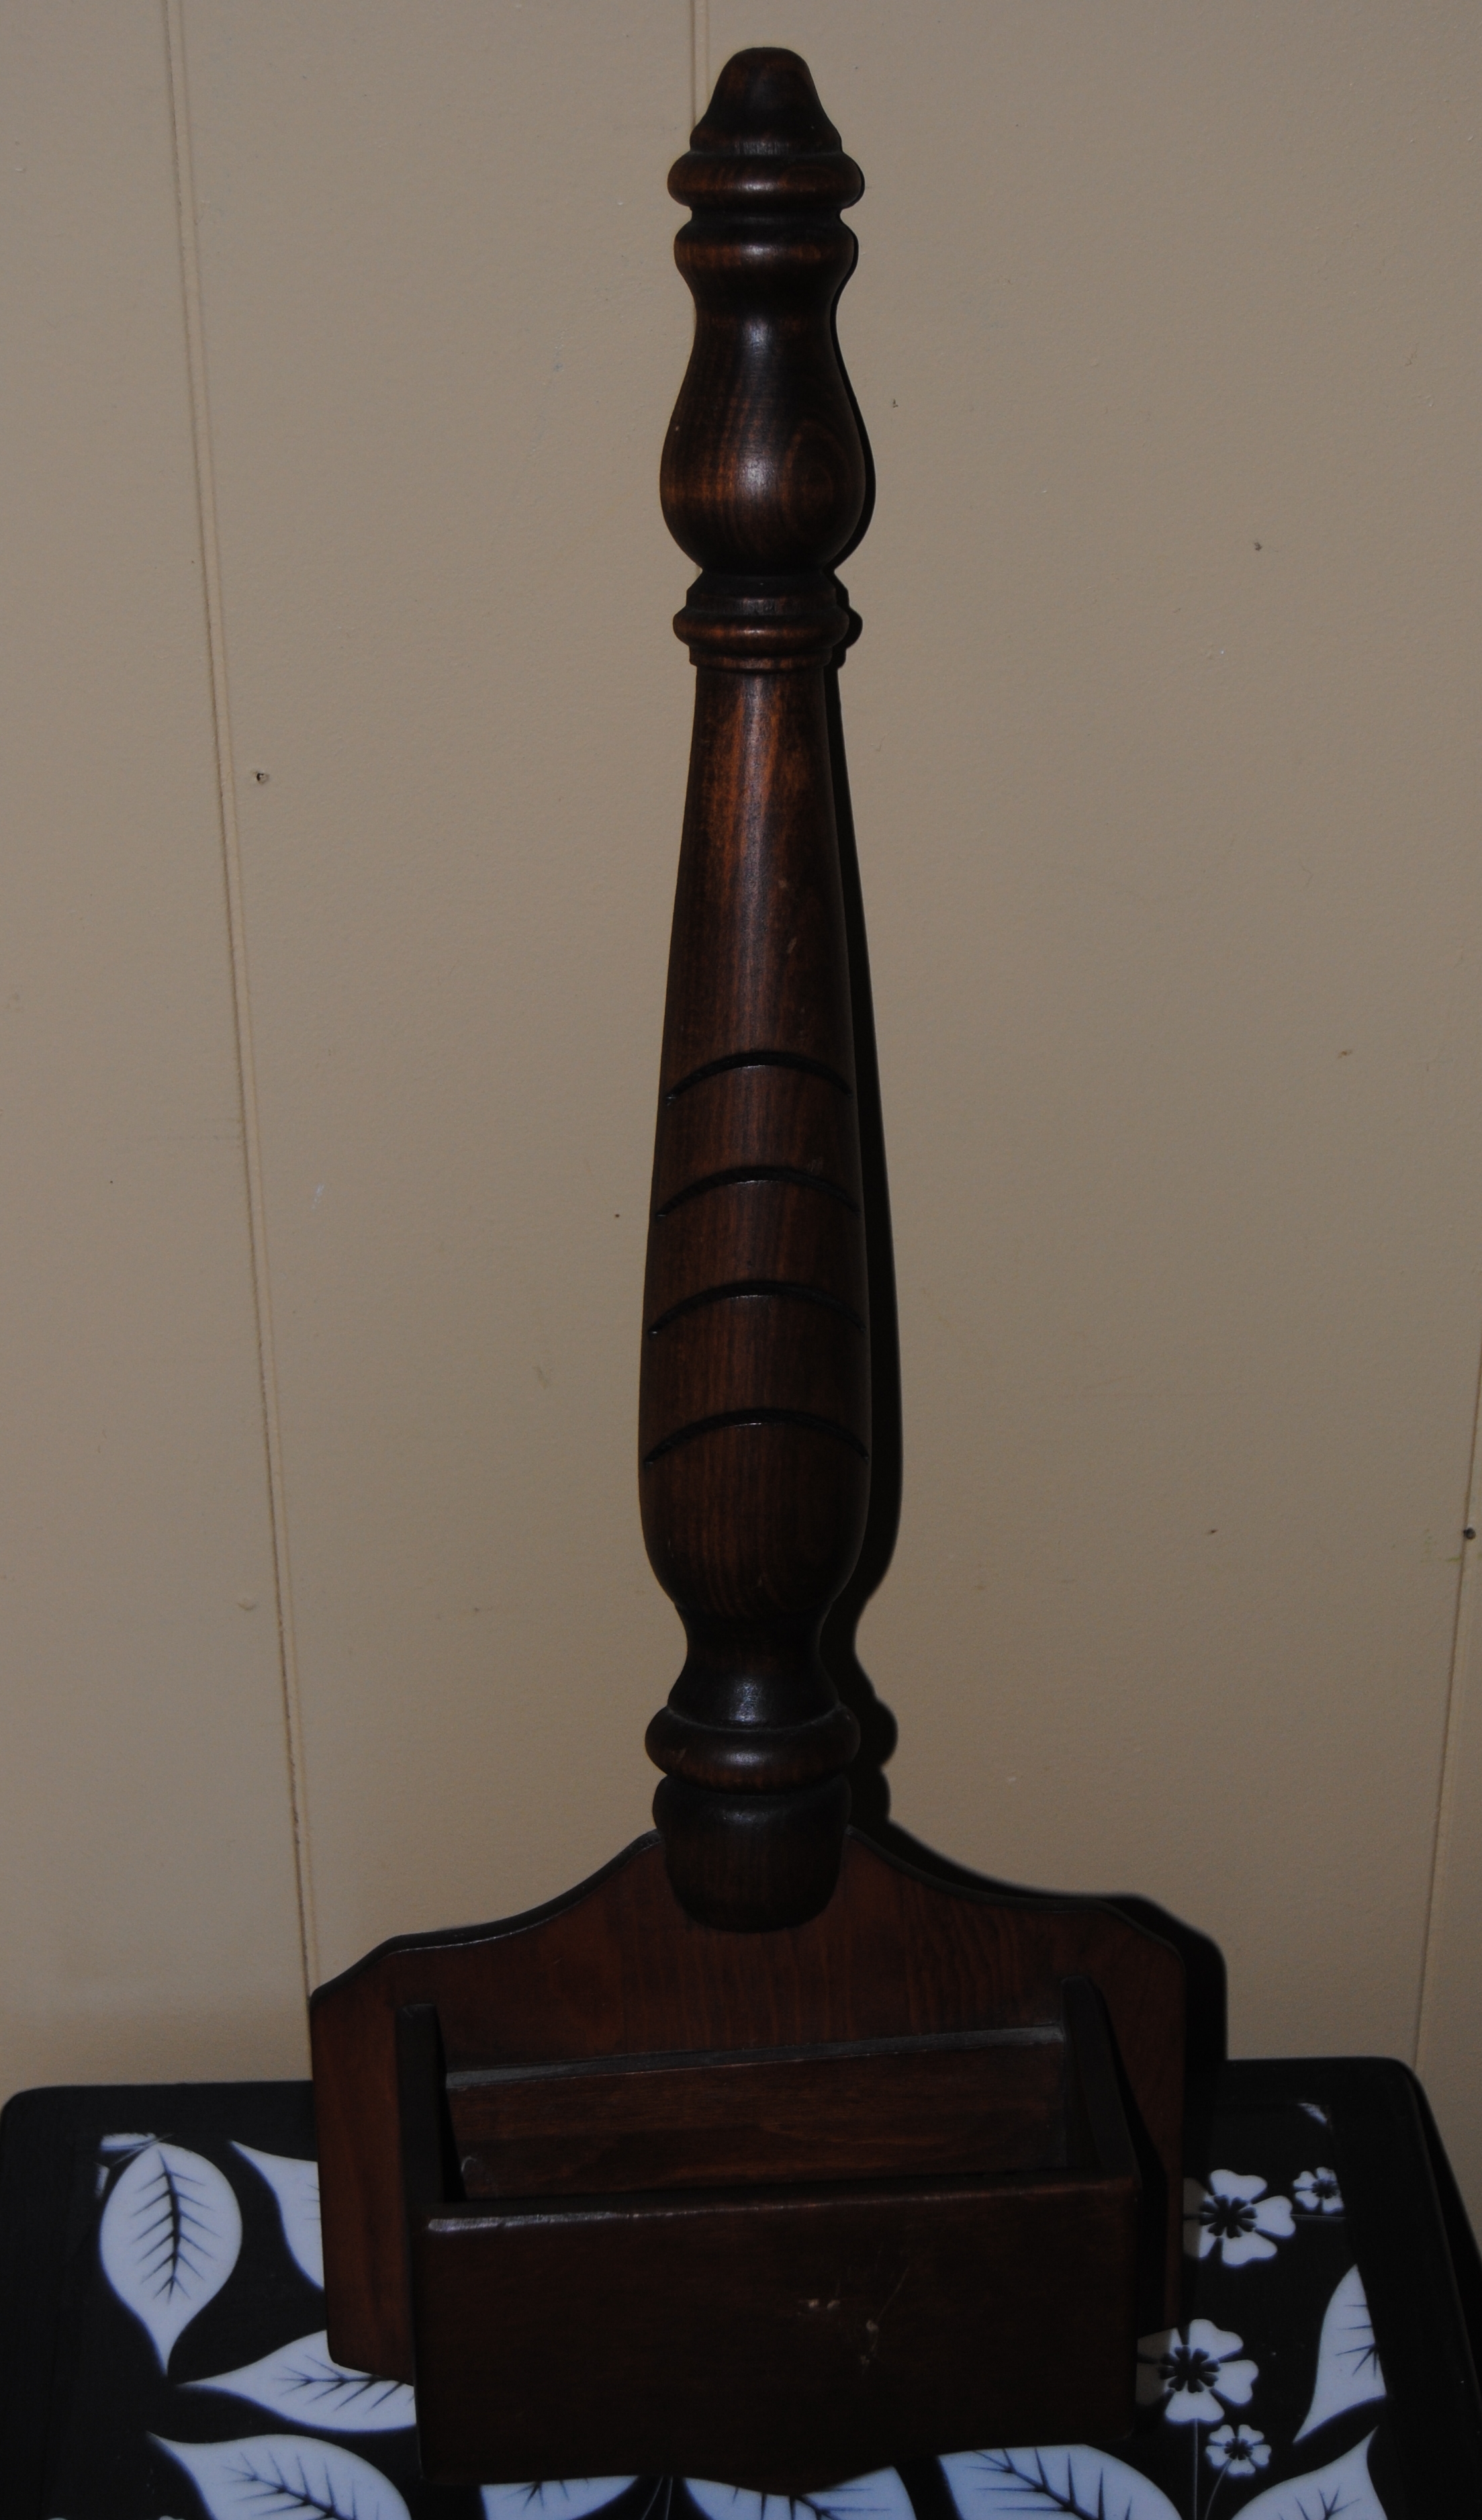
Despite this, I always take a look for those unique items you can only find in a second-hand store and yard sales. Part of the fun is the thrill of the hunt, and coming up empty-handed is a part of it.   I am always interested in quirky little items even if I am not sure what its original use was.  My husband and the toddler apprentice were out with me one Saturday, and we couldn’t find much, but did spot this unique wooden wall hanging with a bit of storage.  It definitely screamed late 70’s early 80’s to me, and I thought it would look cute in our kitchen.

thrift store wooden wall storage thing

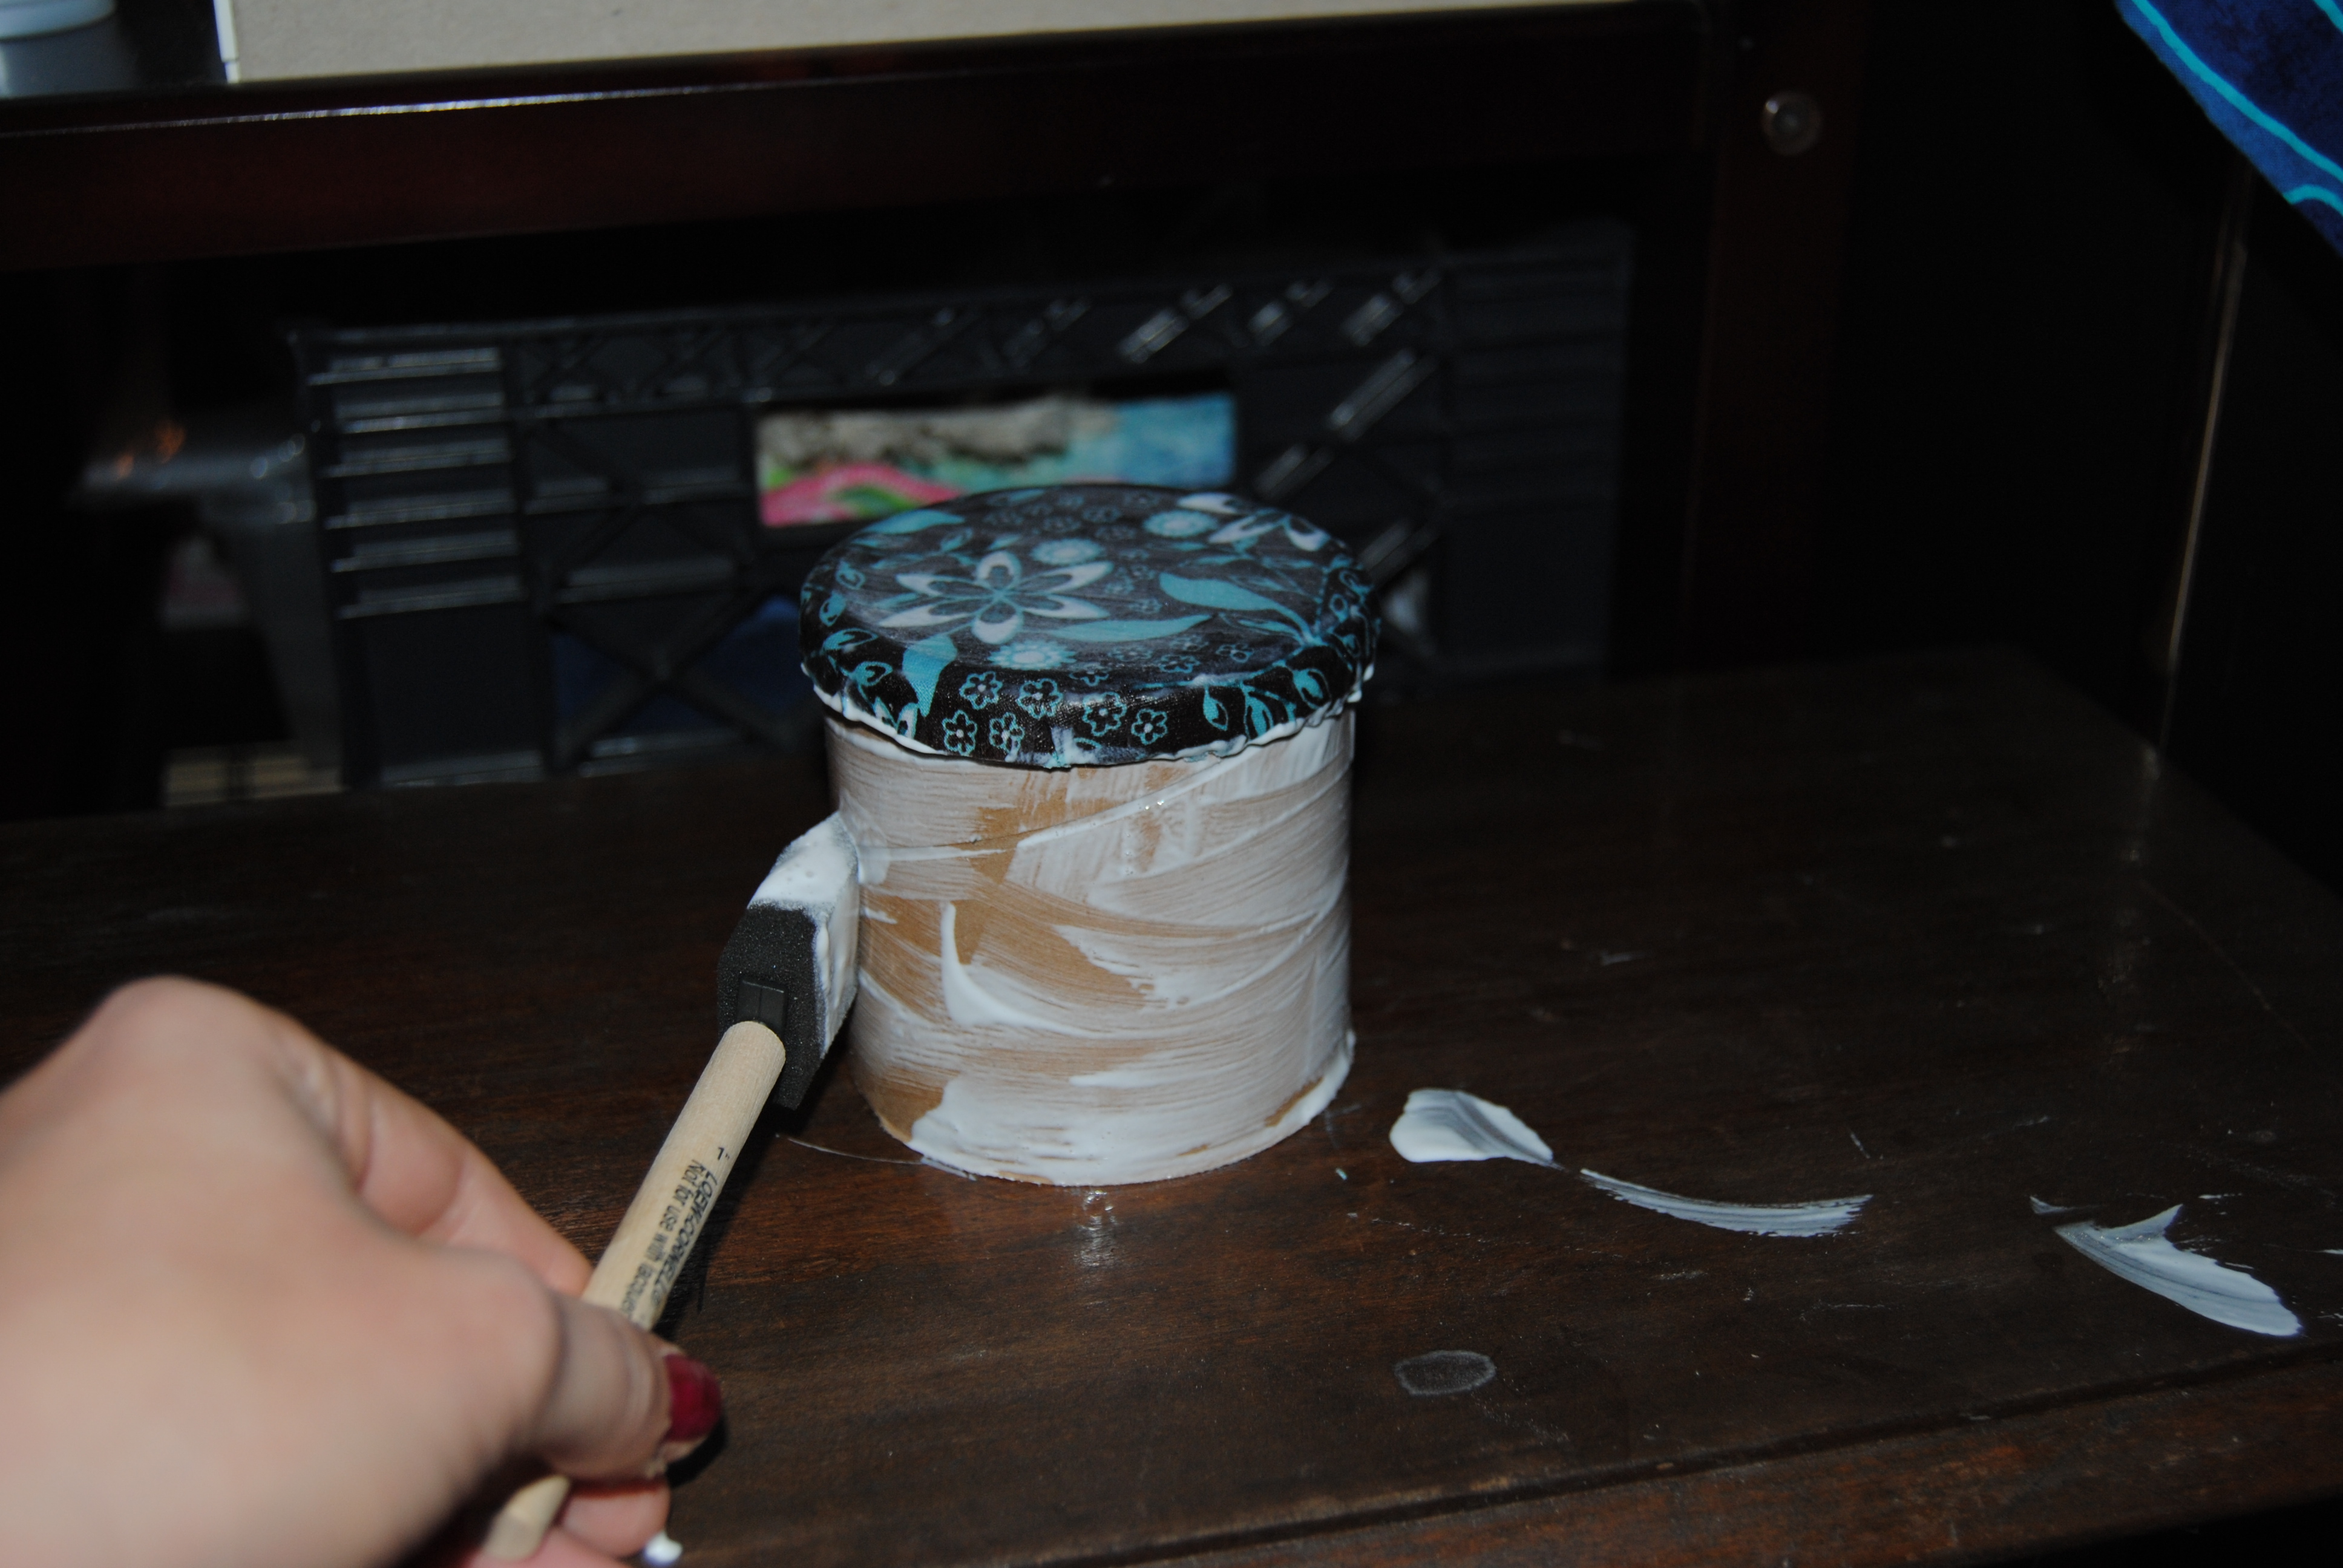
I wanted to re-style it to be more vibrant and colorful.  I thoroughly cleaned the piece with a damp cloth.  I had some leftover red spray paint from a previous project and decided to use it to brighten up the piece.  I took it outside and sprayed it red.

Spray painted piece

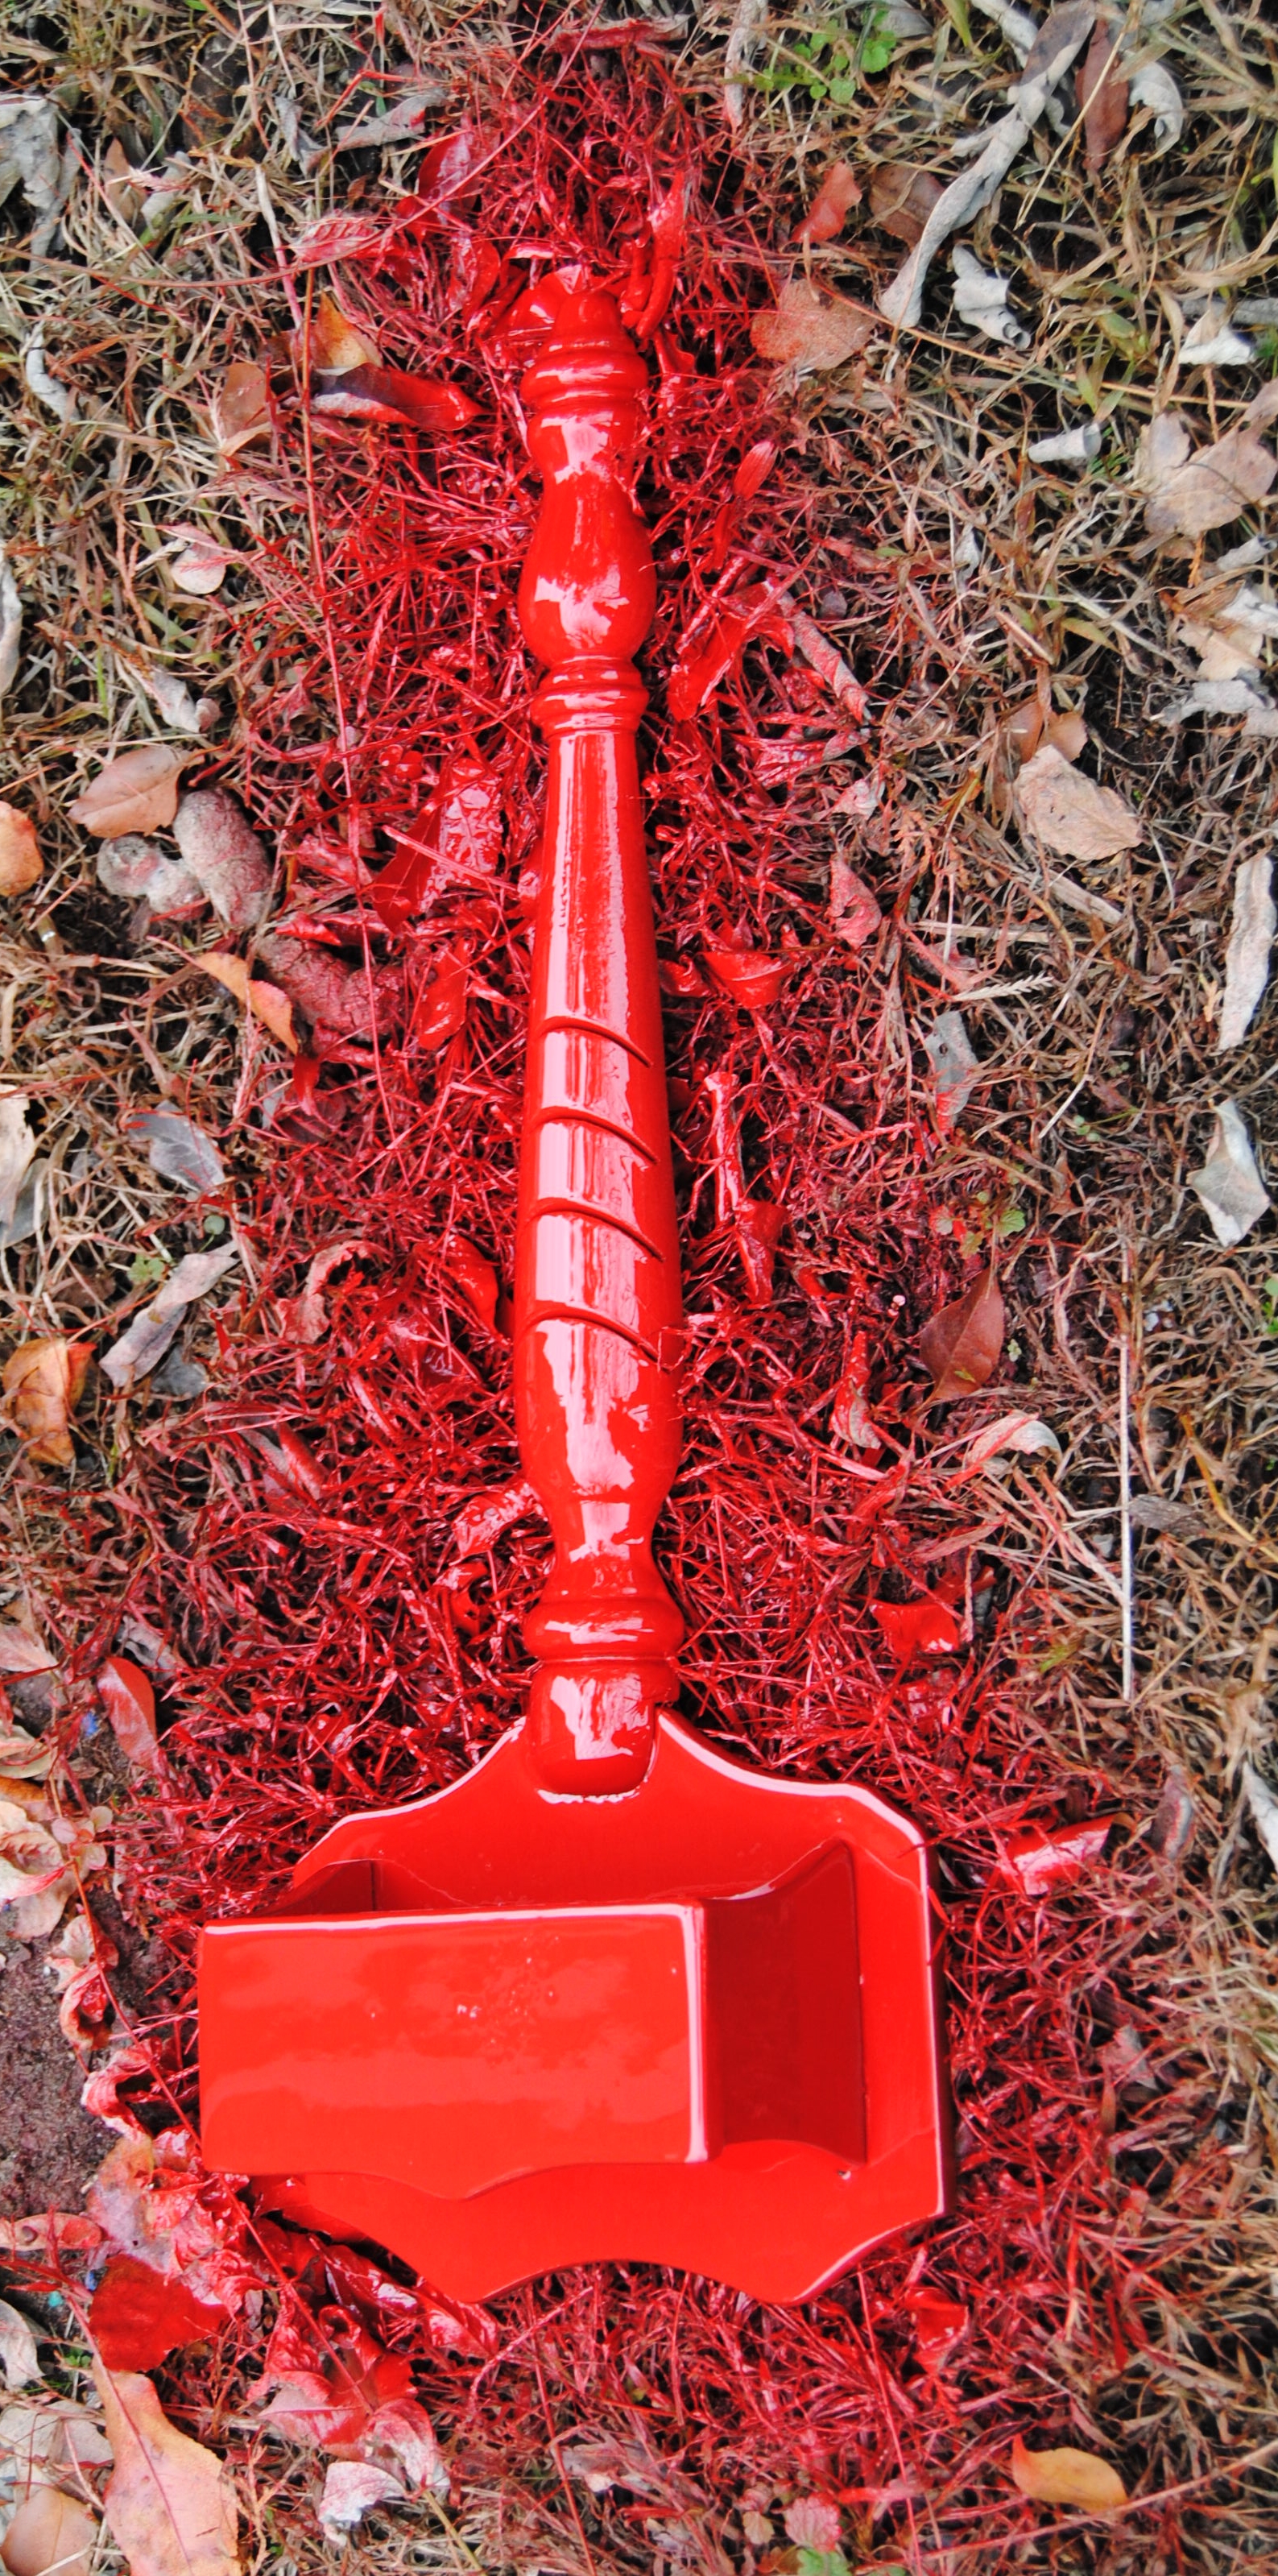
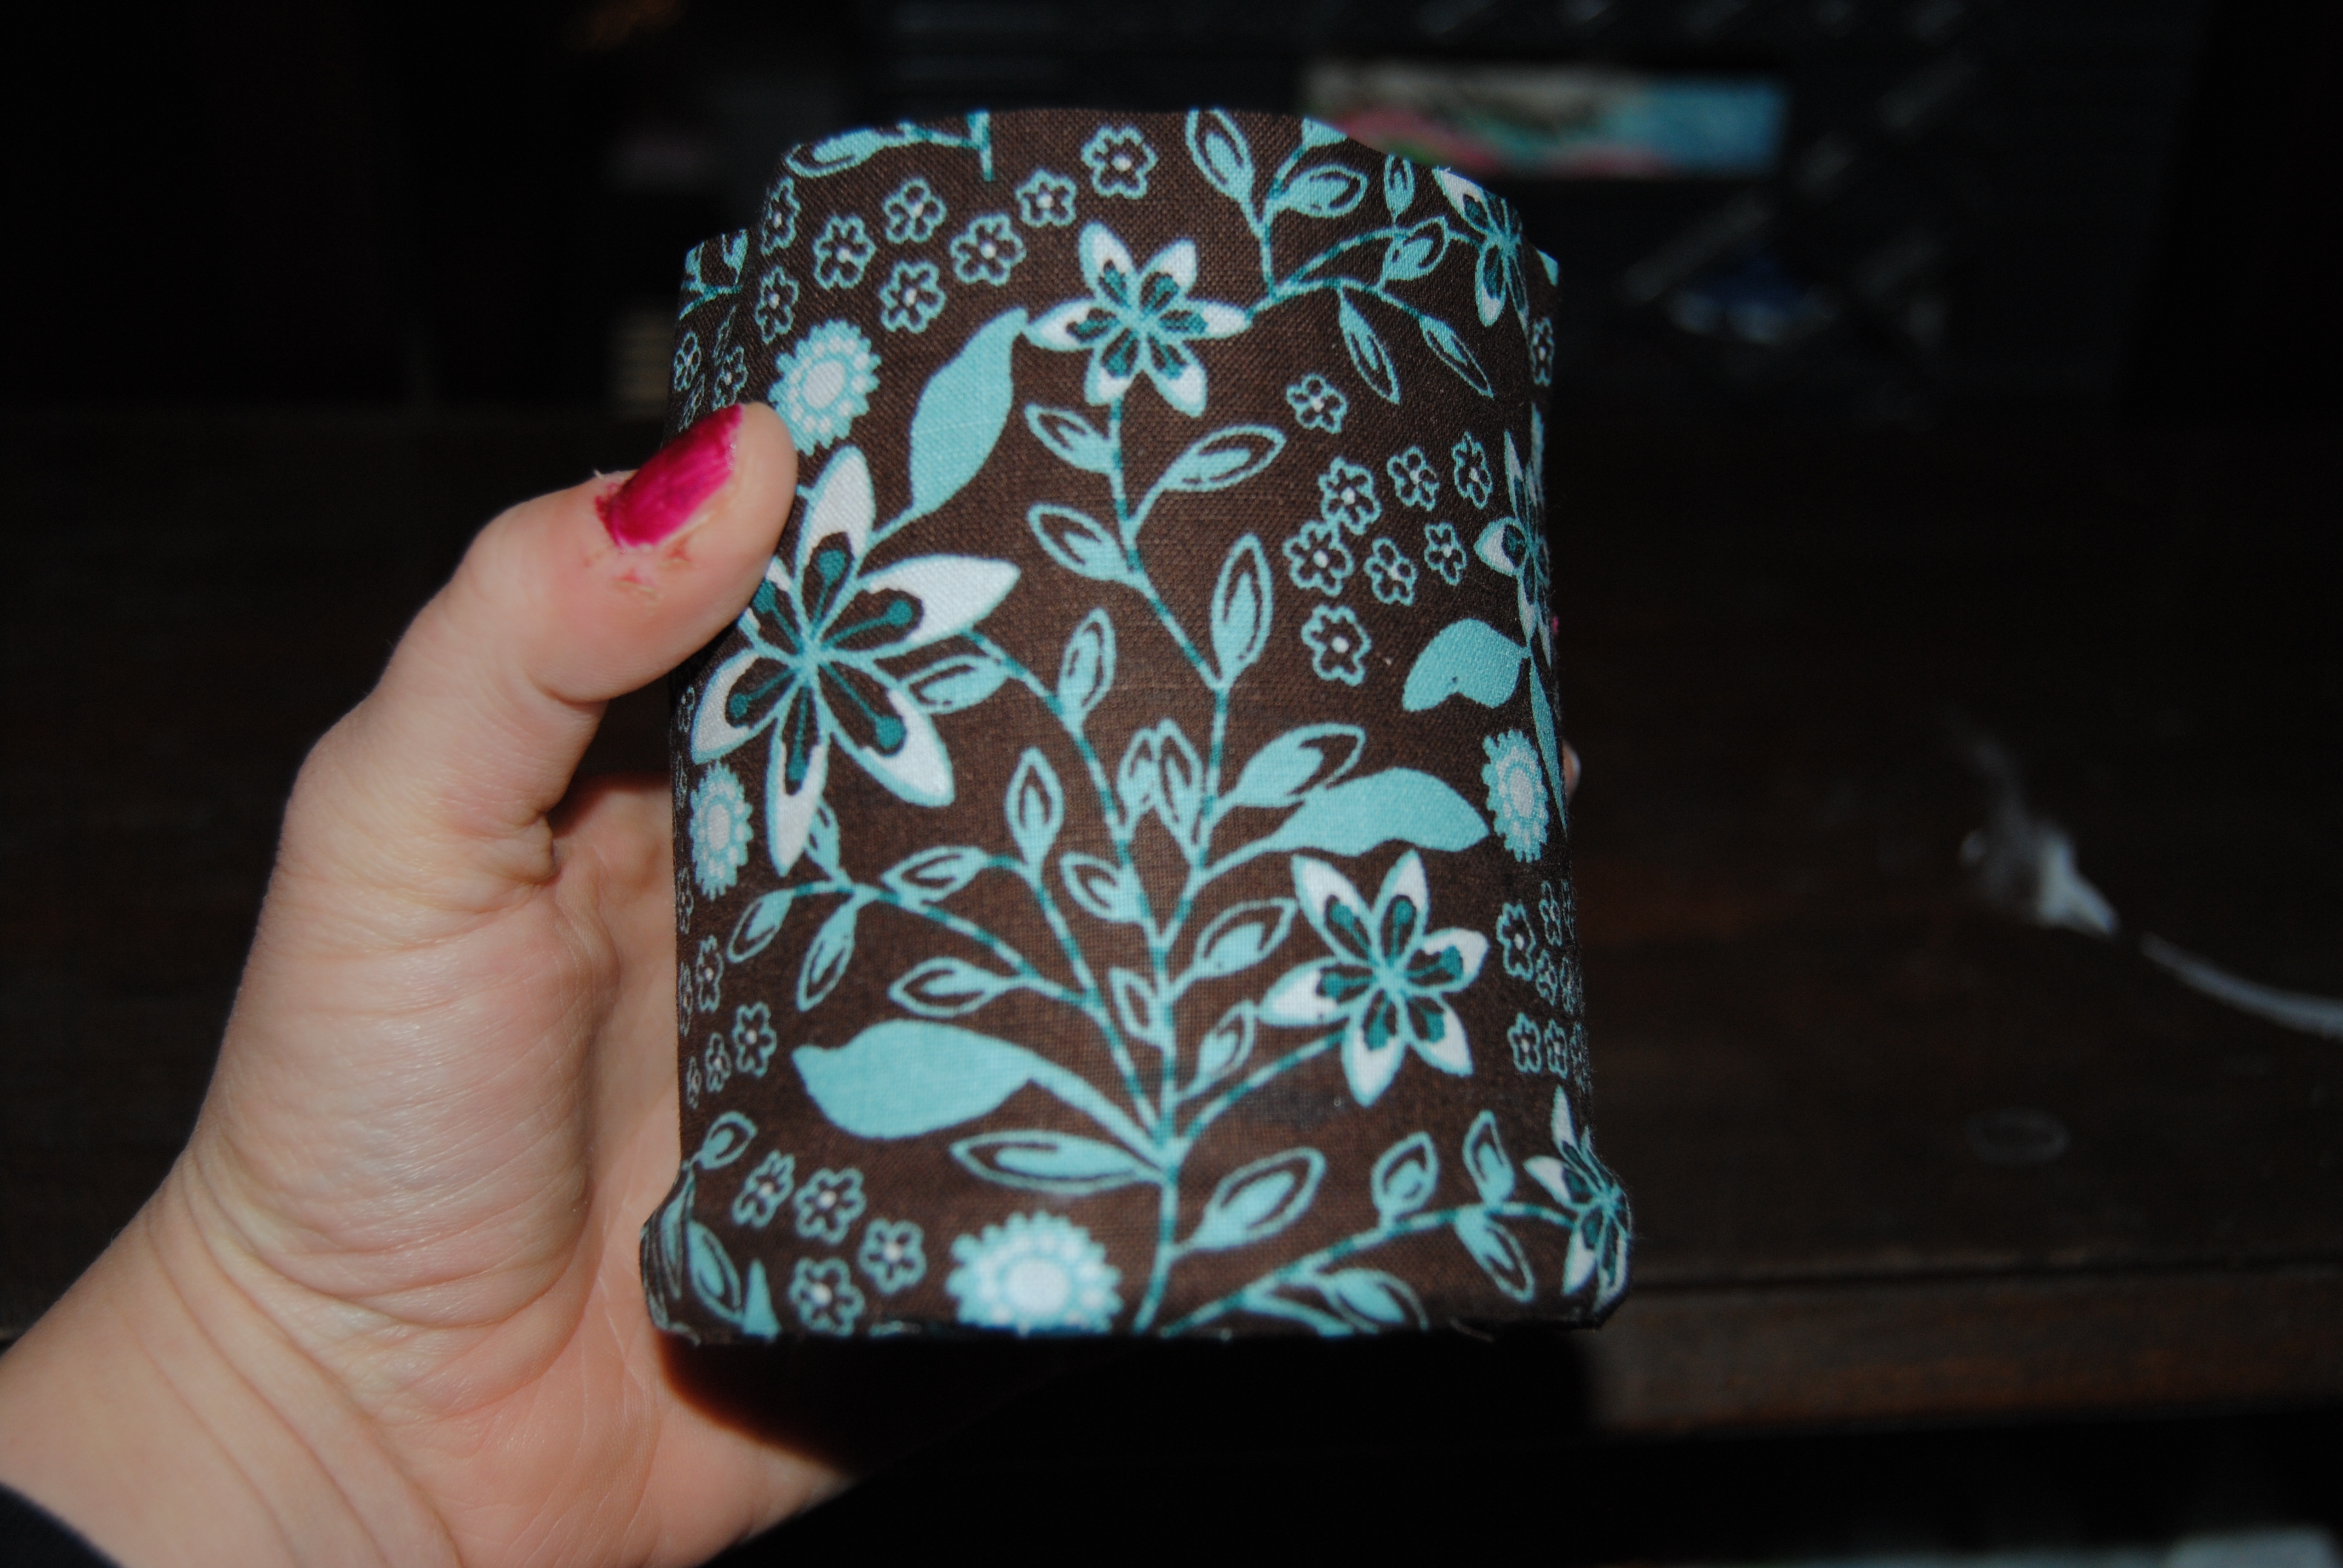
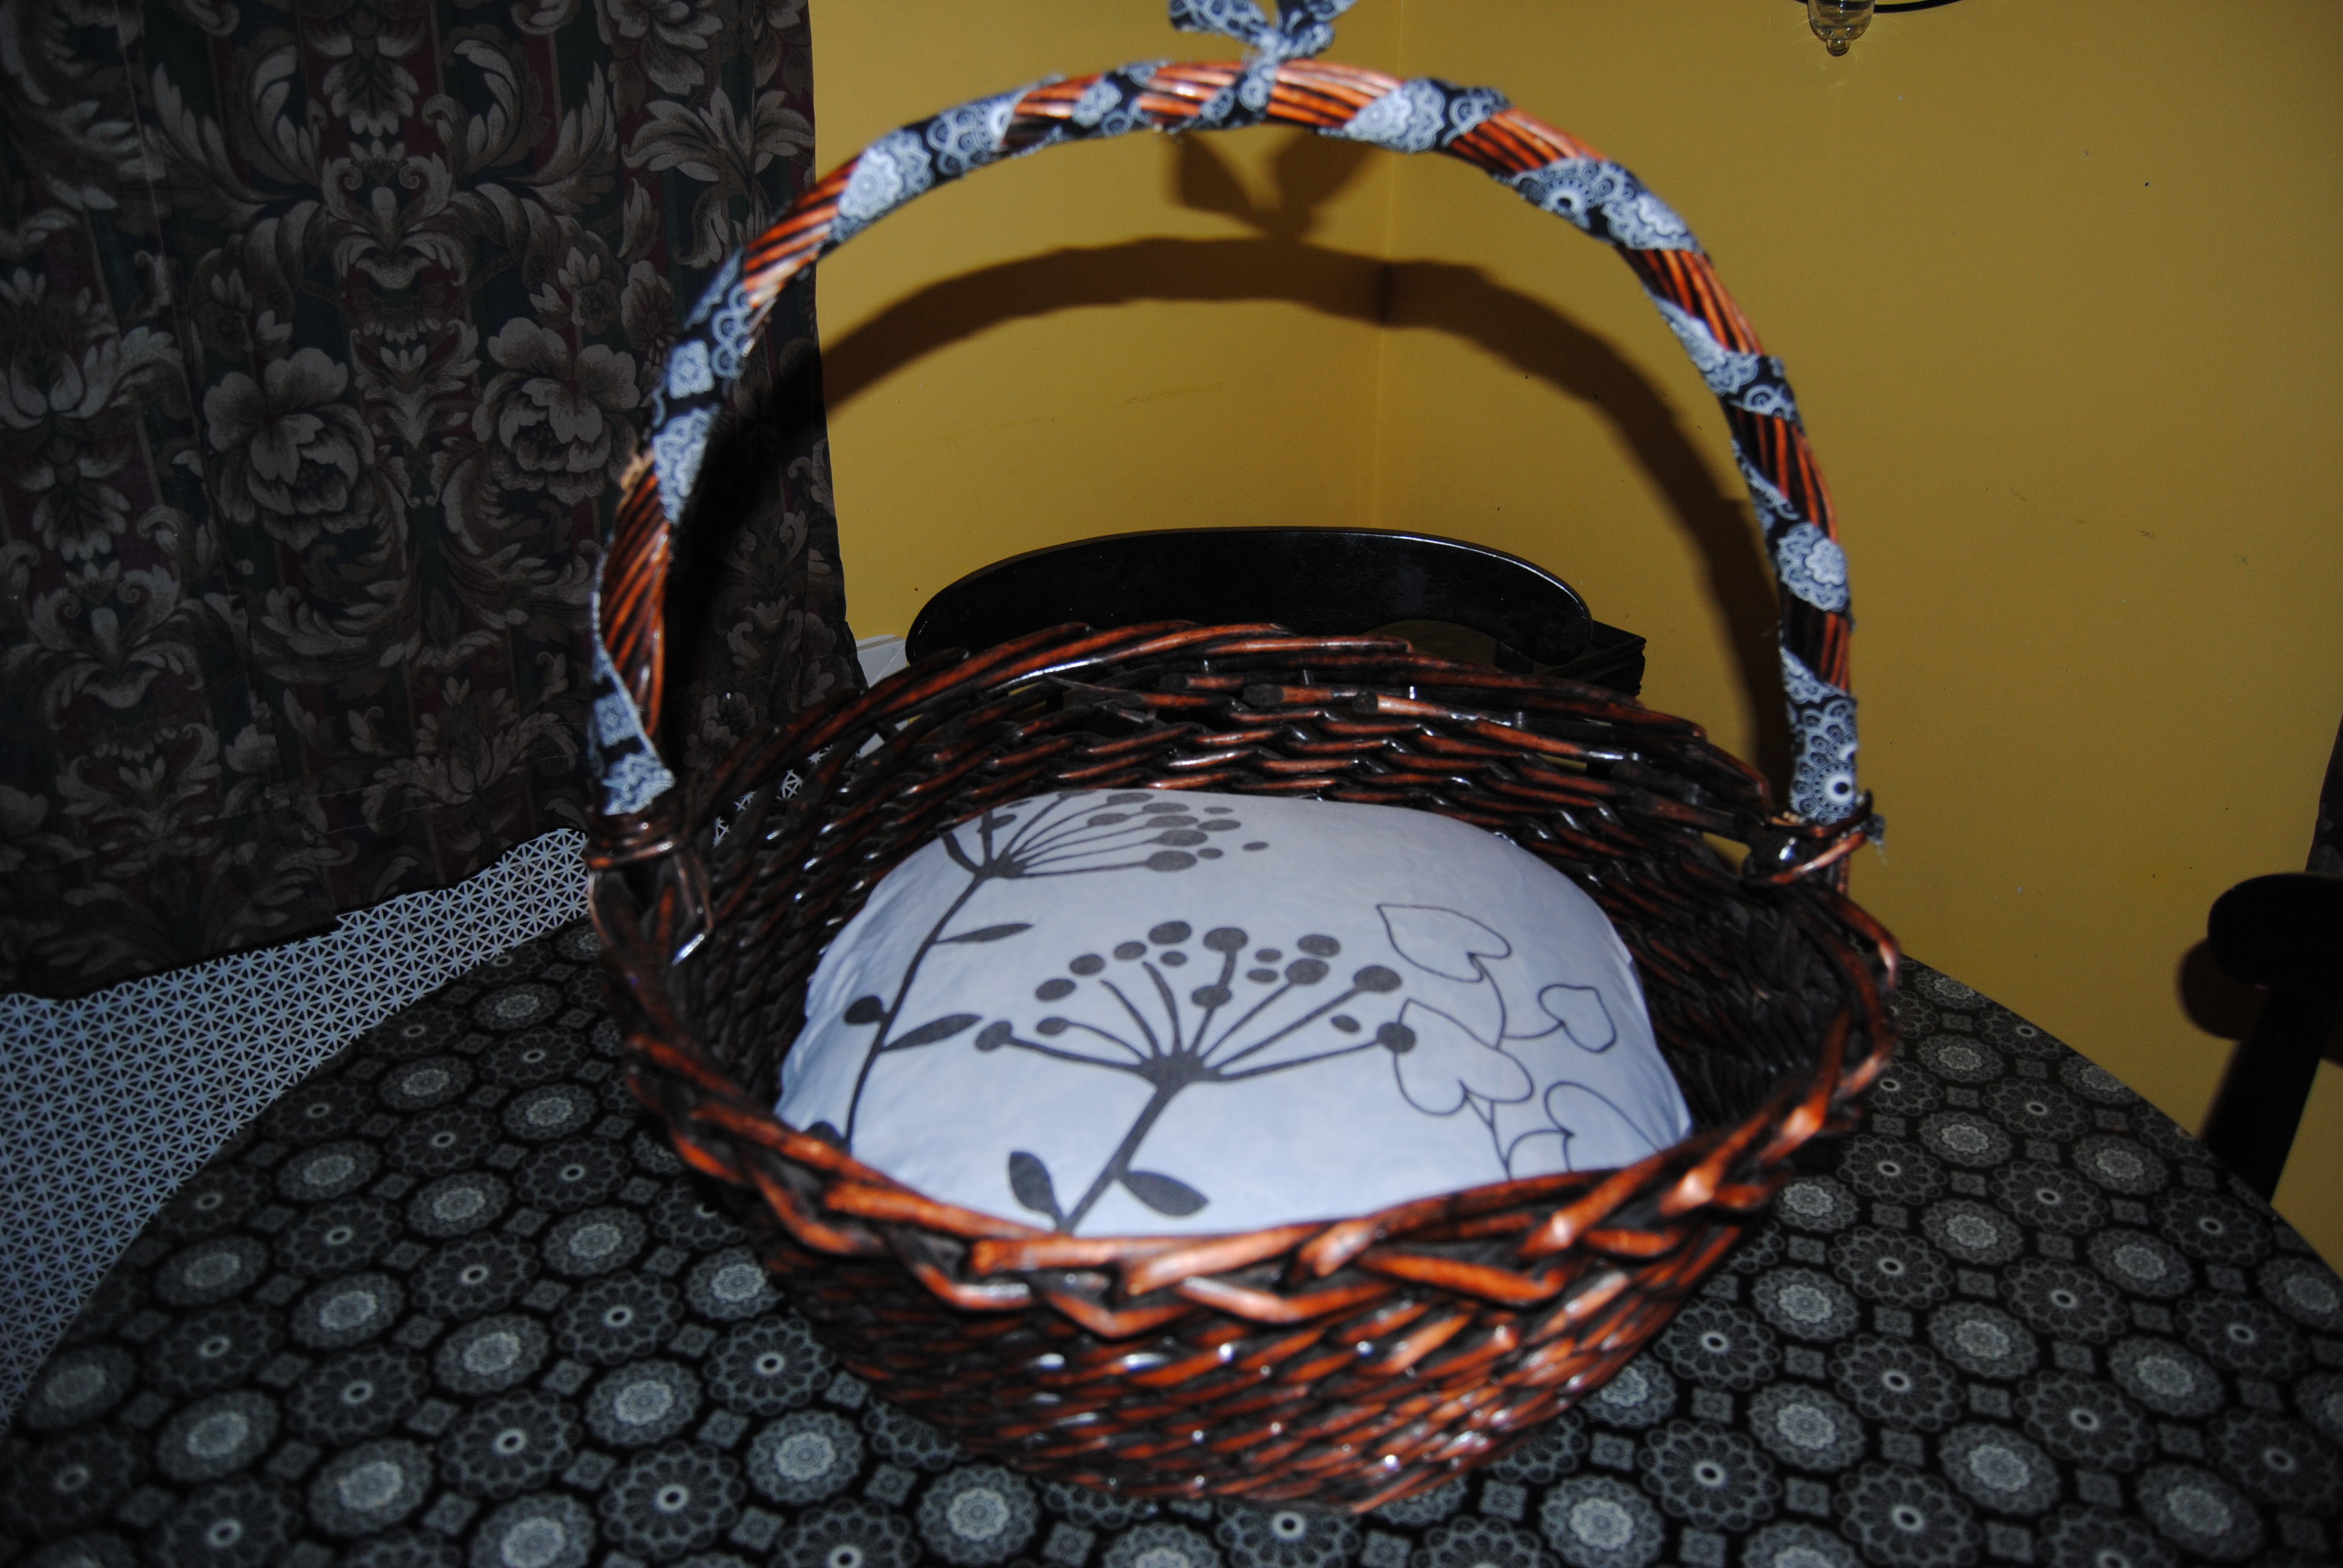
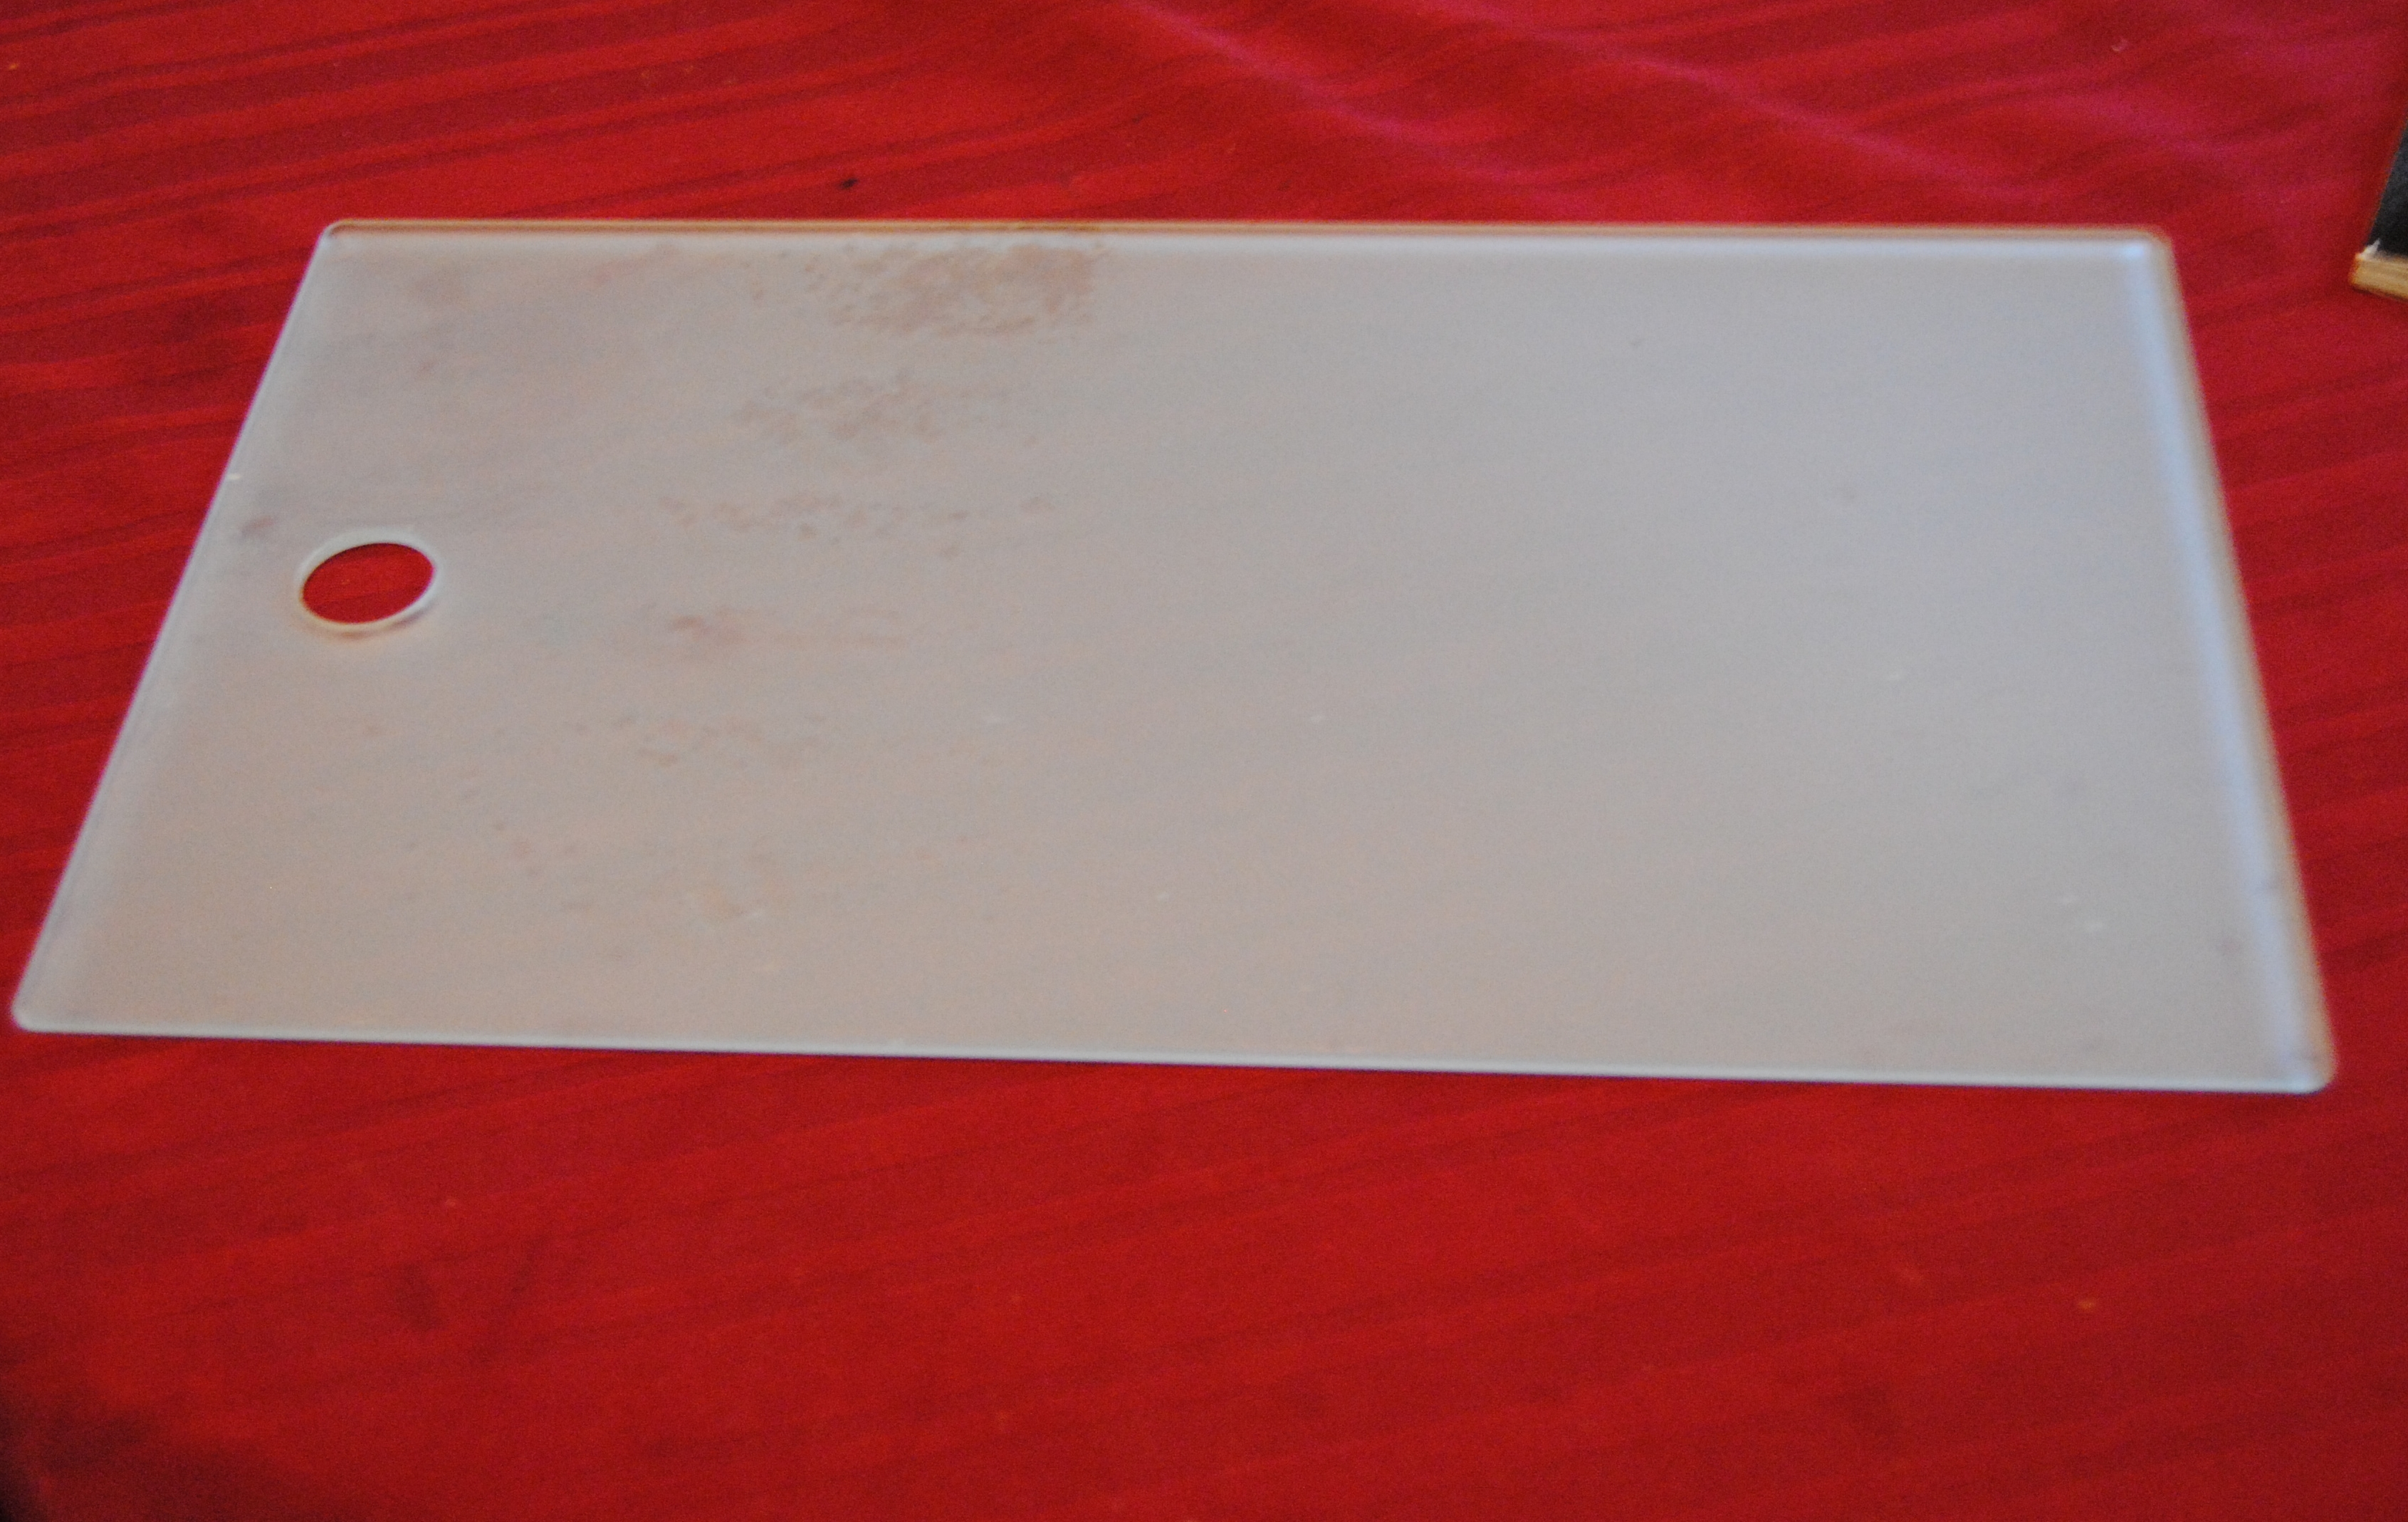
This particular spray paint required about 9-24 hours to completely dry.  Once it was dry enough for me to pick up, I brought it inside to my craft room and allowed it to dry in front of the fan.  Later in the evening the piece seemed dry enough, so I placed the front of the piece down upon the back of the fabric to trace it with a fine tipped black marker.  Probably better if I had traced the object on to the fabric before it was painted, but I was lucky and none of the marker made its way on the painted area.  I then applied Mod Podge with a foam craft brush on the front.

Apply Mod Podge

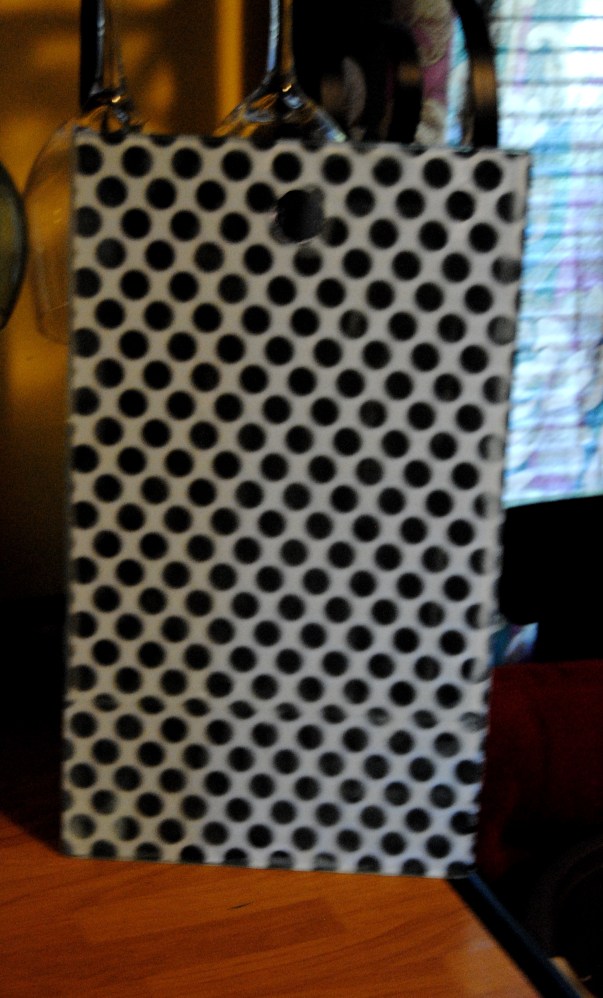
I then applied the cut fabric and smoothed it carefully out with my hands.  I picked a fun Mod fabric with a lot of bright colors.

Apply Fabric

I applied Mod Podge over the fabric and allowed it to dry overnight.  The next morning it was ready to hang.  I love the bright colors which go along perfectly in our yellow kitchen. Now, I just have to decide what I will use it for.  I am leaning toward a salt and pepper holder.

Upcycled Kitchen Wall Hanging and Storage

Before and After: 

From Odd To Mod-Upcycled Thrift Store Wooden Wall Hanging Restyled with Mod Podge, Paint, and Fabric

Can You Spare A Square? Repurposed Toilet Paper Roll.

Ok, so we have all been there.  Through the years, I have learned to look before I leap.  I always check the bathroom stall before I get down to business and make sure the toilet paper roll is full. I considered myself lucky on this day.  When I walked in the stall, I noticed right away all these empty cardboard toilet paper rolls. I did not spot any TP, so I moved on to the next stall, but I couldn’t get those cardboard rolls out of my mind. These rolls are larger than average and are made from a thick cardboard.  It got me thinking, these cardboard rolls could be useful and had repurpose potential.  I took one of them home as an experiment.

I am still in the process of organizing my craft space, and  I thought it would make a perfect pen/supplies holder.  I found an old pickle jar lid that fit the circumference of the roll perfectly.

DSC_1107

I used a hot glue gun to permanently adhere the lid to the bottom of the toilet paper roll.

DSC_1109


I had some left over fabric from a previous project that I thought would be perfect.  I traced the jar lid on the back of the fabric with a marker and cut it out with a pair of scissors.

DSC_1110


I applied Mod Podge to the lid with a foam craft brush, applying the fabric tracing over it.  I then applied Mod Podge to the entire outside of the roll.

DSC_1112

I  wrapped the fabric around to roll and carefully smoothed out any wrinkles and matching up the seam.  I overlapped the fabric where the base met the cardboard.

DSC_1113

I painted the inside with brown acrylic paint to match the fabric.  Once dry, I applied Mod Podge to the entire roll inside and out to seal it.

DSC_1122


Now the hamster wheel in my brain is turning!  I have a feeling this will not be the last project utilizing these rolls!

Stay tuned!

Design On A Nickel: Bathroom Cabinet Decoupage Restyle

Of all the rooms in our home our bathroom I can say without a doubt is my least favorite.  Our house was built-in 1937 and most older homes provided basic accommodations when it came restroom facilities.  Adding to these difficulties is the fact that we have only one, small bathroom in our home and it is in desperate need of a re-model.  That of course financially is not in the cards for us now.  However; I am a firm believer in making the best out of a situation, and I have had plans for quite sometime to work on improving our bathroom.  Our biggest eye sore was our bathroom sink cabinet. Replacing it was not an option, so I thought I could use some paint and a fabric decoupage to improve the look of the cabinet and add some design qualities to a rather bland and uninspired bathroom.

DSC_0951

Generic bathroom cabinet

I hadn’t tried a project like this before and I knew it would require quite a bit of work.  I picked up a half yard of fabric from Joann Fabric and prepped the cabinet by cleaning it with a damp cloth.  I used a screwdriver to remove the doors from the hinges.  I then removed the knobs and placed them aside.  I used a white all in one latex paint and primer to paint the outside and inside shelf of the cabinet.   I used a paint roller on the larger areas and a smaller paint brush for the areas the roller couldn’t reach. I also painted the cabinet doors.  I allowed the cabinet to dry thoroughly overnight. It took about three coats to completely cover it.

DSC_1016

DSC_1013

The next morning, I traced the painted cabinet doors onto the back of the fabric.  Any access fabric, I would trim away later with a box-cutter knife.  I applied Mod Podge to the doors with a foam craft brush.

DSC_1019

I then applied the fabric to the surface and smoothed it out with my hands. I applied another coat of Mod Podge over the top of the fabric and I used my nail to work the fabric into the crevices.

DSC_1022

I repeated the same process for the second door and allowed them to dry in front of the fan. Once dry, I used a box cutter knife to carefully trim the excess fabric using the groove of the door as a guide.

DSC_1037

I reconnected the doors to the cabinet and reattached the knobs.  I applied an additional fabric swatch to the front of the cabinet, and repeated the same process of applying the Mod Podge and fabric and trimming away the access fabric.  I then touched up any areas of the cabinet with paint that needed it.

DSC_1039

DSC_1040

I really love the aqua and brown color scheme and hope to incorporate some more color in our bathroom.  I feel this may be a great start to improving our tiny neglected lavatory! I was surprised at how well this project turned out and the cabinet has gone from eyesore to accent!  It cost only about ten dollars worth of materials to make this project a reality, and I am really glad I gave it a try.  I have a feeling this is only the begining!

Fabric, Decoupage and Paint Bathroom Cabinet Makeover

Bathroom Cabinet Makeover Materials:

Mod Podge

All in one latex primer and paint in one

Fabric of choice

foam craft brush/paint roller

paint brush/fine tipped marker

Box cutter knife/scissors

Before and After:

Bathroom Cabinet Makeover Before and After

Scrap Fabric Upcycled Candle/Tea Light Holders

There is nothing I love more than decorative lighting and candles!  They help create a cozy, relaxing environment in any room and some candles are aromatic as well.  I especially enjoy the pumpkin and apple pie scented candles.  Once the candles burn down, you are left with the glass and some left over wax.  Sadly, these items often get discarded, but each of these can be restyled into decorative tea light holders using a bit of Mod Podge and fabric scraps.

First, I used a butter knife to carefully chip away at the leftover wax.  Once the wax was removed I used a damp paper towel to clean the inside.  I applied Mod Podge to the outside of the candle holder with a paint brush.  I cut a small piece of scrap fabric measured to fit the outside of the candle.    I wrapped the fabric around the outside of the glass and applied Mod Podge over top of the fabric to seal it.  These are simple to make and are a great way to recycle used candles and fabric scraps.

Recycled Candles made into decorative tea light holders

Upcycled Candle holders made with fabric and Mod Podge

Creative Blast Off: Star Wars Fabric Decoupage Kids Chair

I was in Joann Fabric recently and came across some great Star Wars themed fabric.  They were in the midst of having a huge fabric sale and I jumped at the chance to purchase something unique and fun at a discounted price.  When I brought the fabric to the counter to have it measured and cut, the clerk informed me that their was a larger scrap piece she could sell me for an additional half off!  It was my lucky day as I really only needed a half yard.  This piece was large enough to use for additional projects, and I jumped at the chance to buy it.  Two other fabrics I purchased also had discounted scrap pieces.  It was my lucky day!  Over a yard of fabric Star Wars fabric cost a mere $5.30!

Thrift Store Kids Chair

I had picked up two kids chairs during a furniture sale (shown above) at a local Goodwill store.   My first project to utilize one of these chairs was for a Strawberry Shortcake themed guest blogger project celebrating Geek Month on Cheeky Geeks Blog. I primed both chairs with a spray on white latex primer, and this chair sat for quite sometime unfinished.  It seemed a perfect fit for the Star Wars fabric.  My husband and I are like many our age, huge fan “geeks” when it comes to Star Wars. I was more than happy to base a kids chair on such a fun topic from our youth.

Trace chair seat on to fabric

I flipped the chair over on to a table and laid the chair seat upon the flip side of the fabric, tracing carefully with a black marker.  I carefully cut out the piece of fabric, along with a smaller sized piece I would use for the chair back. I applied Mod Podge to the chair seat surface with a large foam craft brush.  I then carefully laid the cut fabric on the chair with my hands smoothing it out to prevent wrinkles.  I trimmed the back of the fabric carefully where the seat back and chair back met. This enabled me to cover the seat with as much fabric as possible.  I repeated the same steps to apply the smaller piece of fabric to the chair back.  Once dry, I covered the fabric over top with Mod Podge, and allowed it to dry.

Decoupage Kids Chair

I then hand-painted the chair with red and black acrylic paint.  Like the first chair, it required quite a few coats of paint. Once dry, I painted on a coat of Mod Podge to seal it.

Star Wars Fabric Decoupage Kids Chair

Materials Used:

Old Kids Chair

Mod Podge

Star Wars Themed Fabric

Foam Craft Brush/Paint Brushes/Scissors

Black and Red Acrylic Paint

White Latex Primer

Star Wars Themed Fabric Decoupage Chair

Check out all the great licensed character themed fabrics Joann Fabric has to offer here

Fabric Decoupage Chair Seat

A Frugal Feline: Make A Cat Bed In A Pinch

About 2 months after the birth of our daughter, I noticed a stray cat hanging around the neighborhood that I hadn’t seen before.  He was very thin and unusually friendly.  I saw the sad state he was in, took pity in him and began feeding him.  He would stay in the backyard lounging on our outdoor chairs, and greet us at our front door when we arrived home.

Summer Stray

After a few months, and the threat of winter approaching, we scheduled a visit through our local animal shelter’s Spay Our Strays program.  He was vaccinated and turned out to already be neutered a sure sign that at one time, he was someone’s pet.  I searched the local lost animal websites, and checked with shelters, but no one seemed to be missing him.  My husband and I decided to take him in.  He was great, but my younger male cat did not approve and started picking fights with him.  Until I could find him a suitable home, he would have to stay in our basement.  I created quite the feline bachelor pad for him.  A cat tree in front of the window, complete with futon bed,  private litter box and a never-ending supply of food and water.  He continues to thrive, after many attempts at finding him a permanent home and attempting to integrate him into the household have failed.  He resides in our basement laundry and remains sweet and content with his life.  He comes upstairs to visit and then goes back down to the basement where he is king and lives in peace by himself.  Just look at him now and how much weight he has gained! It is hard to believe this is the same cat that showed up in our yard on the brink of starvation!..

Nucky

Recently, we were forced to discard the futon in the basement. Removing this piece of furniture removed precious lounging space for our poor “Nucky” (named after the character in HBO’s Boardwalk Empire.) I searched the house for suitable items that I could repurpose into a cat bed.  I came across a large wicker basket that I had stored in our attic.  I found an old couch pillow as well as an old pillow case.  I stuck the pillow in the case, and tucked it inside the basket.  I used some fabric scraps to add some detail to the basket handle.  Cat bed in a pinch was born!  A much less expensive and greener alternative to purchasing a new cat bed.  Nucky loves it and has been sleeping in it every night since it was quickly thrown together!

DSC_0933

Sports Fan Inspired Upcycled Laundry Room Folding Table

My husband and I have been working on each room in the house, cleaning reorganizing and coming up with new ideas for old items.  One of the areas that needed attention was our basement/laundry area. Our basement is damp and unfinished and keeping it clean is quite a challenge. It also serves as our laundry area.  We have a table in our basement we used in our kitchen for many years. We now use the table for folding and basement storage.  When we moved into our home six years ago, our kitchen was too small for such a large table so it was delegated to the basement.

DSC_0909

I am blessed to have a husband that helps with the household chores, especially the chores I hate!  One of these chores is doing laundry and he graciously does the family laundry every Sunday evening.  He is also a huge Phillies fan through good times and bad. While we were grocery shopping, we came across a Philadelphia Phillies plastic table-cloth in a bargain bin. It was priced right at $1.69.

DSC_0912

I thought it would be great to redo the grungy basement table into a Phillies fan table, and a great way to thank the hubby for all of the laundry he does!  My only concern was that the table cover was plastic.  As stated in previous posts, Mod Podge doesn’t always adhere well to certain plastics.  I thought this would be a great experiment as I had never used a plastic table-cloth for decoupage.  First, I cleaned and painted the table surface with a white latex primer.  This was important because the table cloth was white and the brown surface could potentially bleed through the white table-cloth.

DSC_0911

Once the paint was dry, I generously applied Mod Podge to the table surface with a large paintbrush.  I carefully layed the table cloth on top of the Mod Podge table surface.  This was the most challenging aspect of the project as the table cloth material is thin and prone to wrinkles and air bubbles.  The table cover also is spread across a larger surface area.  I smoothed out the table cover as best I could and applied Mod Podge over the top of the cover and allowed it to dry. I used scissors to carefully trim away the excess table cover hanging over the edges.

DSC_0915I used two coats of a polyurethane clear coat to seal the table surface, I allowed the first coat to dry for 4 hours and the second was left to dry over night.  I applied additional Mod Podge to the edges to prevent any minor curling.  This project was certainly not without its challenges, but despite these I think it turned out great.  The hubby may have lost his sports room to a playroom, but his laundry room is on its way to becoming a surrogate man cave!

Phillies sports Fan Table decoupage table cover

For The Kid In All Of Us: Upcycled Justice League Of America Adult Fan Chair

Poor abused dinner table chair!  I managed to spill paint on it,  drip hot glue on it, and just made a general mess out of it.  It became a place to craft on with the intention that one day, I would give it a new life.  I have a set of four that belonged to the kitchen table we owned previously.  The table was broken, but we kept the chairs.  They are about as basic as it gets, similar to the one picture below.

Windsor ChairWhen I finished the Kids Justice League Of America Chair a few people including the hubby, suggested I create an adult version for all the “grown up” Justice League fans out there. This chair seemed like a good candidate for a super hero makeover.  The chair was heavily lacquered so a white latex primer was a must! Once primed, I trimmed and applied the print to the seat surface.  I found a great image featuring The Justice League Of America characters.  These characters had a more adult feel.  I used Mod Podge to adhere the image to the seat with a coat of Mod Podge applied over top to seal.  I then painted the entire chair with Red, White and Blue acrylic paint. This was the most labor intensive part of this project and required multiple applications of paint, but proved therapeutic after another stressful week.   I applied Mod Podge to the entire painted area of the chair to seal it.

Decoupage Justice League Chair

Super Hero Fan Chair

Upcycled Super Hero Chair

To make a “Super” Chair you will need:

Old chair

Comic book pages or printed image

Acrylic paint

White latex primer spray or brush on

brushes, scissors

Mod Podge

Restyled Polka Dot Cutting Board

I have a glass cutting board I used for cutting paper and crafts.  I have several cutting boards, and did not have a use for this one in the kitchen so,  I used it for crafting on and cutting paper.  I was sitting at my work station one day and decided to “dress it up” a little.  I had this great black and white polka dot scrapbook paper.  Since the cutting board was made from a clear glass, the idea was to adhere the paper to the back, and allow the polka dot image to appear through the glass without affecting the usable surface.

DSC_0642

I applied Mod Podge to the back of the cutting board  with a foam craft brush and adhered the scrapbook image facing out. I then trimmed the paper around the glass.  I carefully matched the polka dots up so the pattern appeared as seamless as possible.  I applied Mod Podge on the back of the paper to seal it.  If I were to use this as a real cutting board, I would use outdoor Mod Podge to seal the back for added protection.  This cutting board will be used for cutting, but not used around water so I used Mod Podge matte finish to seal it.

DSC_0645

Just think of the possibilities!  It also would make a nice decorative piece also if not used as a cutting board.  You could Mod Podge any image and photos behind the glass!