Sesame Street Birthday decorations made from construction paper

Image
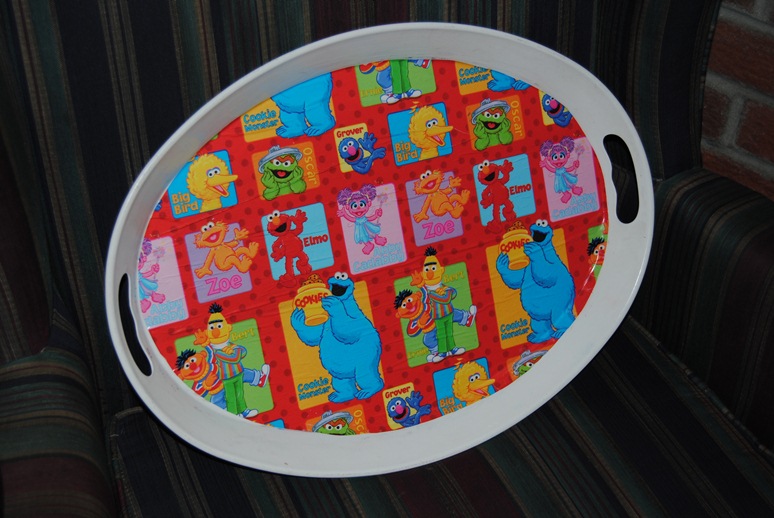
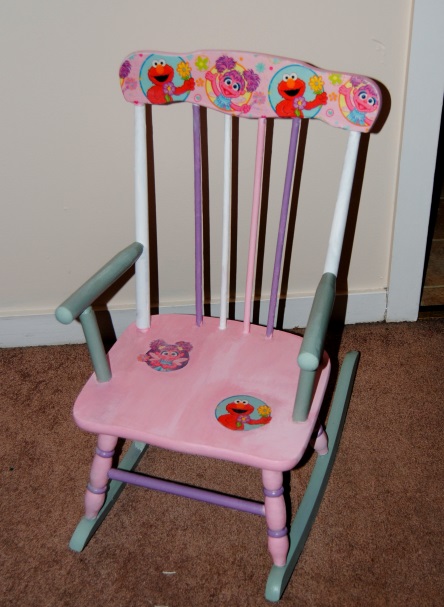
As we get closer to our daughter’s 2nd birthday party this Saturday, I thought I would share some tips from last year’s party.  One of the more expensive elements of throwing a party, other than food is the party decorations.  My husband and I always try to follow a budget the best we can.  We plan, make lists and try to keep costs down, but in this current economy that can sometimes be difficult.  Our theme last year was Sesame Street and since my daughter is still obsessed with these characters, I didn’t stray too far this year from her 1st birthday theme.  Her theme this year is all her favorite Sprout channel characters with a patriotic twist in celebration of Memorial Day.  Stay tuned for more on this idea.

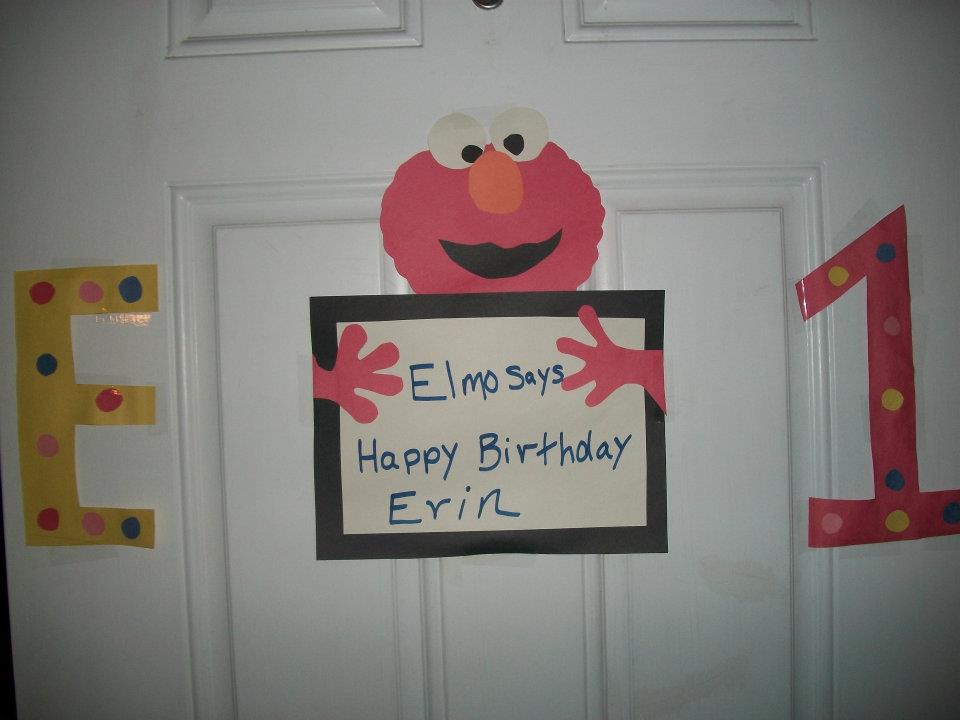
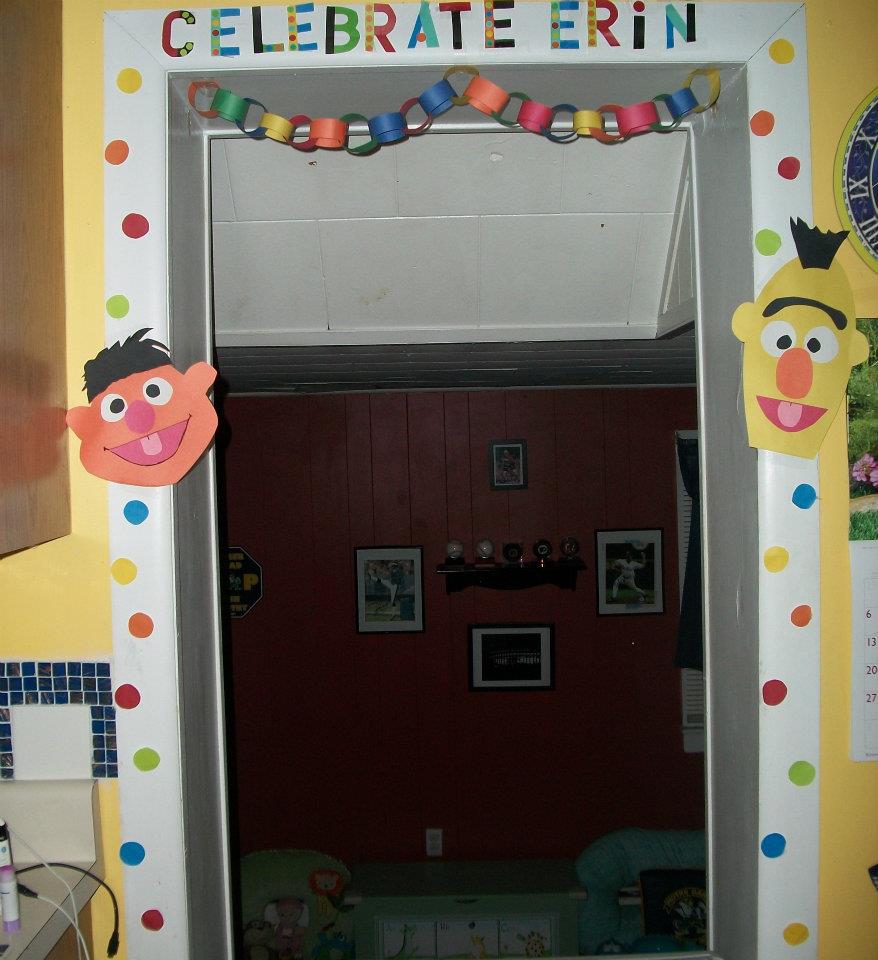
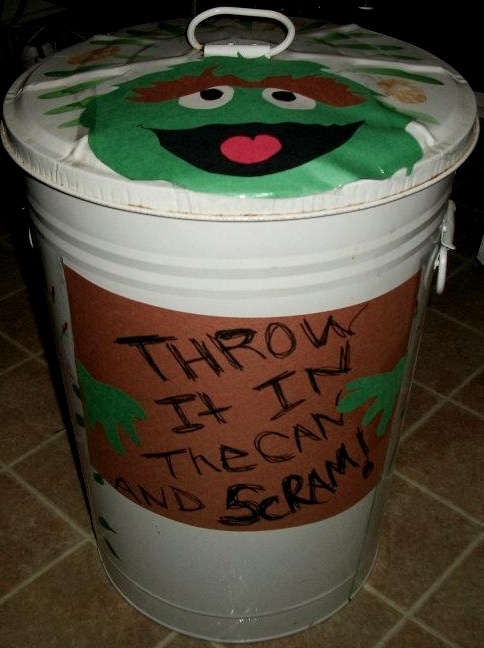
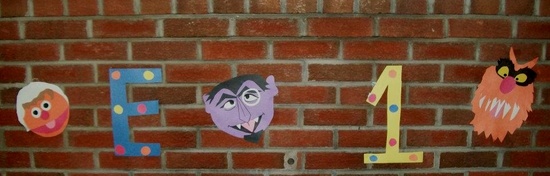
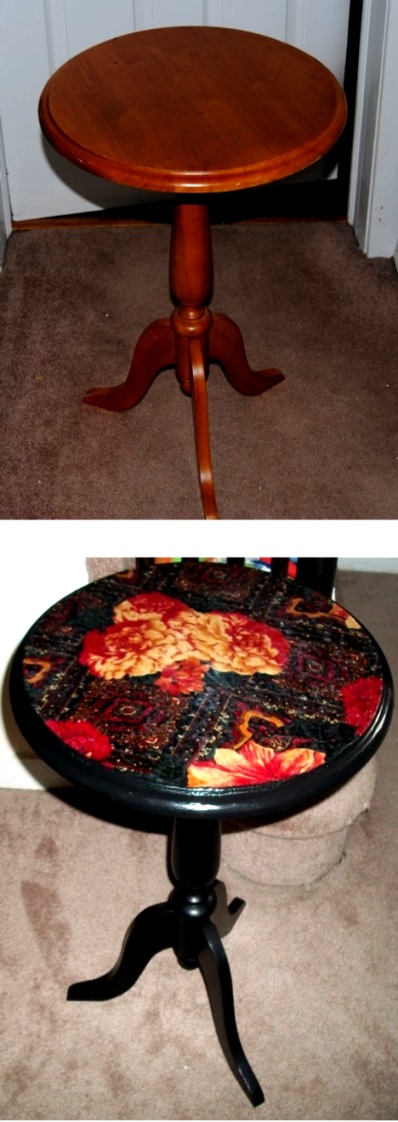
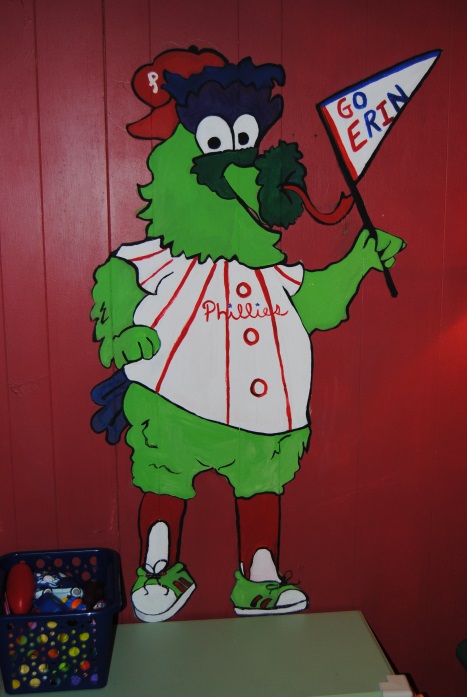
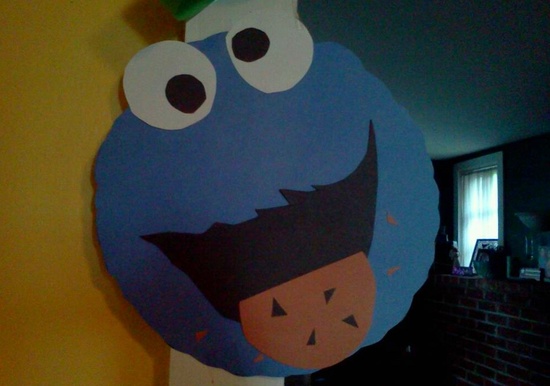
Last year, I created most of her decorations from construction paper and glue.  I searched the internet for all her favorite Sesame characters and used the more basic cartoon images as a guide for making the different characters.  Most of the characters are based on simple shapes, so I drew these shapes onto the construction paper, cut them out and glued together to form the individual characters.  Pretty simple, cost effective, and I think they turned out great and are unique in their own way. I also summoned my old elementary school days cutting out strips of construction paper and making paper chains.  I also used re-cycled gift bags and anything else I could get my hands on, cut out and make into a party decoration.  There are so many great ideas on Pinterest as well, much more than I could ever try myself.  Let your imagination run wild and in the process save a little money!

Elmo Birthday Decoration

Sesame Street sign made from construction paper

Bert and Ernie Birthday Decoration

Oscar Trash Can

Sesame Street Decorations

Character Cupcake trays made with Mod Podge

Sesame Street Cupcake tray

Ahhh ugly old trays! Gotta love them!  There is no shortage of them at your local thrift store, or Dollar Store.  I am on a mission to rescue as many of these trays as possible!  They make great decorations and are simple and easy to repurpose.  I will admit as great wrapping paper is to use when decoupaging, I always struggle a bit with the wrinkles and air bubbles, but the variety of paper and styles available keep me coming back.  In this case, I used Sesame Street, but you can use any characters you like.  My daughter’s 2nd birthday theme is all of the Sprout channel characters.   Sesame Street seemed like a great choice for this cupcake tray and I thought it would make a great decoration for her party.  These are pretty simple to make.  I simply traced the tray onto the wrapping paper, carefully cutting the paper along the line with a pair of scissors.  I used Mod Podge to glue the wrapping paper to the tray, doing my best to smooth out as many air bubbles and wrinkles as I could.  I then applied several coats of Mod Podge to seal the image onto the tray.  I find when using wrapping paper the more coats of Mod Podge the better so use the Mod Podge generously!

Materials:

Ugly old tray of your choice

Mod Podge Matte Finish

Character Wrapping paper

Scissors

Thin tip black marker

Sesame Street Girls Painted Kids Rocking Chair Made With Mod Podge

Image

Monday’s get me down, but rainy days don’t!  It has been raining all weekend and what better indoor therapy is there, than starting and finishing a new project!

Last week, I was on my lunch break and something told me to stop in the local Good Will Store. The last time I was in this store I was very disappointed with their prices and stock.  I am glad I listened to my “thrifty senses” and gave it another try.  As soon as I walked toward the back of the store where they keep all the furniture, I noticed the little rocking chair sitting there.   Before anyone else had time to notice this little “diamond in the rough”, I snatched it up.  I knew this was not going to be easy.  The chair was black lacquer and in several places on the chair, it looked like a small dog had chewed on it. The chair was also loose, but appeared it could easily be tightened up.  The chair was priced $6.99, which was a bit steep for an item in this condition, but who knows when I might find a kids rocking chair again?

I took it home and hand sanded the areas where the wood was damaged until it was smooth.  I then used two coats of latex primer and painted the entire chair.  Once dry I began the process of working out the color scheme and hand painted the chair using acrylics.This took a while as when dry I had to add additional coats.  Once the chair was painted, I used Sesame Street wrapping paper for the chair back and on the seat.  I glued the wrapping paper down with Mod Podge carefully smoothing out any air bubbles.  Once dry, I coated the entire chair with Mod Podge matte finish and repeated a total of 3 times.  The result is what you see here.  Now, My little girl will have her very own chair to sit on and read in her room. I think I am in love with kids furniture!

Image

Erin reading a book in her new rocking chair

Restyled Side Table

100_6249

Their is nothing I love more then a good side table.  They can add so much to a room if you can find one with the right look.  I purchased this side table at Walmart for under 20 dollars more than 6 years ago.  Sure, the table served it’s purpose well, but was far from anything special. I decided to give it a new look, but what to do?  These days, I find myself looking at things differently.  When I am out and about,  I am always looking for fabric, textiles that stand out in the crowd.  Mod Podge and fabric are great for revamping furniture.

On this day I found a really nice woman’s scarf for 99 cents at the thrift store. It was perfect to cover the table top of a smaller piece of furniture.  I primed the table using my trusty latex primer.  Once the table was dry, I painted the entire table with black acrylic paint.  Several coats were required.  I turned the table upside down and carefully traced with a black sharpie marker, onto the scarf material.  I used scissors to cut the fabric.  Now I was ready for Mod Podge!  I covered the table top with Mod Podge and glued down the material.  Through experience I find different materials are better in this process than others.  This scarf because of it’s texture was difficult to smooth out the air bubbles.  I wish I could tell you the materials make up , but the tag was cut off the item.

Once the piece was dry, I coated the entire table with 4 coats of Mod Podge. The result is what you see here and I love it especially the splash of colors (Did I mention I LOVE COLOR)

In the end, The table top had a rougher finish than I preferred so you may want to try using the gloss finish to add a bit more sheen. I generally use Matte finish in most of my projects and it is fine, but sometimes the material you use makes a difference.

side table made with Modge Podge

1960’s Inspired Decoupage Coffee Table

1960's Style Decoupage Coffee table

Impulsive.  That is the word I would used to describe this latest project.  This table was simply in the way.  I was storing it in my craft room and it was propped up against the wall taking up precious space.  I didn’t want to bring it up into the attic mainly because I didn’t want to have to drag it back down again.  After all, I had plans for this table what they were I wasn’t exactly sure.

I had purchased this great fabric at Goodwill, and to me it had a 1960’s style appeal. The material is made by Helen Trast Ikea of Sweden and appear originally to be drapes.  I was attracted to the bright colors.  There is nothing I love more than color.  I used this fabric for both the garden pig make over and step stool of my previous post.   I had an idea.  The coffee table was still in pretty good shape, accept for the table top.  In this case, I decided to give the paint brush a rest.  I thought the bright colored fabric would also go well in our family room/playroom. I went with it.  I flipped the table over onto the fabric and traced the table top with a black marker. I then carefully cut out trying to stay as close to the line as possible.  Once cut, I slathered the table with Mod Podge and glued the fabric carefully to the table top, spreading it out evenly. Once dry I did about 4 coats of Mod podge to the table top allowing to dry between coats.

I realize this fabric style may not be everyone’s cup of tea; However this simple coffee table makeover can be done to restore otherwise destroyed surfaces.  The fabric styles out there are endless and can be modified to a person’s individual taste. The free spirited 60’s and 70’s live on thanks to Mod Podge!

Decoupage Coffee Table

Adding “Bling” to your outdoor table with glass marbles and tile

One day I was sitting outside staring at our old patio table.  Like a lot of things in our home the table was rescued from the trash heap.  It was given to us when my mom moved from a house into an apartment.  It worked out great for us, because at the time all we had was a plastic patio table that had seen better days.  I would go to department stores and pine over all the elaborate outdoor furniture.  Fancy Fire pits, gazebo’s etc. OK so I am a bit of a dreamer, since there was no way I could afford any of it!  Of course that didn’t stop yours truly from stealing a good idea or two from my window shopping and making my own “shabby shiek” version.  I had some left over mosaic tiles so I thought I would add a little “bling” to the table’s edges.  If you are really an adventurous type, you could actually add the tiles to the whole table.  For the job I used a Grout and adhesive in one. There are varying opinions on the internet regarding the use of this product and whether it works as well as grout and adhesive do independently.   I find that it has worked well for the smaller tile projects I have  completed.  The table has been out in all weather conditions and I have not lost one tile so I find that the combo product has held up pretty well.  I used small mosaic tiles along with decorative glass marbles I purchased at  dollar tree.  I think this small change gave the table a lot more character.  Also, another money saving tip:  If you want to save money on a table umbrella, the beach umbrella’s work just as well and are $10-$20 (and even more in some cases) less than the actual table umbrella’s.

I may not be able to afford that fancy gazebo, but through some ingenuity I can have my own little backyard oasis at a discount!

Tiled outdoor table

Beach umbrella VS Table Umbrella save money!

Philadelphia Phillies Phanatic Painted Wall Mural

Before our daughter was born, my husband had the ultimate sports man room.  It was filled with sports memorabilia, and a fully stocked bar.  We hung out in there regularly  watched movies laughed and joked and even kicked back a few drinks.  Now, a new kind of laughter fills this room. It is no longer the ultimate man room, but it IS the ultimate little girl’s playroom.  My husband and I discussed doing something special in the family room for our daughter Erin. We both liked the nursery wall mural and how it turned out.   Sure, we could have decided on a mural of  princess’s and castles, but I wanted to do something different and also keep true to the original theme of  the room which was sports.  One of her favorite toys is her Phillie Phanatic Pillow Pet, which ultimately gave me the idea.  I also wanted to do something for the hubby.  He was more than happy to give up his room for his daughter, but I wanted to thank him too, after all he is a huge Phillies fan!

I searched the internet for a good example of a Phanatic image I wanted to use as a visual.  I often draw through visually studying a picture before I begin.  I usually use a pencil to outline where I am going to paint.  I found it easier this time to simply draw the lines with a fine brush and black paint onto the wall.  If I made a mistake, I used a magic eraser to wipe away the paint.  (Magic Eraser does not work on a flat painted wall) I thought it would be cute to have him holding a pennant with ” Go Erin” on it.  I used acrylic paints and applied about 3 coats total.    The mural measures a little over 5 feet tall.  Hopefully, it will be a good luck charm this season and beyond!

Some Phillie Phanatic trivia:

The Phanatic replaced “Philadelphia Phil” and “Philadelphia Phillis”, a pair of siblings dressed in 18th-century dress.

During the winter after the 1977 season, Dennis Lehman, thought that the team needed a mascot similar to San Diego’s Famous Chicken created the Phanatic with the help of Acme Mascots

The Phanatic debuted on April 25, 1978, at The Veterans Stadium, when the Phillies played the Chicago Cubs.

His mother, Phoebe Phanatic, occasionally appears with the Phanatic.

Phillie Phanatic Painted Wall Mural

Full lengths shot of Phillie Phanatic Wall mural

Bedroom table lamp and magazine rack restyled using Mod Podge.

Image

We have lived in our home for about 7 years and one of the last rooms we put our individual stamp on was our bedroom.  Out of all the rooms in our house at the time, the bedroom was the one room we could live with as is.   It was painted blue and the walls were still in pretty good shape, so we focused on some of the other rooms first that needed our attention.  My husband had a bedroom growing up that was painted grey.  Out of all the rooms he slept in over the years he said he felt more relaxed and slept better in a grey room.  Finally about two months ago we decided to go for it and finally re-do our bedroom.  After we painted the room grey it looked great, but some of our furniture did not.  As per a previous post the first thing that needed our attention was our bedroom nightstands.  We were so pleased with how they turned out we decided to decoupage our table lamp and magazine rack.  We inherited this table, as it was left behind by the previous people who lived in our house.  First thing I did was tighten the table as it was quite loose.  I cleaned the entire table with a wet cloth removing any dust and dirt.  I then glued (using Mod Podge Matte finish)   scrapbook paper to the table top, and the bottom of the magazine rack.  I then removed the drawer knob and traced the front of the drawer onto the scrapbook paper. Using an X Acto knife I carefully cut the paper and glued to the front of the drawer using Mod Podge.  Once dry, I primed the areas I planned on painting with a white latex primer. I painted the table with two coats of black acrylic paint.  Once dry, I covered the piece with 3 layers of Mod Podge allowing to dry completely between coats.  We switched out the lampshade with a lamp shade that matched from Christmas Tree Shop  http://www.christmastreeshops.com/  and poof!  Now we have a matching table, lamp and magazine rack to go along with our bedroom nightstands!

Materials used:

Mod Podge Matte Finish

X Acto knife

Scrapbook paper

White Latex Primer

Black Acrylic Paint

Pencil

Retro Monday-Craft an EAT sign for the kitchen

Retro Style EAT sign

I am definitely what you would call “old school”.   I love retro, and throwback items.  I always say to my husband that if I ever won the lottery I would buy an old Victorian house and fix it up instead of buying a brand spanking new mansion!

One of those throwback items I have seen all over the internet are the “Eat” signs.  These signs were popular beginning in the 1930’s and continued being used into the 1950’s.  Many of these signs were posted along the famous Route 66 advertising popular diners along the route.  I just think they are cute and thought the iconic letters would look nice in our kitchen.  I purchased the wooden letters from Michael’s.  I went to several different craft stores to find the letters.  A little frustrating because none of the stores had all three letters I needed!  Once I purchased the letters I simply painted them using acrylics.  You can also decoupage the letters if painting them is simply too boring for you.  I was looking for the simple red and blue letters.  I wanted them to “pop” in our bright yellow kitchen.  I thought it would be cute to add the napkin with the fork and spoon.  I used an old placemat and my upholstery stapler and stapled the material to the wall.  The hardest part was hanging the letters!  I have a level, but was still having difficulty.  Not sure they are completely straight but I can live with it!

Materials used:

Wooden Letters

Acrylic Paint

Old Kitchen Placemat

Upholstery staple

Old Fork and Spoon.

DIY Photo canvas and wall hangings

This Mother’s day, I made my mom a photo canvas of all four of her grandchildren.  This is also a great first project when working with Mod Podge for the first time.   I have seen many techniques on how to make photo canvas’s on the internet.  I have yet to try the photo transfer method.  (Of course when I do I will be sure and share it with you)

My husband and I attended a beautiful wedding in upstate NY not long after our daughter was born.  The photographer Erin Covey http://erincoveycreative.com/ stopped by our table and took a photo of us.  The bride was nice enough to share this photo with us after the wedding, and we were so happy with the result!  It is one of the first times we had been photographed together as a family.  I wanted to do something special with this print, but I wasn’t sure what to do.  Then I came across all the photo canvas making methods on Pinterest and around the internet,  and decided to go for it.  I wanted to make a bigger canvas, so I ordered a large print of the photo from snapfish.   l also decided for a more dramatic effect, I would convert the photo from color to black and white.  I purchased a canvas from Michael’s and waited somewhat patiently for the photo to arrive in the mail.  Once the photo arrived, I was ready to get started!  The print was slightly smaller than the canvas, so originally I decided to paint the area around it black.  After some thought, I decided to frame it instead with some scrapbook paper.  I was so glad I did!  I think it gives the canvas a unique look from other photo canvas’s I have seen out there!  I used the Modge Podge to glue the print to the canvas.  I then measured the scrapbook paper and used it to frame the photo.  Once dry I applied 3 coats of Modge Podge covering the whole canvas to seal it.

Also don’t stop at using just family photos!  ANY print can be made into a wall hanging.  (I have included an example of this in a kitchen wall hanging that I made) So, get out that Mod Podge and start crafting those last minute Mother’s day gifts.  Mom will love you for it!

Materials used: 

Large printed photo

Mod Podge Matte Finish

X acto knife

Scrapbook paper (to frame print)

Family Photo Canvas

Kitchen Wall Hanging

Modge Podge Photo Canvas