Upcycled Tiles: Instant Wall Art, And Much More!

Most of us have a box of  ceramic tiles collecting dust in the basement.  In our case, my helpful neighbor passed them on to us thinking we could use them, after I told him that I was attempting a DIY kitchen backsplash.   I utilized most of the box but still did not manage to use them all.  These were plain, white ceramic tiles, a clean slate just waiting to be reused, and make an artistic statement!

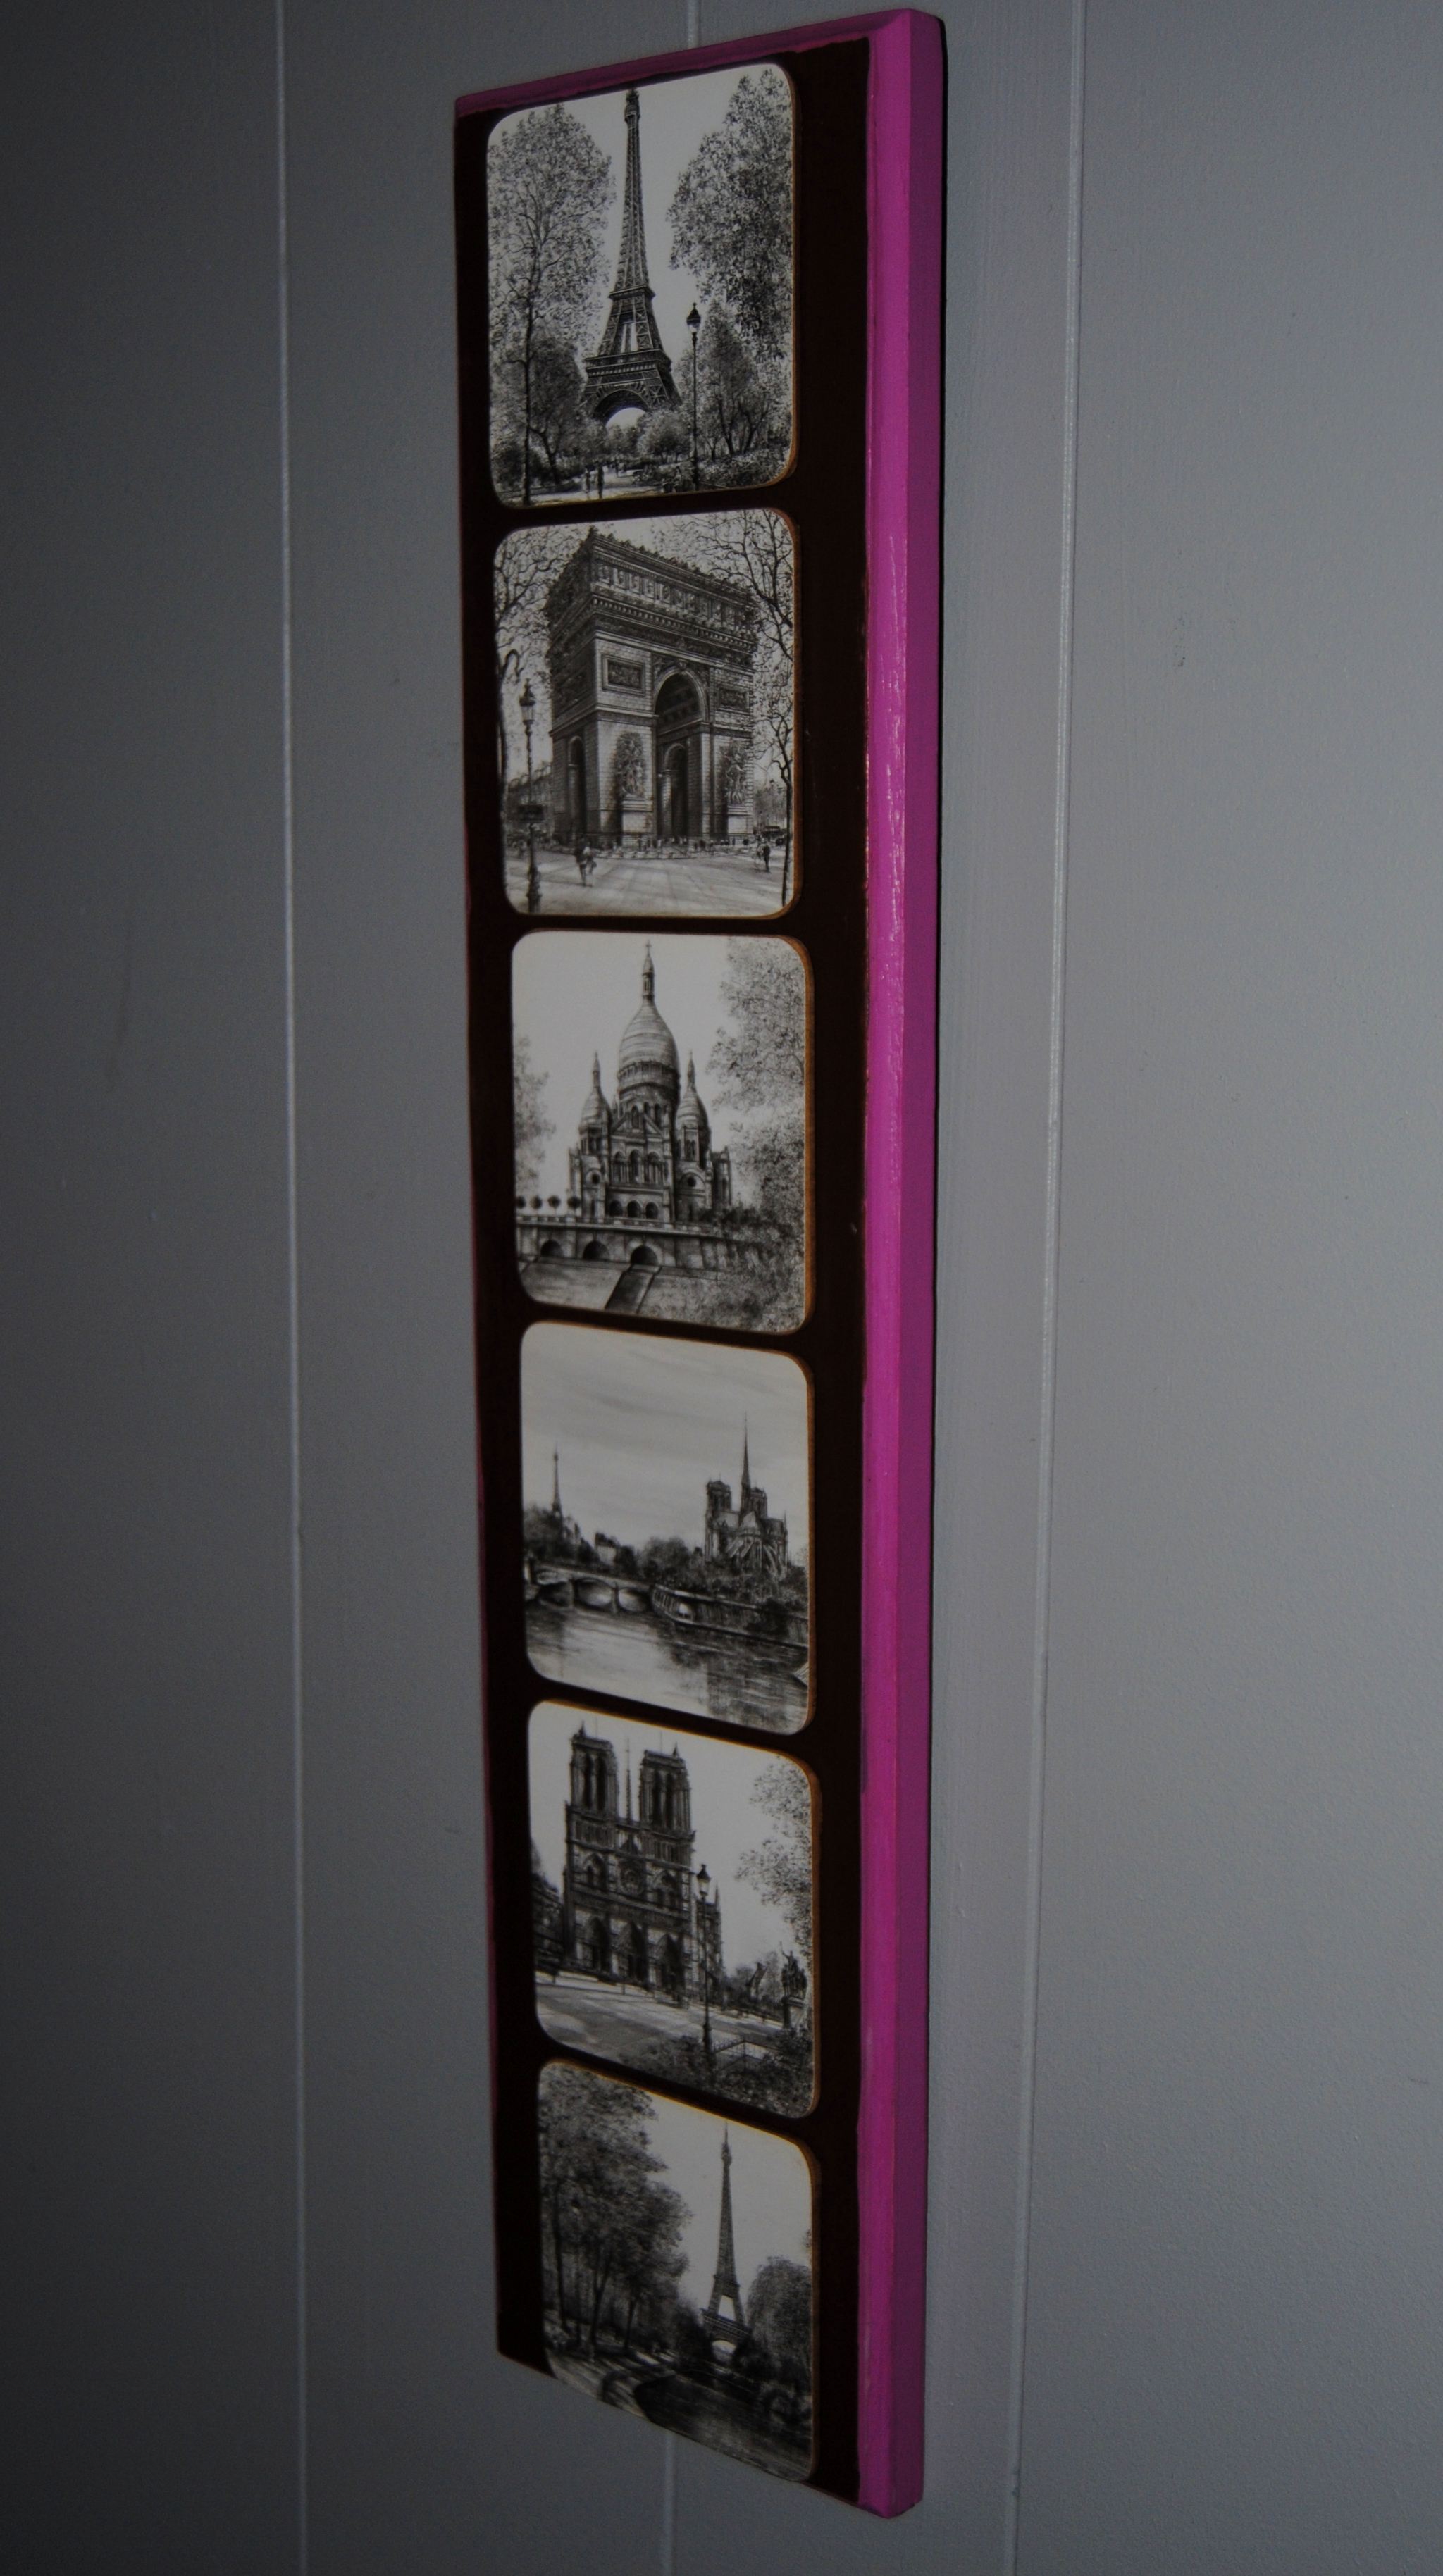
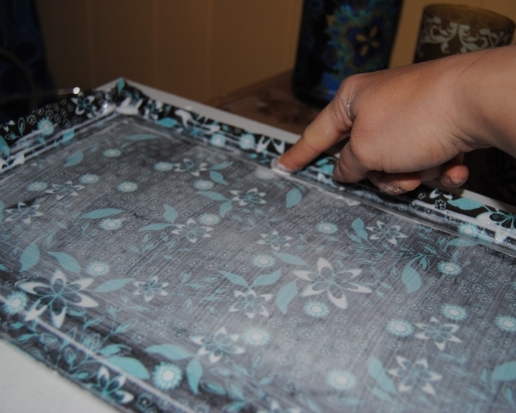
Tiles are a great medium for decoupage, and make great wall art!  It is also a great decoupage beginner project and virtually any image can be decoupaged on tile. Often times when I am working on a project, I will do a smaller side project at the same time.  The tile below, is an example of such a project. I had some great smaller prints and decided to use one of them on this tile.  Simply apply Mod Podge to the tile using a foam craft brush, or smaller paint brush, apply the print and once dry, apply the Mod Podge over the print.  Then simply use a small amount hot glue to adhere the tile to your wall.  You can make photo collages, decorative maps, and create different artistic schemes, while sprucing up boring walls.

DSC_1555

The above is simply one example of repurposed tile. It is displayed on the wall in my craft room.  Due to the magic of sites such as Pinterest, the ideas are flowing.  Below are a few examples of such ideas.

Two Girls Being Crafty Blog

These lovely drink coasters were made by Two Crafty Girls using Mod Podge and scrapbook paper.

instructables com

Take a favorite photo and divide it among several tiles to create wall art. Thanks to C.B.I.D Home Decor and Design for featuring yet another unique and crafty idea!

Indulgy

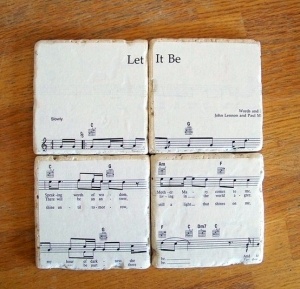
I love the idea of decorating with sheet music, and using it for decoupage!  Check out all of indulgy’s ideas!

On that note, happy crafting and stay warm my friends!

The Craft Must Go On: Upcycled Rock N’ Roll Bar Stool

A few months back, I came across a wooden bar stool at Goodwill for $5.99. I liked the size and design of the stool, and thought it would make a great decoupage piece.

DSC_0884

I decided to upcycle the stool with a Rock N’ Roll theme,  and since it was to be a gift for my husband, I chose the Irish Rock band Thin Lizzy as a subject. The band is one of our favorites and have a vast catalog of great music.  This initial vision took a back seat to the holidays, and various other projects. The idea seemed doomed afer one mishap after another involving this project.  I abused this stool, and used it to allow smaller painted projects to dry.  When I attempted to prime it, the spray can malfunctioned splattering the primer.  (I believe the can may have been too cold) After the bar stool was dry, I sanded off the “lumpy” paint by hand.  Creating yet more work for myself, while attempting to smooth out an air bubble on the initial decoupage print, I tore a hole in it and had to scrape it off only to start all over again.  Despite all of these blunders,  the project managed to come together.  Turns out I found a much nicer print, based on the album cover for “Nightlife” The print featured a black panther on the prowl like the one featured on the cover below.

Thin Lizzy Night Life

I painted the entire chair in black and red alternating the colors.  It took several coats to obtain good coverage.  Once dry I applied Mod Podge to the seat with a foam brush.  I carefully applied the printed logo and smoothed it out carefully with my hands doing my best to avoid tearing or wrinkling.  I painted the area not covered by the print red, creating a bull’s eye effect on the seat.  Once all the paint was dry, I used Mod Podge to cover the entire bar stool.

DSC_1581

Finally, my crafting nightmare showed some “Nightlife” after much adversity.  More importantly my husband seems happy with the result. Now we just need the bar..

Wanna see more chair restyles from “On The Upcycle?  Click Here

DSC_1583

Best Foot Forward: Upcycled Dress Shoe Repair

When I was young, I remember my mom taking me to the mall to visit the Shoemaker.  It was much more common back then to have your shoes repaired.  I remember my mom getting Taps on her shoes to protect the heel and make the shoes last longer.  I did a bit of internet research and was surprised to find that Shoemakers still exist, although not in quite as large numbers as thirty years ago.

Everyone has that pair of shoes that they love.  It is hard to part with a pair that fit well and are comfortable.  Recently, my employer  adopted a casual business attire policy.  After five years of being able to come to work dressed in t-shirts and sneakers, this left me scrambling for an appropriate work wardrobe.   I went to thrift stores mostly, and picked up a wonderful pair of shoes.  They have a block heel and were extremely comfortable for a dress shoe.  One of the problems I encountered was getting used to walking in dress shoes.  I scuffed up the back of the heel pretty badly and the sole began to separate from the shoe.  I was not ready to give them up, so I share with you my first pair of “Upcycled” shoes.

Shoes


This was a total experiment, but I figured I had nothing to lose since I could not wear them in their present condition.  The first repair made was to the sole.  I used a high temperature hot glue gun to adhere the sole back on the shoe.  I used two sticks and applied generously.  I put my hand inside the shoe to apply pressure, while the glue dried.  I then painted the heels with black acrylic paint.  Once the heels and soles were dry I applied a layer of Mod Podge with a paint brush,  I then added another layer of polyurethane for added protection.

DSC_1578


DSC_1572


So far they are holding up well despite the repairs.  The true test will be the hot glue and every day wear.

Memories of Paris: Upcycled Drink Coaster Wall Hanging

Since my upcycle adventures started last April, the word has gotten out to family and friends.  I am on a upcycling mission!  The best part of all is that others are starting to see ordinary items normally discarded or not used in a different light.  The original purpose of an item can be changed and restyled.  Instead of discarding something that can no longer be used, it can be modified so that it may have a new useful new purpose in your life.

Such is with the case of this project I am about to share with you.  My sister brought me a set of coasters she purchased during a trip to France.

DSC_1506

They are lovely and feature famous scenes and landmarks, but she felt the beauty of these coasters was wasted, and she never used them for their original intended purpose. It seemed a total waste not to display these in some way.  She asked me if I would I be able to do “something” with them. I love a challenge so I accepted the task, although at the time I really had no idea what the project plan would be, but luckily she was OK with that!

I held on to the coasters for a while, and kicked around a few ideas in my head.  Then one night I was lying in bed unable to sleep when I remembered this little wooden wall plaque.

DSC_1504

It was an item I had picked up at Goodwill a few months back.  When I purchased it for a dollar, I had no idea how I would use it.  Then it hit me!  It would be great to create a vertical wall hanging featuring the tile-like coasters.  She has a pink and brown french themed bedroom that I thought this would look perfect in.  I created my first chair upcycle for her.  A ladder back chair in pink and brown colors, known as  The Pillow Case Makeover.

I cleaned and primed the piece with a while latex primer.  Once dry, I painted the face of the plaque chocolate-brown.  The edges I painted pink.

DSC_1511

I applied Mod Podge matte finish to the painted areas. Once the Mod Podge was dry and clear, I used a high temperature hot glue gun to attach the coasters to the wood lining them up and allowing the same amount of space between them. I applied the hot glue generously and adhered them carefully one by one.

My sister seemed happy with the end result.  I have never been to France, but have a feeling I would love it there.  Everywhere you look is inspired by art, and hopefully looking at these images will bring back all the great memories of her trip!

DSC_1551

DSC_1547

Rescued Vinyl And The Magic of Mod Podge

With the holidays officially over and the New Year off to a rather frigid start, I share with you the last project on my Christmas list this year.  Late last month, I posted a tutorial for Sports Inspired TV Trays which have turned out to be a popular item among family and friends. The beauty of restyling these tables are the limitless possibilities.

TV Tray before

These tables are neutral and relatively easy to work with.  One of my upcycled gift recipients is not big on sports, so I thought she might like to have a TV table, but with an alternate theme.  A while back, I created a table from an old record, and a plant stand. I used Aerosmith’s greatest hits record.  The record was not in playable shape, so I decided to recycle the LP and use it for a upcycle project. The family member receiving the gift is a huge Aerosmith fan, and I decided to use the album cover and decoupage it to the table top. Upon further inspection, the cover was in pretty rough shape, so in the end I decided not to use it.  The liner notes; however were in great shape, and a colorful purple with the Aerosmith winged symbol in the middle.

DSC_1270

This seemed perfect for decoupage while incorporating something she and I hold close to our hearts~ records.  I have a collection too, mostly stocked through bargain bins.  It is not always easy to tell if a record is playable before purchase, and every so often you wind up purchasing a damaged record.  Not only can you reuse the record itself, but the artwork is perfect for decoupage.  Another example of this can be seen here from a previous post. Long live the LP!

DSC_1269

For a full tutorial and some examples of TV tray table redesigns click here and here.

Happy New Year from On The Upcycle!

Happy New Year

I want to take the opportunity to wish all of my readers a very safe and prosperous New Year!  As with most years of my life 2013 has been filled with many good times and some “not so good” times.  In April 2013, I began this humble little blog with zero expectations, and since then I have received over 25, 600 total page views, (and counting) and in December, 2013 On The Upcycle reached a milestone of over 200 followers.  I had the opportunity of being featured in two digital craft books on Amazon, The Green Crafts Lifestyle, and The Green Crafts Lifestyle Christmas edition.  I was also a guest blogger for the first time this year, contributing a project for Geek Week, On Elise’s Cheeky Geeks Blog.   As crazy as it sounds, I was also contacted regarding a crafting reality show!  Don’t expect to see yours truly on TV anytime soon, but it was all still very flattering.   Also, a special thank you to those who became involved with the “Upcycle” and brought me items to restyle from attics, trash bins , yard sales and thrift shops.

On the Upcycle was also very lucky this year and won two prize drawings.  I would like to send out a BIG THANK YOU to Diana at  Ray’s So Crafty Blog and Kathy and Deb over at Second Hand Roses  for their generosity and appreciation of their readers by sponsoring these giveaways.  I would also like to send ”Congratulations” to Daniella Joe’s Blog who won On The Upcycle’s very first prize giveaway.   A  very special “Thank you” to Katherine at Pillows Ala Mode, who welcomed me to the Word Press community by sharing my blog with her readers, and nominating On The Upcycle for the good neighbor award. I wish I could thank everyone who helped me along the way. Thanks to all my readers who took the time to comment and “like” my posts.  Everyone here has kept me inspired even when I felt I did not have much to give.

As with any New Year, 2014 is filled with mystery.  I am hoping to continue the Upcycling mission in 2014, and be the best mother and wife I can.  My resolution this year, is to treat myself better both physically and emotionally.  This will be my greatest challenge.  As with many of you out there, it is easiest to neglect yourself, when making sure everyone else’s needs are met.  This will be my goal  for 2014 and beyond.  Let’s hope I can make it happen!

May all your wishes and dreams come true in 2014!

easter2013m

Decoupage Sports Fan TV Trays Revisited

This holiday season,  I decided to craft some gifts not only to save money, but simply for the sake of doing something different.  When people stop by our house for a visit, they notice all the upcycled furniture and home decor items.  One of those items in particular, our Decoupaged  Philadelphia Phillies TV tray gets a good deal of attention. For this reason, I thought tables such as these would make great gifts.  Most folks have a set of these boring wooden TV trays at home.

TV Tray before

Despite the lack of design qualities these trays are very functional and often times serve an important purpose.  Who hasn’t sat in front of the TV, and used one of these little trays to devour a late night snack, or simply use as a laptop computer table?

I was in the thrift store and happened across four for sale.  I snatched them up and was glad that I did!  For three of these tables, I decided to use sports team themes, (the recipients are all sports fans, I will save what I did to the fourth table for a future post.)  I found sports images online and printed them out on my printer. If you do not have an available printer, you can use decals, fabric, baseball cards, you name it!

First, be sure and clean the table thoroughly.  Once the table is clean and dry apply a white latex primer.  To speed up this process, I purchased a spray on primer.  I took the tables outside and applied two coats to each table, allowing each table to dry thoroughly between coats.  Table number one was for a Washington Redskins fan.  I painted the table with acrylic paint in the Washington Redskins colors, gold and a deep dark red, almost burgundy color.  Once dry, I used Mod Podge to carefully apply the printed image to the table surface.   I then applied Mod Podge over top of the print and covered all the painted areas with Mod Podge to seal the table.  The Mod Podge on its own is enough to seal the table, but since I was giving these as gifts, I added a coat of a polyurethane clear coat sealer for added protection against moisture and heavy use.  Be sure to be mindful of the parts of the table that fold up. (“On the Upcycle” mistake alert!)  If any Mod Podge or Polyurethane drip into these areas and dry it can be problematic if you try to open the table and it “sticks”  This happened a little with the Washington Redskins table and caused the paint to “chip” a bit in the area that the legs were slightly “stuck” together.  Despite this minor flaw, the table turned out well!

Washington Redskins Decoupage TV Tray

sports tv tray

I repeated the same steps for table number two (New York Yankees Sports fan table)

Yankees Decoupage Sports TV Tray

and table number three (Philadelphia Eagles Sports fan table)

philadelphia eagles tv tray

Before giving the gifts, I inspected the tables carefully, touching up any areas that needed it.  They seemed to be a big hit with those who received one.  It also marked the first time I attempted to work on multiple projects at the same time.

TV Trays Before and After:

Decoupage Sports Themed TV Trays made with Mod Podge


The Green Craft Lifestyle Christmas Addition: Free Amazon Download begins This Saturday, November 30th!

Pickled Lamp: “On The Upcycle” Christmas Craft full tutorial featured in today’s newly released “The Green Craft Lifestyle: Christmas Edition”

Image

The Green Crafts Lifestyle – Christmas Edition – Make Christmas Decor, Cards and Gifts!

1451464_674360959264580_1206827235_n

I have had the pleasure once again to be a part of the second installment of “The Green Craft Lifestyle”.  The new Christmas Edition is jam packed with green Christmas crafts from around the world.  The very talented Mahe Zehra Husain (MZ) is giving away free copies for download from the 30th of November to the 4th of December you can find it here: http://www.amazon.com/dp/B00GXE82S4 and http://www.amazon.co.uk/dp/B00GXE82S4. On Facebook?  Join the free event here. Don’t have a Kindle?  Download Kindle Cloud Reader for your Laptop!

Image

The “On The Upcycle” family want to wish everyone a very safe and happy Thanksgiving day Holiday!

From “Odd To Mod” Upcycled Thrift Store Mystery Wall Hanging

Recently, I have made quite a few thrift store walk throughs, without finding much of anything to stimulate my creativity.  My pockets are lighter, and even the amount of freebie finds have dwindled. Sure, my attic is filled with items all screaming “Repurpose me, me, meee!”, but our attic is a bit of an organizational nightmare I can’t seem to wake up from, not to mention it is unheated and freezing cold up there! When I go up there, I have to bundle up like I am going for a mile walk across the tundra!  I also feel the secret is out now and when I pull up to the Goodwill store, I am lucky if I can find a parking space!

Despite this, I always take a look for those unique items you can only find in a second-hand store and yard sales. Part of the fun is the thrill of the hunt, and coming up empty-handed is a part of it.   I am always interested in quirky little items even if I am not sure what its original use was.  My husband and the toddler apprentice were out with me one Saturday, and we couldn’t find much, but did spot this unique wooden wall hanging with a bit of storage.  It definitely screamed late 70’s early 80’s to me, and I thought it would look cute in our kitchen.

thrift store wooden wall storage thing

I wanted to re-style it to be more vibrant and colorful.  I thoroughly cleaned the piece with a damp cloth.  I had some leftover red spray paint from a previous project and decided to use it to brighten up the piece.  I took it outside and sprayed it red.

Spray painted piece

This particular spray paint required about 9-24 hours to completely dry.  Once it was dry enough for me to pick up, I brought it inside to my craft room and allowed it to dry in front of the fan.  Later in the evening the piece seemed dry enough, so I placed the front of the piece down upon the back of the fabric to trace it with a fine tipped black marker.  Probably better if I had traced the object on to the fabric before it was painted, but I was lucky and none of the marker made its way on the painted area.  I then applied Mod Podge with a foam craft brush on the front.

Apply Mod Podge

I then applied the cut fabric and smoothed it carefully out with my hands.  I picked a fun Mod fabric with a lot of bright colors.

Apply Fabric

I applied Mod Podge over the fabric and allowed it to dry overnight.  The next morning it was ready to hang.  I love the bright colors which go along perfectly in our yellow kitchen. Now, I just have to decide what I will use it for.  I am leaning toward a salt and pepper holder.

Upcycled Kitchen Wall Hanging and Storage

Before and After: 

From Odd To Mod-Upcycled Thrift Store Wooden Wall Hanging Restyled with Mod Podge, Paint, and Fabric

Design On A Nickel: Bathroom Cabinet Decoupage Restyle

Of all the rooms in our home our bathroom I can say without a doubt is my least favorite.  Our house was built-in 1937 and most older homes provided basic accommodations when it came restroom facilities.  Adding to these difficulties is the fact that we have only one, small bathroom in our home and it is in desperate need of a re-model.  That of course financially is not in the cards for us now.  However; I am a firm believer in making the best out of a situation, and I have had plans for quite sometime to work on improving our bathroom.  Our biggest eye sore was our bathroom sink cabinet. Replacing it was not an option, so I thought I could use some paint and a fabric decoupage to improve the look of the cabinet and add some design qualities to a rather bland and uninspired bathroom.

DSC_0951

Generic bathroom cabinet

I hadn’t tried a project like this before and I knew it would require quite a bit of work.  I picked up a half yard of fabric from Joann Fabric and prepped the cabinet by cleaning it with a damp cloth.  I used a screwdriver to remove the doors from the hinges.  I then removed the knobs and placed them aside.  I used a white all in one latex paint and primer to paint the outside and inside shelf of the cabinet.   I used a paint roller on the larger areas and a smaller paint brush for the areas the roller couldn’t reach. I also painted the cabinet doors.  I allowed the cabinet to dry thoroughly overnight. It took about three coats to completely cover it.

DSC_1016

DSC_1013

The next morning, I traced the painted cabinet doors onto the back of the fabric.  Any access fabric, I would trim away later with a box-cutter knife.  I applied Mod Podge to the doors with a foam craft brush.

DSC_1019

I then applied the fabric to the surface and smoothed it out with my hands. I applied another coat of Mod Podge over the top of the fabric and I used my nail to work the fabric into the crevices.

DSC_1022

I repeated the same process for the second door and allowed them to dry in front of the fan. Once dry, I used a box cutter knife to carefully trim the excess fabric using the groove of the door as a guide.

DSC_1037

I reconnected the doors to the cabinet and reattached the knobs.  I applied an additional fabric swatch to the front of the cabinet, and repeated the same process of applying the Mod Podge and fabric and trimming away the access fabric.  I then touched up any areas of the cabinet with paint that needed it.

DSC_1039

DSC_1040

I really love the aqua and brown color scheme and hope to incorporate some more color in our bathroom.  I feel this may be a great start to improving our tiny neglected lavatory! I was surprised at how well this project turned out and the cabinet has gone from eyesore to accent!  It cost only about ten dollars worth of materials to make this project a reality, and I am really glad I gave it a try.  I have a feeling this is only the begining!

Fabric, Decoupage and Paint Bathroom Cabinet Makeover

Bathroom Cabinet Makeover Materials:

Mod Podge

All in one latex primer and paint in one

Fabric of choice

foam craft brush/paint roller

paint brush/fine tipped marker

Box cutter knife/scissors

Before and After:

Bathroom Cabinet Makeover Before and After