Flea Market Bar Cabinet Makeover

My husband and I picked up this wooden cabinet many years back at a local outdoor flea market.  It  had two mirrored bar signs glued to the door and was a perfect “novelty” cabinet for our bar.  We acquired quite a few shot glasses over time, collecting them as an inexpensive souvenirs wherever we traveled.  This cabinet was a perfect way to store them.

Now that the bar has become a distant memory in our family friendly household, this cabinet sat on the floor in our spare bedroom with the shot glasses still in it increasing the chances of something getting broken. The  signs began to fall off, so I decided to remove them all together.  I planned to restyle this cabinet and hang it in a much safer place-Our kitchen.

Image

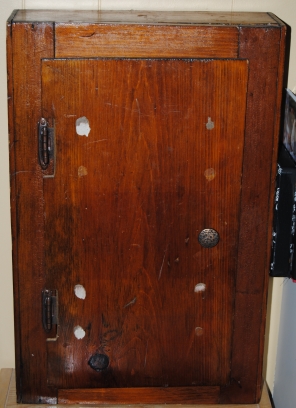
I used a scraper, to remove the access glue front the door and cleaned the cabinet with a wet wipe.  I removed the knob and door and set aside.  The cabinet was heavily lacquered so I used a white latex sealer to prime the cabinet before getting started.

Removed door and Primed

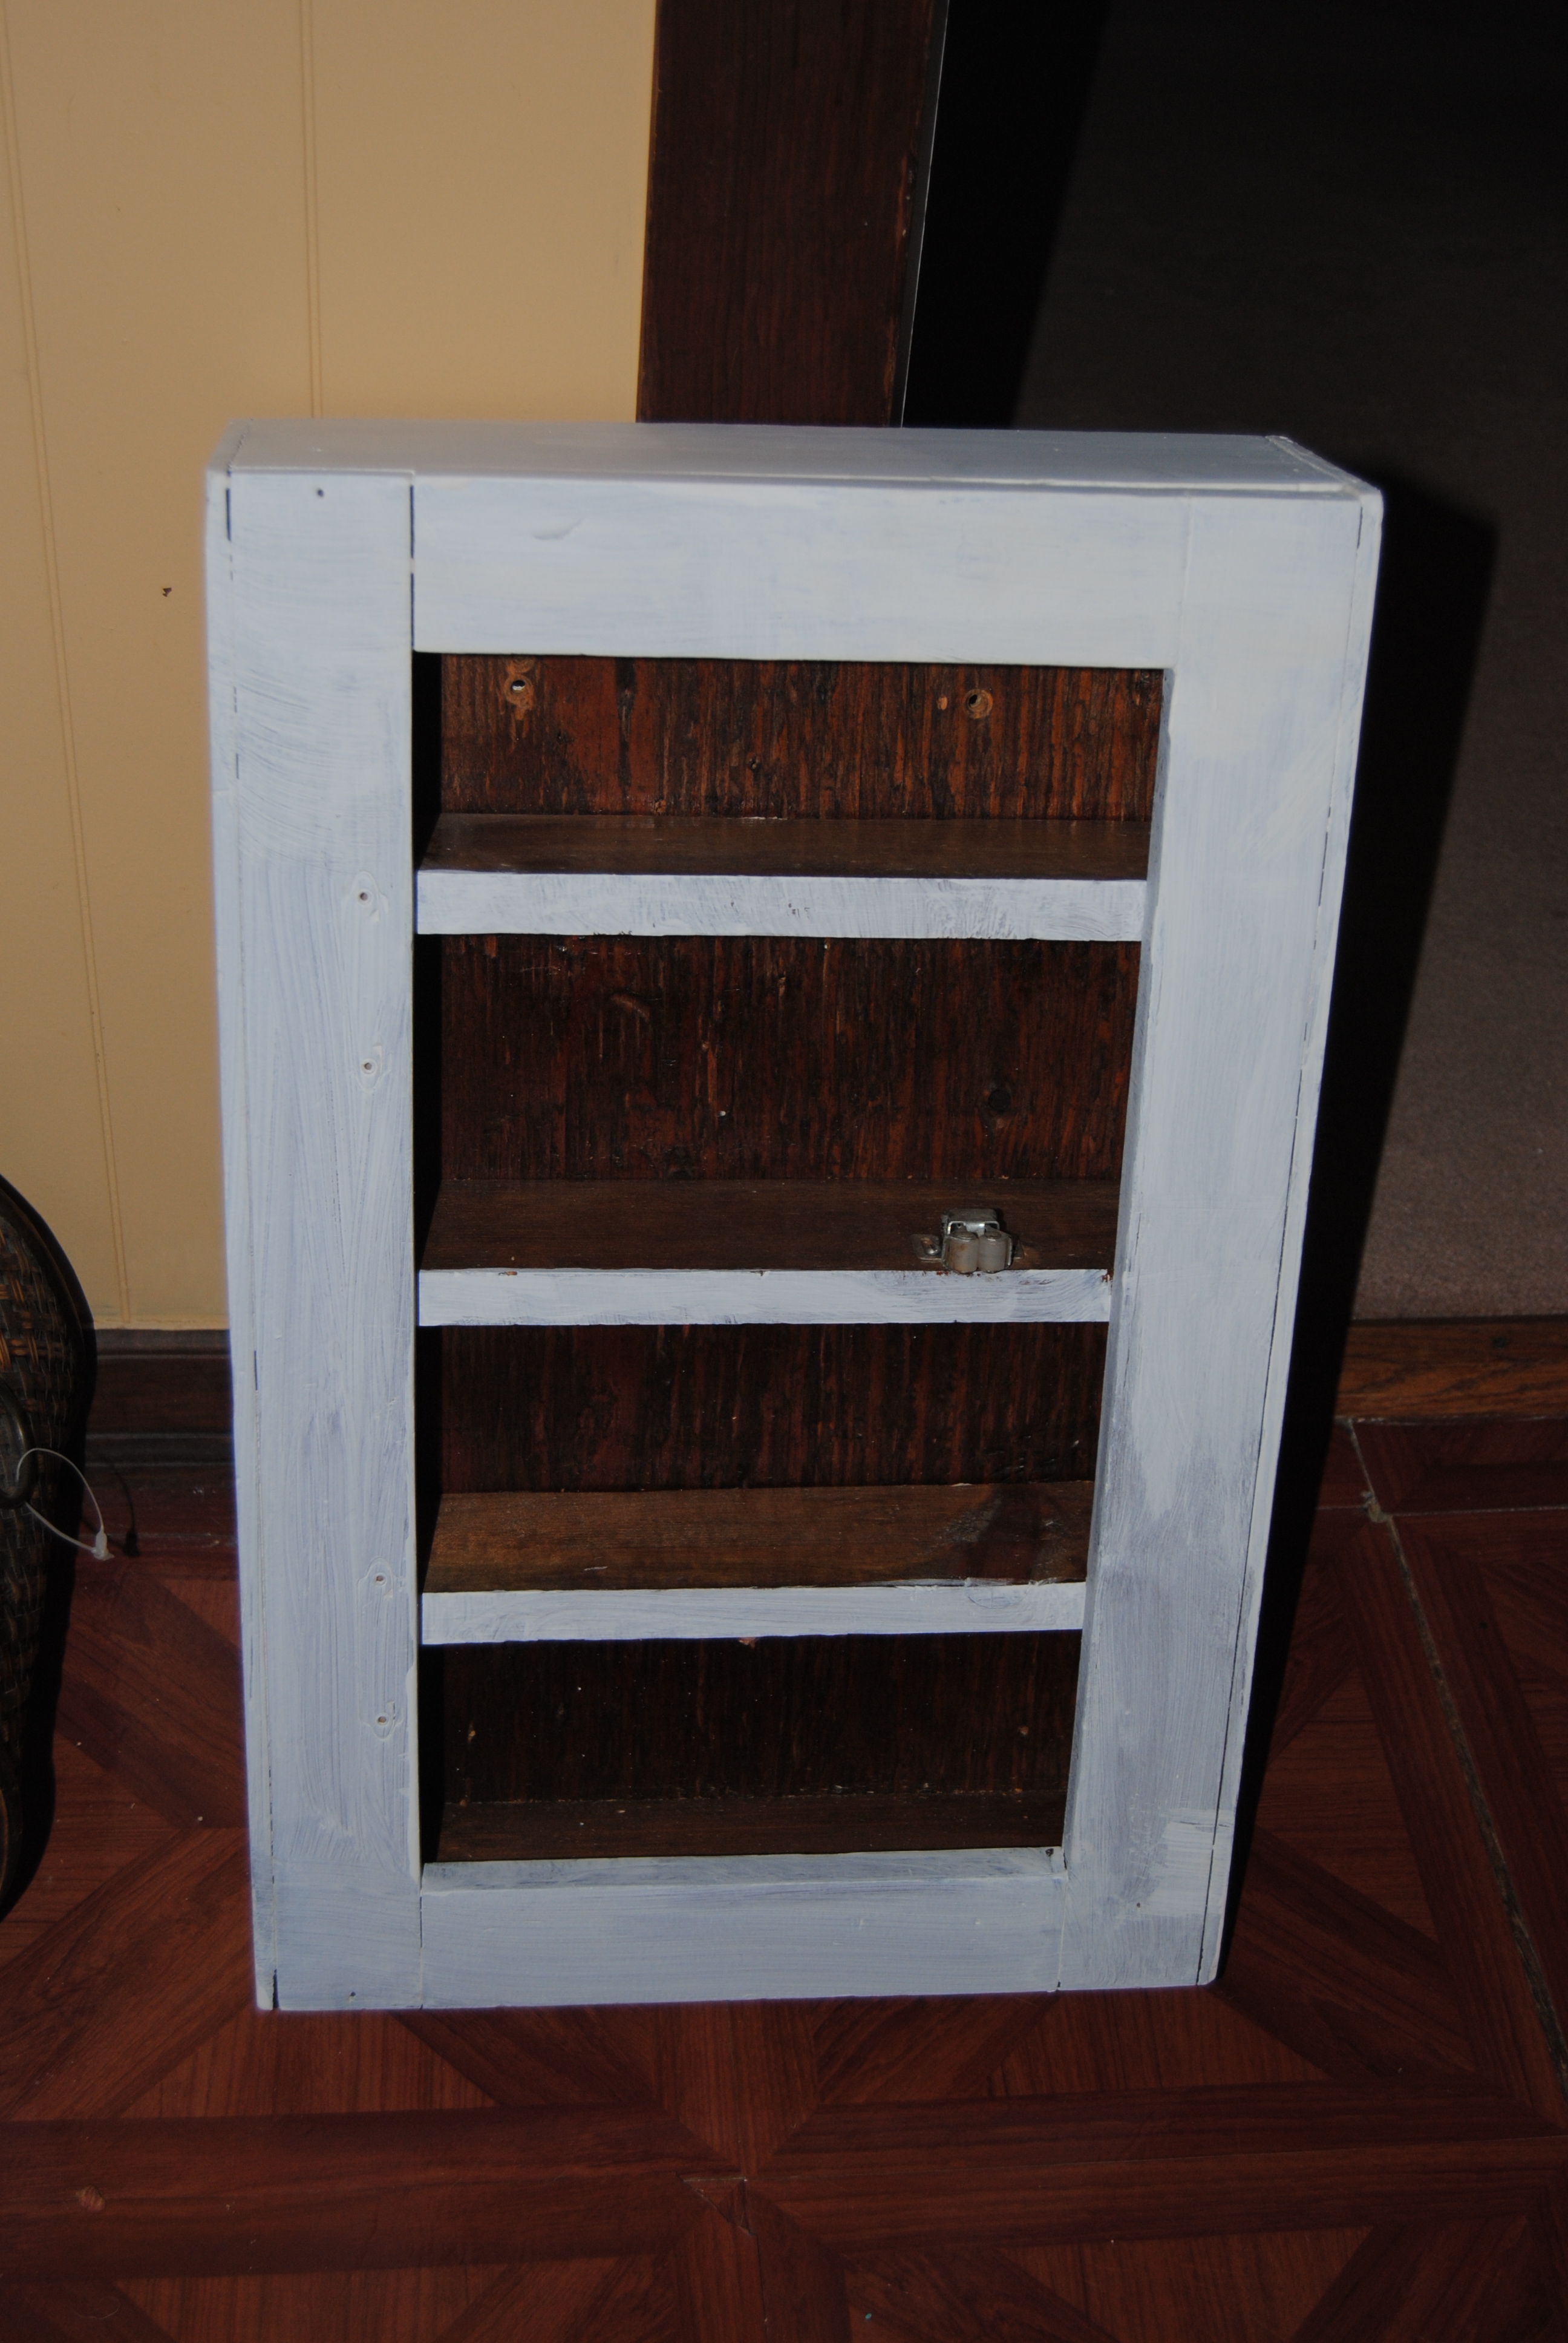
I used fabric to cover the outside of the door and glued it to the wood with Mod Podge, I then applied a thick coating of Mod Podge with a Large brush to the top of the fabric.  Once dry, I trimmed the excess fabric away from the door with a pair of scissors.  I painted the entire cabinet with black acrylic paint except for the inside and shelves. Once dry, I applied Mod Podge over the entire piece.  I spray painted the knob white, and once everything was completely dry, I re-attached the cabinet door and knob.

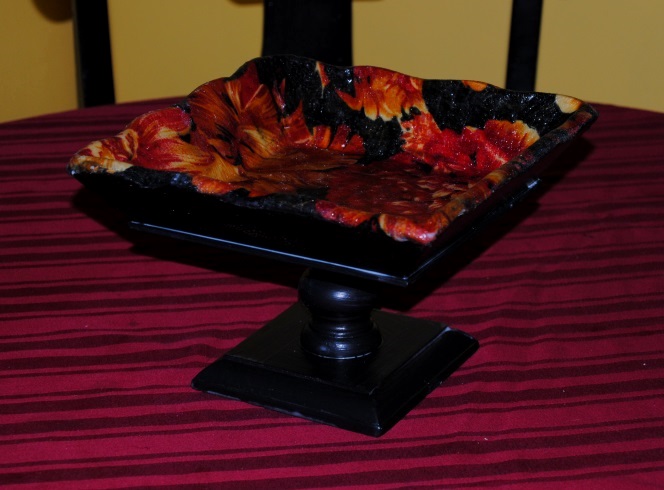
I hung the cabinet in our kitchen by our table, with its much more sophisticated look, It is a great place to store our souvenir glasses!

Restyled cabinet using paint and Mod Podge

Inside wooden shelves

Materials:

Wooden Cabinet

Fabric

Mod Podge

Black acrylic paint

White latex primer

White spray paint

Small and large paint brush

Scissors

Before and After:

Cabinet Re done

Tangled No More: Upcycled Wooden Shaker Peg Rack

I have a confession.  I am horrible when it comes to keeping my jewelry together and organized. I am always losing earrings,  and I constantly tangle my necklaces together.  When I picked up this Shaker Peg Rack at a thrift shop, I planned on using it to hang “crafty”things in my crafting area. I decided against it when I realized it was more urgently needed in our bedroom for jewelry.    I reached my breaking point this weekend, when I went to change my necklace only to discover a tangled mess!

Image

I decided I would use the fabric featured on Upcycled Spaghetti Jar Lamp.  I tried removing the pegs, but needed some of the hubby’s strength to remove them. He was able to loosen them and I was able to finally pop them out. My plan was to glue the pegs back on later. After pulling them out, they still fit snuggly which was great.  Removing the pegs would make it easier when covering the rack with fabric, and it would appear seamless.   I traced the rack surface onto the fabric with a black marker.

DSC_0274

I cut the fabric outline with a pair of scissors.  I placed the fabric aside.  I applied Mod Podge to the wooden rack with a foam craft brush, I carefully applied the cut fabric to the wooden surface smoothing it out on the surface with my hands.  I marked off the spot on the fabric, where the peg holes were.  This way, when dry I could pierce the holes with a scissor tip without making the fabric shift and move. I placed this piece aside to dry and painted the pegs with black acrylic paint.  I painted any areas not covered with fabric black.  Once the paint was completely dry, I covered all the painted and fabric covered areas with another layer of Mod Podge, and glued the wooden pegs back into the holes.  I used two long black screws to mount the jewelry holder to the wall.

This fabric and style looks great in our grey/neutral bedroom. You can use any fabric or color scheme you like and unfinished Shaker Peg Racks can easily be picked up at yard sales and thrift shops for a couple bucks. The perfect upcycle!

Upcycled Shaker Peg Rack Made with fabric, Paint and Mod Podge

Decoupage To The Rescue! Lost Basement Table Gets A Makeover

Last stop before curbside in our house has always been the basement.  This poor glass table had been banished to the basement for seven years, the entire time we have lived in our house!  It was pushed in a corner and with flower pots and miscellaneous basement junk stacked on top of it and covered in spider webs. My husband and I try to keep the basement clean, and clutter free, but it is not always easy.  As much as we dislike our basement’s dampness, cement walls and floors, the spiders seem to love it! That’s good because they help control the other bugs crawling around down there! yuck!  If any item deserved a little TLC, and a makeover it was this table! I cleaned it in our utility sink and brought it upstairs.  The glass was easily removable, and the table cleaned up nicely.

Basement Rolling Glass Table Rescue

I laid out the fabric,  I was using on the floor and traced the glass on to the back of the fabric with a fine tipped marker.  I cut the tracings with scissors, and set the fabric aside. It is amazing that a pair of curtains bought at Goodwill, and originally sold by Ikea has been used in 5 previous projects on this blog! These curtains were a great buy and I still have scrap pieces left.  When I started doing this, I was shocked at the high cost of fabric. I always make sure I take a walk by the linens aisle at the thrift stores. Old bed sheets and curtains are great for  furniture re-styles because of their durability and come in great patterns.  You can still purchase this fabric called “Fredrika” through Ikea here.  I love it! For me, Even though it is modern made, it has a 60’s flower power appeal, and I love the colorful textiles from that era.

DSC_0211

I generously applied the Mod Podge, with a paint brush to the outside of the glass.

DSC_0212

Then, I carefully applied the fabric to the glass, smoothing it out with my hands.  I repeated this three times once for each piece of glass.  I allowed the pieces to dry in front of a fan. Once dry,  I applied Mod Podge over the top of the fabric to coat the surface.  I applied 3 coats to each table top.

DSC_0214

Ta da! The colorful fabric turned a dirty and dusty table bound for the junkyard, into a colorful, and fun piece!  A true basement rescue!

Upcycled Rolling Glass Table Restyled with Ikea Fabric

Upcycled Decorative Jar Lamp: Take Three

Upcycled Decorative Jar Lamp


It all started with a spaghetti Jar, a broken lamp and a upcycle idea.  I found myself making a third decorative fabric covered glass jar lamp tonight.  (See Decorative Lamp # 1 and #2 to read tutorials on how I make these jar lamps.) I enjoy making these because each one turns out unique and the style possibilities are endless when it comes to the different fabrics you can use.

I also had the chance to work on a few smaller projects and organizing my craft space.  I decided to use the same sheet  I used for Cloth Covered Galvanized Bucket.  The Lamp is being displayed in a built-in vanity in our hallway that displays a special family blue vase.  The light this lamp omits illuminates the vase nicely and it is pleasing to the eye as you walk up our stairs.  Upon further inspection today, on a trip up to our attic, I stumbled across more of these “nightlight bulb lights”  These certainly will come in handy for future luminary crafts!

Upcycled Decorative Jar Lamp Reflection


Fabulous Fabric: Little White Wall Shelf Restyle

Old white flip shelf

While I was going through our spare bedroom and it’s contents in the attempt to make way for a crafting space, I discovered this little, white, framed wall shelf.  I remember purchasing this from a department store many years ago.  It came in a set of three and the frames where various sizes.  I used this shelf in our bathroom for quite sometime.  This shelf was the largest among them.  I did not find the two other, smaller shelves, and I  was unsure of their whereabouts.  I am hoping I come across them again.

Although these frames functioned well, I thought they lacked style  and were rather plain.  That is when I got an idea.  I decided to upholstery staple some fabric to the back of the shelf frame.  I spread a large piece of this spare fabric snuggly over the back of the shelf with the design facing outward,  I stapled the fabric to the wooden shelf about every inch around,  I then trimmed the fabric with a pair of scissors.

upholstery stapler

When I turned the shelf around I noticed a few scratches and minor chips on the shelf area.  In order to conceal this, I used black acrylic paint and applied two coats allowing the paint to dry between coats.  Once the paint was completely dry, I applied a coat of Mod Podge to seal the paint and prevent any further chipping.

Shelf restyle, paint fabric and Mod Podge

Now that is more like it!  I love the difference the fabric makes in this piece.

Fabric and Mod Podge Shelf

I decided to display our Willow Tree figurine we were given as a gift when our daughter was born.  It hangs below our family photo canvas and I think it fits in nicely!

DSC_0105

Materials:

Framed Wall Shelf

Fabric of choice

Acrylic Paint

Mod Podge

Scissors

Upholstery Stapler

Another Large Wooden Tray Restyle

I picked up this tray for just a couple of dollars at Goodwill and had no initial plans for it.  I admit I love rescuing old trays even if I have no idea what to do with them.  It sat in our spare room for quite sometime primed, but unfinished.  I then picked up some Victorian inspired black with white fabric during a second Goodwill trip.  I liked it because it had trees on it with children playing.  It reminded me of some of the decor we had in my house growing up in the late 70’s early 80’s. I decided to use the fabric on the tray. I thought it would be a great way to display the fabric and keep the scene intact. I painted the tray with white acrylic paint and then applied the Mod Podge.  Since the fabric was dark, I couldn’t trace it, so I applied the fabric I had to the tray, and when the Mod Podge dried and the fabric hardened I used a box cutter knife to remove the excess fabric. Once dry I used about two more coats of Mod Podge over the entire piece.  If you are just starting out working with Mod Podge, trays are definitely the way to go!  They are a great starter project and the possibilities for styling are endless.

Image

Materials:

Mod Podge

Tray

Fabric

Box Cutter style knife

White acrylic paint and primer

When Crafts Go Wrong: Restyling the Upcycle

On May 12th, I posted a Time Out chair I restyled.  Truth is I was never happy with how it turned out.  I think I know why it didn’t turn out as I planned.  I forced it. I was determined to finish the project even when I felt I should put it aside.  One thing I lack is patience and that can be a crafter’s undoing.  Sometimes it is just better to set a project that is frustrating aside to finish at a later date.The Time Out chair is an example of restyling a restyle.(You could say)

My upcycled 70’s inspired girls table has so far been Erin’s favorite.  It is the perfect size table, but lacked a chair.  We caught her pulling the table up to the step in an attempt to sit at the table. That is when I thought of the time out chair. We are very blessed so far.  We rarely have to put her in Time Out, so we haven’t really used the chair, and I thought if I restyled the chair, it would go great with the table.  I used the same 70’s fabric as the table, and re-painted the chair to match. Now Erin has the perfect place to sit and read her book, and I have a chair I can live with!

70's inspired KidsTable and Chair

Upcycled Wooden Pedestal Bowl

Image

Recently I came across this great wooden pedestal bowl at a flea market.  The first thing I noticed wasn’t the bowl.  Their was a big cardboard sign stating “Everything on this table only a dollar!.”  A buck seriously? I have to admit most of the items on the table were junk, but the little wooden pedestal bowl caught my eye.  I had nothing to lose!  I had some of the scarf material left, I could use this to decoupage the inside.  I had used this same material on a side table in a previous post. I had a vision when it came to this little bowl!  First, I primed the bowl with a white latex primer.  Once dry I used black acrylic paint and painted the entire piece.  Next was the tricky part.  I couldn’t measure the fabric for the inside surface of the bowl.  Instead I took a larger piece of fabric than I needed and using Mod Podge glued it to the surface leaving the extra fabric to hang over the edges.  Once dry I carefully trimmed the fabric and applied Mod Podge to the edges to mold it to the wood.  I then sealed it with four coats of Mod Podge applying it to the entire piece.  I really liked how this turned out and will be sure to keep my eyes open for any wooden bowls that cross our path in the future!

Image