
Follow On The Upcycle Now on Twitter
Now there is another new way to keep up with the “upcycle”. You can follow my blog “On the Upcycle” via my new Twitter account. I have never “tweeted” before so this should be interesting!


Follow On The Upcycle Now on Twitter
Now there is another new way to keep up with the “upcycle”. You can follow my blog “On the Upcycle” via my new Twitter account. I have never “tweeted” before so this should be interesting!

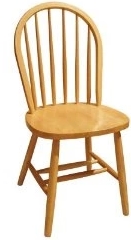
Poor abused dinner table chair! I managed to spill paint on it, drip hot glue on it, and just made a general mess out of it. It became a place to craft on with the intention that one day, I would give it a new life. I have a set of four that belonged to the kitchen table we owned previously. The table was broken, but we kept the chairs. They are about as basic as it gets, similar to the one picture below.
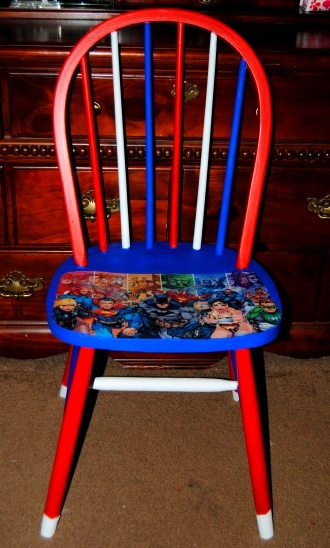
 When I finished the Kids Justice League Of America Chair a few people including the hubby, suggested I create an adult version for all the “grown up” Justice League fans out there. This chair seemed like a good candidate for a super hero makeover. The chair was heavily lacquered so a white latex primer was a must! Once primed, I trimmed and applied the print to the seat surface. I found a great image featuring The Justice League Of America characters. These characters had a more adult feel. I used Mod Podge to adhere the image to the seat with a coat of Mod Podge applied over top to seal. I then painted the entire chair with Red, White and Blue acrylic paint. This was the most labor intensive part of this project and required multiple applications of paint, but proved therapeutic after another stressful week. I applied Mod Podge to the entire painted area of the chair to seal it.


To make a “Super” Chair you will need:
Old chair
Comic book pages or printed image
Acrylic paint
White latex primer spray or brush on
brushes, scissors
Mod Podge
I have seen many exciting ways to upcycle old vinyl online, but the idea for me actually started when I stumbled upon an awesome shop on Etsy called ” It’s our earth” They upcycle records, and floppy discs into coasters, chip bowls and clocks just to name a few. I was shopping online for Christmas and saw a clock made from a Thin Lizzy record, my husband’s favorite band. I jumped at the chance to get it and the price was right. It hangs proudly in our living room next to our 1970 Pioneer stereo cabinet. Most importantly, he loves it!

The plaque below it says “Life is a song and love is the music”
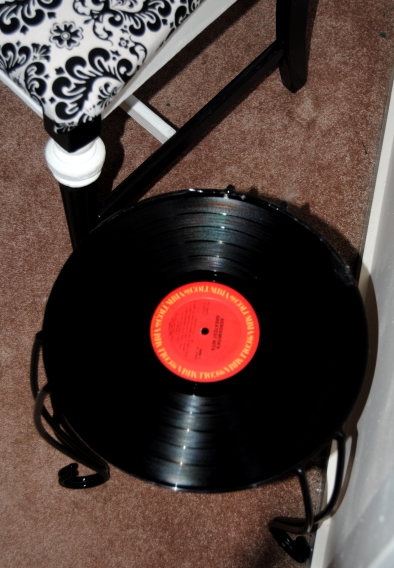
I loved all the great upcycling ideas for small record side tables, and they looked very easy to make. It would also go nicely with the clock in our living room. I am a great lover of music and the sound of vinyl, so I scoured my collection for a record I had purchased from a dollar record bin that was damaged and unplayable.

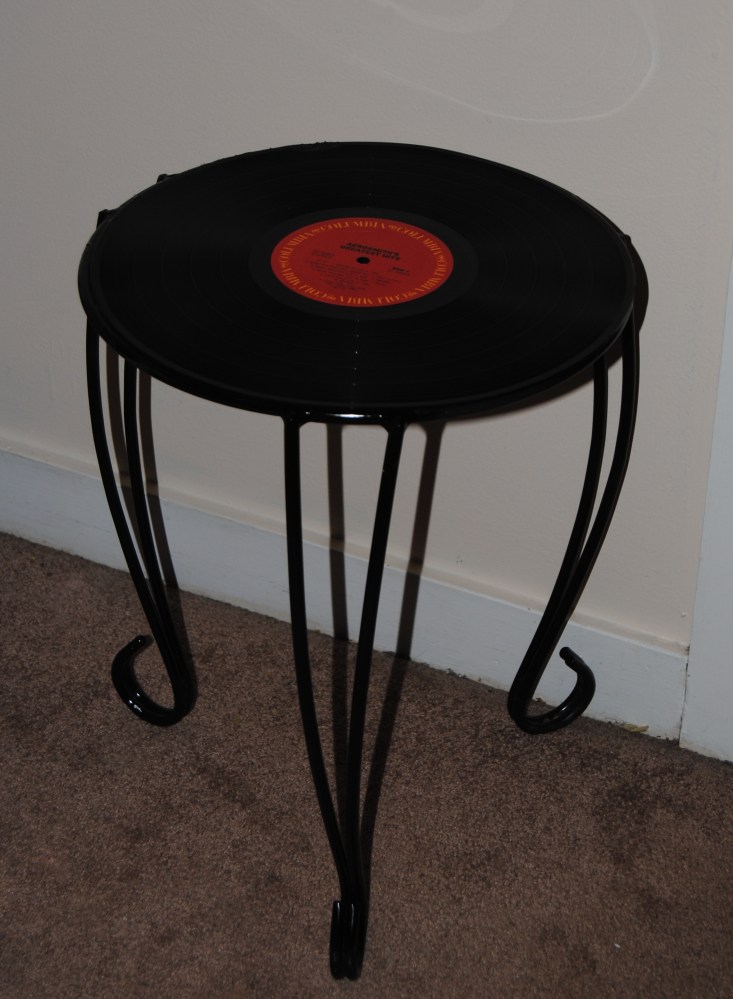
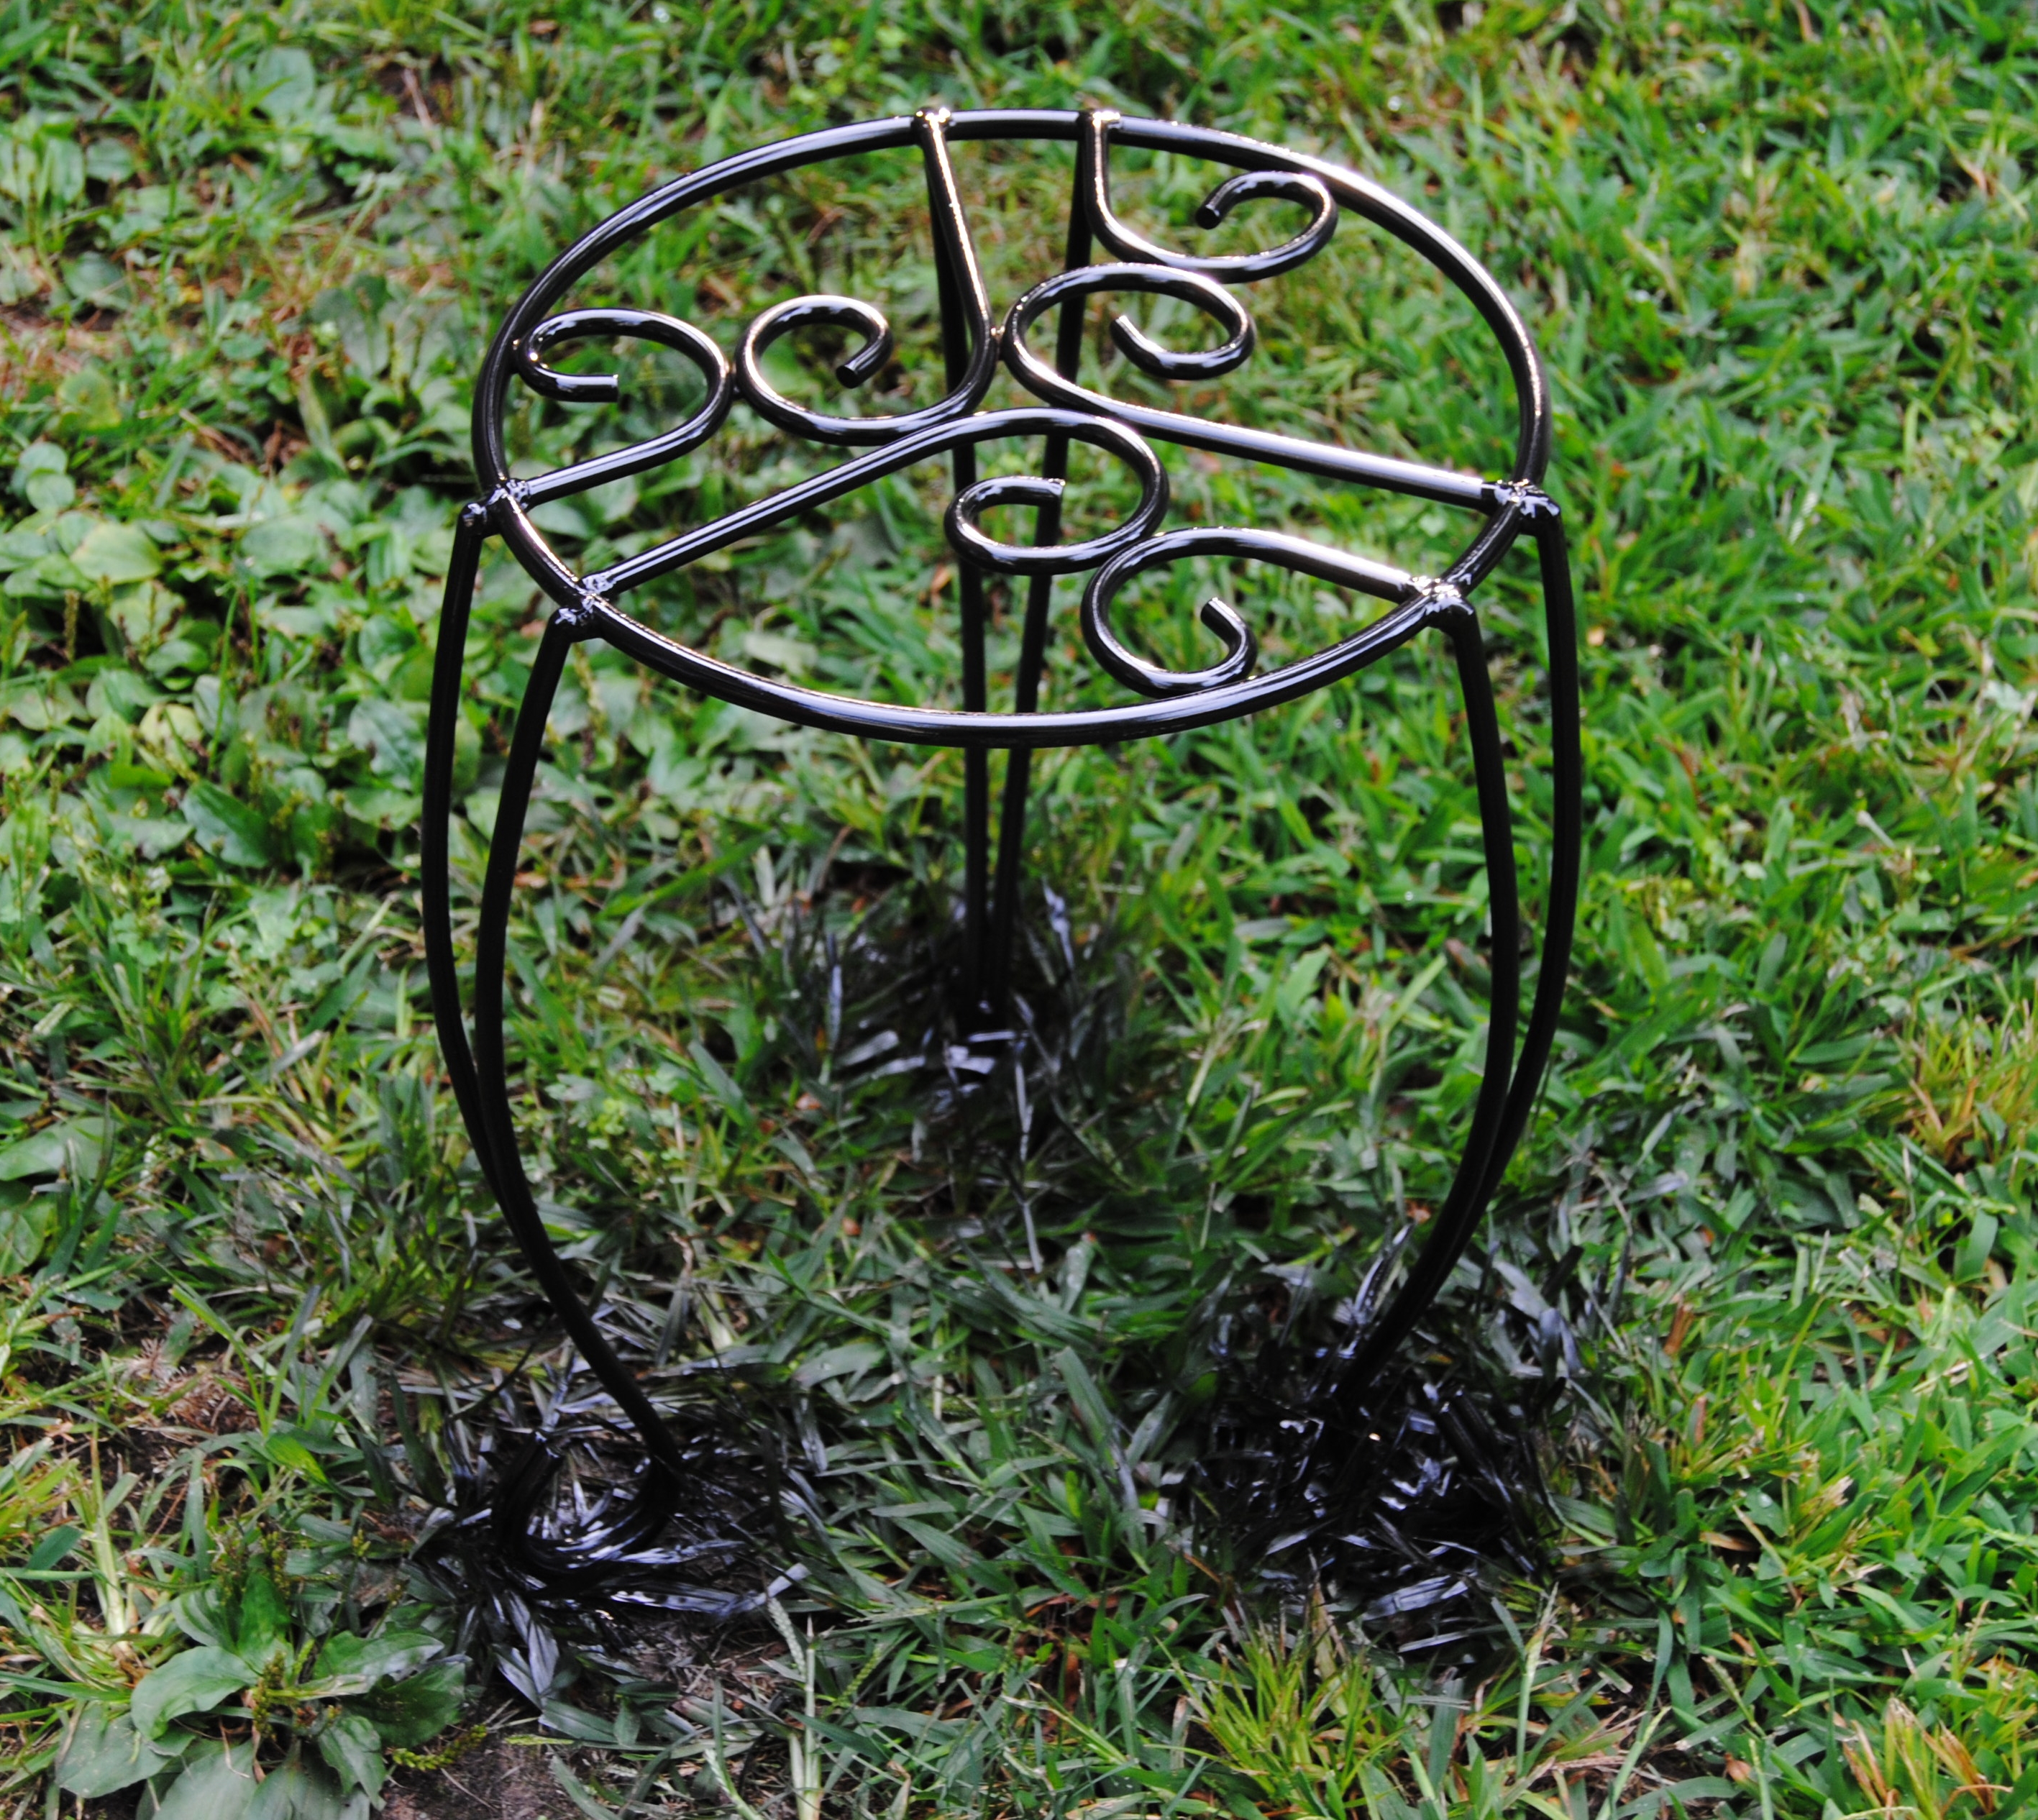
Aerosmith is a cool band, but this record was destroyed! It was perfect for making a record table. I also had an old, weathered metal plant stand. I cleaned it and spray painted it black and allowed it to dry.
I then simply used a high heat hot glued gun to adhere the record to the plant stand.

Not only a cute living room addition, but a great functional side table!

Looking for an easy, fun project on a Sunday afternoon to do while you watch football? I know I am! It has been a rough few days and I am hoping to relax on this lovely sunday and enjoy week one of the NFL games and cheer on our fantasy football team. I have been on a small blogging hiatus, battling a nasty fall cold and continuing to go on with life as usual, work full-time, and as always, be a wife, and a mommy to a 2 year-old with an un-ending supply of energy.
It was my toddler apprentice who gave me the idea for today’s project. My daughter was with me in our craft room the other day exploring as usual. She found some great scrap fabric to play with. It made me think about ways I might be able to utilize these smaller fabric pieces, and then it hit me! I had a tan checkbook cover that was in need of a revival.
I gathered what I would need:
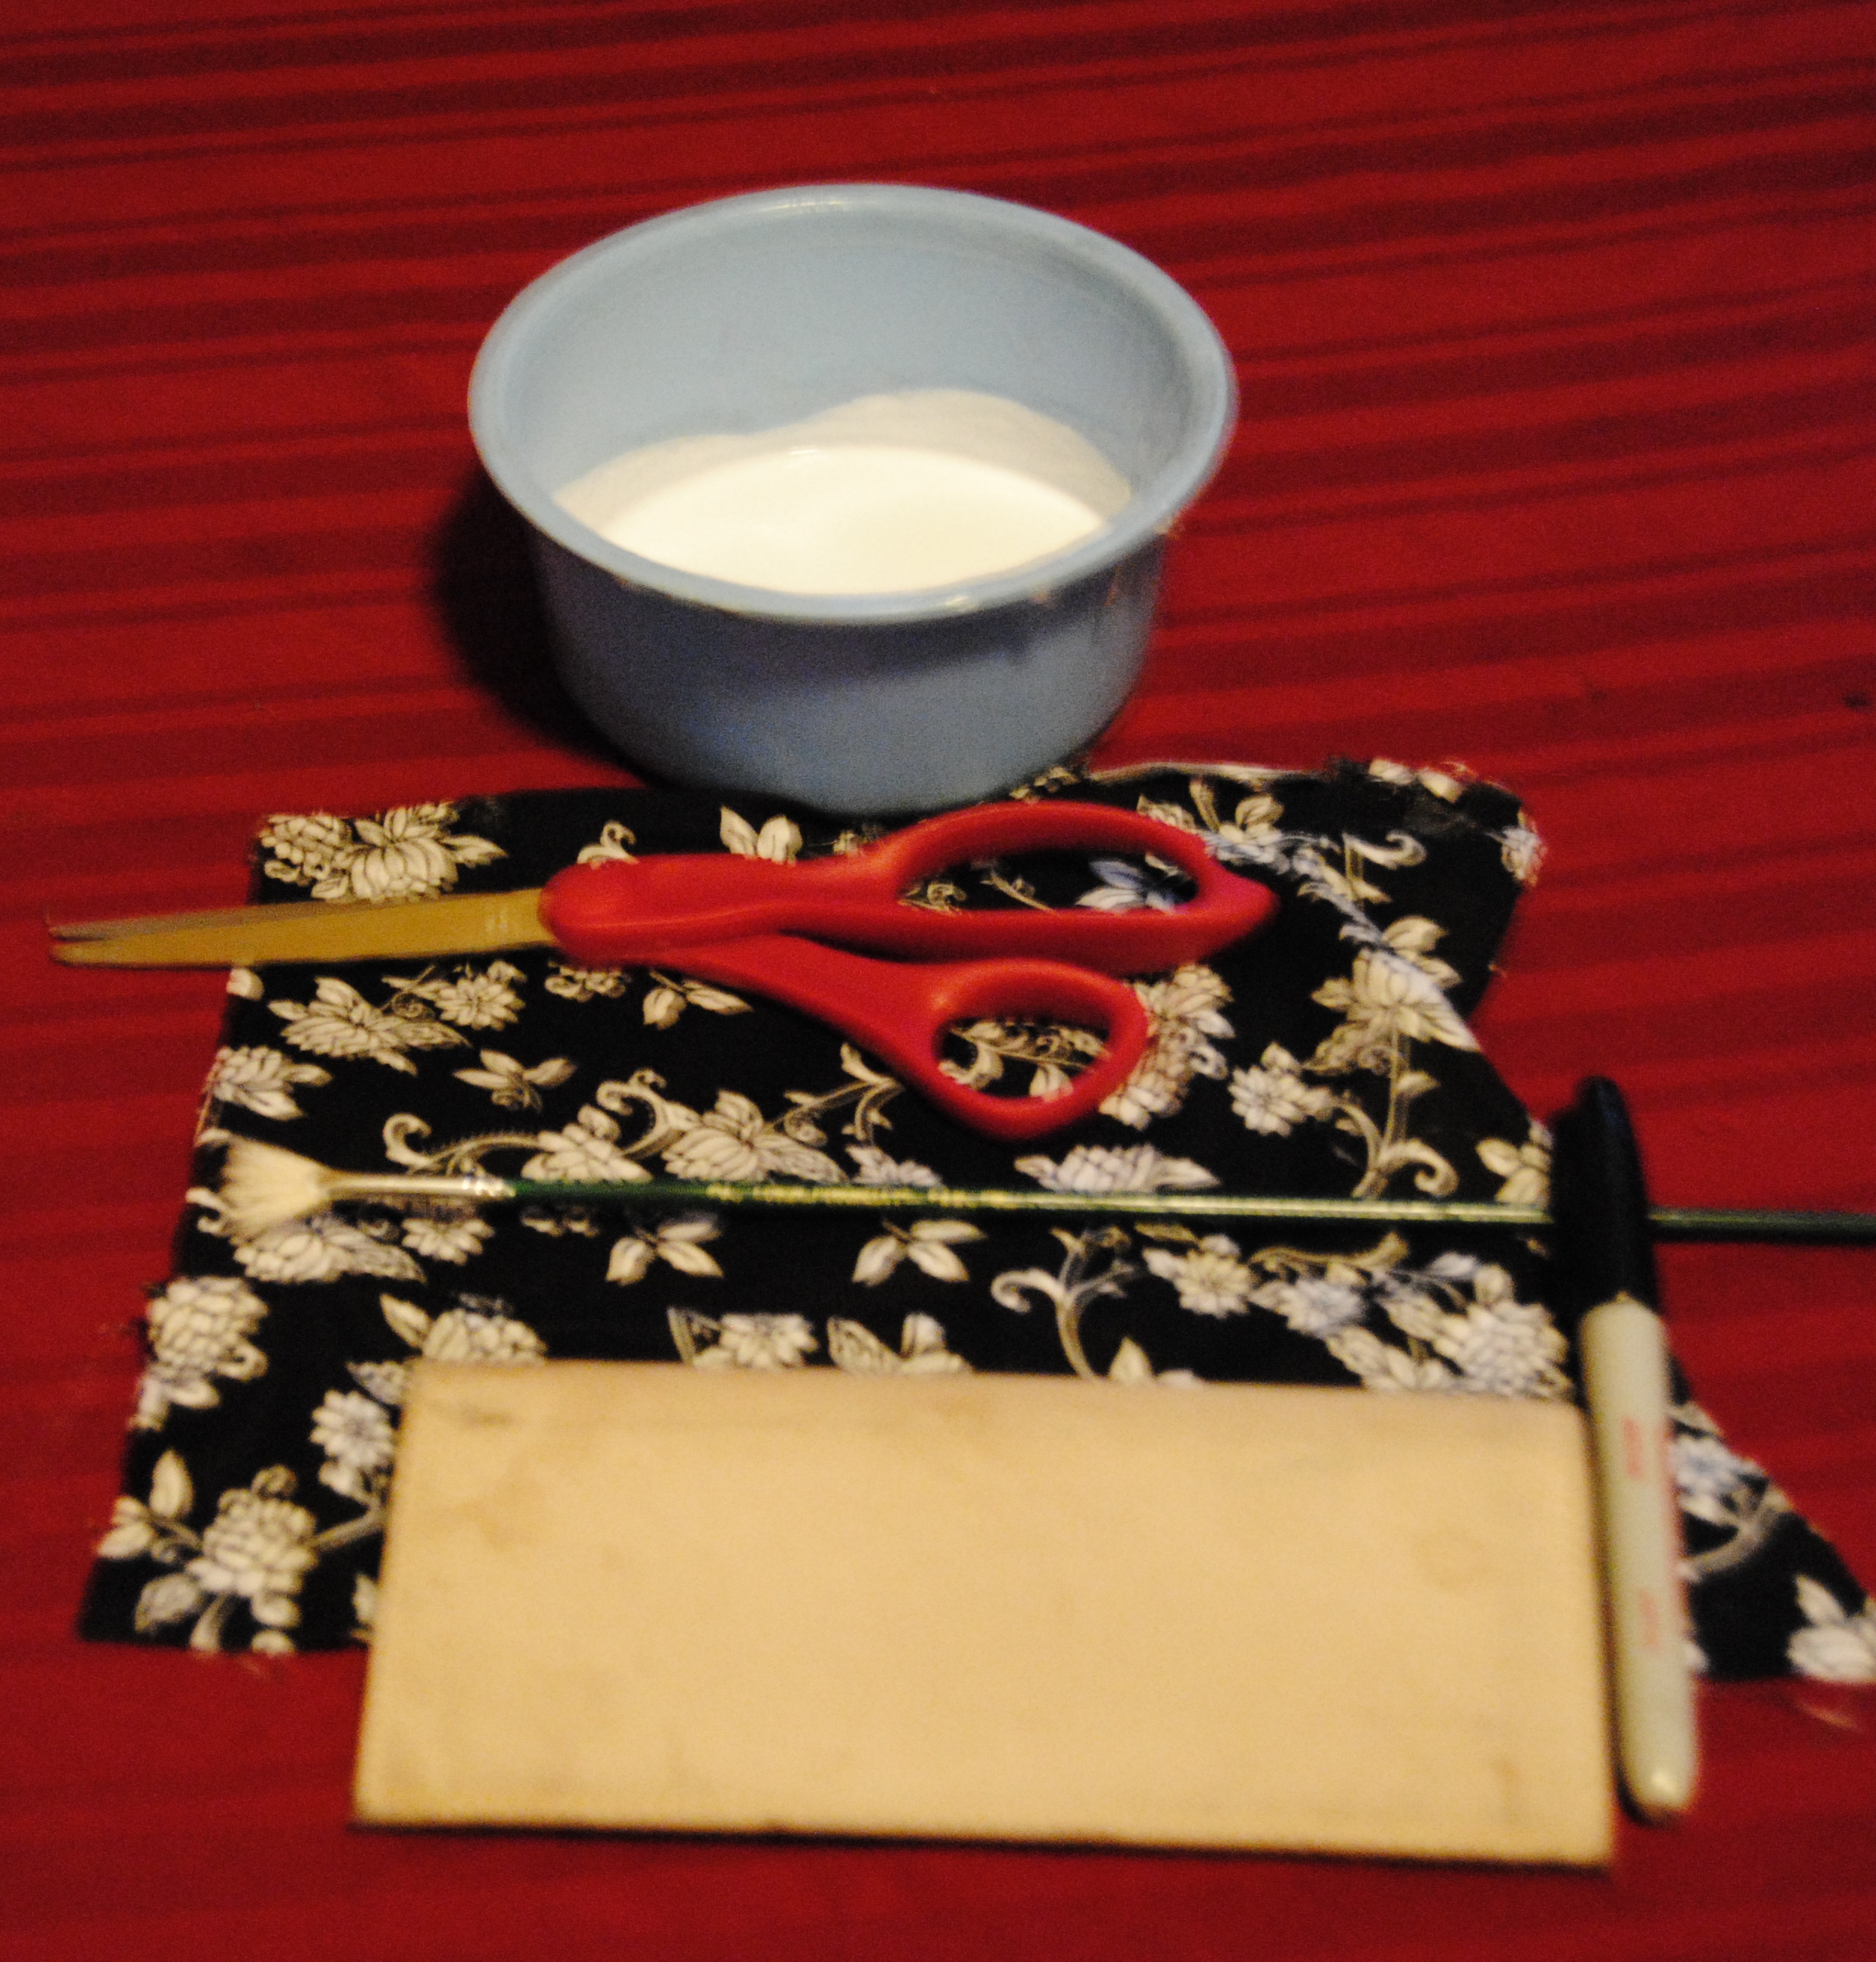
Mod Podge
Scrap Fabric
Paint Brush
Black Marker
Scissors
First, I opened the check book cover, laid it out flat and traced it onto the fabric with the black marker. I cut the tracing, with a pair of scissors and placed aside. I applied Mod Podge to the outside of the check book cover, generously with a paint brush.

I carefully applied the fabric to the checkbook smoothing it out with my hands.

I applied Mod Podge over the fabric and placed the checkbook in front of a fan to dry.

I repeated this process three more times, which left a nice, smooth finish on the cover. I decided to leave the inside as is. I didn’t want the paper checks to “stick” to the inside cover. Mod Podge is attracted to paper. (as it should be!)

What a great way to use fabric scraps and add a little life to your checkbook!
Since I began upcycling, crafting, and decoupaging, I have wanted to make an Americana art piece. I was uncertain as to what the object would be. I was waiting to see what life, or thrifting was going to place in my path. Then one day, I spotted this chair in a Goodwill Store. The chair needed a bit of TLC, and had some issues. Most of the finish was worn off the chair, and the spindles and legs were loose. The chair passed “the sit test” I sat on it and I didn’t end up on the floor! Nothing I thought a little love and wood glue wouldn’t fix. Despite it’s problems, I knew this chair was something special. The chair displayed several design elements I found intriguing, and the chair style looked very “American” to me. I will be honest, I didn’t actually know anything about this chair, but I knew one thing- I liked it.
A woman behind me saw me looking at it ,and said “That’s a Windsor Back Chair.” She was from New England and these chairs are popular in that area. Then she simply walked away. She was eyeing it up, but I had a tight grip on it. By now the chair was in my cart and rolling with me out of the store. The chair cost $5.99, but for this I think I would have paid a little more, so it was a great deal!

When I got home, I did some research on the chair and It had several of the Windsor Chair Design elements. I found this great website for a company that makes these chairs Gummel Chair works and they feature an interesting history of these Windsor Chairs Beginning with their origins during the reign of King George in England to the shores of New England and the Early American Colonies. It also states it became “preferred” in some circles to paint these chairs to bring out their unique design qualities. This made me feel better about painting the chair, and since I did not have the space to keep the chair out year round, I thought it would be a nice to showcase the chair during the patriotic holidays. Having a reproduction in need of some work seemed exciting and the “perfect” Americana project candidate, It also happened to come along at the perfect time. The July 4th holiday was quickly approaching, and I had to submit an original project for the new Green Crafting Book The Green Crafts Lifestyle .
Materials Used:
Red, White and Blue Acrylic paint
Decal, Print, Patriotic decorations for decoupage
Foam Brush to apply Mod Podge
Paint Brushes of various sizes
Scissors
I cleaned the chair before I got started with a damp cloth.
I primed the chair with two coats of a white latex primer.

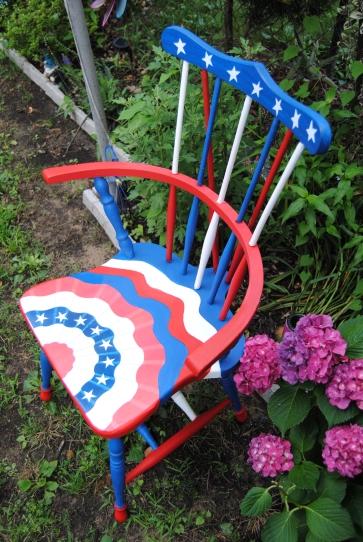
I applied the Mod Podge with a foam brush to the seat surface generously. I took the patriotic image I was using and carefully glued the image to the seat. I used my hand to smooth out any wrinkles or air bubbles. If you have one available, you can also use the rubber Mod Podge, or roller tool to do this as well. Once dry, I applied a layer of Mod Podge with a foam brush over the image to seal it. Now it was time to paint the chair. I used a red white and blue color scheme and continued the pattern featured on the patriotic image for the chair seat. Once the visible parts of the chair were dry, I flipped the chair over and painted underneath. I then cut out some small white stars I wanted to decoupage to the top of the chair to add some additional flare. I applied Mod Podge to the top of the chair with a smaller paint brush and applied the stars to the chair.
Once the chair was dry, I carefully inspected the chair for any painted areas that needed touching up, and added additional paint needed to these areas. I allowed the chair to dry thoroughly overnight in front of a stand up fan. The next day, I applied 2 coats of Mod Podge over the entire piece using the foam brush for larger surfaces, and a smaller paint brush on the smaller areas and chair legs.
An Upcycled Windsor Chair draped in Americana Decoupage:
 :
:
Before and After:


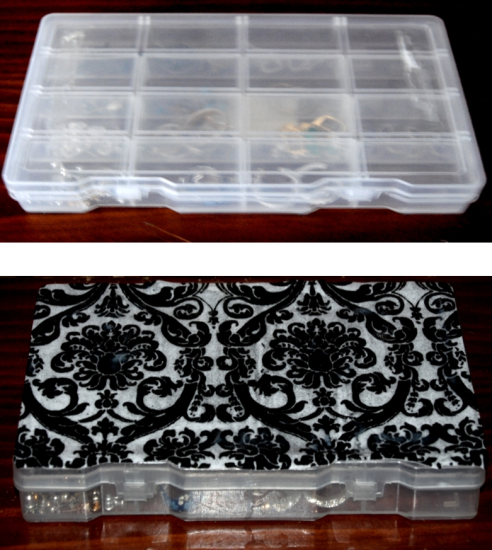
We have all seen them in hardware stores, or down the home improvement aisle. Those nifty assorted nail, nut and bolt sets housed in those plastic containers. I had purchased one some time ago and after using most of the nails, I was left with the plastic box. I held onto it thinking I would eventually use it for something. After some thought, I had the perfect use for it, an earring holder. Sure, I have a jewelry box, but the nice thing about this plastic box were all the individual compartments. There is nothing worse than digging through a jewelry box drawer trying to find a matching pair of earrings. Using this box would eliminate that problem. It worked great, but lacked an aesthetic appeal, so I decided to do a simple restyle. I traced the top of the box onto the scrapbook paper, then used Mod Podge Matte finish to glue the paper to the top of the lid. Once dry I used two coats of Mod Podge to seal the lid and the paper. This was a very simple project, and works great!

I have been blogging for over a month now and I am so thankful to you all for the encouraging words and thoughts. I am also blown away by the amount of talent and creativity I have seen from others on here! Creativity is key! For me, things don’t always work out as you envision them. This forum allows me to feel free and unafraid even if I make a mistake! For that I am grateful!
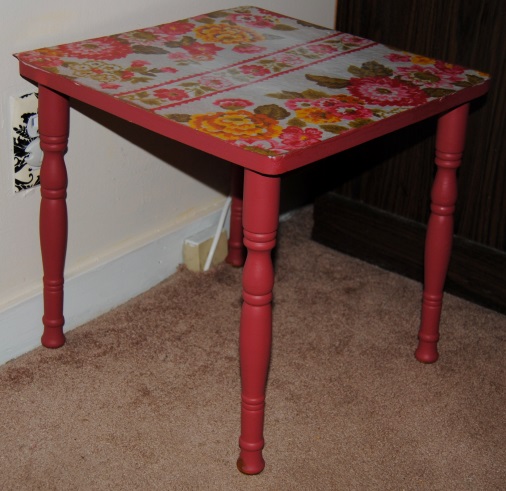
I am back from my two day hiatus; However a lot of craftiness and shopping has taken place in those days! The family went thift shopping yesterday, two Goodwills and a Walmart! It was a very productive day! I picked up a few future projects, and pined and dreamed over other future projects that I could not fit in our little Hyundai!
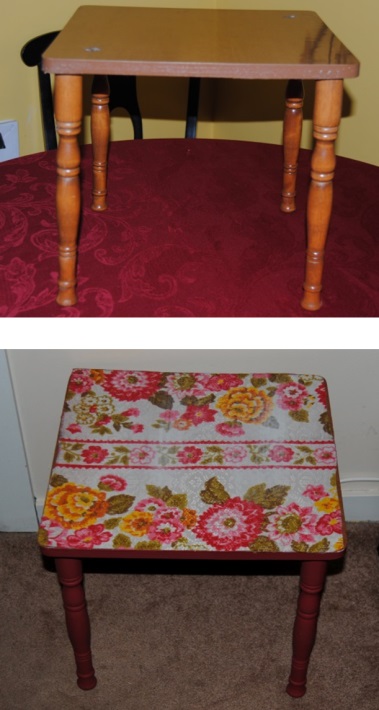
I saw this little brown, particle board, table and I picked it up, I am obsessed with small furniture, as I am always thinking about items that Erin can use that are perfect for toddlers just starting to utilize furniture. She also loves to imitate us and it is wonderful seeing Erin sitting at her kid’s table reading a book like the little person she is becoming.
I also found this great funky floral fabric that screamed 1970. In it’s previous incarnation it was a window drape. I can’t imagine! A bit too funky for curtains according to my taste, but not funky enough to use to redo kids furniture!
Materials:
$5.99 table
Fabric
Mod Podge
paint brushed various sizes
acrylic paint
black marker
scissors
First, I turned the table upside down onto the fabric and traced with a black felt tipped marker. I carefully cut out the fabric. I then used Mod Podge Matte finish to glue the fabric to the table top. I set aside to dry. I wanted the paint the table pink to match part of the fabric, but I didn’t have any pink handy. I was able to mix red, purple, and yellow, and came up with the color you see here! I primed the piece and then covered the legs and sides with pink paint. Once dry I used Mod Podge to seal the entire piece using about three coats total.

Before and After:
Our cat Nucky seemed to be fascinated with what I was doing. He was my cat apprentice as Erin was napping at the time!


This weekend my little toddler and I planted our first vegetable garden together. She loves playing in her sandbox so I had no doubt she would love digging in the dirt. When I began digging, she grabbed her plastic shovel and pretended to dig. She was fascinated by the whole gardening process. I wanted to start out small. I did some hunting in our side yard and found some plastic fencing. It was enough to keep our little Bichon Frise at bay, as well as keeping Miss little legs from crushing the plants. I bought three plants, a tomato, cucumber and red pepper. (I know this will barely make a salad!) At little E’s age it is more the concept of a garden that is most important. I have seen various tutorials on the internet on how to make garden markers. The spoon markers are adorable, and I loved the wine cork ideas. So, I am throwing my virtual hat in the ring and gave the idea a try. Here is my take on the wine cork markers. I painted each a different color with acrylic paint. I let dry. I found pics of veggies online and added text in word. I then printed out those vegetable images on photo paper. I used the contact sheet setting on my printer and this small photo size worked perfectly. I cut the pictures out and glued them to the corks with outdoor Mod Podge. I repeated this process several times coating the entire cork. One finished I inserted a bamboo skewer in the cork to anchor the markers into the ground. A cute little detail in the garden. Never hurts to add a little color!
Materials used:
Wine Corks
Outdoor Mod Podge
Vegetable images/Printables
Bamboo Skewers
Scissors
Acrylic paint
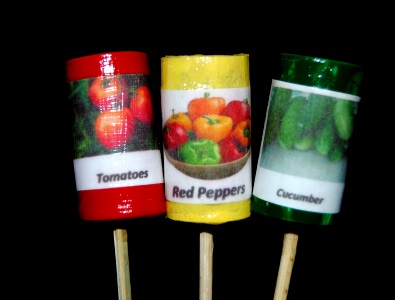
Welcome to our mini garden!


What’s in the glove, Love?
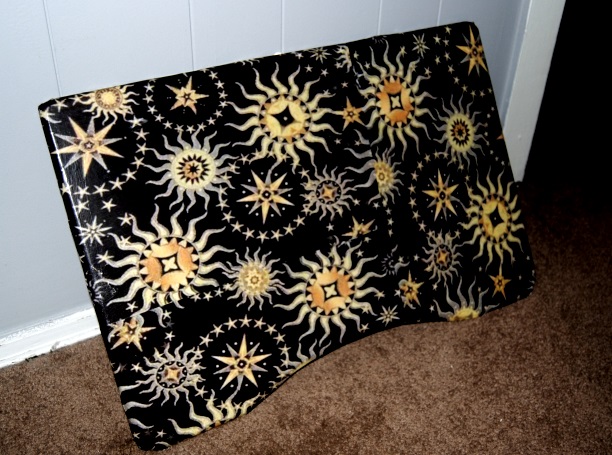

Their is nothing I love more than trolling around in our attic! I call it re-shopping. Before I go out and buy something new, I always check in our attic for items that have long been forgotten, stored away and are one step away from the trash can. It was on this day that I came across an ugly old lap top desk. I find myself more often times than not, blogging from my bed on my laptop . This would be perfect, but boy was it an ugly eye sore! Mod Podge to the rescue! I had these cool celestial prints I had printed out and had no idea what to do with them! I like the pattern and thought I would tuck them away and use someday. I thought to myself someday is now! You can use wrapping paper, scrapbook paper, magazine cut outs, the possibilities are endless! It really depends on your personality! The biggest challenge with this project was the size of the laptop table surface. Matching up the design was a challenge as was gluing the paper to the curved edges of the surface. Otherwise this was a fairly simple project.
Materials used:
Old laptop desk
Mod Podge Matte Finish
Paper of choice to decoupage
Scissors and a marker for tracing
Mod Podge rubber smooth out tool

The random stream of consciousness of a cynical being
A great WordPress.com site
A Motor Neurone Disease (MND/ALS) blog
by Hamda
Create Something Fabulous
Fun, easy and inspirational DIY and up-cycled projects along with creative crafts and more!
Ramblings about what crafts I've been doing lately- with links to some of my free and paid patterns
my craft addiction
My musings on poetry, films and books
DIY, Crafts and Handmade
Inquire, Inspire, Aspire
Life is a great bundle of Little Things ! :)
a little bit of...something different
