You had me at “Half Table” Yard Sale Table Rescue

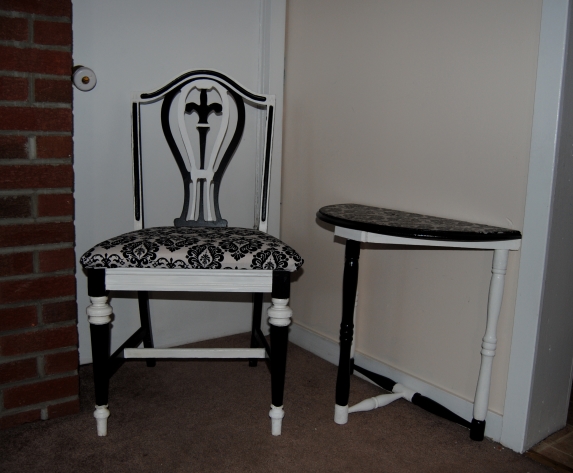
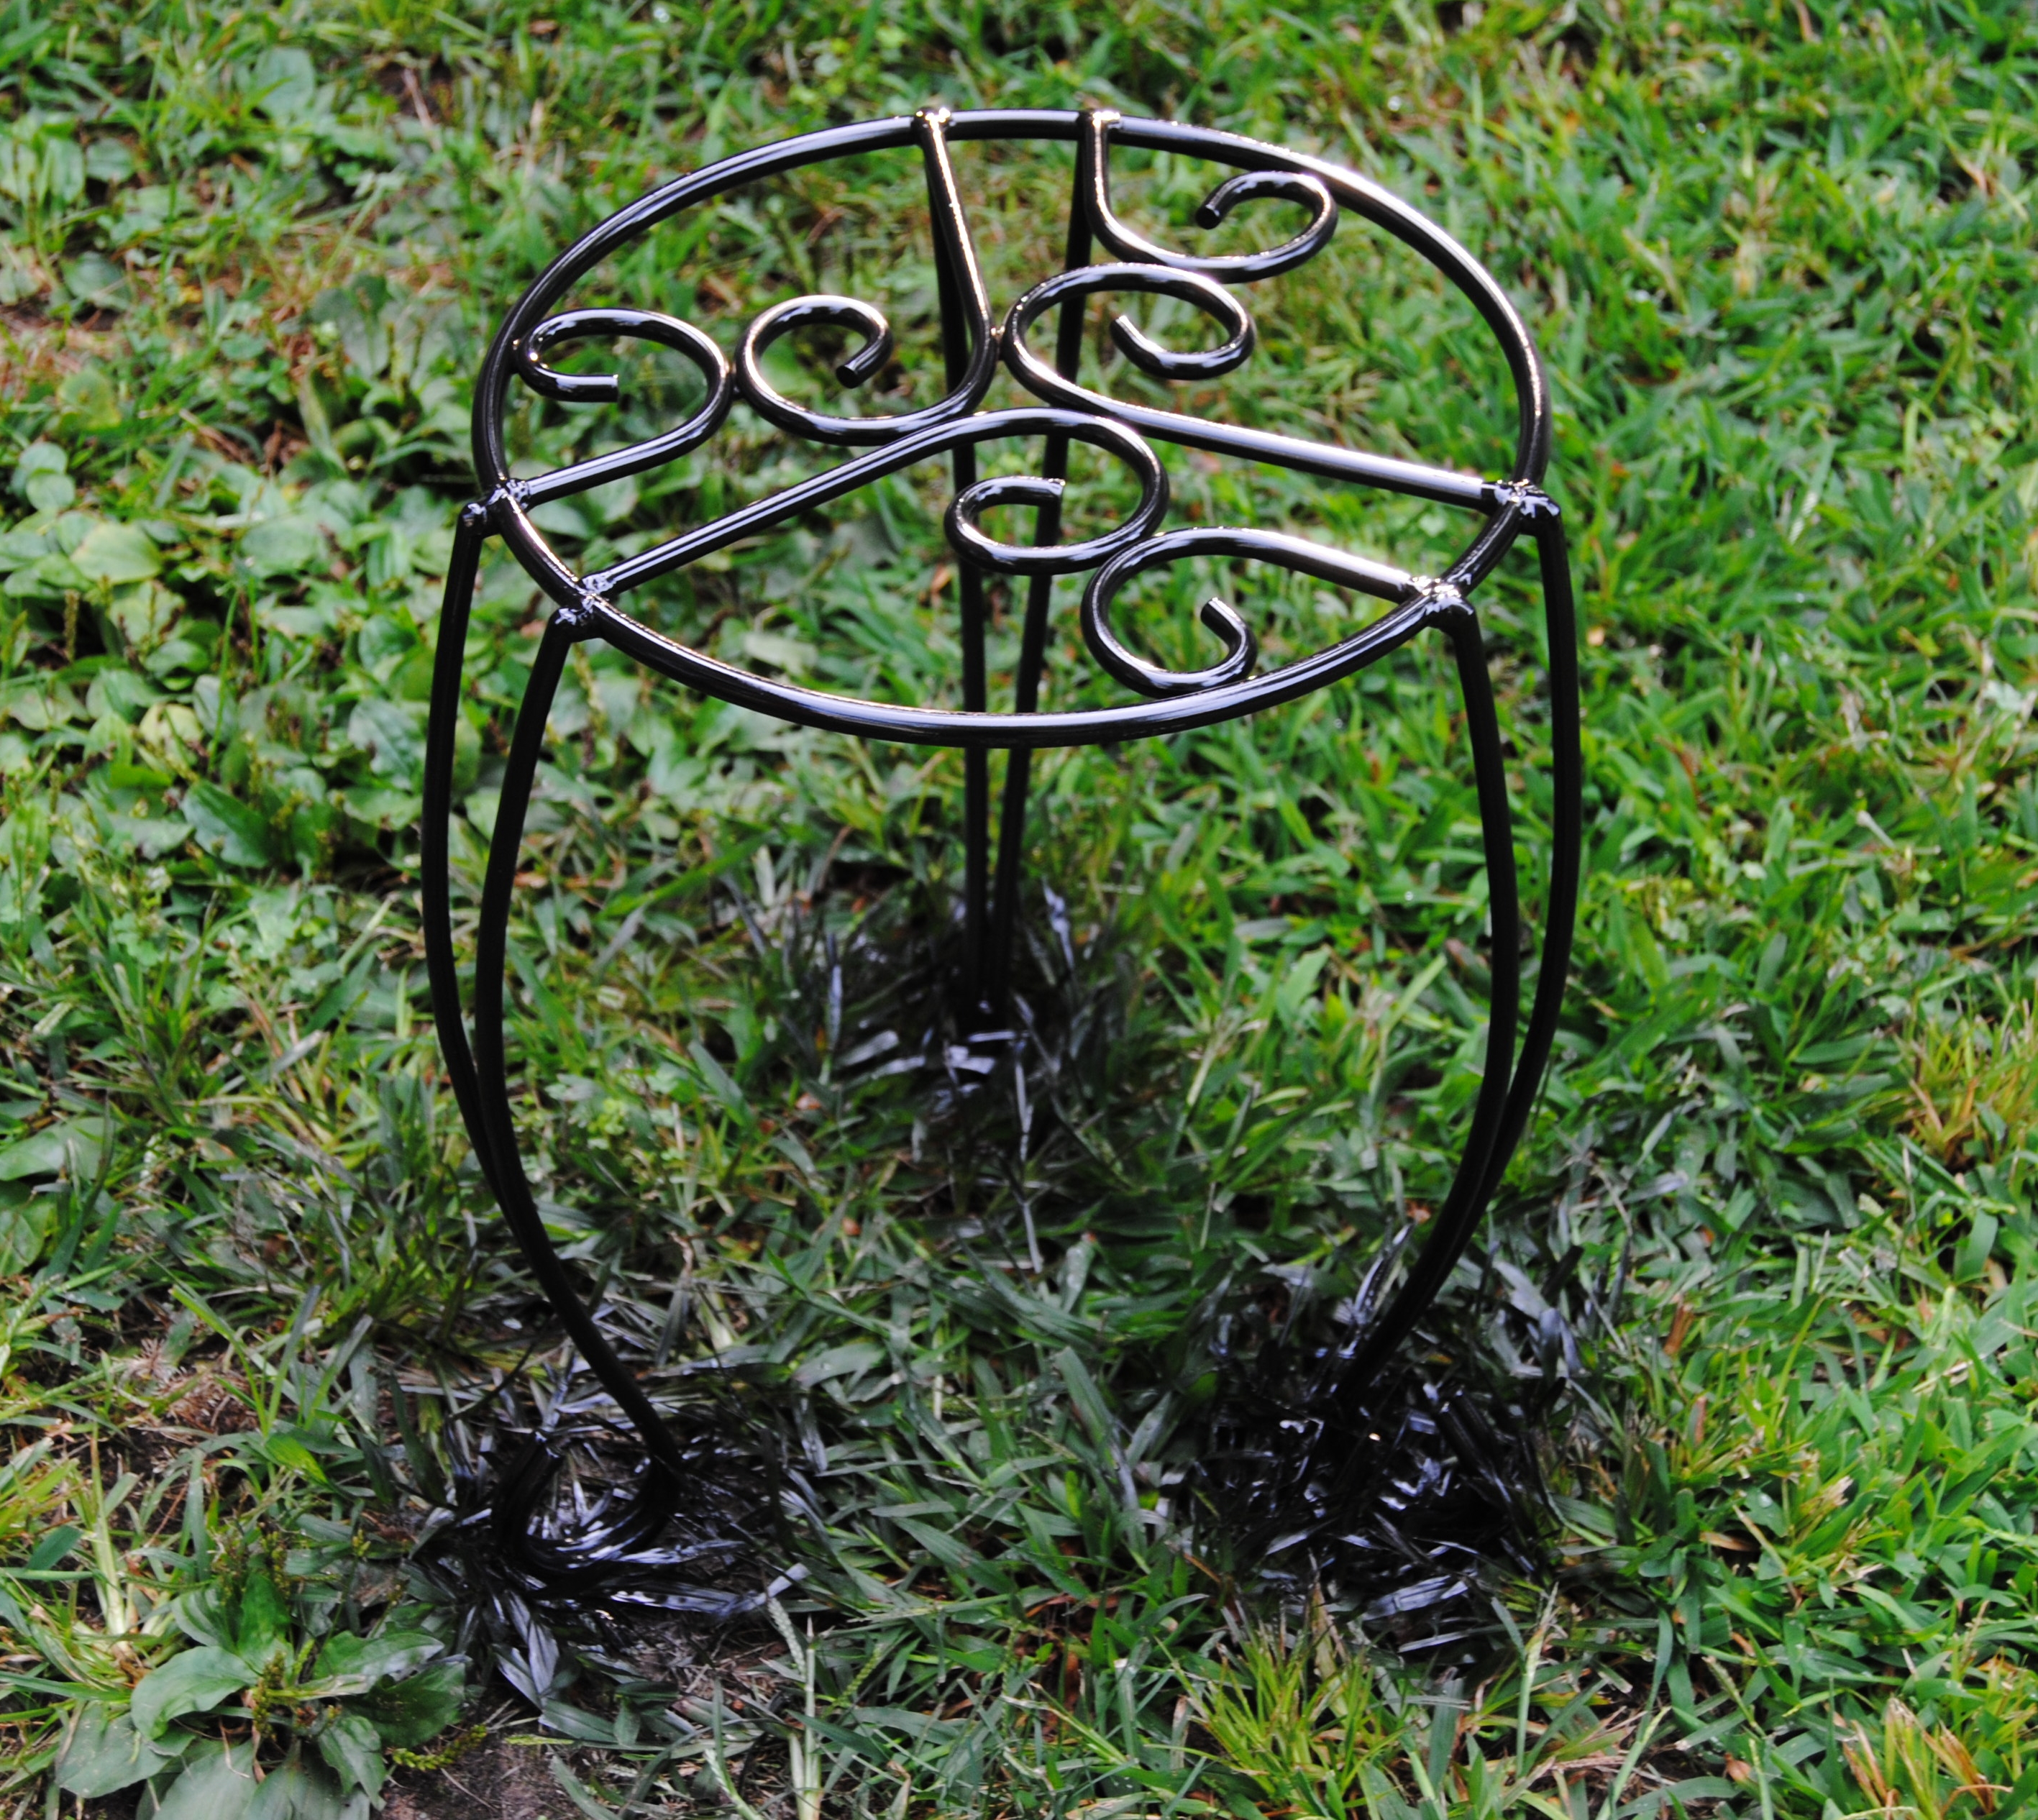
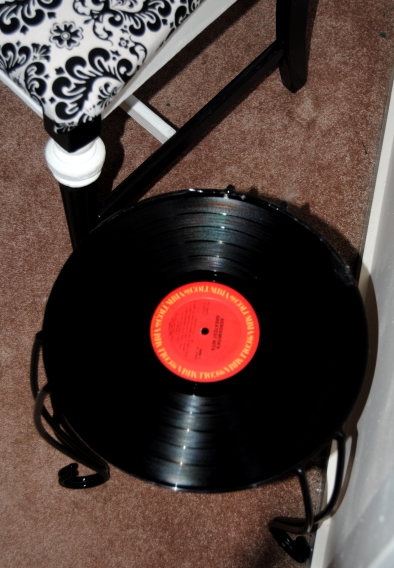
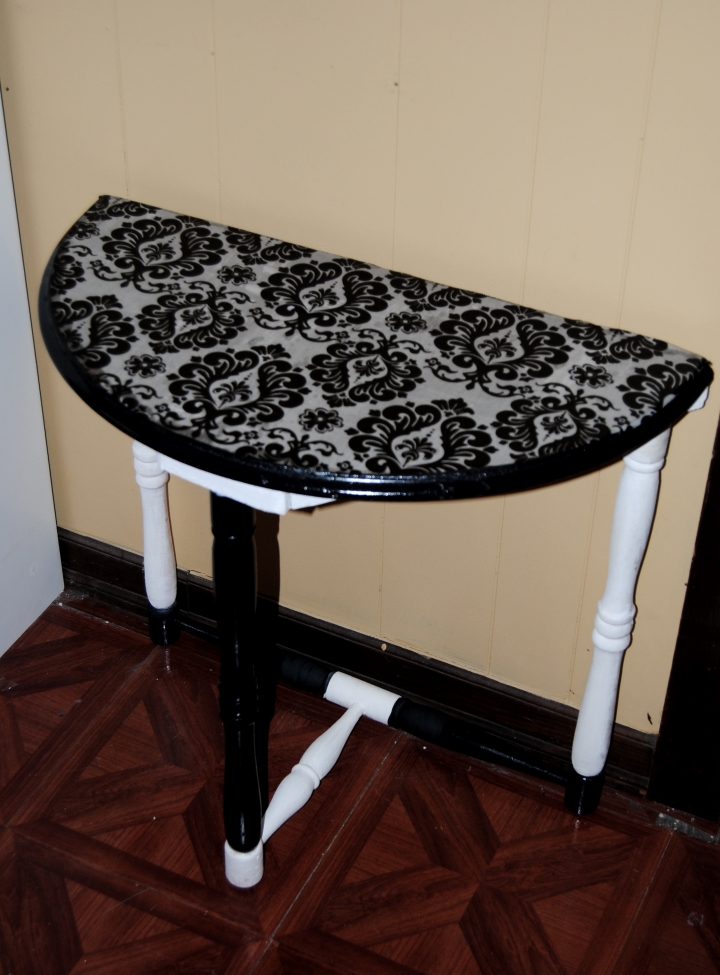
I was excited when a friend of mine from work approached me about a table she had spotted at a yard sale.  She had arrived toward the end of the sale and the family was packing things up that hadn’t sold.  She informed my friend that she was taking most of what didn’t sell and was placing it out on the curb for the trash collectors.  She was nice and asked my co-worker if she wanted to take anything at no charge since it would end up in the trash anyway.  This is the part of the story I am truly thankful for!  She spotted a little half-moon table and thought of me and how much I love to upcycle.  She thought it would be a perfect candidate and that I could “do something” with it.  I was so excited when she brought the table to me. She had no idea the love I have for these little tables!  I had come across a half table previously at a thrift store and snatched it up! That post was called Crazy for Half Tables! so you can see she had me at half table!  I snatched this table up happily and decided to use the table in our living room.  I decided to match the table design to our damask black and white chair which is one of my favorite upcycled chairs to date.

Yard Sale Half Table Before

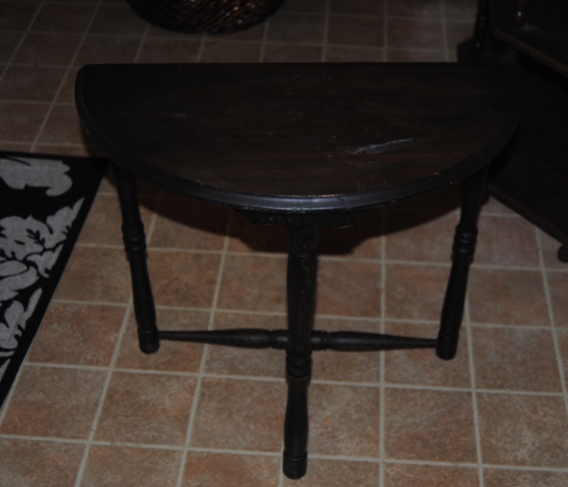
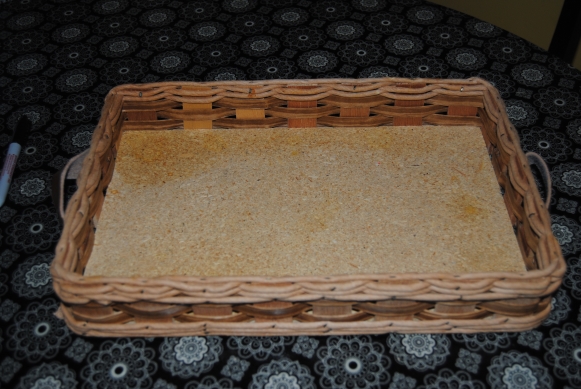
The table finish was rough and ready for priming.  I cleaned the table and placed it upside down on to the fabric I was going to use.  I traced the table surface with a black felt tipped marker.

DSC_0942

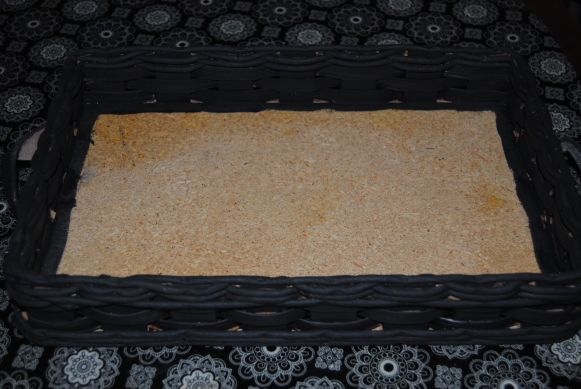
I carefully cut out the tracing and placed the fabric aside.  I primed the table with a white latex primer and allowed the table to dry,  If you are working with a dark piece of furniture and lighter fabric  it is especially important to prime it because the darker color will bleed through the fabric from underneath and may appear darker than desired.  I learned this myself in the past the hard way!

Apply fabric and Mod Podge

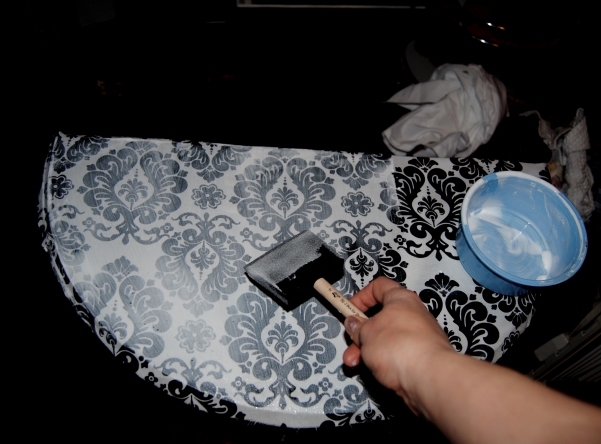
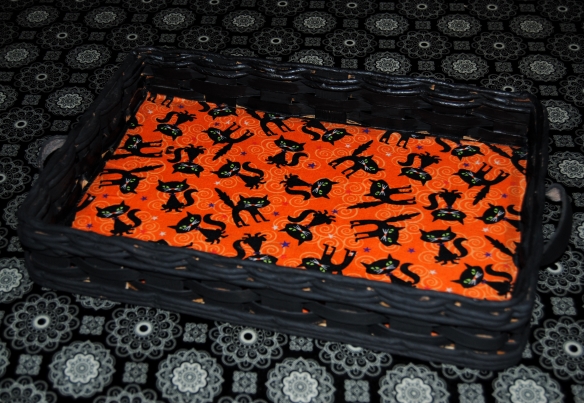
I applied Mod Podge to the surface of the table, applying the fabric slowly to avoid and wrinkles or air bubbles.  Once the fabric was smoothed out, I applied Mod Podge over it with a foam craft brush.  Allowing it to dry.

Painted legs

While the Mod Podge was drying,  I used acrylic paint going with the black and white alternating theme.  Once the piece was completely dry I used a coat of polyurethane sealer to “seal the deal”  Now the piece was allowed to dry overnight.

Restyled Half Moon Table using Mod Podge and Fabric

Thanks again to my awesome like-minded friend who saw the possibilities in this piece! Someone’s trash truly is to another a treasure!  Now my damask chair has a friend and my living room is all the better for it!

Upcycled chair with half moon table

Purrific Candy Cats: Upcycled Halloween Candy Tray

While I was out thrifting yesterday, I picked up this great little wicker tray with a hard unfinished wooden bottom, and two handles. This tray was stamped underneath as made by Corning.  It was a bit of a mystery as to what this tray was used for in its current state.  It was certainly priced right and stamped with a red tag marked 50% off and cost only $1.00.

Mystery Wicker Tray

I had an idea since it is close to Halloween to repurpose this item into a Halloween candy tray.  Using a flat tray instead of a deep one, enables the kids to pick the candy that they like best.  I had some great left over Halloween themed spooky black cat fabric I purchased at Joann Fabric.  The same fabric I used for DIY Upcycled Decorative Halloween Lamp.  I gathered the materials needed for this project.

Wooden Tray

Mod Podge

Black Acrylic Paint

Spooky Halloween Fabric

Paint Brush/Fine Tipped Marker

Foam Craft Brush/Scissors

First, I painted the tray areas that would not be covered by fabric with a medium-sized paint brush,  I used a couple of coats and allowed it to dry thoroughly between coats.

Painted Tray

Once dry, I traced the bottom of the tray on to the back of the fabric with the black fine tipped marker.  I carefully cut the fabric out with a pair of scissors.  I placed the fabric aside and applied Mod Podge to the tray surface with a foam craft brush.  I carefully placed the fabric on the tray surface and smoothed out any wrinkles with my hands.  I allowed this to dry and then applied Mod Podge over the painted areas, and the fabric surface.

Upcycled Halloween Candy Tray-Black Cats

Now the hubby and I can pass out candy in spooky black cat style! This can also be used as a serving tray for ghastly goodies. What crafts do you have planned this Halloween?

Halloween Tray made with Mod Podge

Repurposed Decoupage Photograph Shadow Box

I was very excited recently, when I received my prize in the mail from Ray’s Sew Crafty‘s Labor day giveaway.  A lovely book filled with different designed scrapbook paper. I was eager to use this paper on a project and share it with all of you.  Once again I want to send a big thank you to Diana at Ray’s Sew Crafty. Be sure and stop by and check out her blog!

Labor Day Giveaway


I had a set of three different sized black shadow box shelves that I wasn’t sure what to do with.  I decided to repurpose the medium-sized shelf into a photo shadow box.  I gathered my materials:

Shelf

Scrapbook paper

Photo

Mod Podge/Foam craft brush

Hot Glue Gun

Black Fine Tipped Marker and Scissors

I traced the four sides of the shelf with a black marker.  I cut the tracings out with a pair of scissors and placed them aside.  I applied Mod Podge to the outside of the shelf with a foam brush, and carefully applied the scrapbook paper to the outside.  Once dry, I applied Mod Podge over the top of the paper to seal it.  I used the hot glue gun to carefully glue the photo to the back, leaving a small space at the top if I decided to hang it on the wall.

Photo Shadow Box


I wish the edges had come out better, as I accidentally touched them before they were dry! Overall I loved the project and what a wonderful way to display a favorite photograph!

Sports Fan Inspired Upcycled Laundry Room Folding Table

My husband and I have been working on each room in the house, cleaning reorganizing and coming up with new ideas for old items.  One of the areas that needed attention was our basement/laundry area. Our basement is damp and unfinished and keeping it clean is quite a challenge. It also serves as our laundry area.  We have a table in our basement we used in our kitchen for many years. We now use the table for folding and basement storage.  When we moved into our home six years ago, our kitchen was too small for such a large table so it was delegated to the basement.

DSC_0909

I am blessed to have a husband that helps with the household chores, especially the chores I hate!  One of these chores is doing laundry and he graciously does the family laundry every Sunday evening.  He is also a huge Phillies fan through good times and bad. While we were grocery shopping, we came across a Philadelphia Phillies plastic table-cloth in a bargain bin. It was priced right at $1.69.

DSC_0912

I thought it would be great to redo the grungy basement table into a Phillies fan table, and a great way to thank the hubby for all of the laundry he does!  My only concern was that the table cover was plastic.  As stated in previous posts, Mod Podge doesn’t always adhere well to certain plastics.  I thought this would be a great experiment as I had never used a plastic table-cloth for decoupage.  First, I cleaned and painted the table surface with a white latex primer.  This was important because the table cloth was white and the brown surface could potentially bleed through the white table-cloth.

DSC_0911

Once the paint was dry, I generously applied Mod Podge to the table surface with a large paintbrush.  I carefully layed the table cloth on top of the Mod Podge table surface.  This was the most challenging aspect of the project as the table cloth material is thin and prone to wrinkles and air bubbles.  The table cover also is spread across a larger surface area.  I smoothed out the table cover as best I could and applied Mod Podge over the top of the cover and allowed it to dry. I used scissors to carefully trim away the excess table cover hanging over the edges.

DSC_0915I used two coats of a polyurethane clear coat to seal the table surface, I allowed the first coat to dry for 4 hours and the second was left to dry over night.  I applied additional Mod Podge to the edges to prevent any minor curling.  This project was certainly not without its challenges, but despite these I think it turned out great.  The hubby may have lost his sports room to a playroom, but his laundry room is on its way to becoming a surrogate man cave!

Phillies sports Fan Table decoupage table cover

Upcycled Coffee Cans and Glass Jars

It has been a hectic few weeks and my upcycling ways have suffered a bit.  My free time has consisted of some travel, household chores, decorating for fall and getting my craft space in order.  I have a few projects in the works, but lately I feel like I am coming up mostly empty-handed during my Goodwill lunches.   During these lean crafting times, I try to work on the craft room.   I am hoping to share it one day, but alas it is far from finished.  I am still finding ways to organize supplies, and just hung some shelves: Progress!

A great way to organize paint brushes and general supplies are old coffee cans and glass jars.  I like to cover them with fabric using Mod Podge.  Glass covered jars not only make great lamps, they also are a decorative way to organize craft room supplies. Simply measure the fabric, cut,  and apply the Mod Podge and fabric to the outside of the coffee can.

DSC_0106

DSC_0754

Similar method can be used to apply fabric to glass jars, such as pickle jars, and spaghetti jars.  The possibilities and uses for these items are endless, and it is a great way to repurpose and recycle throw away items. What’s better than craft room storage for free?

It’s Raining Black Cats: DIY Upcycled Decorative Halloween Lamp

Hands down, Autumn is my favorite time of year.  From Pumpkin coffee to homes decorated with colorful mums, It is apparent fall is here and Halloween is just around the corner.  What better way to celebrate the most fun and certaintly most spookiest of holidays than with an upcycle craft celebrating All Hallows Eve?

I visited Joann Fabric and picked up some festive material featuring very scary black cats in different poses.  I thought the orange-colored background would look nicely when the lamp light shines through it.

DSC_0746

Materials:

Halloween fabric of choice

Small lamp base

Dollar Store Glass Vase (You can also use a glass jar)

Mod Podge

Scissors/Paint Brush/thin tipped black marker

Twine/String

First, I wrapped the fabric around the outside of the vase and trimmed with scissors.  I traced the bottom of the glass vase on the back of the fabric.  I cut the circle of material out and placed it aside,  I applied Mod Podge to the outside of the glass with a brush and carefully wrapped the material around it smoothing it out with my hands.  I cut a piece of twine off the spool and tied it around what would be the base of the lamp.  Doing this helps add a decorative touch and holds the fabric in place while drying,

DSC_0747

I  stood the vase up and applied the last piece of fabric to what would be the top of the lamp.  Once applied, I covered the entire outside with Mod Podge.

DSC_0750

Once the piece was dry, I added one additional coat of Mod Podge to the lamp and fabric.  What is great about these lamps is the capability to use one lamplight base and switch out different decorated glass jars and vases to create new decorative lighting looks.

DIY Decorative Halloween lamp made with Mod Podge and fabric

Hope you enjoy my festive feline Halloween lamp!  ahhh I can taste the candy corn now!

Stepping through time: DIY Cemetery Flowers And A walk through St Peter’s Cemetery, Staten Island, New York

Yesterday, my daughter and I took a trip to visit my aunt in New York.  During the trip, my sister and I traveled over to St. Peter’s Cemetery in Staten Island to visit several ancestors memorials.  I called the cemetery office and spoke with Pat who was wonderful!  I e-mailed her with a list of names I suspected were interred at the cemetery. She responded back with several and provided the grave plots and locations along with a cemetery map.  I planned on photographing the graves, but also wanted to leave something for them out of respect.

I found some old artificial flowers and glass candle holders in our attic as well as some left over styrofoam packing materials.  I decided to use these items to come up with a small tribute to each grave as I visited.

DSC_0574

I had to create five total and did not have enough styrofoam for the bases.  I used two glass candle holders instead with a small piece of styrofoam inside to attach the flowers.  I used scrap fabric, paint and hot glue to put these together.  I was also stopping by to visit my grandparents and made a special one for them with my daughter’s picture in it.

Repurpused Grave Memorial Flowers

DSC_0579

My daughter visiting her great grandparents

Stay tuned for more of the genealogy series!

The Cats Meow: Repurposed Cookie Jar Planter

In my kitchen recently while organizing and cleaning, I came across this great white cat cookie jar I had for many years that I picked up at a yard sale.  When I originally purchased it, I knew nothing about it.  It had a slight crack in the front.  Through the years, the straw hat was broken and missing, and it sat for 7 years collecting dust on the top of the kitchen cabinet.

I took it down and gave it a look.  Thanks to the internet I discovered it is a Metlox Cookie Jar.  Turns out they are vintage and very collectible when in good condition. Online they go for between $35.00 to $125.00! Of course this cat had seen better days, and wouldn’t be worth anything with a cracked nose and a missing hat.

I am starting to begin to think my upcycling ways are beginning to rub off on my husband.  When I scratched my head as to what to do with it he suggested a planter!

Upcycled Broken Metlox Cookie jar

What a great idea!  I purchased a small fall mum and placed it inside the jar.  Since there are no holes at the bottom of the jar, I left the mum in its original container so the water can properly drain away from the plants roots. Recently, I lost my beautiful cat Clyde at the age of 17 to kidney disease.  I created a memorial garden in his honor,  and I thought this would make a great addition to it. A great way to upcycle an old cookie jar!

Metlox Broken Cookie Jar Upcycle

Feline Memorial Garden


My daughter was more interested in the wind chime, but loves to help mom in the garden and in the craft room.  She is my little toddler apprentice after all.

DSC_0557


Strawberry Shortcake Sunday | CheekyGeeks

I want to thank Elise from Cheeky Geeks for featuring “On The Upcycle” during Geek month.  This week is retro week and what a better way to celebrate than with an upcycled Kids Strawberry Shortcake Record table and chair.  Be sure and check out my full tutorial on Cheeky Geeks.

Strawberry Shortcake Sunday | CheekyGeeks.

r\Retro Strawberry Shortcake Chair and Record table
Cheeky Geeks : Geek Month Celebration

Upcycled Strawberry Shortcake Kids Record Chair

For The Record: Upcycling Vinyl

I have seen many exciting ways to upcycle old vinyl online, but the idea for me actually started when I stumbled upon an awesome shop on Etsy called ” It’s our earth” They upcycle records, and floppy discs into coasters, chip bowls and clocks just to name a few.  I was shopping online for Christmas and saw a clock made from a Thin Lizzy record, my husband’s favorite band.  I jumped at the chance to get it and the price was right.  It hangs proudly in our living room next to our 1970 Pioneer stereo cabinet. Most importantly, he loves it!

It's our earth upcycled record clock on Etsy

The plaque below it says “Life is a song and love is the music”

I loved all the great upcycling ideas for small record side tables, and they looked very easy to make.  It would also go nicely with the clock in our living room. I am a great lover of music and the sound of vinyl, so I scoured my collection for a record I had purchased from a dollar record bin that was damaged and unplayable.

Aerosmith Greatest Hits

Aerosmith is a cool band, but this  record was destroyed! It was perfect for making a record table.  I also had an old, weathered metal plant stand.  I cleaned it and spray painted it black and allowed it to dry.

Spray painted metal plant stand

I then simply used a high heat hot glued gun to adhere the record to the plant stand.

Upcycled Plant Stand Record Table

Not only a cute living room addition, but a great functional side table!

Record Side Table